

Before writing this month’s newsletter, I reread the newsletter from April of last winter’s CSA. It was full of the very early signs of what turned out to be a rather late spring- and reminds me of where we’re headed, and the season that was between here and there that was full of growth and work and food. A lot happens between the first sighting of a red-winged black bird and the last, ever fluctuating V of geese.
Last Friday, after we had packed this first Winter Share, I stepped out of the root cellar to  the lovely snow, of course, and a V of geese who I perceived to be flying faster than usual, and using a rather more urgent tone to encourage each other to get the heck out of here! As a life long procrastinator, I had to laugh into the sky full of snow and geese and their plight ‘n’ flight.
Not us though. Here we are in the Northland, preparing to settle in for another winter.
I made my love for the month of November known last year in the newsletter, but for those who missed it, or for those new folks to the CSA (welcome!) I’ll recap: I love November.
I love the color palette the world offers us this time of year, before it is muddled and faded by the sun over winter. I love how everything looks with snow on the ground on my drive out to the farm, and how it brings out the lines and contours of the land around me. I love bare trees. Summer is wonderful, I enjoy the comfort of not needing to prepare to step outside. And I love the fall colors and the luminescence it brings to the woods in a finale of shed energy and life. But now the trees can rest after all that time spent gathering stores for winter.
After the big harvest push in September and October, things on the Farm start to feel that same way. A lot of planning, planting and care goes into making this bounty possible. Next week the summer crew will be done, and we’ll have time to rest and plan and do the winter basics. For example, drinking coffee while bagging carrots. Who am I kidding? Janaki, Dave and John do the planning.
Winter can be a difficult and sometimes an isolating time up in the North. I hope getting your share of vegetables each month can become a re-centering ritual of sorts as we go through the season.
If you had been a part of our Summer CSA, you’ll know that this looks and feels (and tastes!) quite different. It is not the same burst of color and variety of flavors as summer. I see the Winter CSA is a sort of reorienting to local, storeable staples. There is no end of ways to prepare these sorts of vegetables, because for hundreds of years these sorts of crops are what got people through winter. The simplicity of ingredients drives innovation. Unless you really do like boiled cabbage for months, then go wild with that and you might have the house to yourself for a while!
I hope you enjoy the refilling of your pantry this month, and have time and enjoyment of the slower cook times, warm kitchen spaces and dinners of whole food.
Thank you for choosing to partake with us in the winter stores.
For the Farm crew,
Karin
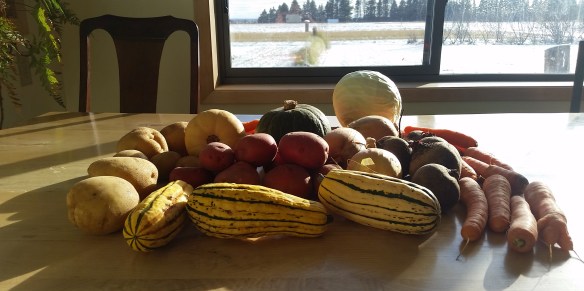
November’s Share
Beets – Green Cabbage – Carrots – Red and Yellow potatoes – Yellow Onions –
Butternut, Kabocha and Delicata squash

Red Split Lentils With Cabbage
Serves 4 to 6
1 1/4 cups red split lentils, picked over, washed and drained
5 cups water
1/2 teaspoon ground turmeric
5 tablespoons vegetable oil
1 teaspoon cumin seeds
2 to 4 cloves garlic, peeled and finely chopped
1 medium onion, peeled and cut into fine slices
1/2 pound cored and finely shredded cabbage
1 to 2 fresh, hot green chilies, finely sliced
1 1/2 teaspoons salt
1 medium tomato, peeled and finely chopped
1/2 teaspoon peeled, finely grated fresh ginger
Put the lentils and water into a heavy pot and bring to a boil. Remove any scum that collects at the top. Add the turmeric and stir to mix. Cover, leaving the lid very slightly ajar, turn heat down to low, and simmer gently for 1 1/4 hours. Stir a few times during the last 30 minutes.
When the lentils cook, heat the oil in a 8 to 9 inch frying pan over medium heat. When hot, put in the cumin seeds. Let them sizzle for 3 to 4 seconds. Now put in the garlic. As soon as the garlic pieces begin to brown, put in the onion, cabbage and green chilies. Stir and fry the cabbage mixture for about 10 minutes or until it begins to brown and turn slightly crisp. Stir in 1/4 teaspoon of the salt. Turn off the heat under the frying pan.
When the lentils have cooked for 1 1/4 hours, add the remaining 1 1/4 teaspoon salt, the tomato and ginger to the pot. Stir to mix. Cover and cook another 10 minutes. Add the cabbage mixture and any remaining oil in the frying pan. Stir to mix and bring to a simmer.
Simmer uncovered for 2 to 3 minutes or until the cabbage is heated through.
Breakfast Slab Pie
Serves 12 generously
Crust
3 3/4 (470 grams) cups all-purpose flour (feel free to replace up to half with whole-wheat)
1 1/2 teaspoons table salt
3 sticks (340 grams) unsalted butter, very cold
3/4 cup very cold water
Filling
1 pound potatoes, cut into 1/2-inch slices
10 ounces spinach (baby, “grown-up,” or frozen)
1 cup coarsely grated sharp cheddar cheese
4 scallions, thinly sliced
11 large eggs + 1 large egg white (you’ll use the yolk in a minute)
1 teaspoon kosher or coarse sea salt, plus more to taste
Freshly ground black pepper
To finish
1 large egg yolk (leftover from filling)
1 teaspoon water
Make pie crust: Whisk together flour, and salt in the bottom of a large, wide-ish bowl. Using a pastry blender, two forks, or your fingertips, work the butter into the flour until the biggest pieces of butter are the size of tiny peas. (You’ll want to chop your butter into small bits first, unless you’re using a very strong pastry blender in which case you can throw the sticks in whole, as I do.) Gently stir in the water with a rubber spatula, mixing it until a craggy mass forms. Get your hands in the bowl and knead it just two or three times to form a ball. Divide dough roughly in half (it’s okay if one is slightly larger). Wrap each half in plastic wrap and flatten a bit, like a disc. Chill in fridge for at least an hour or up to two days or slip plastic-wrapped dough into a freezer bag and freeze for up to 1 to 2 months (longer if you trust your freezer more than I do). To defrost, leave in fridge for 1 day. [Still freaked out about making your own pie dough?
Heat oven oven to 375 degrees F. Line bottom of 10x15x1-inch baking sheet or jellyroll pan with parchment paper.
Prepare filling: Place potatoes in a medium saucepan and cover with cold water. Bring to a boil, then reduce to a simmer, cooking for 7 to 10 minutes, until potatoes are tender but not falling apart. Drain.
Wash spinach but no need to dry it. Place wet spinach in hot skillet and cook until it just wilts. Drain in a colander, pressing or squeezing out as much liquid as possible. You should have about 1 cup of spinach one wilted and squeezed. If spinach leaves were large, you might want to roughly chop the squeezed-out piles of spinach before adding it to the filling.
Assemble pie: On a lightly floured surface, roll one of your dough halves (the larger one, if you have two different sizes) into an 18-by-13-inch rectangle. This can be kind of a pain because it is so large. Do your best to work quickly, keeping the dough as cold as possible and using enough flour that it doesn’t stick to the counter. Transfer to your prepared baking sheet and gently drape some of the overhang in so that the dough fills out the inner edges and corners. Some pastry will still hang over the sides of the pan; trim this to 3/4-inch overhang.
Layer vegetables, including scallions, evenly over bottom pie crust. Sprinkle cheese on top. If using the fillings that I did, beat 11 whole eggs and 1 egg white lightly and pour over vegetables. If you’ve used other fillings, you might find that you need more or fewer eggs to mostly fill (I did not want to fill the crust to the top with eggs, as it would have been more difficult to bake without filling) the bottom crust; if you’re nervous, just beat a few eggs at a time and pour them in until your filling reaches the desired level. Sprinkle with salt and many grinds of black pepper.
Roll the second of your dough halves (the smaller one, if they were different sizes) into a 16-by-11-inch rectangle. Drape over filling and fold the bottom crust’s overhang over the edges sealing them together. Cut only a couple tiny slits in the lid to act as vents — too many or too big, and the filling will want to leak out before the eggs set. Beat remaining egg yolk with 1 teaspoon water and brush over lid.
Bake pie: Until crust is golden and filling is set, about 40 to 45 minutes. Transfer to a wire rack and cool a bit before cutting into squares.
Do ahead: I haven’t frozen this pie, but suspect that it will freeze well already baked. Or, you could make the pie doughs up to one month in advance (storing them in the freezer), four days in advance (to store in the fridge) and roll them out when you’re ready to bake the pie. Baked slab pie will keep in the fridge for 3 to 4 days. Squares can be reheated as needed. Vegetables can be prepped (spinach wilted, potato par-boiled) and stored in the fridge for 2 days before using.
