November Winter Share

We love seeing our fields all tucked in with cover crops for the winter!

Welcome to all of our new members, and welcome back to our returning members. We’re so excited you have chosen to spend your Winter receiving the best veggies in town!

Boy oh boy has it been busy around the farm! I know I said that a lot this year, but this time I really mean it. November marks the busiest time of year here. Our Summer CSA season ended about a month ago, and since then, the farm crew has been hard at work. We said goodbye to all of the tomatoes, cucumbers, pole beans, and some herbs in the greenhouses. Rye got planted in their place to begin putting nutrients back into the soil to prepare it for next spring. We packed up and stored the last of the peppers and kale before we said a final goodbye to those plants as well. We got the 2025 garlic separated, planted, and covered with rye straw to keep it cozy through the winter. We moved onions and winter squash to their more temperature controlled, winter homes in the pack shed. Then we got to harvesting.

It has been all hands on deck, non-stop work, to get everything out of the field. Potatoes, cabbage, brussels sprouts, carrots, beets, and parsnips are all out of the field and crammed into the root cellar for storage. We emptied out the very last greenhouse with the harvest of lettuce and celery for the share boxes. The only things left in the field are rutabaga and daikon radishes. We need to make a little room in the root cellar first so we have space to put them. A wonderful and terrible problem to have. This time of year, our root cellars are filled floor to ceiling, wall to wall with pallet boxes of vegetables. It’s an amazing sight to see. It’s one of my favorite things to stand in the cooler and look around at all the boxes filled with vegetables that we lovingly (and reluctantly) seeded, planted, transplanted, weeded, thinned, hoed, watered, stressed over, and harvested. It’s a year’s-worth of hard work all packed and stacked into massive pallet boxes.

…and the crops all tucked into the cellar for storage!

The hard work doesn’t stop there. Once we get the last of the veggies out of the ground, we hope to take advantage of this nicer weather to get some various projects done around the farm, and clean up some last minute things before the snow starts piling up.

If I had to sum up this share box in two words it would be: Large and Lush. You’ll probably agree with this when you look inside. Thanks to all the rain this year, the carrots are HUGE! In early October, Janaki mowed off the top greenery of the plants in hopes the carrots would stop growing. The carrots didn’t seem to understand, and we harvested really large carrots. They’re still just as tasty as normal, but now, you don’t have to wash and cut as many for dinner. Win! Our friends over at Spirit Creek agreed to take the largest carrots, and a whole pallet box of super large beets as well. This means we can attempt to give you all normal-ish sized food. The weather was perfect for growing lettuce, so you all got one beautiful and lush head of lettuce. It is sturdy and tasty. If you’re not quite ready for cold and snow, this lettuce is the perfect time to make one last Summer salad. The only thing that isn’t large and lush is the celery. This got a slow start, so it’s smaller than the celery we normally send. The smaller size makes it more tender and less stringy. If you aren’t a fan of celery and don’t know what to do with it, did you know it’s a great treat for dogs? The fibers help to clean their teeth, it works to freshen their breath, and the high water content is hydrating. Around our house, we freeze the stalks so the dogs can’t chew through them as fast. Local produce can be fun and tasty for the whole family!

In your share this month:

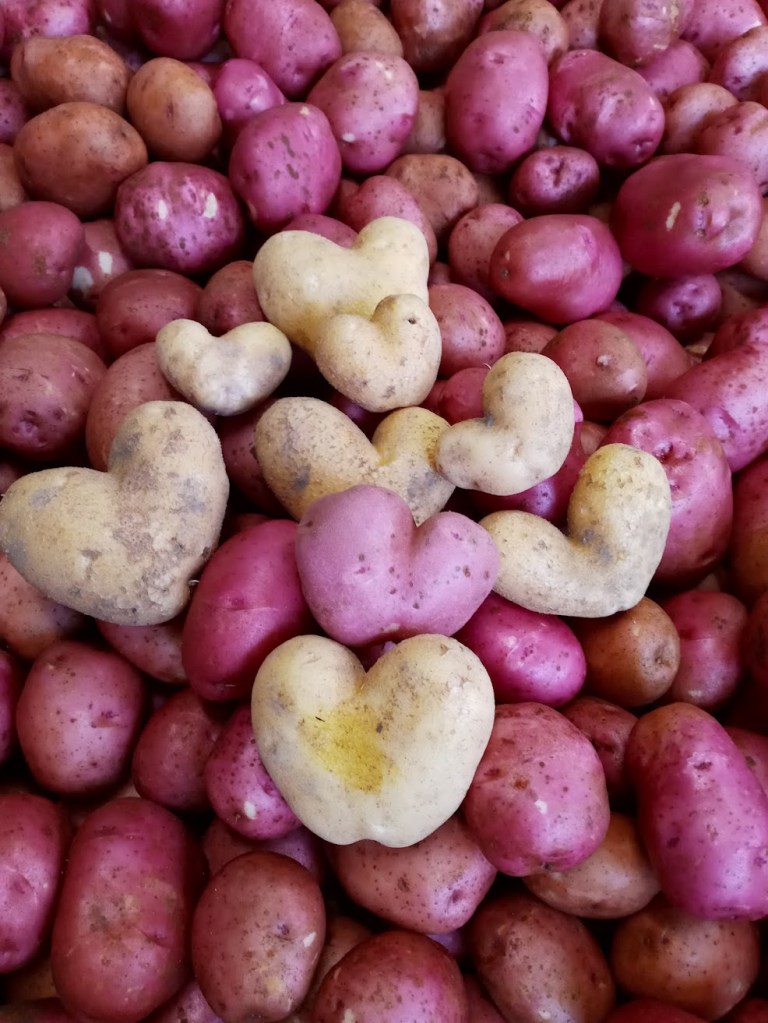
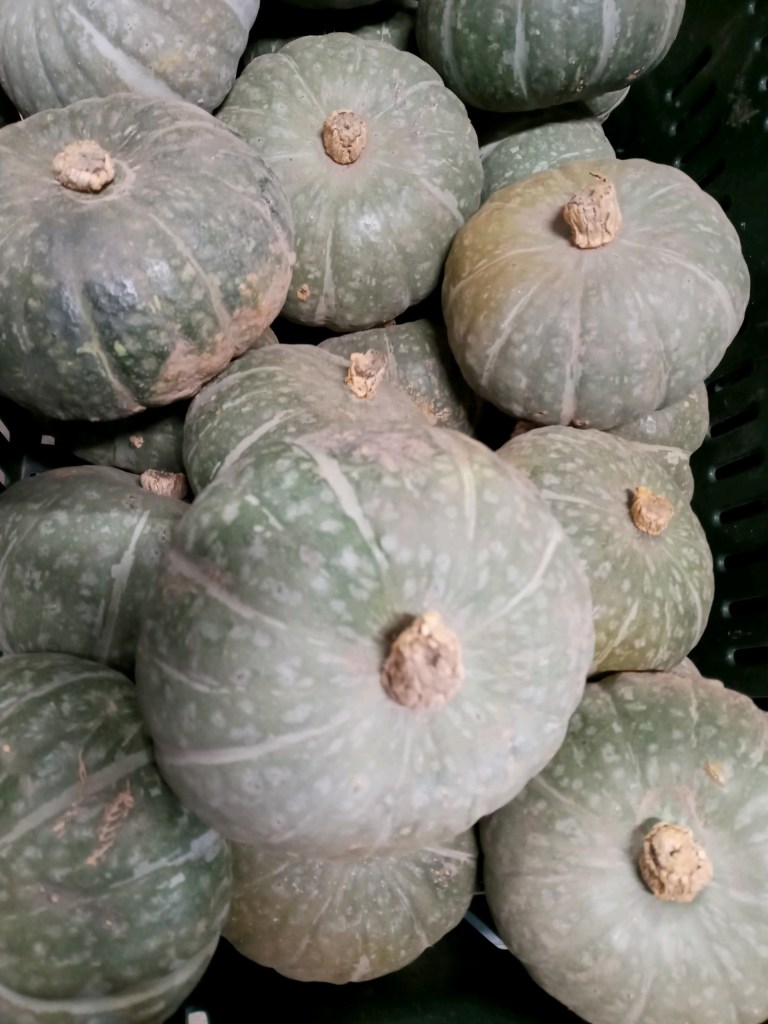
Yellow Potatoes – Red Potatoes – Delicata Squash – Sunshine Squash – Beets

Carrots – Celery – Lettuce – Onions – Brussels Sprouts – Thyme – Rosemary

Persian Celery Stew

INGREDIENTS

  • 2 large onions, thinly sliced
  • 3 cloves of garlic, minced
  • 1 can of butter beans or kidney beans
  • 1 tsp of turmeric
  • 1 bunch of celery stalks (around 6-8 stalks) chopped into 3cm pieces
  • 250g of chopped parsley
  • 50g of chopped fresh mint or 2.5 tbsp of dried mint
  • 130ml juice of lime
  • ½ tsp of saffron dissolved in ¼ cup of boiling water
  • 1 tsp salt
  • ½ tsp freshly cracked black pepper
  • 1 vegetable stock cube
  • Vegetable oil of your choice

INSTRUCTIONS

1. Heat 3 tbsp of vegetable olive oil in a pan over medium heat. Add the chopped mint and parsley and fry for around 10-15 minutes until herbs start getting dark and release their aroma. Add more oil if necessary. The darker the colour, the better the flavour will be.

2. In a separate pot, fry the sliced onion in 3 tbsp of vegetable oil. When translucent, add 1 tsp of turmeric. Then add the garlic and celery pieces and saute for another 5 minutes on medium heat.

3. Add in the butter beans and sauteed herbs and cook for about a minute further.

4. Add in 3 cups of boiling water, followed by the stock cube, lime juice, saffron water, salt, pepper, and cover and cook for at least 45 minutes-1 hour on a very low heat.

5. Make sure it is not completely dry, we want the juice! Add more salt to taste.

6. Serve hot with steamed basmati rice and vegan yoghurt!

Carrot Tahini Soup

Ingredients

  • 2 large onions, thinly sliced
  • 2-4 garlic cloves, minced
  • 5-6 large carrots (about 3 lb. or 1200 g.), chopped
  • 2 tbsp. olive oil
  • ~ 7 cups water or vegetable broth
  • 2/3 to 1 tsp. salt
  • 1 tbsp. fresh or 1/2 tsp dried thyme
  • 1/1 tbsp. Italian seasoning herbs
  • 1 tbsp. smoked paprika
  • 1/4 tsp. chipotle powder
  • 1/4 cup (or a bit more) tahini + more for garnish
  • sesame seeds, lightly toasted, for serving(optional)
  • fresh thyme, for serving (optional)

Directions

  • In a large pot, heat the olive oil and sauté the onions with garlics, 5-7 min, until aromatic and translucent. Add the carrots and cook them for 5 minutes until start to lightly brown.
  • Add the water or broth to the pot along with the ginger juice, seasonings, and maple syrup (if using). Simmer at low-medium heat, covered and skimming the scum (if any appear) for about 12-15 minutes or until the carrots are soft.
  • At the end, stir in the tahini and off heat.  Let it cool a bit until easy to handle. Using an immersion blender, process until smooth. If the soup is too thick to your liking, add a little of hot water or broth. Try and adjust the seasoning (or maybe even more tahini!) if necessary. When serving, drizzle with extra tahini and sprinkle with the sesame seeds, if desired. Enjoy!

Thanksgiving Slaw

Ingredients

For the dressing:

  • 1/2 medium red onion
  • 1/3 cup vegetable or olive oil
  • 1/4 cup apple cider vinegar
  • 2 tablespoons maple syrup
  • 4 teaspoons Dijon mustard
  • 1/2 teaspoon kosher salt

For the salad:

  • 1.5 pounds shredded brussels sprouts
  • 1 bunch fresh parsley
  • 3/4 cup toasted, sliced almonds
  • 3/4 cup dried cranberries
  • Kosher salt
  • Freshly ground black pepper

Instructions

Make the dressing:

  1. Finely chop 1/2 medium red onion and add to a large bowl. Whisk in 1/3 cup vegetable oil, 1/4 cup apple cider vinegar, 2 tablespoons maple syrup, 4 teaspoons Dijon mustard, and 1/2 teaspoon kosher salt. Let sit for at least 10 minutes for the flavors to meld. Meanwhile, prepare the salad.

Make the salad:

  1. Shred the brussels sprouts. Pick the leaves from 1 bunch fresh parsley and coarsely chop until you have 2/3 cup.
  2. Add the shredded brussels sprouts, chopped fresh parsley leaves, 3/4 cup toasted, sliced almonds, and 3/4 cup dried cranberries to the dressing. Toss to combine. Taste and season with kosher salt and black pepper as needed.

For the farm crew,

Jennifer

Summer CSA Week 18

Today marks the final Summer CSA delivery.  We are sad to see this part of our season come to a close, but what a wonderful season it has been. This year has been filled with seeding, planting, harvesting, learning, laughing, and gratitude. 

Our Farm crew shows up and works incredibly hard every day, but as the saying goes, many hands make light work. On Mondays and Thursdays we are grateful for our wonderful volunteers that help to lighten the load. This year we had quite the list of volunteers come out to help–if you braved the weather to come bag vegetables, harvest, weigh items, fill boxes, wash veggies, or cheer us on while we did those things, we appreciate you and your time more than words could express! Our CSA deliveries also wouldn’t be possible without our wonderful site hosts. Thank you to all of you who allowed us to use space at your home or business. This allows us to get local veggies onto the plates of more families by making pick up locations closer to their homes. 

Today may end the CSA season, but it doesn’t end the farming season. These next 3 weeks are crunch time for us. We still have lots of veggies in the field that can handle a light frost ( and remember from last week, some of them even taste better), but too much frost can damage the crops. We also had a hard start to the growing season with how wet this spring was, so the longer we can let the plants grow, the better.

We will start the harvesting with things that shouldn’t get too cold such as potatoes and brussels sprouts. We will finish the harvest with our most cold hardy vegetables such as carrots and parsnips. By the end of October, all of the fields will be empty and everything that shows up on grocery store shelves, or in the Winter CSA boxes has been carefully stored over many months. Vegetables can last for a very long time if they are properly stored. We are grateful for our root cellar that will soon get packed from floor to ceiling with vegetables. This year was finally time to admit that we might be growing more vegetables than we have storage for. Janaki applied for, and got approved for a grant that will allow us to expand our cold storage area. By the end of the project, we will have increased our cold storage by over 50%, and give us a bit more space to wash and pack those veggies as well. If the mild weather continues, the plan is to get the footings in place before snow flies. The rest of the project will have to wait until Spring, so check back for more updates. 

Another fun project we have in the works is adding another well. Up to this point, we’ve been using our household well to irrigate all of our greenhouses and tunnels, as well as a few of the smaller fields that don’t fit our larger irrigation equipment. This has required a careful dance to make sure everything gets watered and we still have pressure to wash and pack everything we need to. We hired a crew to come out a few weeks ago and dig the new well, and they’ll be coming back soon to install the pump and run new pipe to connect the buildings. We’re looking forward to having easy access and enough water pressure to provide water to the greenhouses, pack shed, and maybe even run a load of laundry at the same time.

Once November hits, we say goodbye to most of our summer crew. A couple people will stay on to fill retail orders, box Winter shares, wash vegetables (there isn’t always enough time to harvest and wash before the season ends) and do various tasks over the winter. The Summer crew will rejoin in late April or early May to start the cleaning process and take everything out of storage so we can do this all over again next year. 

Before we end this last newsletter, we need to say a big thank you to all of you. Thank you for supporting us. Thank you for believing in us. Thank you for being here with us through the twists and turns. Farming isn’t easy. We give up a lot of control to mother nature, and hope things work out how we want them to…and sometimes they do! Having your support makes the challenges a little easier. Thank you for putting your trust in us, for supporting your local farmers, and for allowing us to wake up each day and do what we love. We hope to see you all again next year!

In your share this week:

Arugula – Northeaster Beans – Beets – Brussels Sprouts – Cabbage – Carrots – Cucumbers – Lettuce – Onions – Peppers – Potatoes – Winter Squash – Tomatoes

Egyptian red lentil soup

One large onion, chopped

One carrot finely chopped

4 to 5 garlic cloves, finely chopped

3 tablespoons olive oil

1 1/2 cups split red lentils

8 1/2 cups chicken or vegetable stock

2 teaspoons ground cumin

1 1/2 teaspoons ground coriander

One good pinch, hot pepper flakes

Juice of one lemon

Salt and pepper to taste

Soften the onion, carrot and garlic in the olive oil in a large pan over low heat for about 10 minutes. Add the lentils in stock to the pan bring to boil and skim off the foam that forms on the top simmer for 20 to 40 minutes until the lentils have disintegrated.  Stir in the spices and lemon juice and season with salt and pepper. Simmer for five minutes more – if the soup needs thinning, add water and bring to boil again.

Winter Salad

For the Salad:

  • 6 oz. shredded kale
  • 1/2 small lemon, juiced
  • 1 Tbsp. extra-virgin olive oil
  • 6 oz. shredded vegetables, such as Brussels sprouts, cabbage, carrots
  • 2 medium apples, cored and diced
  • 1 1/2 c. candied pecans
  • 4 oz. crumbled goat cheese
  • 1 1/2 c. roasted winter squash
  • 1/2 c. pomegranate arils

For the Dressing:

  • 1/2 c. red wine vinegar
  • 4 tsp. whole grain or dijon mustard
  • 4 tsp. pure maple syrup
  • 1 tsp. kosher salt
  • 1/2 tsp. ground black pepper
  • 1/2 c. extra-virgin olive oil

Directions

  • Place the shredded kale in a very large salad bowl. Add the lemon juice and oil. Use your hands to massage the lemon juice and oil into the greens, about a minute or so. The greens should wilt slightly and take on a deep green color.
  • Add the other shredded vegetables to the bowl as well as the chopped apple.
  • Make the dressing by combining all of the dressing ingredients in a mason jar. Shake vigorously for 30 seconds and then pour it over the salad. Toss well to combine.
  • Add the pecans, goat cheese, squash, and pomegranate arils on top. Serve.

For the farm crew,

Jennifer

November Winter Share

The first winter CSA delivery is upon us! For our new members: Welcome to our veggie community and thank you for choosing local and organic 🙂 For our season to season members: Thank you for your continued support and welcome back! It’s been a little over a month since our last summer share box was delivered. We hope the short break in your Food Farm veggie action has not been too much to bear. Despite a pause in share deliveries, the farm crew has done anything but pause…

Next year’s garlic crop all tucked in for the winter

It has been a mad dash to get us set up for winter! A short three weeks ago we were digging the last of our storage potatoes from the ground (a remarkable feat in its own regard), thinking to ourselves “How in the heck are we gonna get 35 tons of carrots, four tons of beets, a couple tons of parsnips and a few thousand pounds of rutabagas from the rapidly cooling earth before it freezes in four days?”

Well… we did things a little differently this year, that’s how.

Usually, during peak harvest time, we operate with two crews. One crew harvesting and another washing. This year, because of the hard freeze during the last week of October, we used all hands on deck (along with some volunteers from Fond du Lac Community College) to harvest everything as quickly as we could. Just in the nick of time, we packed the veggies in pallet boxes and stacked them to the ceiling of our root cellar with dirt still clinging to their skin. We then began November by pulling it all back out, one pallet box at a time, to gently roll or tumble through our washing assembly. We took the occasional break to knock ice free from the spray nozzles and it was a chilly process indeed, but Dave brought lots of extra winter gear and by the end the veggies were shining in vibrant shades of orange, purple & parsnip. It also helped that Janaki kept us fed and happy with hot cocoa, cookies & pizza during our lunch breaks. The morale boost was at times needed.

All in all, it was a year filled with joys and challenges, but we got through it and at the end of the day, that’s farming!


In your share this month:

Beets – Brussels Sprouts – Carrots – Celery – Onions

Red & Yellow Potatoes Delicata & Sunshine Winter Squash – Tatsoi


Thriving under the shelter of Catherine’s hoop houses, the celery reached rather impressive height this fall. We had to cut the stalks in half just to fit them in the share box. Because of this, we went ahead and left the leaves on – something we don’t often do in the summer shares. The leaves present a concentrated flavor that is more robust than the stalks. They can be used in a variety of dishes, including soups, stocks, salads, and as a garnish. Or maybe you would like to include them in your stuffing this holiday season… Included below is a recipe for just that!


Classic Thanksgiving Stuffing (by Anna from crunchycreamysweet.com)

Yield: 6 servings

1 fresh French bread or 10 cups dried cubed bread
1 ½ sticks unsalted butter, divided
1 ½ cup chopped celery
½ cup celery leaves, chopped
1 large yellow onion, chopped
1 tablespoon chopped fresh sage
1 tablespoon fresh thyme
1 tablespoon chopped fresh rosemary
1 teaspoon salt
½ teaspoon black pepper
1 ½ cups broth chicken, turkey or vegetable

  1. If you are using fresh French bread: slice it into ½″ slices, then each slice into ½″ cubes. Place bread cubes on a baking sheet (most likely you will need at least two sheets), in a single layer, then let it air-dry in room temperature overnight OR preheat oven to 250° F and bake bread for 30 to 35 minutes, shaking the pans every 15 minutes. If using already dried bread, place 10 cups in a large bowl.
  2. Preheat oven to 350° F. Butter a 13″x9″ baking dish or 3 quart baking dish. Set aside.
  3. In a skillet, melt 1 stick (½ cup) of butter. Add chopped onion and celery. Saute until veggies are soft.
  4. Add veggies to bread.
  5. Add herbs, celery leaves, salt and pepper. Stir in.
  6. Add broth and stir in gently. Place in buttered dish.
  7. Melt remaining butter and pour over the stuffing.
  8. Cover the dish with aluminum foil.
  9. Bake in preheated oven for 30 to 35 minutes. You can uncover it for the last 5 minutes to toast up the top pieces, if desired.
  10. Let cool for 10 minutes, then serve.

P.S. – For the best texture, bake the stuffing the same day you will serve it. You can prep everything the day before: dry the bread and sauté veggies. The next day just assemble everything and bake!


Bacon & Brussels Sprout Salad (from pinchofyum.com)

Yield: 8-10 servings

Dressing:
1 lemon
1 orange
1-2 tablespoons of apple cider, maple syrup or honey (something for sweetness)
1 shallot, minced
1/2 cup olive oil
1/2 teaspoon salt & pepper to taste

Salad:
4 dozen brussels sprouts
1 cup almonds
6 slices of cooked bacon, crumbled or chopped
1 cup grated parmesan cheese

  1. Combine the lemon juice, orange juice, apple cider, and shallots in a small bowl. Add the olive oil in a steady stream and whisk for a minute or two, until it becomes creamy-looking.
  2. Slice the brussels sprouts with a mandoline, taking care of your fingers! and slicing them as thin as possible. This works best when you hold the stem, slice from the top, and stop with a little bit left at the bottom, discarding the remaining bottom stem part since it’s not very leafy anyway. The thinner the shreds, the better the salad! Toss the shreds and loosen them with your fingers to they separate and fluff a little bit.
  3. Pulse the almonds in a food processor until finely chopped.
  4. Toss the brussels sprouts, almonds, bacon, cheese, and dressing together. Serve immediately or within a few hours of tossing.

This next recipe is rather simple, but I haven’t been able to get enough of it in the last couple weeks. I like it as a side, just as the recipe below says, but I also think it would make a great salad if combined with a bed of greens & dressing of your choice.

Delicata, Beets & Goat Cheese w/ Papitas

Yield: 2 servings

1 delicata squash
2 beets
olive oil
salt & pepper to taste

2 tablespoons toasted & salted pepitas
1-2oz. goat cheese

  1. Preheat the Oven: Preheat your oven to 400°F (200°C).
  2. Prepare the Squash: Wash the delicata squash and cut it in half lengthwise. Scoop out the seeds using a spoon. Then, slice the squash into half-moon shapes about 1/2-inch thick. Leave the skin on as it becomes tender when roasted.
  3. Prepare the Beets: Wash the beets thoroughly to remove any dirt. If the beets are large, you can peel them, but small to medium-sized beets can be roasted with the skin on for easy preparation. Cut the beets into even-sized pieces to ensure uniform cooking. You can either slice them into rounds or cube them, depending on your preference.
  4. Arrange on a Baking Sheet: Lay the squash slices in a single layer on one baking sheet & the beet cubes on another. Make sure not to overcrowd to ensure even roasting. Drizzle with olive oil and season with a generous dusting of salt and pepper.
  5. Roast in the Oven: Roast the delicata squash in the preheated oven for approximately 20-25 minutes, or until the edges are golden brown and the squash is tender. You can flip the slices halfway through the cooking time for even browning. Roast the beets for about 30-40 minutes, or until they are fork-tender. Larger pieces may require more time.
  6. Serve and Enjoy: Once the vegetables have cooled, serve with goat cheese & pepitas!

For the farm crew,

Charlie

Summer CSA Week 18, 2023

This is the last Summer Share of the season! Please remember to bring any empty boxes back to your pickup site by next Thursday, the 19th. Winter Shares begin on November 13th.

As the chill of autumn sets in, we find ourselves on the threshold of our last CSA distribution of the summer season. As with most endings, it’s a bittersweet feeling.

The CSA boxes are one of our most straightforward connections to the community. The weekly bounties we harvest, wash, package, and deliver give us an opportunity to share the farm with all of you – something we miss during the longer stretches of the winter.

This time of year also signals the ramping up of end-of-season chores! There’s lots to do on the farm to get ready for winter. A big part of our business is caring for and delivering storage crops throughout the non-growing months. The short break between summer and winter CSA gives us just enough time to pull the cabbage, beets, potatoes, daikon radish, rutabaga, parsnips, & carrots from the fields before they freeze!

A big thanks is also in order to all of the volunteers who helped us in countless ways throughout the season. With so much work still to go, I don’t want to start reflecting too early, but I think it is safe to say “Thank you so so much Patricia, Sandy, Betsy, Rollie, Deb, Diane, Pat & any other names I may be forgetting while typing this.” Your work is really appreciated!


In your share this week:

Beets – Brussel Sprouts – Green Cabbage – Carrots – Garlic – Lacinato Kale – Onions

Parsley – Red Peppers – Potatoes – Rutabaga – Winter Squash


Now you’ve had some winter squash in your share this year, but this week will be your first time seeing green kabocha. You can think of it as a cross between a pumpkin and sweet potato. Its flesh has a sweet, earthy flavor that is denser and drier than the other varieties you’ve tasted this year. This makes it an excellent candidate for soups, stews & curries. It is quite dry right now, but should gain moisture as it cures over the next couple of weeks.

Also joining the lineup are tender brussel sprouts, small but mighty in flavor, and rutabagas!

Usually I am a strong endorser of leaving the skin on vegetables when eating. I do this in part for flavor, in part for valuable nutrients and fiber, but mostly out of laziness. Peeling can feel like an unnecessary chore… the worst kind. This year’s rutabaga is not quite as nice and smooth as usual, due in part to stress from our hot dry summer, and may benefit from being peeled.


Roasted Kabocha Squash Soup, from Simply Recipes

Yield: 4-6 Servings

1/2 large kabocha squash, seeded (about 3 to 4 pounds for the 1/2 squash)
2 1/2 tablespoons extra virgin olive oil, divided
Salt
2 cups chopped or sliced onions
2 ribs celery, sliced
3 cloves garlic (about 1 tablespoon)
1 (2-inch) piece fresh ginger, peeled and grated
1/2 teaspoon ground cumin
1 teaspoon ground coriander
4 cups chicken stock
2 teaspoons kosher salt
1/4 teaspoon black pepper
Lime juice, for serving
Chopped fresh cilantro, optional for serving

  1. Set the oven to 400°F.
  2. Roast The Squash: Use a heavy chef’s knife or cleaver (it helps if you have a rubber mallet as well) to cut the kabocha squash half into a few large pieces. (Kabocha squash is thick and meaty and can be a challenge to cut. So take care! Make sure the squash is stable on your cutting board before you start to cut it. You can create a flat side by shaving off a bit of the outside in one spot.)

    Scoop out the seeds (you can toast them like pumpkin seeds!) and stringy insides. Place the squash pieces on a foil, baking parchment, or Silpat-lined roasting pan. Rub 1 tablespoon olive oil over all sides, and sprinkle with salt.

    Put the squash pieces skin side up on the pan. Roast for 45 to 60 minutes until completely cooked through. The pieces should be soft and caramelized at the edges. Remove from oven and let sit.
  3. Sauté the onions, celery, garlic, ginger, and spices: While the squash is cooling, heat the remaining 1 1/2 tablespoons of olive oil on medium-high heat in a large (4- to 6-quart) thick-bottomed pan. Add the onions and celery. Lower the heat to medium and cook until softened, 8 to 10 minutes.

    Add the garlic, ginger, cumin, and coriander and cook 2 minutes more.
  4. Add the squash, stock, salt, and pepper, then simmer: Once the squash is cool enough to handle, remove and discard the skin. Place the roasted kabocha squash flesh into the pot with the onions and celery mixture. Add the stock, salt, and pepper. Increase the heat to high to bring the soup to a simmer. Then, lower the heat to low. Partially cover and cook 8 to 10 minutes.
  5. Purée the soup: Remove from the heat. Use an immersion blender (or work in batches with a standing blender, only filling the blender bowl 1/3 of the way each time) to purée the soup.

    Add more salt to taste. Sprinkle with lime juice and chopped cilantro to serve.

Maple-Roasted Brussel Sprouts and Rutabaga with Hazelnuts, from Martha Stewart

Yield: 5 Servings

½ cup pure maple syrup
2 ½ tablespoons extra-virgin olive oil
1 tablespoon fresh lemon juice
Coarse salt and freshly ground black pepper
2 pounds rutabaga, skin removed and cut into 1 ½-inch pieces (5 cups)
¾ pound brussels sprouts, trimmed and halved lengthwise
1 ounce toasted hazelnuts, chopped (⅓ cup)

  1. Preheat oven to 400 degrees. Whisk together maple syrup, oil, lemon juice, and 1/4 teaspoon salt in a large bowl. Add rutabaga, and toss.
  2. Transfer rutabaga and all but 2 tablespoons glaze to a rimmed baking sheet (leave remaining glaze in bowl). Spread rutabaga in a single layer, sprinkle with 1/4 teaspoon salt, and roast for 35 minutes, tossing halfway through and making sure rutabaga is spread toward the edges of pan.
  3. Raise oven temperature to 450 degrees. Toss brussels sprouts with remaining glaze in bowl and 1/4 teaspoon salt. Remove sheet from oven, and add sprouts. Toss, and spread in a single layer. Roast vegetables, tossing every 5 minutes, until glaze is very thick and vegetables are deep golden brown, about 20 minutes. Season with pepper and sprinkle with hazelnuts.

For the farm crew,

Charlie