Summer CSA Week 8

Last week the crew spent most of their time in the fields across the road. Most of our storage vegetables are across the road. These are the vegetables that we will keep in the root cellar to feed our Winter CSA members all winter, such as potatoes, carrots, beets, and winter squash. We’ve already given lots of love and attention to our potatoes in previous weeks, so it was time to focus on the carrots and beets.

The crew spent last week doing what we call close weeding. This is actually the third type of weeding these plants will receive. The first type of weeding is called flame weeding. This is where Janaki puts on a tractor attachment that is about the same power as 9 handheld blowtorches. He drives the tractor over the beds right before the carrot seeds germinate to burn off all the tiny weeds that germinate more quickly. This is a fast way to get rid of all the weeds in the entire bed to give the carrots a jump start. At this stage, we have a pretty good idea where the plants will pop up, but it’s always best to be cautious.  Once the seeds germinate and plants start popping up through the soil, either Janaki or crew member Catherine will do what’s called basket weeding. This is where the tractor gets an attachment that looks like a few rolling wire baskets. Catherine or Janaki will then drive the tractor down the beds getting as close to the plants as possible. This is beneficial because it breaks up all the soil which disrupts any weeds that might be about to germinate, while also pulling out any weeds in between the rows that have already germinated. The downside of the basket weeder is that it leaves an untilled area about an inch and a half on either side of the row. This is where the crew steps in and performs the close weeding. We’ve taken old butter knives and steak knives, and bent the blades at a 90° angle. The crew members use the knives to scratch the soil around and in-between the plants to remove any current weeds, and disrupt any weeds that were about to germinate. This is very effective, but also quite time consuming. It’s effective because every single plant in every single row gets love and attention. However, it’s very time consuming because we are crawling along, giving every plant, in every bed, on 300-500 foot fields, love and attention. The crew can work pretty fast, this task takes a while for a farm of our scale.

Cue the crew’s excitement (and immense gratitude) last Wednesday when some friends from the UMD Land Lab showed up to check out the farm, and spend the morning helping us weed all of the carrots. Almost doubling our usual farm crew allowed us to get through many beds in record time! We were able to close weed all of our storage beets and carrots last week.

We will close weed these crops two to three times depending on how quickly the plants grow, and what the weed pressure is. We start weeding when the carrots are about an inch tall, with the goal of making sure we can finish before weeds begin to out-compete the vegetables for sunlight and nutrients. Once the plants are 3-4 inches or tall, Janaki can use other tools like rubber finger weeders to kill small weeds that are in the row without killing the crop. The crew gets the few weeds that survive this cultivation by spot weeding the field by walking through before harvest. We really focus on good weed control at the farm because it makes for a nice consistent crop, and it makes our harvesting equipment work better.

 Fun fact for all of you, it is estimated by the end of the week, the farm crew had crawled through and close weeded 56,760 row-feet of carrots and beets. That’s nearly 11 miles! 

In your share this week:

Basil – Carrots – Lettuce – Cucumbers – Napa Cabbage 

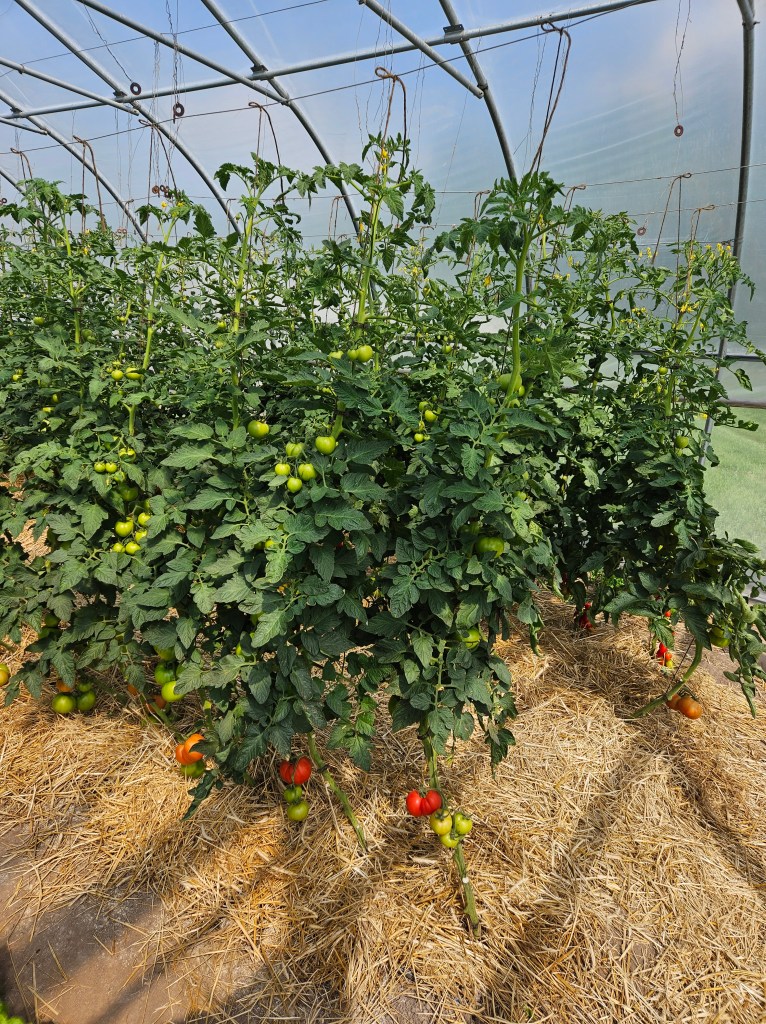
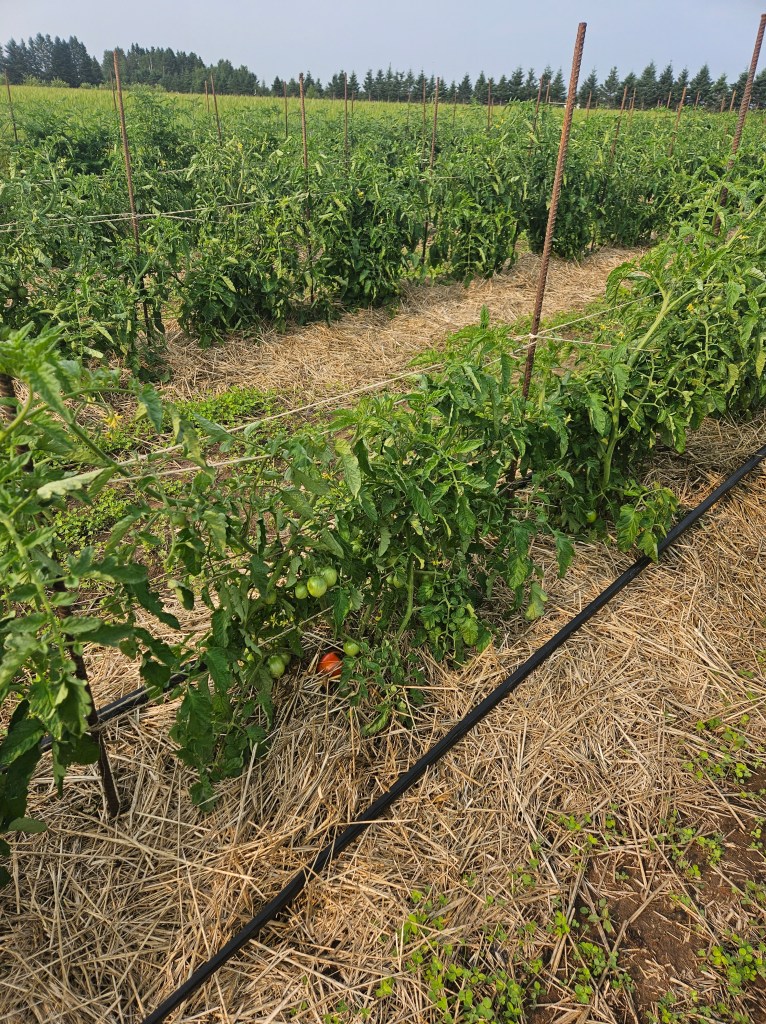
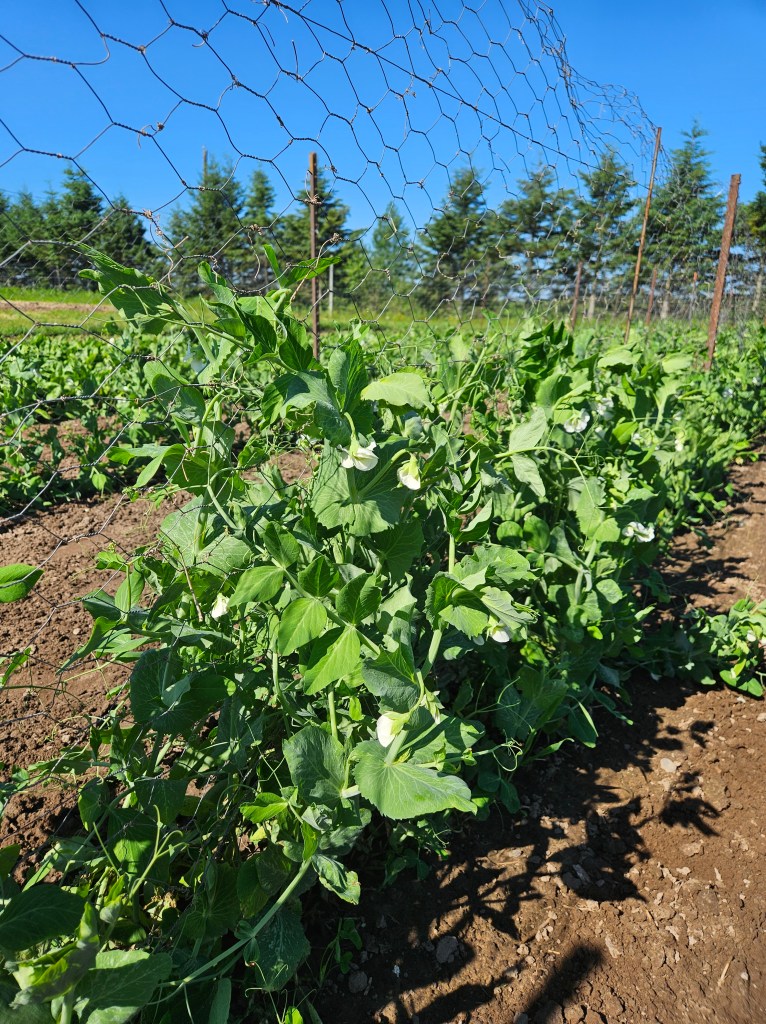
Onions – Snap Peas – Tomatoes – Cilantro – Zucchini

Swiss Chard Summer Roll

Wraps and Filling:

16 to 18 sheets of rice paper

One bunch of chard, leaves only, thinly sliced 

One bunch of basil, torn into bite-sized pieces

Two avocados sliced

Two carrots cut into 2 inch match sticks

One cucumber cut into 2 inch match sticks

Dipping Sauce:

1/2 cup hoisin sauce

1/4 cup soy sauce

1.5 tbsp sugar

1.5 tbsp sesame oil

Finely sliced green onions

To make the dipping sauce, combine all sauce ingredients in a bowl.  Whisk.  

In a large bowl with warm water, dip the rice paper into the water for a few seconds until the whole sheet is moistened carefully lay the rice paper flat on your work surface and wait a minute for the sheet to become soft and pliable. Layer the chard, basil, avocado, carrots, and cucumbers on the bottom third of the rice paper.  Fold the bottom edge over the filling and roll the paper away from you folding the sides in towards the middle about halfway up to roll.  Repeat with the remaining rice papers and filling.   Serve roles with dipping sauce.  The rice papers will start to stiffen if left out for too long, so it’s best to wrap as you eat.  This is a great dinner to make with kids!!!

Frittata with Napa Cabbage

8 large eggs
1/2 c creme fraiche
1 c finely chopped napa cabbage
1/2 c finely chopped red onion
4 green onions, thinly sliced
2 garlic cloves, minced
2 T chopped cilantro, plus more for garnish
1/2 t curry powder
1/4 t cayenne pepper
1/2 t fine sea salt
1/2 t fresh ground pepper
2 T butter
1/2 c crumbled feta

Position a rack in upper third of the oven and preheat the oven to 350.

In a large bowl, combine the eggs, creme fraiche, cabbage, both onions, garlic, cilantro and spices. Beat with a fork to incorporate.

Heat the butter in a 9-inch cast iron skillet over medium-high heat, tilting the pan to coat all surfaces thoroughly as the butter melts. When the butter starts to foam, pour in the egg mixture and cook undisturbed for 5 minutes. Top with the crumbled feta and transfer to the oven. Bake for 20 minutes, or until golden brown and pulling away from the sides of the pan. Garnish with cilantro leaves and serve warm.

For the farm crew,

Jennifer

Summer CSA week 7

Last week felt like it was all about tomatoes here on the farm. This can only mean one thing, TOMATO SEASON IS HERE! Our crew member Catherine, and our lovely volunteer, Patricia, spend a lot of time in the Spring and Summer keeping the greenhouse tomatoes happy and healthy while the rest of the farm crew tends to all of the outdoor tomatoes. It’s helpful to dedicate specific people to each location since the tomatoes are grown in different ways, which requires different levels of attention. 

In the greenhouse, we vertically trellis the tomatoes using the single leader system. In non-farm speak, this essentially means that we force the tomato plants to grow on one single stem, and we use a small circular clip to connect the twine to the tomato stem as a means of supporting the plant as it continues to grow. Tomatoes love to grow what we call suckers, also known as side shoots. These are shoots that sprout out from where the main stem and a leaf meet. If we left the suckers on the plant, they would eventually grow into another top, so the plant forms a bush. This sounds really cool because most people think it means extra tomatoes, but it can actually mean the exact opposite. By leaving the suckers, the plant then has more stems and leaves to distribute nutrients to. As the plants grow taller, this can take a lot longer for the nutrients to get past all the suckers and make its way to the top of the plant. This means more of the plant’s attention is put into vegetation rather than fruit. Too much foliage also reduces air movement which is one of the many ways tomato plants can get and spread disease. In order to achieve this, once a week, Catherine and Patricia spend time pruning off any suckers and adding clips to the plant to keep it supported. This week, Catherine also spent time taking off any of  the leaves that were growing below the first set of fruit. This does two things, it speeds ripening by allowing more light to reach the fruit, and creates better air circulation. With the hot weather we’ve recently been getting, and the plants being grown in an already hot greenhouse, more air flow is very welcomed by the plants. 

The outside tomatoes are a whole different story. We don’t do any pruning on those tomatoes. Airflow is better outside, and space isn’t at as much of a premium, so we’re able to plant the tomatoes farther apart without causing disease or shading. Another major difference between the inside and outside tomatoes is how they are trellised. Since there isn’t a pole or wire above the tomatoes, and we aren’t pruning them to follow the single leader system, the easiest way to trellis these crazy tomatoes is to use what is called the “Florida Weave” or “Basket Weave” method. With this method, posts are evenly spaced between the tomato plants, and string or twine is tightly run, horizontally, on either side of the plant. This method works to compress the plant so it stays tight and tidy in its space. It helps to lift the leaves off the ground so they are less likely to pick up diseases from the soil splashing on the leaves when it rains.  Most home growers will use a tomato cage which creates a similar effect. However, with the cages, the plant will eventually grow over the top of the cage and run out of support, and cages are prone to falling over unless they’re large, which can make harvesting tedious. With the Florida Weave method, a new set of twine is added every week or so as the plant grows to continue giving it support. At this point in the season, the outdoor tomatoes have 3 sets of twine holding them up, and we plan to add another 3 or 4 as the season progresses. 

The cool thing about these trellising methods is that they aren’t exclusive to tomatoes. You can use either method for trellising many other vegetables. On the farm, we use the single leader, vertical trellising for all of our greenhouse cucumbers. In the coming weeks, we will use the Florida Weave method as a form of trellising all of our pepper plants. 

In your share this week:

Beets – Broccoli/Cauliflower – Cilantro – Chard – Carrots Green Onions – Snap Peas – Juliet tomatoes (just a couple today, but more to come!) 

Fried Rice

3 tablespoons oil

One medium onion, chopped

1 clove garlic, minced

One bell pepper, chopped

Two carrots, chopped

Broccoli or cauliflower chopped

Chard cut into ribbons

Snap peas, chopped

Green onions, chopped

1/4 cup Cilantro, minced

Tomatoes, optional

2 eggs, whisked

3 to 4 cups of cooked rice, cooled

1/4 c water

2tbsp soy sauce

1 tbsp sesame oil

Salt and pepper to taste

Put 1 tablespoon of oil into a wok or large skillet.   When it begins to shimmer add the chopped onion, garlic, carrots, pepper, broccoli, and cauliflower.  Sauté a few minutes and then add the peas, chard and tomatoes.  Fry  until partially cooked, but still crisply textured. 

Remove vegetables. Add remaining oil to pan or wok.  When the oil shimmers, add the rice.  Break up clumps and stirfry. Make a well in the center and pour the eggs into the well.  Scramble the eggs in the middle of the rice and when they’re cooked, add all the vegetables.

Add water, soy sauce, sesame oil and salt + pepper.   Stir.   Top with cilantro and green onions

For the farm crew,

Jennifer

Summer CSA week 6

Last week was a very busy week for the farm crew. Along with the heat, more of our time is dedicated to harvesting in addition to weeding and other tasks. Now that we have more consistent supply of a few items, we are beginning to ramp up deliveries to our wholesale customers. In addition to our CSA members, we also harvest and deliver vegetables to local grocery stores, co-ops, and restaurants. Once Fall hits and kids are back in school, we will also start selling some of our vegetables to local schools. We sell a more limited mix of crops to these outlets, and their deliveries start later than the CSA because of the risk and inconsistency of the wholesale market. Having these outlets does provide great balance for the farm, though, since it allows us to to stabilize the supply of staple crops to the CSA boxes and grow these crops at a scale and efficiency that wouldn’t be possible with CSA alone. It also is great outreach and helps expose the broader public to the exceptional quality and flavor of local produce.

We harvested an early planting of cabbage last week as well. This is always a fun activity on the farm. You know when your parents always told you “don’t play with your food”? Yeah, well, we don’t listen to that here on the farm. When it comes to cabbage harvest, we play with our food. The way it works is we usually have one group of people who are cutting the cabbages, and one group of people who are catching the cabbages. The first group cuts the cabbages, removes the outer leaves, then they throw the head to someone that’s catching, and they place it into the pallet box which gets put into the root cellar for storage. It’s a fun activity that always creates a lot of smiles, laughs, and teamwork, but takes a little while to bring back our muscle memory on how to toss around a 4 pound cabbage without dropping it or hurting anyone. These small cabbage harvests will give the crew plenty of practice time before the big fall cabbage harvest. You’re getting tender Napa Cabbage in your shares today, but regular cabbage will be on its way in a couple of weeks.

Last Friday, we did something I didn’t think we would ever have to do this season and that was lay irrigation pipe. The way the season started, it seemed as though mother nature was going to take care of the irrigation for us, but with the warm and dry days we got last week and more being predicted for this week, it was time to haul out the irrigation pipe. On the farm we always try to push the envelope on sustainability. One of the ways we do this is by utilizing a pond for watering our crops, rather than groundwater alone. Each year this pond fills up with snow melt and rain water, which we then pump about 1/4 mile to the vegetable fields. The pond also catches the water coming from our underground drainage tile system that has helped keep our fields from becoming too waterlogged this year.

If you grow anything at home, you probably use a garden hose and sprinkler. We have similar set up, only industrial sized. The way it works is we turn on a pump by the pond that sucks water from the pond. The water then travels through many 40 foot sections of pipe until it reaches the water reel that’s placed at the end of the field we wish to irrigate. The water reel is a big fancy looking hose reel. Think of those things you can put on the side of your house to wind up your garden hose but imagine that it’s 12 feet tall. It has an 1100′ long hose that attaches to a sprinkler system that’s on wheels. We pull the hose and sprinklers to the end of the field we wish to irrigate. Once you turn on the pump, the water starts flowing and irrigating the plants. The coolest thing, and probably the biggest difference from a home set up is that you don’t have to move the sprinkler down the field. The reel slowly retracts the hose which moves the sprinkler. From far away, it looks like it’s not moving at all, but up close, you can see that it is moving about two feet per minute. This is a wonderful set up because it allows us to irrigate a lot of acreage efficiently.

In your share this week:

Cucumbers – Napa Cabbage – Snap Peas – Carrots – Garlic Scapes

Green Onions – Lettuce – Cauliflower or Broccoli (we didn’t have enough for everyone but we’ll switch sites next week to make sure everyone gets some of each!)

Sesame Carrots (from Vegetable Heaven by Mollie Katzen)

2 tsp sesame oil

1.5-2 cups carrots, sliced into coins

2 tbsp unseasoned rice wine

2 tbsp honey

2 tsp tahini

One clove of garlic, minced (or several scapes minced)

1 teaspoon vegetable oil

 3 cups of chopped onion

6 cups chopped Napa cabbage

1 tsp salt

Freshly ground pepper

Heat a large skillet and add the sesame oil, carrots and half a teaspoon of salt. Stirfry over medium high heat for five minutes. Cover, and cook for another five minutes.

Turn heat down to medium and add the vinegar cover again and cook for an additional five minutes. Stirring the honey tahini, and the garlic and cook, uncovered, stirring frequently for 5 to 8 more minutes or until carrots are tender, and starting to brown.

At the same time in a second skillet and add the vegetable oil, onion and the remaining half a teaspoon of salt. Stirfry over medium heat add cabbage.  Keep the heat high and stirfry for another five minutes or until the cabbage wilts (it will be slightly crunchy).  Transfer to a serving platter. Spoon the carrots on top of the cabbage. Grind some black pepper over the top and serve hot warm or at room temperature.

Quinoa Salad (from NYT Cooking)

4 cups water 

2/3 of a cup dried fruit, such as apricots, raisins, craisins, or currents

1/4 cup chopped cilantro

1/4 cup chopped mint

1/4 cup chopped parsley

Salt to taste

One cup, red or rainbow quinoa

1/4 cup toasted pistachios 

1/4 cup toasted almonds

1/4 cup toasted walnuts

2 tsp lemon zest

Dressing:

1/4 cup lemon zest

Salt to taste

1 small garlic clove, pureed (optional) (or use minced scapes!)

1/4 tsp cinnamon

1 tsp balsamic vinegar

1/3 c olive oil

Bring water to boil and add quinoa and salt.  Bring back to a boil, then turn down and simmer for 20 minutes until the thread separates from the quinoa grains.  Drain and shake well in the strainer then return to the pot. Cover the pot with a dish towel and put the top back on it and let it sit for 10 to 15 minutes. Place quinoa in a large bowl.

Meanwhile, mix all the dressing ingredients together. Add remaining ingredients and toss place on a large platter or in a large serving bowl.

***  add chopped up pea pods, broccoli florets, raw carrots, or any of the delicious vegetables you receive this week in your share to increase the vegetable content of this dish

For the farm crew,

Jennifer

Summer CSA Week 5

As July begins, there seems to be a strange energy in the air. It’s technically the middle of Summer which means it’s almost the middle of the growing season. It’s this happy, yet sad, yet stressful time of year. It’s the time of year on the farm when most of the planting is complete, but a lot of vegetables aren’t quite ready to be harvested. It creates a sort of limbo stage.

As farmers, we try to stay in the moment (then again aren’t we all) to ensure we complete all the necessary tasks so the vegetables stay happy and healthy. This week that meant the farm crew was out mulching the rest of the outdoor tomatoes, doing some pruning of the peppers, more bug hunting, and lots and lots of weeding. Falling behind on any of these tasks can lead to unhealthy or stressed out plants that won’t produce how we expect them to. That would mean less veggies in your box each week, which would be a disaster!

However, in order to be a successful farmer, one must also be thinking of the future. Farmer Janaki spent a lot of time this week checking on the storage planting of potatoes that went in a few weeks ago, to ensure the seed pieces didn’t get entirely drowned out in all the rain. He’s also been checking in on the storage cabbage to make sure they are growing on track for fall harvest. There’s also been an uptick in conversations during our morning staff meetings about when final plantings of vegetables are scheduled to go in the ground. Every vegetable gets seeded, planted, and harvested at very specific times to ensure the predicted outcome is achieved. Straying too far from any of these dates could have big consequences if we aren’t careful.

This can make July an overwhelming time on the farm, but it’s also one of my favorite. As the crew walks along the fields moving from one weeding project to the next, you can’t help but notice all the flowers and tiny vegetables popping up all over. The baby broccoli peeking through the foliage. The beautiful white flowers that will soon turn into tasty peas. The Napa cabbage that is just days away from being ready to harvest. The big green tomatoes that, if I stare at them long enough, I can convince myself they might have the slightest tint of yellow to them.

I always think of July as nature’s way of reminding us to slow down and find happiness in the little things. Of course we will keep checking our calendars and racing around to get everything done before the end of the work day, but we might occasionally take the long way to our next weeding project as a way to bask in the beauty of almost-full fields, and to congratulate ourselves on all the hard work we’ve done to get to this point. I encourage all of you to take an extra moment this week to really take in the beauty and flavor of all the vegetables inside your box.

As I mentioned, good farmers are always thinking about the future, and we are going to ask all of you to do the same. We are giving you a heads up that we will be hosting our Coffee On The Farm event the morning of Saturday, August 24th. It’s a time for you to drink coffee, tour the farm, and meet other members. We will send out more information and additional reminders as the event gets closer.

This week in your share:

Kale – Cucumbers – Beets – Lettuce – Pac Choi – Parsley Green Onions – Garlic Scapes

Cucumber and Yogurt Salad (modified from A Book of Middle Eastern Cooking by Claudia Roden)

One large, cucumber, peeled and diced

Salt

3 to 4 garlic scapes, minced

2 cups plain yogurt

Pepper to taste

1 tablespoon dried, crushed mint or 3 tablespoons finally chopped fresh mint

Sprinkle diced cucumber with salt, and leave in a colander to drain for 30 minutes.  Mix the yogurt, garlic scapes, and mint in a large bowl. Season with salt and pepper.  Drain the cucumbers and add them to the yogurt dressing. Mix well and serve.

Moroccan Beet Salad

Half a pound of beets

Juice of half a lemon

One clove of garlic, minced finely

Half to 1 teaspoon ground cumin

2 tablespoons olive oil

Salt and pepper to taste

1/4 cup of parsley, chopped

Place water in a saucepan and bring to a boil.  Cut the beets in half and add them to the boiling water -cook until tender when pierced with a fork (approximately 30 minutes). Cool, peel and cut into bite-size pieces.   Place in a serving bowl.

Whisk lemon juice, garlic, and cumin in a small bowl.  Add salt and pepper to taste.  Gradually add the olive oil while whisking.  Pour over the beets and stir to mix.  Let beets marinade for a few hours.  Sprinkle parsley on top on beets before serving.

For the farm crew,

Jennifer

Summer CSA Week 4

For all of us who put in a plea to Mother Nature, it worked…sort of. Last week felt like a normal week on the farm (if such a thing even exists in agriculture). This time of year, as the seasons shift from Spring to Summer, the farm crew’s agenda changes from spontaneous to more routine. It usually means weeding, row cover, weeding, bug hunting, and more weeding. Janaki and the crew were finally able to get out into the fields to do some much needed field work.

The drier weather gave us the opportunity to roll up all of our row cover. If you aren’t familiar with it, row cover is a permeable fabric that we lay over the top of our plants, specifically the brassicas. The row cover has multiple benefits, but the main ones we use it for on the farm are for deterring pests, and adding some extra early season heat. Broccoli is generally a cool season crop, but “cool season” generally refers to our normal weather in early June, while our first planting goes in the ground in mid-April. This is one of the reasons we are able to provide all of you with broccoli so early in the summer. It’s a large task to lay out the 30’x400′ sheets of row cover after each Spring planting of brassicas, but it’s an even larger task to roll all of it back up. 

We also made it across the road to weed through the first two plantings of outdoor carrots, and do some bug hunting while we were over by the potatoes. Each year we find ourselves fully experiencing what it means to work for an organic farm. It means that instead of the farm crew going out to spray insecticides on the plants, we take the organic approach. Think Ghostbusters, but instead of proton packs and cool jumpsuits, we get 5 gallon buckets and overalls. We go row by row, plant by plant, searching for the various life stages of the Colorado Potato Beetle. The eggs are by far the easiest to spot since they are bright orange against the deep green foliage of the plants. The larvae are a little more difficult, but get easier to spot as they go through the 4 larval stages. They start out really tiny with a black head and brown body, and slowly grow to almost being the size of an adult beetle. Once they’ve reached the adult stage, they get wings and stripes on their back which help them to be more noticeable against the plant. The worst thing about the Colorado Potato Beetle is how adaptable it is. These bugs overwinter in different life stages, don’t have to mate in the spring before they lay eggs, and aren’t even solely attracted to potato plants! Their favorites are potatoes and eggplant, they will also survive on other members of the nightshade family. This unfortunately meant we found quite a few on our outdoor tomatoes. Nothing the Beetlebusters (aka the farm crew) couldn’t handle. 

In case that wasn’t enough bug fun, we also noticed cucumber beetles on our greenhouse cucumbers, and squash beetles on our squash. We did identify a ‘new’ pest on the potatoes called a blister beetle. Mother nature is always keeping us on our toes. This summer is going to have a lot of bug pressure. We are coming off of a mild winter which didn’t get cold enough to kill most of the populations, then following that up with warm wet weather in the Spring/Summer, it’s the perfect recipe for a lot of bugs! This is all to remind you that if you ever find a little critter, or see some holes on your veggies, we promise it’s okay. It’s just nature’s way of reminding all of you that the veggies you receive each week are grown with love instead of harsh chemicals!

This week in your share: 

Arugula – Broccoli – Turnips – Radishes – Spinach – Green Onions

Garlic Scapes – Cucumbers – Green-top Carrots

This week we are giving you garlic scapes. If you’ve never used these before, they have the same flavor you get from fresh garlic, only a little milder and a lot less work since no peeling is involved. You can substitute scapes for fresh garlic in almost any recipe using 4-6 scapes = 1 clove of garlic.

One- Pan Orzo With Spinach and Feta

Ingredients

Yield:4 servings

  • 2tablespoons unsalted butter
  • 4large green onions, trimmed and thinly sliced
  • 2large garlic cloves, minced
  • 8ounces baby spinach leaves (8 cups), coarsely chopped
  • 1teaspoon kosher salt
  • 1¾cups low-sodium chicken or vegetable stock
  • 1cup orzo
  • 1teaspoon finely grated lemon zest (from 1 lemon)
  • ¾cup crumbled feta (3 ounces), plus more for garnish
  • ½cup frozen peas, thawed (optional)
  • 1cup chopped fresh dill, or use parsley or cilantro

PREPARATION

  1. Heat a 10-inch skillet over medium, then melt butter, 30 seconds to 1 minute. Stir in about three-quarters of the green onions (saving some of the green parts for garnish) and garlic, and cook until softened, stirring frequently, about 3 minutes.
  2. Stir in spinach, adding in batches if it doesn’t all fit in the pan at once, and ½ teaspoon salt. Continue to cook, stirring occasionally, until spinach is wilted, about 5 minutes.
  3. Stir in stock and bring to a simmer. Stir in orzo, lemon zest and remaining ½ teaspoon salt. Cover and simmer over medium-low heat until orzo is nearly cooked through and most of the liquid is absorbed, 10 to 14 minutes, stirring once or twice.
  4. Stir in cheese, peas (if you like) and dill, cover the pan, and cook for another 1 minute, to finish cooking and warm the peas. To serve, sprinkle with more cheese and the reserved green onions

Salmon Cakes With Arugula Salad

Ingredients

  • 1 pound salmon, skinned (canned will also work)
  • 2 tablespoons lemon juice, divided
  • 2 teaspoons Dijon mustard, divided
  • ½ cup finely chopped yellow bell pepper
  • 1 tablespoon finely chopped shallot
  • ½ teaspoon ground pepper, divided
  • ½ cup panko breadcrumbs
  • ½ cup crème fraîche or sour cream
  • ¼ cup buttermilk
  • 3 tablespoons chopped fresh dill
  • ½ teaspoon salt, divided
  • 2 tablespoons extra-virgin olive oil
  • 5 ounces arugula
  • 1 cup sliced radishes

Directions

  • Coarsely chop salmon and place half in a food processor. Add 1 tablespoon lemon juice and 1 teaspoon mustard. Process, scraping down the sides as necessary, until smooth. Add the remaining salmon, bell pepper, shallot and 1/4 teaspoon pepper and pulse until the mixture is combined but still chunky.
  • Transfer the salmon mixture to a medium bowl. Add breadcrumbs and stir until combined. Form the salmon into 4 patties, about 4 inches wide each, and place on a plate. Freeze for 5 minutes.
  • Meanwhile, whisk crème fraîche (or sour cream), buttermilk, dill and 1/4 teaspoon salt with the remaining 1 tablespoon lemon juice, 1 teaspoon mustard and 1/4 teaspoon pepper in a large bowl. Set aside 1/4 cup of the dressing for drizzling.
  • Heat oil in a large cast-iron or nonstick skillet over medium-high heat. Add the salmon cakes and cook, flipping once, until well browned and cooked through, 2 to 3 minutes per side. Transfer to a clean plate and sprinkle with the remaining 1/4 teaspoon salt.
  • Add arugula and radishes to the dressing in the large bowl. Toss to coat. Serve the salmon cakes on top of the salad, drizzled with the reserved 1/4 cup dressing

Carrot Top Salsa (The CSA Cookbook by Linda Ly)

2 cups minced carrot greens leaves and tender, stems only

3 tablespoons minced garlic

3 tablespoons minced fresh oregano

2 tablespoons minced jalapeño

One to one and a quarter cups olive oil

1/4 of a cup red wine vinegar

Zest and juice of lemon

Add all the ingredients to a medium bowl and stir to combine (use more or less oil to make a chunkier or thinner sauce).  Cover and let stand at room temperature overnight so the flavors intermingle.  This salsa gets better with age – so the carrot have turned to deep muted shade of army green is still good!!  Decant into a jar and refrigerate.  The oil will congeal in the cold temperature, but it does not affect the flavor. Bring the salsa to room temperature before serving.

For the farm crew,

Jennifer