Summer CSA Week 13, 2023

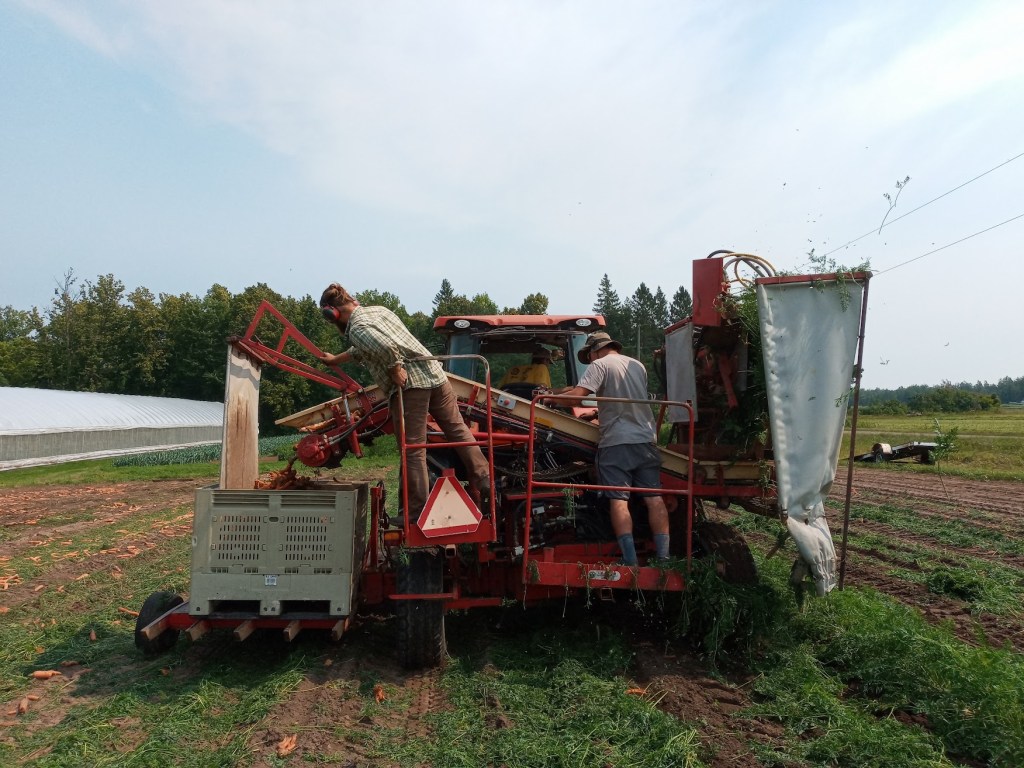
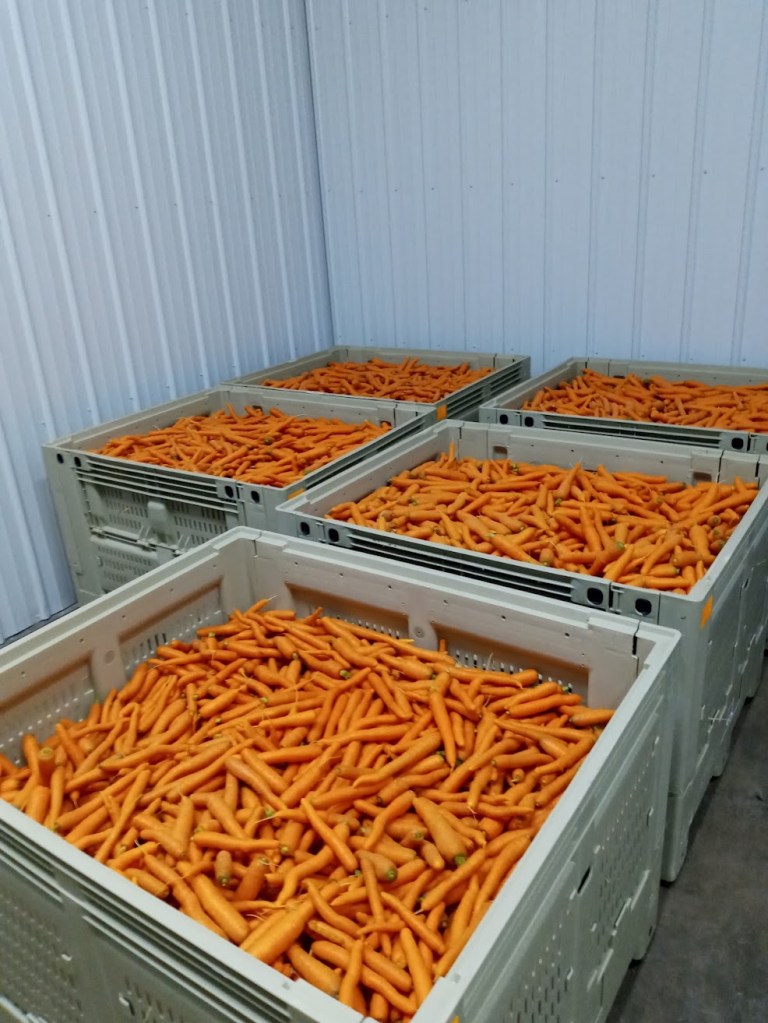
This past week, while harvesting carrots, we found bees… or rather, they found me. Maybe it was the lavender soap I had used that morning, maybe it was my sweet disposition, but whatever it was the bees seemed to swarm to it. Each time the carrot harvester made a lap around the edge of the field with the bee boxes I would pick up a stinger or two. I had just about had enough when Janaki hooked me up with a nice bee keepers hat. After which, I was able to complete the harvest much more comfortably than it had begun.

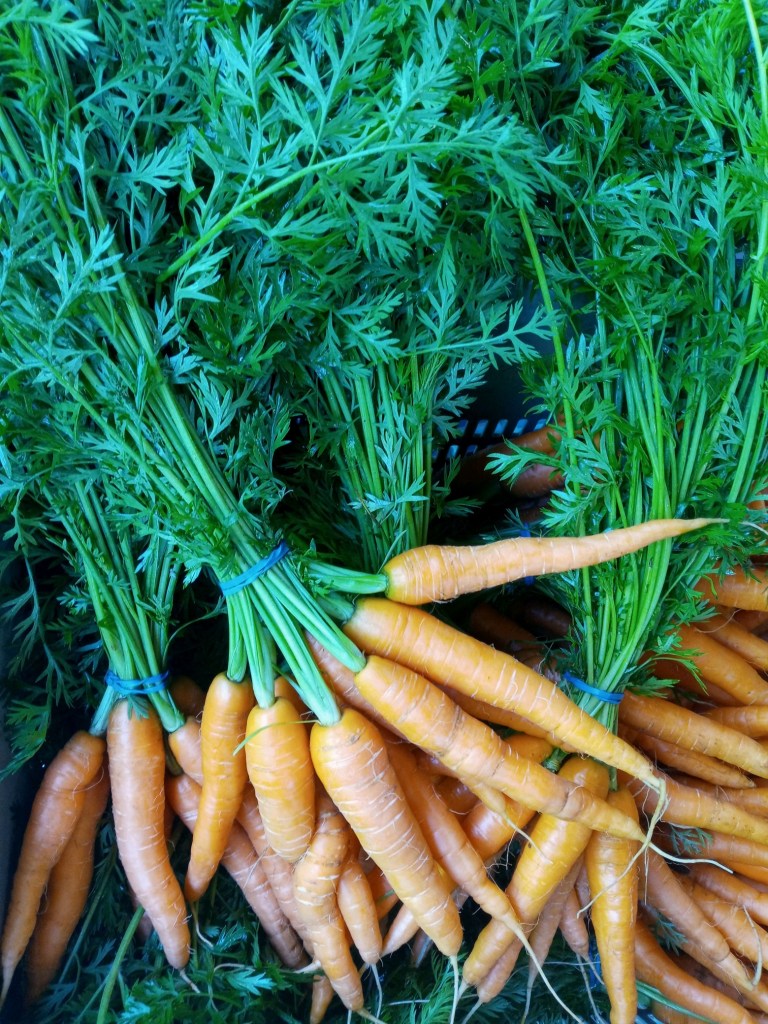
While I was communing with the bees, most of the other crew members gathered around the barrel washer to sort, clean & taste the carrots as they came from the field. The colder nights we had last week really seemed to help bring out their sweetness, and it was great to get them out of the ground before the heat sapped their flavor!

It’s starting to be that time of year when some of the summer crops start to slow down. The outside cucumbers have wrapped up, while the zucchini are hanging on for just a little longer. We were hoping to hoard some melons for the weeks to come, but decided to send what we have for fear of them going bad before they make it to the shares.

We have an exciting new addition this week, however, in the Carmen pepper. Carmen is a unique sweet pepper variety known for its distinctive shape. Unlike the traditional bell pepper shape that most people associate with sweet peppers, Carmen peppers have a more elongated and tapered form, which lead some folks to mistakenly believe they’re hot (there are also green Jalapenos in the share today, and they are hot!) Carmen peppers exhibit their sweetest flavor when they ripen to a vibrant red, but they are also very sweet when they’ve just begun to turn color. Other sweet peppers (like the bell) tend to be more bright and grassy, rather than sweet, in their green state.


In your share this week:

Beans – Beets – Carrots – Cilantro – Cucumbers – Kale – Melons – Onions

Hot PeppersSweet Red Peppers – Potatoes – Tomatoes – Zucchini


When Catherine sent the “best guess” email for the share this week, my mind initially jumped to vegetable enchiladas. This would be a great bounty to prepare something like that, but after melting in the heat all day yesterday, I decided that hot enchiladas was not the move. In an effort to keep the oven off this week, I decided to share a recipe for gazpacho along with a zesty salad dressing that would pair nicely with the kale this week.


Gazpacho, from cookie & kate

2 ½ pounds ripe red tomatoes (about 4 large or 9 small)
1 small sweet yellow onion (½ pound), peeled and cut into rough 1″ chunks
1 small cucumber (½ pound), peeled and seeded
1 medium sweet red pepper, cored and seeded
¼ cup fresh basil leaves, plus extra for garnish
1 large garlic clove, peeled
¼ cup extra-virgin olive oil
2 tablespoons sherry vinegar or red wine vinegar
¾ teaspoon fine sea salt
Freshly ground black pepper

  1. To prepare your veggies, place your blender bowl, a medium serving bowl, and a small bowl on the counter. Core the tomatoes and cut them into rough 1″ chunks. Reserve about ¼ cup of the juicy tomato seeds and place them in your small bowl (we’ll use them as a garnish later). Add half of the tomato chunks to the blender, and the other half to your serving bowl. Add all of the onion chunks to the blender.
  2. Cut off about one-fourth of the cucumber. Finely chop that piece and place it in the small bowl. Slice the rest of the cucumber into rough 1″ chunks, and divide them between the blender and the serving bowl. Cut off about one-fourth of the bell pepper, finely chop that piece, and add it to the small bowl. Slice the rest of the bell pepper into rough 1″ chunks and divide them between the blender and the serving bowl.
  3. To the blender, add the basil, garlic, olive oil, vinegar, salt and about 10 twists of black pepper. Securely fasten the lid and blend, starting on low and increasing to high speed, until the mixture is completely smooth, about 2 minutes.
  4. Pour the contents of the serving bowl (the remaining chunks of tomato, cucumber and bell pepper) into the blender. Fasten the lid and blend for just 10 to 20 seconds, until the ingredients are broken up into small pieces. Stop there, or blend a little longer if you prefer smaller pieces.
  5. Add a small pinch of salt to the small bowl of garnishes, stir, and store it in the fridge. Chill the soup for at least 2 hours, or up to 24 hours.
  6. Before serving, taste, and add additional salt (I sometimes add another ¼ teaspoon) and/or black pepper if necessary. To serve, divide the soup into small bowls or cups, and top with the reserved cucumber and bell pepper. Top with a few tiny or torn basil leaves and a light sprinkle of pepper. Leftover servings keep well, covered and refrigerated, for 3 to 4 days.

Jalapeño Honey Mustard Dressing, from kroll’s korner

1/3 cup olive oil
1/4 cup honey
1/4 cup dijon mustard
2 tablespoons lime juice
1/2 teaspoon lime zest
1/2 jalapeño, diced
2 teaspoons thyme, chopped
Salt & pepper, to taste

  1. In a medium sized bowl, whisk all ingredients together until well combined. Or you can combine all ingredients in a mason jar and give it a nice shake until combined so you don’t have to dirty a bowl! Taste and adjust ingredients as desired. Store in a mason jar or airtight container in the fridge for 1-2 weeks. Makes ~1 cup.

For the farm crew,

Charlie

Summer CSA Week 12, 2023

It was so nice to see Food Farm folks this Saturday–we enjoyed speaking with so many of you and show off our hard work!

As some of you may have noticed, the root cellar is gradually filling up with a colorful abundance of carrots, beets, cabbage and potatoes. The farmers have been diligently packing up more and more of these vibrant vegetables, destined for grocery store shelves and eager CSA members.

Moreover, last week marked the collapse of our onion tops. This may sound slightly catastrophic, but don’t worry – it’s a good thing! The leaves fall over simply because the plant has matured and is no longer developing. It’s also how we know they are ready for harvest. In the photo (see left), you can see Teri & Aaron gently lifting them from the ground before laying them out to dry. Careful handling is essential during harvest to avoid bruising, which makes the bulbs susceptible to storage rot. Following the uprooting, these onions will begin their curing process in the fields for a week or so before having their tops removed and transferred to a well-ventilated indoor storage space.


In your share this week:

Basil – Beans – Broccoli – Cauliflower – Carrots – Celery – Cucumber – Melons

Sweet Onions – Bell Peppers – Potatoes – Tomatoes – Zucchini


The recipes this week have a lot of room to make them your own. Either one would be good with just about any item in the share (excluding the melons). So feel free to follow them as directed or create your own pizza & curry experiments…


Zucchini Crust Pizza, from The Cozy Cook

2 cups shredded zucchini
1/4 teaspoon salt
3 large eggs, beaten
1/2 cup all purpose flour (almond flour, coconut flour, and whole wheat flour may also be used)
1/3 cup shredded parmesan

  1. Preheat oven to 350°.
  2. Spread the shredded zucchini out on a lightly greased baking sheet and sprinkle lightly with salt. Bake for 15 minutes. Remove and transfer the zucchini to paper towels or a cheesecloth.
  3. Increase oven temperature to 450°.
  4. Squeeze out as much additional moisture from the zucchini as possible. Add the zucchini to a large bowl along with the whisked eggs.
  5. Sprinkle the flour in gradually, stirring to incorporate. Continue to add flour until desired consistency is obtained. (I use the entire ½ cup for all-purpose flour.)
  6. Spread out onto a lightly greased 12-inch pizza pan, leaving 1-inch or so around the edges.
  7. Top with shredded Parmesan cheese and bake for 18 minutes, until it begins to brown slightly. Remove from oven.
  8. Reduce heat to 400°.
  9. If possible, let the crust cool for extra crispy results.
  10. Top with desired pizza toppings. Bake for ~10 minutes, until the cheese is melted and bubbly.

Summer Vegetable Curry, Inspired by Half Baked Harvest

Basil Coconut Ginger-Lime Rice:

1 (14 ounce) can coconut milk
1 cup jasmine or basmati rice
1 tablespoon fresh ginger grated
1 lime juiced + zest

  1. Add the coconut milk to a medium size pot. Bring to a low boil and then add the rice, salt, and ginger. Stir to combine and then place the lid on the pot and turn the heat down to the lowest setting possible. Allow the rice to cook ten minutes on low and then turn the heat off completely and let the rice sit on the stove, covered for another 20 minutes (don’t take any peeks inside!). After 20 minutes remove the lid and add the lime juice + zest.

Curry:

4 tablespoons extra virgin olive oil
1 pound boneless, skinless chicken, diced
2 bell peppers, chopped
1 zucchini, chopped
2 cups green beans, chopped
1 cup broccoli, diced
1 cup cauliflower, diced
1 cup carrots, diced
1 tablespoon fresh ginger, grated
2 cloves garlic, grated or minced
2-3 tablespoon thai red curry paste
1 (14 ounce) can coconut milk
1 tablespoon fish sauce
1/2 cup fresh basil, chopped
1 mango, diced
1 jalapeño, seeded + diced
fresh naan and goat cheese, for serving

  1. Heat a little olive oil in a large skillet over high heat. Add the chicken and cook until browned and cooked through, about 5-10 minutes.
  2. Add another drizzle of olive oil to the skillet. Add the peppers, zucchini, beans, broccoli, cauliflower, carrots, ginger and garlic. Cook the veggies 5 minutes or until they just begin to soften.
  3. Add the coconut milk, curry paste, and fish sauce. Stir to combine, bring the mixture to a boil, cook 5 minutes or until the sauce thickens slightly. Remove from the heat and stir in the basil.
  4. In a small bowl toss together the mango and jalapeño.
  5. Serve the curry over the rice. Add a spoonful of the mangos and a sprinkle of goat cheese. Eat with Naan!

For the farm crew,

Charlie

Summer CSA Week 11, 2023

It’s farm tour time–this Saturday from 10-noon, we’d love to see you!

It’s melon mayhem at the Food Farm! We recently set our new daily harvest record with a whopping 377 cantaloupe. That is more than 800 pounds of weight to pull from the field! We expect them to slow down soon, so enjoy it while it lasts.

In other news that is orange, the crew christened a “new-to-us” carrot harvester. A lucky few climbed aboard as it took its maiden voyage through the fields, while the rest of the crew assembled at the washing stations. There were certainly some wrinkles to iron out, as there often is with any new piece of machinery, but by the end of the week the process seemed to be moving along rather quickly.


Beans – Broccoli – Carrots – Cilantro – Cucumbers – Dill – Greens Mix – Melons

Onion – Bell Peppers – Hot Peppers – Potatoes – Tomatoes – Zucchini


Usually the melons are best enjoyed straight up in all their glory. That way you can fully appreciate the depth of their flavor. This week though, because there are so many, I thought it would be nice to include a recipe with them in it. It does include basil, which we are not sending this week… I’m hoping some of you still have a few sprigs leftover from last weeks share, or can maybe snag some from a friendly neighbor’s garden.

P.S. The vinaigrette would also go great on the greens mix in today’s share 🙂

Melon Caprese Salad, from Half Baked Harvest

Honey Herb Vinaigrette:
1/4 cup extra virgin olive oil
2 tablespoons honey
Juice of 1 lemon
1 tablespoon white balsamic
1 cup fresh basil
1 tablespoon toasted pine nuts
1 pinch flaky sea salt

  1. To make the vinaigrette, combine all ingredients in a blender and blend until smooth.

3 balls fresh burrata cheese
4 cups melon balls
1/2 cup fresh basil leaves
2 tablespoons fresh mint
6 slices prosciutto

  1. Break the burrata in half and place each half in the bottom of a small bowl or glass (about 8 ounces). Over the burrata, layer the melon balls, basil, and mint. Top with a slice of prosciutto. 
  2. At this point the salad can be covered and placed in the fridge for up to 6 hours. 
  3. Before serving, drizzle over the vinaigrette.

Blistered Green Beans w/ Tomato-Almond Pesto, from Bon Appétit

1 1/4 cups diced tomatoes
1/8 cup unsalted, roasted almonds
1 garlic clove, grated
1 tablespoons olive oil
1 tablespoons Sherry vinegar or red wine vinegar
1/2 teaspoon paprika
Pinch of cayenne pepper
Kosher salt, freshly ground pepper
1 1/2 teaspoons vegetable oil
1 pounds green beans, trimmed

  1. Preheat oven to 450°F. Roast tomatoes on a rimmed baking sheet, turning once, until blistered and lightly charred, 15-20 minutes. Let cool slightly. Finely chop almonds in a food processor. Add garlic, olive oil, vinegar, paprika, cayenne, and half of tomatoes; pulse to a coarse pesto consistency. Season with salt and pepper.
  2. Heat 3/4 tsp. vegetable oil in a large skillet over medium-high. Add half of beans; cook, undisturbed, until beginning to blister, about 2 minutes. Toss and continue to cook, tossing occasionally, until tender, 7–9 minutes; season with salt and pepper. Spread beans out on a platter; let cool. Repeat with remaining vegetable oil and beans.
  3. Toss beans with pesto; season with salt and pepper if needed. Add remaining tomatoes and transfer to a platter.

Summer-Vegetable Casserole, from Food & Wine

Extra-virgin olive oil, for drizzling
1/2 pound potatoes, peeled and sliced 1/4 inch thick
Salt and freshly ground pepper
1 bell pepper, thinly sliced
1 small onion, thinly sliced
1 large garlic clove, minced
1 teaspoon thyme leaves
1/2 pound tomatoes, sliced 1/4 inch thick
1 medium zucchini, sliced on the diagonal 1/4 inch thick
3 tablespoons freshly grated Parmigiano-Reggiano cheese

  1. Preheat the oven to 350°. Coat a 9-inch baking dish with olive oil. Spread the potatoes in the dish in an even layer; drizzle with oil and season with salt and pepper. In a bowl, combine the bell pepper, onion, garlic and thyme and season with salt and pepper. Arrange two-thirds of the bell pepper mixture over the potatoes and drizzle with oil. Top with the tomatoes and the zucchini; drizzle with oil and season with salt and pepper. Cover with the remaining bell pepper mixture and sprinkle with the cheese.
  2. Cover the casserole with foil and bake for 40 minutes. Increase the oven temperature to 425°. Uncover the casserole and bake for about 20 minutes longer, until the vegetables are tender and glazed on top. Let stand for 10 minutes. Serve warm.

For the farm crew,

Charlie

Summer CSA Week 10, 2023

Let’s take a moment to say thank you for the bit of rain that came last week. The farm was lucky enough to get three quarters of an inch, which isn’t that much in the grand scheme of things, but as my mother likes to say “beggars can’t be choosers.” The problem is that we need rain consistently to make much of an impact. Every hotter-than-normal, rainless day with ample sunshine dries the soil out. We do have a pond toward the back of the farm property, which we are able to pump water from to aid in our irrigation efforts, but it certainly wouldn’t hurt if we all put some collective energy into wishing for more rain to fall 🙂

We are getting to that time of year where every day is a harvest day. Whether it’s digging beets, carrots & potatoes, picking canning tomatoes, or slicing bunches of kale, there just doesn’t seem to be enough time in the day. One fun item that got added to the list this week is cantaloupe. This is a crop that can be difficult to grow in our area, but through a lot of trial an error, we have managed to grow consistently for the last five or so years. It has become somewhat of a crowd favorite and for good reason! Nothing quite cuts the summer heat like a freshly sliced melon!


Carrots – Cilantro – Cukes – Kale – Lettuce – Green Onions – Green Peppers

Green BeansHot Peppers – Parsley – Potatoes – Tomatoes – Zucchini – Melons


Feel free to get creative with the salad recipe below… As is, it uses up a good chunk of the ingredients in your share this week, but it could feature even more farm goodness if you happen to have some leftover cabbage or snap peas hiding in your fridge from weeks prior. The dressing itself is also pretty versatile and would make a wonderful marinade or stir fry sauce.

Salad w/ Peanut Butter Dressing

2 medium cucumbers
1/2 cup shredded carrots
1 green onion, thinly sliced
1/4 cup salted & roasted peanuts, chopped
2 tablespoons cilantro, chopped
1-2 hot pepper, finely diced (optional)

PB Dressing, from theendlessmeal.com:
1/2 cup peanut butter
1/4 cup lime juice
1 tablespoon soy sauce
1 tablespoon ginger, finely minced
2 teaspoons toasted sesame oil
2 cloves garlic, finely minced
1/4 – 1/2 cup water
sea salt, to taste

  1. In a medium-sized bowl, whisk the peanut butter, lime juice, soy sauce, ginger, sesame oil, and garlic. Thin with the water, starting with ¼ cup. (The amount of water you’ll need to add will depend on how thick your peanut butter is and how thick or thin you’d like the dressing to be).
  2. Taste and add salt as needed.
  3. Dress the salad as you see fit!

Potato Salad w/ Grilled Kale, from Bon Appétit

5 tablespoons olive oil, divided, plus more
2 pounds potatoes
1 pound shallots, unpeeled
3 tablespoons lemon juice
1 tablespoon apple cider vinegar
freshly ground black pepper
1/4 cup chopped pickles
2 tablespoons drained capers (optional)
1 bunch kale, ribs and stems removed
3 green onions, sliced
1 cup parsley leaves w/ tender stems

  1. Prepare a grill for medium-high heat; lightly oil grate. Place potatoes in a large saucepan and pour in cold water to cover by 1″. Season with salt and bring to a boil. Reduce heat; simmer until tender, 15–18 minutes. Drain and return to saucepan.
  2. Meanwhile, grill shallots, turning occasionally, until skins are blackened and flesh is tender, 15–20 minutes. Let cool. Halve lengthwise and scoop out insides (discard skins).
  3. Whisk lemon juice, vinegar, and 3 Tbsp. oil in a large bowl; season with salt and pepper. Add cornichons, capers, and potatoes and toss to coat.
  4. Toss kale and remaining 2 Tbsp. oil in a medium bowl; season with salt. Grill, turning often, until charred and crisp-tender, about 1 minute. Fold into salad along with scallions, parsley, and shallots.
  5. Do Ahead: Potato salad can be made 1 hour ahead. Store tightly covered at room temperature.

For the farm crew,


Charlie

Summer CSA Week 9, 2023

Start your engines… The harvest machines are starting to make their laps through the fields! Heretofore, the veggies you’ve been enjoying have been harvested by hand, with love. Towards the end of last week, the carrots and potatoes were still harvested with lots of love, but with a little extra help from two wonderful harvesting machines that are made specifically for those crops. The added volume means we can now send carrots to local grocery stores like the Co-op & Mt. Royal, as well as more for our CSA members.

Not all the work was machine assisted, however, as the crew also spent many hours crawling on their hands and knees to remove weeds from the beet, carrot and pea fields. This may not be the most glamorous of tasks, but the plants sure are thankful for less competition for water, sunlight and nutrients.

I hope you’ve been enjoying this newsletter as a way to stay updated about the recent happenings at the farm, however, nothing captures the beauty of this place quite like seeing it for yourself. Coming up is the perfect opportunity to do just that! We would love to see you all at our Annual Farm Tour get-together on Saturday, August 26th from 10am to noon!


In your share this week:

Basil – Green Beans – Broccoli – Carrots – Celery – Cucumbers

Green Garlic – Onion – Bell Peppers – Potatoes – Tomatoes – Zucchini


This weeks share features a few new additions in basil, bell peppers, onion, and celery. Also included is a head of green garlic, which is brighter, milder and has less heat than fully cured garlic.

The past couple weeks, I have had multiple friends reach out to tell me about the delicious berry pies they have been making with the freshly foraged juneberries, raspberries and blueberries that are currently in season. We have many wonderful berry farms in our area, but that isn’t the only thing a pie crust is good for. A more veggie applicable method would be to make a quiche! This is also a delicious way to use up some of our girls’ eggs if you happen to have an egg share.

I’ve decided to include my favorite most versatile recipe for flaky pastry crust as the base for both recipes this week. It is somewhat involved, so If you are short on time, a store bought crust will also do the trick.


Flaky Pastry Crust

12oz butter
3/4 cup cold water
2 tablespoons apple cider vinegar
3 3/4 cup flour
1 1/2 teaspoons cumin
1 1/2 teaspoons salt

  1. Put butter in the freezer for an hour or so to let it get nice and cold.
  2. Combine flour, salt & cumin in a large mixing bowl. Stir 3-4 times to combine.
  3. Combine apple cider vinegar and water in a small cup or liquid measuring container.
  4. Using the large holes of a cheese greater, grate the frozen butter into the flour mixture. Gently stir to combine.
  5. Slowly add water & vinegar mixture to the large mixing bowl until a crumbly dough starts to just come together. A little extra water may be necessary depending on humidity levels. Go slow though, as the dough should just barely hold together.
  6. Remove the dough from the bowl and mound onto a clean work surface. Cut ball in half then form each half into discs. Wrap discs in plastic wrap and place in fridge for at least an hour.
  7. Roll out when ready.

Broccoli Quiche w/ Peppers and Tomatoes

2-ish cups broccoli florets (about 1/2 pound)
1/2 cup peppers, diced
1 medium tomato, sliced
5 large eggs
3/4 cup milk (whole works, but half and half can be used for extra richness)
3/4 tsp salt
1/4 tsp pepper
1 tsp dijon mustard
1 cup shredded cheese of choice (cheddar is great!)
1 9-inch pie crust

  1. Preheat oven to 350 degrees F.
  2. Roll out pie crust, arrange in pie tin, and chill until ready to use.
  3. Place 1-2 cups water in the bottom of a small pot. Add broccoli and bring to a boil. Cook until the broccoli is bright green and slightly tender (about 3-4 minutes). Transfer broccoli to a colander and rinse with cool water. Chop broccoli into small pieces.
  4. In a large bowl, whisk together eggs, milk, salt, pepper, and mustard. Stir in the broccoli, peppers, and cheese. Pour into the prepared pie shell.
  5. Gently pat the tomato slices with a paper towel to absorb excess moisture and place on top of the egg mixture.
  6. Bake quiche for 35-40 minutes, until eggs are set in the center. Check quiche starting at 25 minutes, and tent with foil if the crust is browning too quickly.

Vegetable Galette

Galettes are a wonderful way to use up vegetables! “Galette” is a french term for a pastry base, filled with sweet or savory fillings, with the edges folded in. I recommend sautéing vegetables such as onion, broccoli, and green beans before baking in a galette. They don’t need to be fully cooked, as they will continue cooking while the galette is baking. Veggies such as zucchini, pepper, garlic can be chopped and mixed with olive oil, salt, pepper, and any other dried spices of your choosing and placed in a galette raw. Grate some parmesan or another hard cheese over the vegetables before folding up the sides. Fresh herbs (such as the basil from this weeks share) can be chopped up and sprinkled over the top of the galette when it comes out of the oven.

Here’s an article from Bon Appetit to shed some more light on the galette-making process.

Channel the spirit of this free-form pastry to experiment with ingredients from this week’s share and whatever is hanging around in your fridge! You can rarely go wrong when pie dough is involved 🙂


For the farm crew,

Charlie

Summer CSA Week 8, 2023

Garlic season has arrived! Last Wednesday was all hands on deck as the crew shuttled wagon load after wagon load of freshly harvested German Extra Hardy to washing stations. Once washed the garlic was gently laid out on wire racks (see below). Although it is edible right from the ground, you won’t be seeing it in the shares for at least a couple weeks. To stay fresh in the pantry for any extended period of time, it must go through the curing process – essentially just letting it dry out. As the garlic dries, the skin shrinks and turns papery, forming a protective barrier against moisture and mold.

As we wait for the garlic to be ready, we can take a little time to enjoy another new addition to this weeks box… Potatoes! Not just any old potatoes, but new potatoes. New potatoes are essentially young potatoes that are harvested before they reach full maturity. They are the same varieties as their larger counterparts but are picked early in the growing season, typically about three to four months after planting. Because they are harvested at this young stage, new potatoes are sweeter and more delicate in flavor than mature potatoes. Their skin is thin, tender, and often flaky, which makes them particularly appealing for potato salad. This week i’ve included one of my favorite recipes for just that.


In your share this week:

Cabbage – Carrots – Cilantro – Dill – Cucumbers – Lettuce – Green Onions – Snap Peas

Jalapeño Peppers – New Red Potatoes – Tomatoes – Zucchini


Herby Potato Salad, from Half Baked Harvest

Yield: 6 servings

2 pounds new potatoes
3 cloves garlic
kosher salt
1/2 cup raw cashews, soaked in hot water for 30 minutes, then drained
1 tablespoon dijon mustard
1/3 cup olive oil
1 cup fresh basil, chopped
1/4 fresh dill, chopped
2 chives, chopped
flakey sea salt and black pepper
1 pinch crushed red pepper flakes
juice of 1 lemon

1. Place the potatoes, garlic and a tablespoon of salt in a large pot and fill with water. Bring to a boil over high heat and then reduce the to heat to medium, simmer 10-15 minutes or until the potatoes are just fork tender. Drain. Place the potatoes back in the hot pot. Remove the garlic cloves. Cover the pot and let the potatoes steam for another 20 minutes.

2. Meanwhile, combine the cooked garlic, drained cashews, mustard, and olive oil in a food processor. Pulse until smooth and creamy, adding water if needed to thin slightly. 

3. Cut the potatoes in half and add to a large serving bowl. Add the cashew sauce, basil, dill, chives, lemon juice, and a pinch each of salt, pepper, and crushed red pepper flakes. Toss well to combine. Taste and adjust salt and pepper to your liking. Serve warm or cover and place in the fridge. Can be served at room temp or cold.


Cilantro Lime Slaw, from Gimme Some Oven

Yield: 4-6 servings

1 cup plain Greek yogurt
1/2 cup tightly-packed fresh cilantro
1/4 cup freshly-squeezed lime juice
1/2 teaspoon ground cumin
1/2 teaspoon fine sea salt
1/4 teaspoon freshly-cracked black pepper
3 green onions (just the green parts)
2 garlic cloves
1 jalapeño or serrano pepper, stemmed and cored
14 ounces cabbage, thinly sliced

1. Combine the Greek yogurt, cilantro, lime juice, cumin, salt, black pepper, green onions, garlic and jalapeño in a blender or food processor*.  Pulse briefly a few times until the mixtures is combined.

2. Place the cabbage in a large mixing bowl. Drizzle the sauce on top of the cole slaw, then toss until the mixture is evenly combined.  Season with extra pepper and/or lime juice if needed.

3. Serve immediately, or cover and refrigerate for up to 24 hours.


For the farm crew,

Charlie

Summer CSA Week 7, 2023

In our region, July is known for claiming the title of the hottest month of the year. Last week you wouldn’t have guessed it as the crew enjoyed slightly cooler temps. We won’t be so lucky this week, however, with the forecast pushing 90° for the next few days. Such high temps may be hard on the farm crew, but many of the vegetable varieties are going to love it!

This weeks box brings a few new additions in cilantro, dill and even a couple of salad tomatoes 🙂

Dill is an especially exciting one for me. While it is often associated with dill pickles and potato salad, its culinary significance spans centuries across Europe and Asia, enriching a wide array of cuisines. Due to its distinct and potent flavor, even a small quantity of dill can make a significant impact, making it an excellent choice as a garnish. The delicate, feathery texture of dill leaves adds a touch of beauty, while a mere sprig can infuse a dish with a noticeable and delightful aroma. Moreover, dill finds its place in salads and serves as a crucial component, along with buttermilk, in bestowing homemade ranch dressing with its unique and flavorful character.

When considering planting dill, it’s worth noting that this annual herb, related to celery, possesses a natural tendency to self-replant and propagate extensively, adding to its appeal as a versatile and abundant addition to your garden space.


In your share this week:

Beets – Broccoli – Carrots – Chard – Cilantro – Cucumbers

Dill – Lettuce – Tomatoes – Green Onions – Snap Peas – Zucchini


Dilly Ranch Dressing, from Feasting at Home

Yield: 1 1/4 Cup

1/3 cup mayo
1/3 cup buttermilk
1/3 cup sour cream
1-2 garlic cloves, finely minced
1/2 cup fresh dill
2 tablespoons tarragon
1 tablespoon parsley, chopped
1/2 teaspoon salt, more to taste
1 teaspoon pepper
1 tablespoon lemon juice, more to taste
1 teaspoon apple cider vinegar

  1. Whisk the mayo, buttermilk, and sour cream in a medium bowl until smooth.
  2. Stir in the remaining ingredients: garlic, herbs, salt, pepper, lemon juice, and vinegar.
  3. Taste- you want this slightly salty and tangy- so adjust salt and lemon juice to bump up the flavor.
  4. Place in a sealed jar and chill. You want this cold!

Cucumber Salsa, from Lemon Tree Dwelling

The farm peppers will be in your shares soon enough, but for now store bought will have to do for this recipe…

Yield: 8 servings

1 large English cucumber, about 2 1/2 cups chopped
1/4 cup red onion, chopped
1/3 cup yellow bell pepper, chopped
1/3 cup green bell pepper, chopped
2 tomatoes, chopped
1 jalapeño, minced
1/4 cup cilantro, minced
2 cloves garlic, minced
juice of 1/2 lemon
juice of 1/2 lime
1 teaspoon salt

  1. Chop the cucumbers, peppers, tomatoes, and onions into small pieces, about 1/4 inch. Add them to a medium mixing bowl.
  2. Mince the jalapeño (remove seeds for less heat as desired), cilantro, and fresh garlic. Add it to the chopped veggies in the bowl. 
  3. Squeeze in the fresh citrus juices and add the salt.
  4. Stir well; enjoy immediately or refrigerate until ready to use.

Carrot, Date and Feta Salad; from Food Network

Yield: 4 servings

3 medium carrots
2 tablespoons roughly chopped fresh cilantro
1 1/2 tablespoons extra-virgin olive oil
2 teaspoons honey
Kosher salt
Juice of 1 lime
1/4 cup crumbled feta cheese
2 tablespoons chopped toasted almonds
2 tablespoons finely chopped dates

  1. Thinly slice the carrots into ribbons using a vegetable peeler or mandolin, including any remaining “stubs” of carrot. Soak in ice water until the ribbons firm up and curl, about 15 minutes. Drain and pat dry. 
  2. Whisk together the cilantro, olive oil, honey, 1/2 teaspoon salt and the lime juice in a medium bowl. Add the carrots along with the feta cheese, almonds and dates, and toss until evenly combined. Serve immediately, or let the salad marinate a bit before serving. 

When I first started working at the farm, a little over a year ago, I thought that all of the job would be directly dealing with plants or dirt. I quickly learned, however, that there are many tasks we do that don’t necessarily pop into your mind when you think farming. A lot of the equipment we use here is quite old. The thing about old stuff is that it tends to break. It would be really nice to just replace something when it breaks, but new stuff is rather expensive. We will usually opt for the fix it yourself mentality – something Janaki and Dave are rather good at.

Above you can see Dave hard at work as he repairs our flail mower.

For the farm crew,

Charlie

Farm update and Week 6 CSA

At the end of last week, Janaki took the crew for a walk about the farm to check out everything that’s going on. Things are really starting to pop! The snap peas are crawling all over their trellises and the potatoes are sporting their beautiful white flowers (see above). The biggest melons are palm-sized and starting to ripen. This year we are growing our crowd-favorite, cantaloupe, but we are also trying some watermelons. They’re unlikely to ripen in our climate, but we’re rooting for them! Stay tuned. Also looking to be in good shape are our outdoor carrots (thus far all of the carrots we’ve sent have enjoyed the comfort of greenhouse living).

A highlight for me was learning about Janaki’s growing strategy and how he rotates crops to ensure superb soil quality year after year. He tries to keep a certain level of available resources in each field by incorporating compost, organic matter and planting cover crops after a field has yielded a successful vegetable harvest. For example, he will often interseed clover in mid-to-late summer, which works to replenish important nutrients such as nitrogen levels in the soil. By doing this, we’re able to avoid using fertilizers and other conventional methods to re-establish optimal nutrient levels in our soil for the next round of vegetables. It also aids in weed suppression, meaning we can avoid using herbicides.

We also checked in on a new no-till method we are is testing out. When trying something new at the farm, it’s pragmatic to do a test and a control. In the picture above, you can observe the results at this point in the season. On the left, you can see the control group rows – the soil was turned over before planting and the cabbage is large. On the right, the no-till method shows smaller cabbages, which were planted directly into the clover cover crop. While the control rows appear to be doing much better, what you can’t see is all the work that went into turning over that soil at the beginning of the season before the cabbage could be transplanted. With a no-till method, transplants can go directly into unturned soil. Another benefit of a no-till method is less intensive to no weeding (big win!). The experiment doesn’t look promising now, but we’re waiting until the fall to make a final judgement. With trial and error, we’ve already learned a few things we’d change to make the system better.


In your share this week:

Broccoli – Green-top Carrots – Cucumbers – Garlic Scapes – Greens Mix – Lettuce

Napa Cabbage – Green Onions – Parsley – Snap Peas – Zucchini


This is a recipe forwarded to me from Deb Rausch, A frequent volunteer and friend of the farm. She’s been enjoying a variety of vegetables (mostly kale and chard) with this simple yet tasty dressing. I think it would be great with the broccoli and parsley this week, but use it for whatever feels right to you.

Deb’s Dressing

1/3 c mayo
2 green onions
1 tablespoon champagne vinegar (or rice vinegar)


Miso Glazed Grilled Zucchini

This recipe is a bit intensive but so worth the effort!

2 tablespoons white miso
1 tablespoon honey or maple syrup
1 tablespoon rice vinegar
1 tablespoon soy sauce (or Tamari)
3 medium zucchini (about 1-1/4 lbs)
Cooking oil
Green onions and sesame seeds for garnish

Instructions:

  1. Preheat oven to 400. Slice the zucchini in half length-wise. Cut a cross-hatch pattern into the cut-side of each zucchini half. Each cut should only be about 1/4-1/8 inch deep.
  2. Sprinkle each cut-side with a little bit fo salt. Turn the cut-side down onto a paper towel and let drain for 15-20 minutes.
  3. Once the moisture has been released, quickly rinse the zucchini. Take care not to let the water run over them for too long – you don’t want them to re-absorb water after you’ve drawn out the moisture! Dry off with fresh towels. Make them as dry as possible.
  4. Heat a cast iron skilled or other oven-proof vessel over medium heat. Add 1-2 tablespoons oil, let it heart up, then place the zucchini cut-side down in the pan. Cook until golden brown (about 7 minutes). You can use tongs to carefully peek at the cut-side while cooking.
  5. Once browned, place the cast-iron skill into the oven for 15 minutes. While roasting, make the miso glaze. You can add water to thin it out to the consistency of a BBQ sauce if needed. The zucchini should be extremely fork-tender.
  6. Remove pan from oven and carefully turn over the zucchini so the cut-sides are up. Spoon on the glaze so it covers the zucchini (it doesn’t have to be thick).
  7. Return the pan to the oven, this time with the cut-side up. Turn on the broil function and watch until the miso glaze just starts to bubble. Finish with green onions and sesame seeds.

Smashed Cucumber Salad

Yield: 4 servings

1 large greenhouse cucumber
handful of snap peas (everything you got in your share)
1 teaspoon kosher salt, plus more for cucumber
2 teaspoon granulated sugar, plus more for cucumber
1 1/2 tablespoons rice vinegar
2 teaspoons sesame oil
2 teaspoons soy sauce or tamari
1 tablespoon grapeseed or olive oil
2-3 garlic scapes, minced
Red pepper flakes, to taste

For garnish:
Small handful of cilantro
1 teaspoon toasted sesame seeds (optional)

Instructions:

  1. Rinse cucumber and pat dry. Cut crosswise into pieces about 4 inches long. Cut each piece in half lengthwise.
  2. On a work surface, place a piece of cucumber cut side down. Lay the blade of a large knife flat on top the cucumber and smash down lightly with your hand. The skin will begin to crack, the flesh will break down and the seeds will separate. Repeat until the whole piece is smashed. Break or slice diagonally into bite-sized pieces, leaving the seeds behind.
  3. Place the cucumber in a strainer and toss with a big pinch of salt and a big pinch of sugar. Place a plastic bag filled with ice on top of the cucumbers to serve as a weight and place the strainer over a bowl. Let drain 15 to 30 minutes.
  4. Make the dressing: In a small bowl, combine salt, sugar and rice vinegar. Stir until salt and sugar are dissolved. Stir in sesame oil and soy sauce.
  5. When ready to serve, shake cucumbers well to drain off any remaining liquid and transfer to a serving bowl with snap peas. Drizzle with grapeseed or olive oil and toss. add half the dressing, half the garlic scapes and the red pepper flakes to taste, and toss. Keep adding dressing until cucumbers are well coated but not drowned. Taste and add more pepper flakes and garlic if needed. Serve immediately, garnished with cilantro and sesame seeds.

For the farm crew,

Charlie

Summer CSA Week 5, 2023

Dear Food Farm Community,

As we delve into the heart of the growing season, we find ourselves knee-deep in the world of weeding. Weeding, although often deemed an arduous task, is an essential part of maintaining the health and vitality of our crops. The crew has been diligently working through the fields, carefully tending to each bed, ensuring that our plants have the space, nutrients, and sunlight they need to thrive.

Soon we’ll begin to notice that the daylight hours are gradually decreasing, but the harvest time seamlessly extends, stretching out longer and longer. More variety means more running around for the crew and volunteers. This morning we were doing just that; shuttling harvest totes to and fro to deliver a well rounded box of vegetables.


In your share this week:

Green-top Beets – Broccoli – Green-top Carrots

Cucumber – Garlic Scapes – Kale – Green Onions – Zucchini


Beet Greens & Kale Sautéed with Garlic Scapes

~ 2 servings

  • 1 tablespoon olive oil
  • 1 slice bacon, cut into small pieces (optional, use a little more oil if omitting)
  • 2 garlic scapes, finely chopped
  • 2 green onions, white and pale green portion, finely chopped
  • 6 leaves beet greens, stems cut into 2-inch pieces
  • 2 leaves kale, ribs and stems removed, chopped
  • salt and pepper to taste
  1. Heat olive oil in a large skillet over low heat. Cook bacon until it begins to brown and crisp, about 2 minutes. Add garlic scapes and green onion, cook and stir until golden brown, 3-5 minutes.
  2. Stir beet stems and kale into skillet. Cover and cook until kale wilts, about 3 minutes. Add beet greens. Cover and cook until bright green and wilted, 1 to 2 minutes.
  3. Season with salt and pepper.

Sautéed Zucchini & Carrots

  • 1 medium zucchini, thinly sliced
  • 2 medium carrots, thinly sliced
  • 1 tablespoon olive oil
  • 1 tablespoon ghee (optional)
  • 1 teaspoon dried thyme
  • salt and pepper to taste
  1. Heat a large skillet over medium-high heat. Add the oil and butter.
  2. Once the better is melted, add the zucchini and carrots. Sprinkle with thyme, salt and pepper, toss to coat.
  3. Sauté vegetables until lightly browned and tender, stirring occasionally so they do not burn.

I know I already included a pickled turnip recipe in the week 2 newsletter, but if you are like me, you may have a few extra rolling around in your fridge still. Here is a recipe that includes beets along with our old friend. If you happen to be out of turnips, just use more beets!

Pink Pickles, from Cotter Crunch

8 servings

  • 12–14 ounces purified water
  • Optional: 1 teaspoon sugar
  • 2 ½ Tablespoon Kosher salt
  • 1 bay leaf
  • ½ cup white vinegar (for quick pickling)
  • 1 small red beet, peeled and sliced
  • 2 turnips (about 1 pound), peeled and sliced
  • 1 clove garlic, chopped
  1. Add beet, turnips and garlic to a heatproof jar or container. Set aside.
  2. In a medium saucepan, bring salt, sugar, bay leaf, and 12 ounces of purified water to a boil, stirring occasionally to dissolve salt and sugar. Turn off heat and let mixture cool down for 5 minutes, then stir in vinegar.
  3. Pour pickling liquid over the contents in the jar, and ensure that the turnip and beet slices are submerged completely in the brining liquid. Let it cool, then close the jar and place it in a dark area for 5 to 7 days.
  4. For best flavor, refrigerate before serving.
  5. Store in a covered jar or container in the refrigerator for up to one month.

For the farm crew,

Charlie

Summer CSA Week 4, 2023

Greetings & Happy Fourth of July!

It’s a big week for us here at the farm as the first carrot harvest is underway. If there is one crop we are “known for” this could be it. Carrots have been a Fisher-Merritt staple since before the Food Farm was located in Wrenshall; back to when John and Jane were farming in Holyoke, MN. Thats over 48 years of experience and artistry!

These particular carrots are grown in our greenhouses and still feature their tops (which make a great addition to pesto). The variety is called “Ya Ya” and have been meticulously selected for their summer sweetness. Carrots always seem to taste better in the fall as they turn starches into sugars as a defense mechanism against the colder temperatures. It can be tough to find a variety with that desirable sweetness during the heat of the season, but these are always tender and sweet from the greenhouse.


In your share this week:

Cauliflower – Carrots – Chard – Cucumber – Garlic Scapes – Green Onions –

Napa Cabbage – TurnipsLettuce


Another exciting addition to the boxes this week is garlic scapes. Garlic scapes emerge from the garlic top and start to curl and twist as they grow. It is important to harvest them before they straighten out and become woody, as this will ensure their optimal flavor and texture. Typically, garlic scapes are ready for harvest when they reach a length of 8 to 12 inches, although this may vary depending on the garlic variety. Harvesting garlic scapes at the right time not only allows you to enjoy their unique flavor but also encourages the garlic plant to direct its energy towards bulb development, resulting in plump and flavorful garlic cloves at harvest time.

Raw garlic scapes pack a robust and assertive garlic flavor, with hints of onion and a pungent, herbaceous quality, yet they offer a milder spice compared to raw garlic cloves. However, when cooked, these scapes transform into a delightful treat, revealing a sweeter profile akin to roasted garlic. In essence, their taste embodies a harmonious fusion of garlic and chives.

Garlic Scape Pesto, from NYT Cooking

yields ~ 1 Cup

  • 1 cup garlic scapes, roughly chopped (about 10 to 12 scapes)
  • 1/4 cup raw sunflower seeds
  • 1/2 cup extra virgin olive oil
  • 1/4 cup Parmesan cheese
  • 1/2 cup basil leaves
  • Juice of one lemon
  1. Place the garlic scapes in a food processor and pulse for 30 seconds.
  2. Add the sunflower seeds and pulse for 30 seconds. Scrape down the sides of the bowl.
  3. Add the olive oil and process on high for 15 seconds.
  4. Add the Parmesan cheese and pulse until the ingredients are combined.
  5. Add the basil and lemon juice, and process until reaching the desired consistency.
  6. Add salt to taste and serve immediately.

Napa Cabbage & Cucumber Slaw, from Bon Appétit

4 servings

  • 6 cups thinly shaved or slices cucumbers and/or Napa Cabbage
  • 1/4 red or white onion, very thinly sliced
  • 1/4 cup seasoned rice vinegar
  • 2 tablespoons extra-virgin olive oil
  1. Combine vegetables and onion in a medium bowl; season generously with salt. Let sit until they start to release their water, 8–10 minutes, then begin to massage, gently at first so they don’t break, then harder as they begin to expel their liquid, until softened to about the texture of coleslaw. Pour off all excess liquid and add vinegar and oil; toss to coat. Taste and season with more salt if needed.

Do Ahead: Slaw can be made 3 days ahead. Cover and chill.


As the summer scorches along, more and more people will be breaking out the grills. Here’s a friendly reminder that this doesn’t always mean brats and burgers! Veggies are also delicious when grilled – especially when paired with a yummy dip.

Veggie Dunkin’ Dip Ideas:

Hummus or Tzatziki


For the farm crew,

Charlie