Summer CSA Week 14

Can you all believe it, we only have 4 more weeks of our Summer CSA season!

The final weeks of the CSA season are busy, busy, busy! Mother Nature threw quite the curve ball for us on Friday night with her far too early, danger of frost. Usually we don’t have to start worrying about the dreaded F word until later in the month. We chose the mentality that if you don’t think about it, it won’t happen (it’s actually the only thing any of us thought about all week, but we had good intentions). Things worked out well for us. It did get really chilly on Friday night, but with the exception of a few melon vines the plants appear to have been mostly unaffected. We then had to pull out our warm-ish layers to get ready for our busy Saturday.

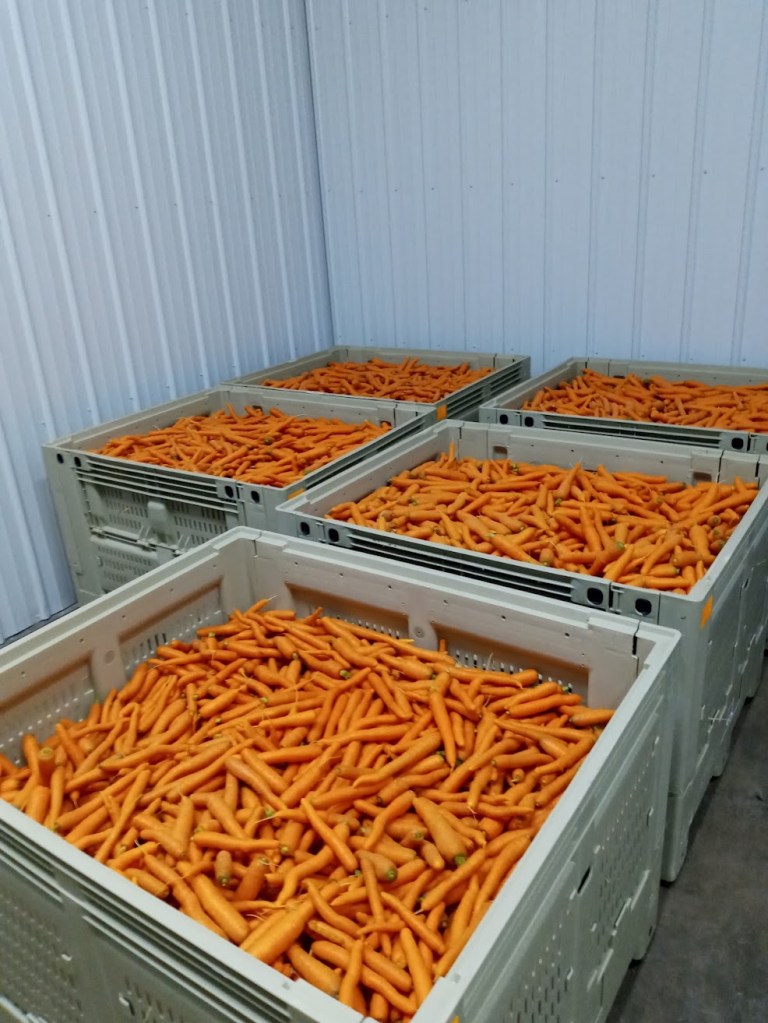
On Saturday, we were at Bayfront for Harvest Fest. It’s always a fun event to meet so many people in the community, chat with other local farmers, and show off some new things. If you stopped by our booth, you may have seen our mini carrots in their packaging. The bags arrived just in time for Harvest Fest, and will be hitting some grocery store shelves later this season, so be on the lookout for them. You’ll be getting this variety in your shares this week, but 2 pounds instead of the little bags for market.

In preparation for the remaining few weeks of the CSA season, Janaki starts taking inventory of all the vegetables we have sent to our members so far this season, and starts planning for when we will send the remaining vegetables.  You all have gotten lots of delicious veggies so far, but there are still quite a few things you haven’t seen in your boxes yet. Spoiler Alert: we still have leeks, rutabaga, parsnips, pole beans, red cabbage, winter squash, and brussels sprouts. This week we have a new addition to the line up with Carmen peppers. These peppers look intimidating because their shape resembles that of a spicy pepper, but they are not spicy at all. They are like a sweet red bell pepper but we love the thick walls and robust flavor of the Carmens.

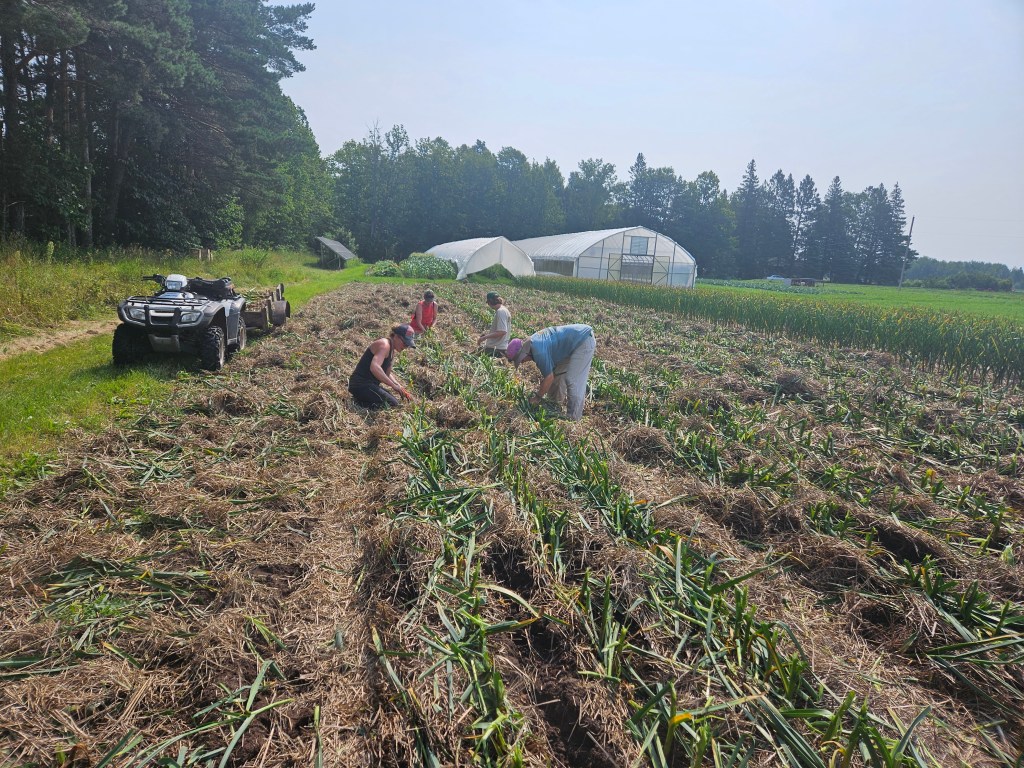
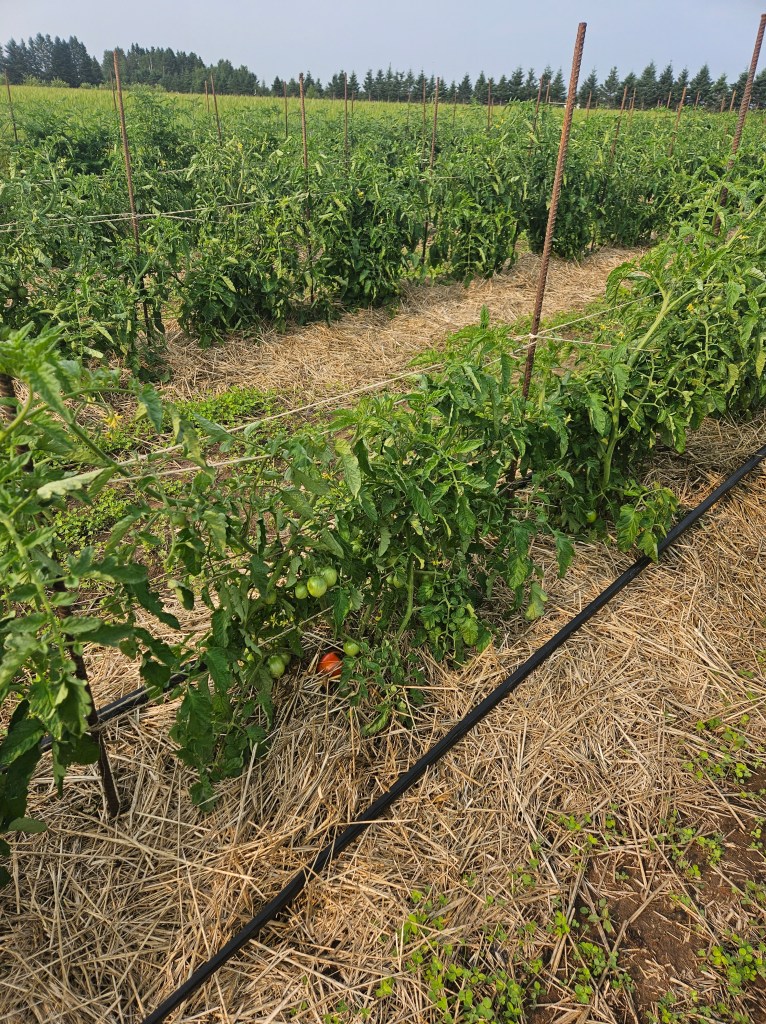
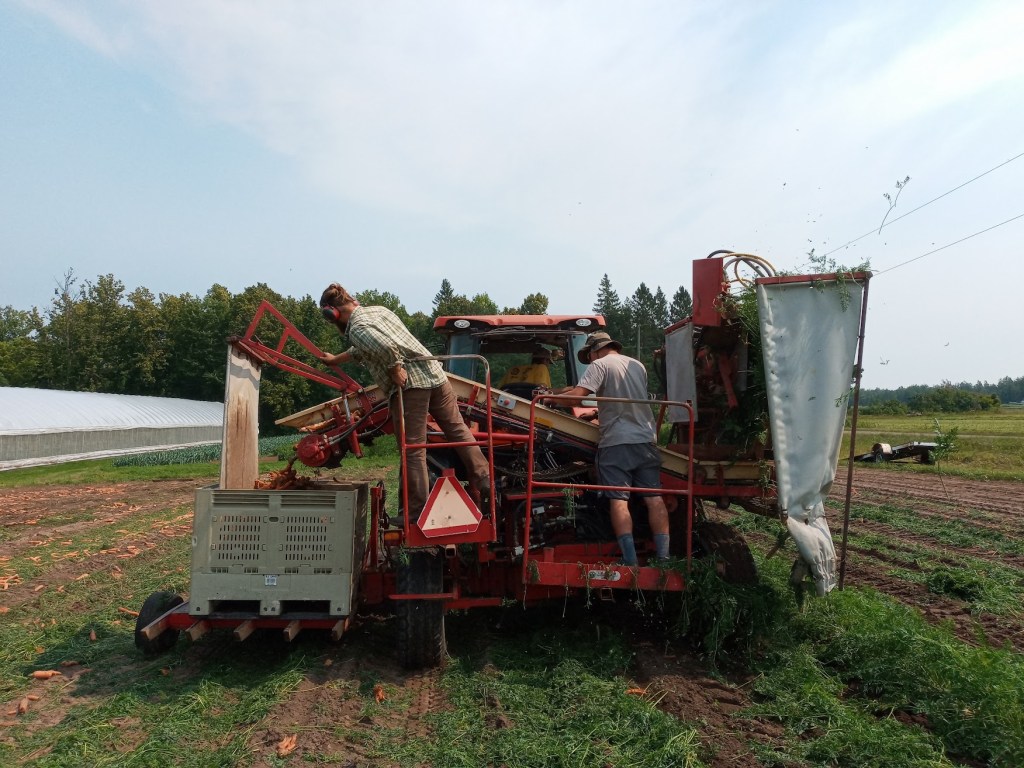
Along with planning what else will go in the boxes for the remaining weeks, Janaki also starts creating a plan for our big Fall harvest that happens at the end of October. A big part of this is pulling out the carrot and potato harvesters to fix anything that got broken/damaged last fall or over the winter in storage, and to dust off the machines and the crew’s sorting abilities that haven’t been used in a year. We used the carrot harvester on Wednesday to get most of the third planting of carrots out of the field, and we used the potato harvester on Thursday to get russets and red potatoes out of the field to bring to Harvest Fest. This means that for the last 13 weeks, every vegetable you’ve received in your box has been lovingly harvested by hand by our hard working farm crew. 

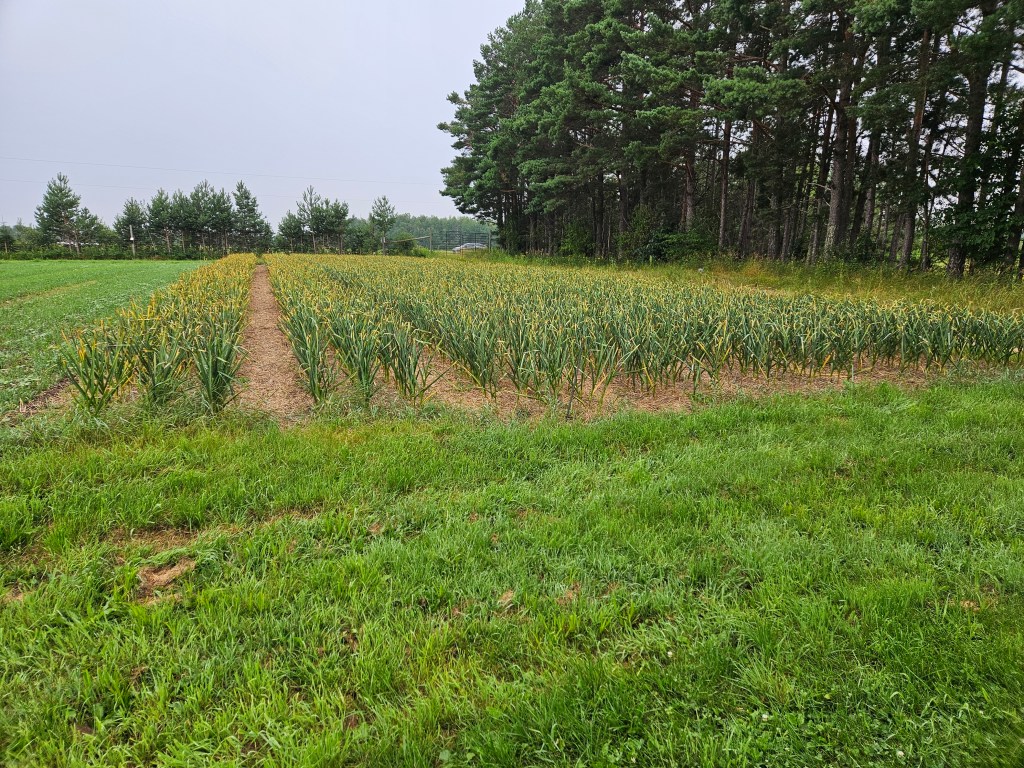
It’s an exciting time when the veggies are large enough and mature enough to use the full sized harvesters. We weren’t able to use the potato harvester until now because the potatoes weren’t mature enough. Their skin was still too delicate for all of the rolling, shaking, and dropping that the potato harvester puts them through. The first two plantings of carrots were large enough and mature enough that we could have used the harvester. However, due to the disease, the carrots required a lot of sorting. This would have required the harvester to go slower so we would have time to sort more accurately. If we run the carrot harvester too slow, the harvester will skip over some carrots leaving them in the field. We actually enjoy hand-harvesting, but when we’re all geared up to go fast it gets pretty irritating in a hurry when things go wrong. 

Aloo Gobi

Ingredients

2 Tbsp. vegetable oil

1 red chili, diced

2 cloves garlic, minced

1 Tbsp. minced ginger

1 tsp. garam masala

1/2 tsp. dried turmeric

1/4 tsp. cayenne pepper

3 potatoes, peeled and chopped into 1″ pieces

1 medium head cauliflower, cut into florets

1 c. low-sodium vegetable broth

Kosher salt

Freshly ground black pepper

Freshly chopped cilantro, for serving

  • Directions
  • Step 1:In a large skillet over medium-high heat, heat oil. Add chili, garlic, and ginger and cook until fragrant, 1 minute. Add garam masala, turmeric, and cayenne and cook until toasted, 1 minute more. 

  • Step 2:Add potatoes, cauliflower, and vegetable broth and season with salt and pepper. Reduce heat and cook, covered, until potatoes and cauliflower are tender, 15 minutes. Garnish with cilantro to serve.

  • Melon and Cucumber Salad

    Ingredients

    • cantaloupe, seeds removed and cubed
    • 1 large cucumber , thinly sliced
    • 1 large red bell pepper, thinly sliced
    • 1/2 large red onion, thinly sliced
    • 3 – 4 tablespoons apple cider vinegar (white wine vinegar ok too)
    • 1 tablespoon olive oil, optional
    • 1/2 teaspoon fresh cracked pepper, or to taste
    • good pinch of salt
    • fresh basil or mint, to garnish (optional)

    Instructions

    Cantaloupe: Slice your cantaloupe in half (doesn’t matter if you slice it horizontally or vertically). Scoop out the seeds with a large spoon and discard. Slice your cantaloupe halves into 5 or 6 slices. Using a sharp knife, cut from one end of the slice to the other as close as you can to the rind, slowly and carefully cutting the orange flesh away from the peel. Slice into bite size pieces.

    Cucumber: Slice off each end and using a vegetable peeler remove the outer skin (leave skin on for extra nutritional value and fiber). Slice the cucumber into 1/8 – 1/4 inch slices.

    Bell Pepper: Wash and core your bell pepper. Slice into 1/4 – 1/8 inch slices. Cut the slices in half.

    Onion: Slice the onion in half lengthwise. Cut off both ends of one of the halves and remove the outer layer. Place the sliced onion, end cut down and slice into 1/8 – 1/4 inch slices. If onion slices seem too long for you, cut them in half.

    Assemble salad: Place ingredients in a large bowl. Add apple cider vinegar, salt and pepper and mix well to coat. Cover and set in the refrigerator for an hour or so to chill and marinate, mix occasionally if you like

    Summer CSA Week 13

    Last week I promised you all an official update on how the caterpillar tunnel experiment went. I know a few of you were heartbroken to learn that this was not in fact a fun tunnel that we let caterpillars run through all day, but instead it was an effort to save our sad looking tomatoes.

    At the beginning of the season, before we put the caterpillar tunnel up, the field tomatoes looked very stressed. They had gotten their leaves pelted by so much rain and the soil was soaked. As we hustled to get the tunnel up before yet another 2″ rain, we worried that it might be too late for them to recover. I am happy to report that the exact opposite happened. We put the caterpillar tunnel over the tomatoes, and in just a few weeks, they looked like entirely different plants. The leaves went from a dry, shriveled, brown color to a soft, vibrant green color. The plants started producing more leaf sets, growing taller, and eventually putting on flowers and fruit. We think the protection from the elements really saved them because the rest of the field tomatoes developed early blight.

    The fruit has been slow to ripen, but that could be because we pinched off the first one or two sets of flowers in an effort to convince the plant to focus on getting healthy rather than producing fruit. We have been able to harvest a few tomatoes, but most of the fruit on the plants is still green.

    The most important factor in determining if this tunnel was a success came down to the taste. First, for background, we haven’t been satisfied with our greenhouse tomatoes for a few years so this year we tested out new fertility sources. Previously, our nitrogen source was coming from fish fertilizer, and our potassium source was mineral based. Nitrogen is important for the chlorophyll formation in plants. Chlorophyll is what makes plants green which allows them to absorb sunlight through photosynthesis. Without adequate nitrogen, plants won’t be “green” enough to absorb sunlight thus stunting their growth, and possibly preventing them from fully maturing. Potassium is important for plants because it aids in regulating the rate of photosynthesis, and it is associated with the movement of water and nutrients throughout the plant. Without adequate potassium, plants have reduced yield, stunted growth, and poor flavor. 

    Our previous fertilizer mixture worked okay (though applying fish fertilizer through drip tape is a smelly hassle), but we wanted to see if we could do better so we tried an amino acid based nitrogen. This is beneficial to the plants because amino acids are immediately available for the plants to absorb. The fish fertilizer delivered nitrogen in the form of proteins which can take a while to break down so they can be absorbed by the plants. We also switched to using a plant based potassium source instead of a mineral based source. Mineral based sources can often lead to a build up of minerals at the roots of the plant, preventing the plant from being able to absorb other nutrients. We also added calcium and micronutrients to round out the program.  

    Farmer Janaki thought this new fertilizer combination made the greenhouse tomatoes taste significantly better than in previous years. This meant the caterpillar tunnel tomatoes had to be really great in order to earn the top spot for best tomatoes on the farm this year. We had lots of people taste testing, and we all came to the same conclusion: for our Geronimo (large slicing tomatoes) we compared one from our regular greenhouse and one from our caterpillar tunnel, and the greenhouse won. They both had a similar texture, but the greenhouse tomato had more flavor. We also compared an Early Cascade (small canning tomato) from outside and one from the caterpillar tunnel. In this test the caterpillar tunnel won. Again, they had similar textures, but the appearance and flavor of the caterpillar tunnel tomatoes was better. Oddly, the caterpillar tunnel fruit ripened later than both the high tunnel and field tomatoes. We only did a small sample so far, and this is just one year, so we are excited to keep this in mind and see if we feel the same again next year. In farming, there are so many variables that it’s hard to run true experiments that inform results year-to-year, but we keep trying to zero in on better ways of growing healthy food!

    In your share this week:

    Green Beans – Broccoli – Cucumbers – Zucchini – Tomatoes – Sweet Onions – Carrots

    Hot Peppers – Sweet Peppers – Potatoes – Melons – Lavender

    Marcella Hazan’s Tomato Sauce 

    2 cups of tomatoes with juices

    5 tablespoons of butter

    One onion, peeled and cut in half

    Salt

    Combine tomatoes and juices, butter and the onion halves in a sauce pan with one or two pinches of salt.  

    Place over medium heat and bring to a simmer. Cook uncovered for 45 minutes occasionally stirring and breaking up chunks of tomatoes with the back of the spoon.

    Discard the onion before pouring sauce on cooked pasta.  This recipe creates enough sauce for 1 pound of pasta.

    Marinated Vegetable Antipasto

    Vegetable suggestions: Blanched and chilled broccoli, cauliflower, and carrots.  Onion, celery, sweet peppers, zucchini

    Marinade:

    1/2 cup water

    1-1/2 cups wine vinegar

    1 cup olive oil

    2 tbsp sugar

    2 tsp fresh oregano, minced

    1/2 cup pitted olives

    Salt and pepper to taste

    Prepare appx 8 cups vegetables by cutting into bite-size pieces.  Bring marinade ingredients to a boil in a larger saucepan.  Add approximately 2 quarts of cut up vegetables – cover and cook 3 to 4 minutes, stirring once.   Uncover, cool and refrigerate for at least two hours. Drain before serving.

    Summer CSA Week 10

    First things first, let’s get the business out of the way. It ‘s now August which means Coffee on the Farm is right around the corner. Please join us on Saturday, August 24th from 10am-12pm to have some delicious coffee, tour the farm, meet other CSA members, and taste some veggies straight out of the ground. This event is open to CSA members and those who are farm-curious. Bring your friends, family, neighbors, or anyone else you know who likes coffee and veggies!

    Now for the fun! Last week, Janaki enjoyed some much deserved time off with his family. Thankfully he has an awesome crew who keeps things going while he’s away. This annual vacation marks 2 important timelines on the farm: garlic harvest and what I like to call “crop transition”. This is the beautiful time of year where we say our official goodbye to early season crops, and welcome the vegetable abundance that comes with the warmer weather crops.

    We finished up harvesting all of the garlic, and it is set to spend the next few weeks drying away with the first group of garlic that we harvested 2 weeks ago. This marks the first empty field of the year. an exciting, but bittersweet moment.

    We spent the rest of the week giving our attention to the crop transition that comes with veggie abundance. This meant saying goodbye to spring and early season crops like snap peas, napa cabbage, and Pak Choi. This meant getting any of these vegetables that might be remaining, out of the field, and taking down the pea fencing so we can put it into storage until next year.
    Now we can start paying more attention to our warm weather crops such as outdoor cucumbers, tomatoes, zucchini, and peppers. It’s their time to shine, and thanks to that heat wave we got, the plants are thriving!

    Last week marked the first of our peppers going out. It was great to get some peppers off the plants so smaller fruit has more space to grow. You’ll get to enjoy green peppers for a while, and as the season progresses, so will the plants resulting in delicious red peppers. Did you know that a green pepper is a pepper at its first point of maturity? Most bell peppers start out green, and as they mature they turn red, yellow or orange depending on the variety. The Jalapenos are also loving the weather lately, and we are excited to introduce these to you all this week. Be warned: these beauties pack some serious heat, so a little goes a long way.

    Our zucchini got kind of a rough start this year, but looks like they’re finally coming around. When we first planted them, they immediately got attacked by squash and cucumber beetles. This left the plants weak and struggling. We put a clay spray on the plants to make them less tasty for the bugs, and it worked. The plants started growing and began producing fruit and flowers. The zucchini flowers need to be pollinated in order for fruit to grow. Ours weren’t pollinated consistently for the first few weeks, which results in strange and deformed fruit. These still taste okay, but they are unsightly and only last a day or two before they get wiggly or start to rot so we don’t send them to shares. We suspect the issue is that we planted the zucchini right next to a bed of melons, and the bees seem more interested in melon flowers rather than the zucchini flowers. This means fewer zucchini in your share, but hopefully lots of delicious and juicy melons later this month.

    The outdoor tomatoes are starting to ripen, and the greenhouse tomatoes continue to get bigger and ripen at rapid speed. If you get overwhelmed by tomatoes, a great option is to freeze them and use them later for sauces, stews, salsa, or many other things. If you freeze the tomatoes with the skin on, once they’ve defrosted, the skin slides right off. No boiling necessary. This is my favorite trick to be able to enjoy the delicious taste of fresh tomatoes in the middle of winter when we’re all thinking of warmer times.

    Another new introduction to your share this week is potatoes. You already got to try two of our other pre-storage crops with the green garlic and the onions. Potatoes are the next addition to this collection. We call them “new potatoes”. This means that they are young and not fully developed. They have a thin skin, and delicious flavor. We love sharing these with you as soon as possible. However, this means they aren’t fully mature. You’ll likely notice that their skin is really thin and flaky. This is because they haven’t been in the ground long enough to create the sturdy outer skin we are all used to. On the plus side, this means no peeling needed. On the downside, this means they won’t store as long, and they should be kept in the fridge. The outer skin protects the potatoes and allows them to be stored longer. Without the shell, the potatoes will turn brown and spoil quite quickly if left out at room temp for too long.

    In your share this week:

    Beets – Beans – Cucumbers – New Potatoes Zucchini – Baby Carrots

    Broccoli – Greens Mix – Cilantro – Cucumbers – Hot Peppers – Onions – Green PeppersOregano – Tomatoes

    Broccoli Pasta Salad

    Ingredients

    • 3 cups small broccoli florets
    • 1 cup cut green beans
    • 2 cups uncooked gluten free fusilli pasta
    • 1 small zucchini, thinly sliced and cut into half moons (or spiralized)
    • 1 cup sliced cherry tomatoes
    • 4 oil-packed sun-dried tomatoes, chopped
    • 8 fresh basil leaves, thinly sliced
    • ¼ cup pine nuts
    • sea salt and freshly ground black pepper
    • Lemon Tahini dressing: (can be made ahead)
    • 3 tablespoons extra-virgin olive oil
    • 3 tablespoons tahini
    • 3 tablespoons fresh lemon juice, more for squeezing at the end
    • 2 tablespoon white wine vinegar
    • 1 garlic clove, minced
    • ½ teaspoon Dijon mustard
    • ½ teaspoon maple syrup
    • ½ teaspoon sea salt
    • 3 tablespoons water
    • Instructions:
    • In a small bowl, whisk together the olive oil, tahini, lemon juice, vinegar, garlic, mustard, maple syrup, salt and water. Set aside.
    • Prepare a large pot of salted boiling water and a large bowl of ice water. Drop the broccoli and green beans into the boiling water and blanch for 1-2 minutes, until tender but still bright green. Remove and immediately immerse in the ice water to stop the cooking processing. Keep in the ice water long enough to cool completely, about 15 seconds. Then, drain and and place on a kitchen towel to dry.
    • In a large pot of salted boiling water, prepare the pasta according to the instructions on the package, cooking until al dente. Drain and rinse with cold water.
    • In a large bowl, combine the broccoli, green beans, zucchini, tomatoes, basil and the pasta. Drizzle with the dressing and toss. Season to taste with salt, pepper, and squeezes of lemon, if desired. Sprinkle with the pine nuts and chill for 15 minutes. Can be stored in the refrigerator for up to 2 days.

    Veggie Fajitas

    SIMPLE PICO

    • 2 tomatoes, diced small
    • 1 garlic clove, minced
    • 1 jalapeño, minced
    • 1 lime, juiced
    • 1 small onion, diced small
    • 1/2 tsp. kosher salt
    • 1/4 tsp. black pepper
    • 3 Tbsp. fresh cilantro, chopped

    FAJITAS

    • 2 Tbsp. salted butter, divided
    • 2 Tbsp. olive oil, divided
    • 6 oz. white button mushrooms, halved
    • 1 small red onion, sliced
    • 1 Tbsp. steak seasoning
    • 1 bell pepper, sliced into strips
    • 1 poblano pepper, sliced into strips
    • 1 small yellow squash, halved lengthwise and cut into half-moons
    • 1 small zucchini, halved lengthwise and cut into half-moons
    • 2 limes, juiced
    • 1 Tbsp. honey

    Directions

    For the simple pico: Combine the tomato, garlic, jalapeño, lime juice, onion, salt, pepper, and cilantro in a medium bowl.

    For the fajitas: Heat 1 tablespoon of the butter and 1 tablespoon of the oil in a large heavy-bottom skillet over medium-high heat. Add the mushrooms and onions in a single layer. Let cook undisturbed for 2 to 3 minutes, allowing the vegetables to char. Season with half of the steak seasoning, and stir. Remove to a plate and set aside.

    Add the remaining 1 tablespoon butter and 1 tablespoon olive oil to the skillet and heat over medium-high heat. Add the bell pepper, poblano, yellow squash, and zucchini in a single layer. Let cook undisturbed for 2 to 3 minutes, allowing the vegetables to char. Season with the remaining steak seasoning, then stir in the reserved mushrooms and onions. Let cook until the vegetables are tender but still have some bite, about 2 minutes more. Stir in the lime juice and honey, and remove from the heat.

    Serve the fajitas with the simple pico, tortillas, cheddar jack, crema, lime wedges, and hot sauce.

    Summer CSA Week 9

    Last week was an exciting week here on the farm. It was garlic harvest! Well, part one of two for garlic harvest.

    This is a much anticipated time on the farm. Garlic is the crop that takes by far the longest to go from being planted to being ready for harvest. Garlic gets planted in the Fall, usually by Halloween, and doesn’t get harvested until the end of July or early August. That’s almost 9 months of growing to create the beautiful bulbs that you all get to enjoy.

    A little background about garlic, there are two main types of garlic: hardneck and softneck. Hardneck garlic is what we grow on the farm, while softneck garlic is generally what you find in most grocery stores. Hardneck garlic gets its name from the hard neck or stem that grows in the middle of the bulb. This is actually where the garlic scapes came from (remember those from a few weeks ago?) making it two crops in one. If the scapes are left on the plant, it will eventually create a flower. However, this also results in a very small garlic bulb because the plant has spent all its energy on creating a flower rather than on creating the garlic bulb. By removing the scapes, we redirect the plant’s energy back to creating a big, beautiful bulb. Hardneck garlic needs to experience a hard freeze in order for the individual cloves to form. The freeze initiates the division of the cloves. Without a freeze, you end up with what’s called a “round”. This is one massive garlic clove. Makes for easy peeling, but really difficult to use since I’ve never found a recipe that calls for that much garlic at one time. This is why we have to plant the garlic in the fall, then wait so long before harvesting.

     We know the garlic is ready to harvest when about half of the leaves have started to brown and die. If the garlic is harvested too early, the cloves won’t be fully formed and you’ll end up with a small bulb.You also run into the possibility of air pockets between the skin and the cloves which could lead to moisture getting trapped and hindering the drying process. If we wait too long to harvest, the bulb will start splitting which exposes the cloves and prevents the bulb from being stored. It’s a delicate balance. Janaki wasn’t sure if the garlic was ready to harvest, so we decided to harvest half of the garlic that seemed further along, and leave the rest of the garlic for another week to give it more time to mature. 

    On harvest day, we mow off some of the foliage to make them easier to handle. Then Janaki uses a tractor attachment to gently loosen the bed so it’s easier to pull the bulbs from the soil. At this point, one crew jumps in and we start pulling all of the garlic bulbs out one by one. They get loaded onto a trailer, then moved over to the greenhouses to be washed. Another crew gently sprays off any excess dirt, and lays them on racks in front of industrial sized fans to begin the drying process.  After harvest, the garlic needs to dry for about a month (timeline depends on temps and humidity) in order for the papery, protective shell to properly form. You can eat the garlic before it’s dried, but it won’t store if it doesn’t get properly dried. After the garlic is dried, we save the biggest, best looking bulbs to use for next year’s planting. That’s right, garlic is the gift that keeps on giving. We harvest the garlic, dry it, select the best bulbs, break them apart into individual cloves, plant the cloves in the Fall, and repeat. Once you get garlic, you never have to buy it again because you can keep planting it over and over. Because you can keep using the garlic over and over to plant, I asked Janaki when the last time garlic was purchased to use for seed, and he said it had been so long that he couldn’t remember but knew it was long before 2010 (the year he and Annie took over the farm). That’s more than 14 years of the same garlic being used over and over! He did say that this might be the first year he may purchase more seed garlic since the garlic preserving shares sold this year were at an all time high. Thanks for all the garlic love!

    In your share this week:

    Cauliflower – Cucumber – Carrots – Green Garlic – Kale – Onion – Parsley – Green Pepper – Sage – Tomatoes – Zucchini

    Zucchini stuffed with sausage and sage

    INGREDIENTS

    • 2 to 3 pounds zucchini
    • 1/2 cup walnuts
    • 1 pound sausage
    • 1 onion, diced
    • 8 ounces mushrooms, diced
    • 3 to 4 cloves garlic, minced
    • 2 tablespoons minced fresh sage
    • 2 eggs
    • 1 cup shredded pecorino cheese, divided

    INSTRUCTIONS

    • Pre-heat the oven to 375° F.
    • Cut the zucchini in half lengthwise and scoop out the seeds. Leave an inch or so of zucchini. Set the zucchini in the baking pan cut-side up and season it with olive oil, salt, and pepper. Pour a quarter inch of boiling water into the pan, cover with foil, and bake for 10 minutes, just until the zucchini is no longer raw. Set aside to cool enough to handle.
    • Spread the walnuts on a baking sheet and roast them alongside the zucchini for 5-10 minutes, until fragrant. Chop into small pieces and set aside.
    • Heat a large skillet over medium-high heat. Brown the sausage, breaking it up into medium-sized bits as you go. Transfer to a bowl and drain off all but a teaspoon of the grease. Add the onions to the pan with a good pinch of salt, and cook until soft and golden. Add the mushrooms and another pinch of salt. Cook together until the mushrooms have turned golden and any moisture they released has evaporated. Stir in the garlic and sage. Cook for about thirty seconds until fragrant.
    • Combine the walnuts, cooked sausage, onions, and mushrooms in a large bowl. Beat the eggs together. Stir the eggs and 3/4 cup of the pecorino into the stuffing mixture.
    • Pat the zucchini dry and fill the cavity with the stuffing..
    • Drain the liquid from the baking pan, rub it with a little butter or olive oil, and place the stuffed zucchini back inside. Cover with foil and bake for 30 minutes. Uncover, sprinkle the remaining cheese over the zucchini, and bake for another 10-15 minutes until the filling is bubbling and the cheese is crispy.
    • Allow the zucchini to cool slightly. Slice into portions and serve. Leftovers will keep refrigerated for one week

    Mediterranean tuna salad

    • 1 (5-ounce) can albacore tuna in water, drained
    • 1 small bell pepper, halved, cored, and finely chopped (1 cup)
    • 2 tablespoons extra-virgin olive oil
    • 2 tablespoons fresh lemon juice
    • 1 teaspoon grainy mustard
    • 3 tablespoons chopped capers
    • ½ cup chopped fresh parsley
    • Kosher salt and freshly ground pepper
    • Dressed salad greens for serving
    • Sliced cucumbers and crackers, for serving

    Directions


    Place tuna in a bowl and flake with a fork.
    Add bell pepper, oil, lemon juice, mustard, capers, and parsley; stir well to combine and season with salt and pepper.
    Serve with salad greens, cucumbers, and crackers on the side

    Summer CSA week 7

    Last week felt like it was all about tomatoes here on the farm. This can only mean one thing, TOMATO SEASON IS HERE! Our crew member Catherine, and our lovely volunteer, Patricia, spend a lot of time in the Spring and Summer keeping the greenhouse tomatoes happy and healthy while the rest of the farm crew tends to all of the outdoor tomatoes. It’s helpful to dedicate specific people to each location since the tomatoes are grown in different ways, which requires different levels of attention. 

    In the greenhouse, we vertically trellis the tomatoes using the single leader system. In non-farm speak, this essentially means that we force the tomato plants to grow on one single stem, and we use a small circular clip to connect the twine to the tomato stem as a means of supporting the plant as it continues to grow. Tomatoes love to grow what we call suckers, also known as side shoots. These are shoots that sprout out from where the main stem and a leaf meet. If we left the suckers on the plant, they would eventually grow into another top, so the plant forms a bush. This sounds really cool because most people think it means extra tomatoes, but it can actually mean the exact opposite. By leaving the suckers, the plant then has more stems and leaves to distribute nutrients to. As the plants grow taller, this can take a lot longer for the nutrients to get past all the suckers and make its way to the top of the plant. This means more of the plant’s attention is put into vegetation rather than fruit. Too much foliage also reduces air movement which is one of the many ways tomato plants can get and spread disease. In order to achieve this, once a week, Catherine and Patricia spend time pruning off any suckers and adding clips to the plant to keep it supported. This week, Catherine also spent time taking off any of  the leaves that were growing below the first set of fruit. This does two things, it speeds ripening by allowing more light to reach the fruit, and creates better air circulation. With the hot weather we’ve recently been getting, and the plants being grown in an already hot greenhouse, more air flow is very welcomed by the plants. 

    The outside tomatoes are a whole different story. We don’t do any pruning on those tomatoes. Airflow is better outside, and space isn’t at as much of a premium, so we’re able to plant the tomatoes farther apart without causing disease or shading. Another major difference between the inside and outside tomatoes is how they are trellised. Since there isn’t a pole or wire above the tomatoes, and we aren’t pruning them to follow the single leader system, the easiest way to trellis these crazy tomatoes is to use what is called the “Florida Weave” or “Basket Weave” method. With this method, posts are evenly spaced between the tomato plants, and string or twine is tightly run, horizontally, on either side of the plant. This method works to compress the plant so it stays tight and tidy in its space. It helps to lift the leaves off the ground so they are less likely to pick up diseases from the soil splashing on the leaves when it rains.  Most home growers will use a tomato cage which creates a similar effect. However, with the cages, the plant will eventually grow over the top of the cage and run out of support, and cages are prone to falling over unless they’re large, which can make harvesting tedious. With the Florida Weave method, a new set of twine is added every week or so as the plant grows to continue giving it support. At this point in the season, the outdoor tomatoes have 3 sets of twine holding them up, and we plan to add another 3 or 4 as the season progresses. 

    The cool thing about these trellising methods is that they aren’t exclusive to tomatoes. You can use either method for trellising many other vegetables. On the farm, we use the single leader, vertical trellising for all of our greenhouse cucumbers. In the coming weeks, we will use the Florida Weave method as a form of trellising all of our pepper plants. 

    In your share this week:

    Beets – Broccoli/Cauliflower – Cilantro – Chard – Carrots Green Onions – Snap Peas – Juliet tomatoes (just a couple today, but more to come!) 

    Fried Rice

    3 tablespoons oil

    One medium onion, chopped

    1 clove garlic, minced

    One bell pepper, chopped

    Two carrots, chopped

    Broccoli or cauliflower chopped

    Chard cut into ribbons

    Snap peas, chopped

    Green onions, chopped

    1/4 cup Cilantro, minced

    Tomatoes, optional

    2 eggs, whisked

    3 to 4 cups of cooked rice, cooled

    1/4 c water

    2tbsp soy sauce

    1 tbsp sesame oil

    Salt and pepper to taste

    Put 1 tablespoon of oil into a wok or large skillet.   When it begins to shimmer add the chopped onion, garlic, carrots, pepper, broccoli, and cauliflower.  Sauté a few minutes and then add the peas, chard and tomatoes.  Fry  until partially cooked, but still crisply textured. 

    Remove vegetables. Add remaining oil to pan or wok.  When the oil shimmers, add the rice.  Break up clumps and stirfry. Make a well in the center and pour the eggs into the well.  Scramble the eggs in the middle of the rice and when they’re cooked, add all the vegetables.

    Add water, soy sauce, sesame oil and salt + pepper.   Stir.   Top with cilantro and green onions

    For the farm crew,

    Jennifer

    Summer CSA Week 4

    For all of us who put in a plea to Mother Nature, it worked…sort of. Last week felt like a normal week on the farm (if such a thing even exists in agriculture). This time of year, as the seasons shift from Spring to Summer, the farm crew’s agenda changes from spontaneous to more routine. It usually means weeding, row cover, weeding, bug hunting, and more weeding. Janaki and the crew were finally able to get out into the fields to do some much needed field work.

    The drier weather gave us the opportunity to roll up all of our row cover. If you aren’t familiar with it, row cover is a permeable fabric that we lay over the top of our plants, specifically the brassicas. The row cover has multiple benefits, but the main ones we use it for on the farm are for deterring pests, and adding some extra early season heat. Broccoli is generally a cool season crop, but “cool season” generally refers to our normal weather in early June, while our first planting goes in the ground in mid-April. This is one of the reasons we are able to provide all of you with broccoli so early in the summer. It’s a large task to lay out the 30’x400′ sheets of row cover after each Spring planting of brassicas, but it’s an even larger task to roll all of it back up. 

    We also made it across the road to weed through the first two plantings of outdoor carrots, and do some bug hunting while we were over by the potatoes. Each year we find ourselves fully experiencing what it means to work for an organic farm. It means that instead of the farm crew going out to spray insecticides on the plants, we take the organic approach. Think Ghostbusters, but instead of proton packs and cool jumpsuits, we get 5 gallon buckets and overalls. We go row by row, plant by plant, searching for the various life stages of the Colorado Potato Beetle. The eggs are by far the easiest to spot since they are bright orange against the deep green foliage of the plants. The larvae are a little more difficult, but get easier to spot as they go through the 4 larval stages. They start out really tiny with a black head and brown body, and slowly grow to almost being the size of an adult beetle. Once they’ve reached the adult stage, they get wings and stripes on their back which help them to be more noticeable against the plant. The worst thing about the Colorado Potato Beetle is how adaptable it is. These bugs overwinter in different life stages, don’t have to mate in the spring before they lay eggs, and aren’t even solely attracted to potato plants! Their favorites are potatoes and eggplant, they will also survive on other members of the nightshade family. This unfortunately meant we found quite a few on our outdoor tomatoes. Nothing the Beetlebusters (aka the farm crew) couldn’t handle. 

    In case that wasn’t enough bug fun, we also noticed cucumber beetles on our greenhouse cucumbers, and squash beetles on our squash. We did identify a ‘new’ pest on the potatoes called a blister beetle. Mother nature is always keeping us on our toes. This summer is going to have a lot of bug pressure. We are coming off of a mild winter which didn’t get cold enough to kill most of the populations, then following that up with warm wet weather in the Spring/Summer, it’s the perfect recipe for a lot of bugs! This is all to remind you that if you ever find a little critter, or see some holes on your veggies, we promise it’s okay. It’s just nature’s way of reminding all of you that the veggies you receive each week are grown with love instead of harsh chemicals!

    This week in your share: 

    Arugula – Broccoli – Turnips – Radishes – Spinach – Green Onions

    Garlic Scapes – Cucumbers – Green-top Carrots

    This week we are giving you garlic scapes. If you’ve never used these before, they have the same flavor you get from fresh garlic, only a little milder and a lot less work since no peeling is involved. You can substitute scapes for fresh garlic in almost any recipe using 4-6 scapes = 1 clove of garlic.

    One- Pan Orzo With Spinach and Feta

    Ingredients

    Yield:4 servings

    • 2tablespoons unsalted butter
    • 4large green onions, trimmed and thinly sliced
    • 2large garlic cloves, minced
    • 8ounces baby spinach leaves (8 cups), coarsely chopped
    • 1teaspoon kosher salt
    • 1¾cups low-sodium chicken or vegetable stock
    • 1cup orzo
    • 1teaspoon finely grated lemon zest (from 1 lemon)
    • ¾cup crumbled feta (3 ounces), plus more for garnish
    • ½cup frozen peas, thawed (optional)
    • 1cup chopped fresh dill, or use parsley or cilantro

    PREPARATION

    1. Heat a 10-inch skillet over medium, then melt butter, 30 seconds to 1 minute. Stir in about three-quarters of the green onions (saving some of the green parts for garnish) and garlic, and cook until softened, stirring frequently, about 3 minutes.
    2. Stir in spinach, adding in batches if it doesn’t all fit in the pan at once, and ½ teaspoon salt. Continue to cook, stirring occasionally, until spinach is wilted, about 5 minutes.
    3. Stir in stock and bring to a simmer. Stir in orzo, lemon zest and remaining ½ teaspoon salt. Cover and simmer over medium-low heat until orzo is nearly cooked through and most of the liquid is absorbed, 10 to 14 minutes, stirring once or twice.
    4. Stir in cheese, peas (if you like) and dill, cover the pan, and cook for another 1 minute, to finish cooking and warm the peas. To serve, sprinkle with more cheese and the reserved green onions

    Salmon Cakes With Arugula Salad

    Ingredients

    • 1 pound salmon, skinned (canned will also work)
    • 2 tablespoons lemon juice, divided
    • 2 teaspoons Dijon mustard, divided
    • ½ cup finely chopped yellow bell pepper
    • 1 tablespoon finely chopped shallot
    • ½ teaspoon ground pepper, divided
    • ½ cup panko breadcrumbs
    • ½ cup crème fraîche or sour cream
    • ¼ cup buttermilk
    • 3 tablespoons chopped fresh dill
    • ½ teaspoon salt, divided
    • 2 tablespoons extra-virgin olive oil
    • 5 ounces arugula
    • 1 cup sliced radishes

    Directions

    • Coarsely chop salmon and place half in a food processor. Add 1 tablespoon lemon juice and 1 teaspoon mustard. Process, scraping down the sides as necessary, until smooth. Add the remaining salmon, bell pepper, shallot and 1/4 teaspoon pepper and pulse until the mixture is combined but still chunky.
    • Transfer the salmon mixture to a medium bowl. Add breadcrumbs and stir until combined. Form the salmon into 4 patties, about 4 inches wide each, and place on a plate. Freeze for 5 minutes.
    • Meanwhile, whisk crème fraîche (or sour cream), buttermilk, dill and 1/4 teaspoon salt with the remaining 1 tablespoon lemon juice, 1 teaspoon mustard and 1/4 teaspoon pepper in a large bowl. Set aside 1/4 cup of the dressing for drizzling.
    • Heat oil in a large cast-iron or nonstick skillet over medium-high heat. Add the salmon cakes and cook, flipping once, until well browned and cooked through, 2 to 3 minutes per side. Transfer to a clean plate and sprinkle with the remaining 1/4 teaspoon salt.
    • Add arugula and radishes to the dressing in the large bowl. Toss to coat. Serve the salmon cakes on top of the salad, drizzled with the reserved 1/4 cup dressing

    Carrot Top Salsa (The CSA Cookbook by Linda Ly)

    2 cups minced carrot greens leaves and tender, stems only

    3 tablespoons minced garlic

    3 tablespoons minced fresh oregano

    2 tablespoons minced jalapeño

    One to one and a quarter cups olive oil

    1/4 of a cup red wine vinegar

    Zest and juice of lemon

    Add all the ingredients to a medium bowl and stir to combine (use more or less oil to make a chunkier or thinner sauce).  Cover and let stand at room temperature overnight so the flavors intermingle.  This salsa gets better with age – so the carrot have turned to deep muted shade of army green is still good!!  Decant into a jar and refrigerate.  The oil will congeal in the cold temperature, but it does not affect the flavor. Bring the salsa to room temperature before serving.

    For the farm crew,

    Jennifer

    Summer CSA Week 14, 2023

    The Food Farm had a bustling week and weekend! On Saturday, we took part in the annual Lake Superior Harvest Festival, which brought together over 10,000 people of all ages. The event is dedicated to advancing sustainable local food production, recognizing it as a pivotal element in fostering a more robust economy, preserving the environment, and strengthening the community in the Lake Superior region.

    A lot of extra harvesting goes into preparing for such a big market, but it all feels worthwhile when we get to see so many smiling faces enjoying the fruits of our labor 🙂

    In addition to all the extra harvesting that took place, the crew also managed to trim & clean the garlic that has been curing since being pulled from the fields back in July. It is at this time that Dave carefully selects the best looking heads to be put back in the ground come October.


    In your share this week:

    Broccoli – Carrots – Cucumber – Leeks – Lettuce – Melons – Onions

    Parsley – Red & Green Peppers – Russet Potatoes – Tomatoes


    You will notice the new addition of leeks & russet potatoes this week. As the weather begins to cool down, this dynamic duo has arrived just in time for the start of soup season. The recipe that first comes to mind is the ever-so-comforting potato leek soup. I know I am looking forward to whipping up a double batch when I get home from work today!

    Also included in the share is a large quantity of Carmen red peppers. It may be more than most families get through in a week, so I’ve included Jane Fisher-Merritt’s delicious marinated pepper recipe. Enjoy 🙂


    Potato-Leek Soup, from Serious Eats

    Yield ~ 6 servings

    2 tablespoons unsalted butter
    2 large leeks, white and pale green parts only, rinsed and roughly chopped
    1 quart homemade or store-bought low-sodium chicken stock
    2 medium russet potatoes, peeled and cut into quarters (about 3/4 pound)
    1 bay leaf
    Kosher salt and freshly ground black pepper
    1 cup buttermilk
    1/2 cup heavy cream
    1/2 teaspoon freshly ground nutmeg
    Sliced chives or scallions, for serving

    1. Melt butter in a large saucepan or Dutch oven over medium heat. Add leeks, reduce heat to low, and cook, stirring frequently, until very soft but not browned, 10 to 15 minutes.
    2. Add stock, potatoes, and bay leaf, and season lightly with salt and pepper. Bring to a boil over high heat, reduce to a gentle simmer, cover, and cook until potatoes are fall-apart tender, about 15 minutes.
    3. To Finish With a Ricer (Recommended): Remove potatoes from soup using tongs and transfer to a bowl. Set aside. Discard bay leaf. Transfer remaining soup to a blender. Slowly increase blender speed to high and blend until completely smooth, about 2 minutes. Return soup to a clean pot.
    4. Press potatoes through a potato ricer or food mill into the pot with the soup. Whisk in buttermilk and heavy cream. Whisking frequently, bring soup to a simmer over medium-high heat. Whisk in grated nutmeg. Season to taste with salt and pepper and serve with chives or scallions.
    5. To Finish With a Blender (Faster): Add heavy cream and buttermilk to pot. Discard bay leaf. Working in batches if necessary, transfer soup to a blender. Slowly increase blender speed to high and blend until completely smooth, about 2 minutes. Return soup to a clean pot, pressing it through a fine-mesh strainer with the bottom of a ladle if a smoother texture is desired. Whisking frequently, bring soup to a simmer over medium-high heat. Alternatively, chill completely and serve cold. Whisk in grated nutmeg. Season to taste with salt and pepper and serve with chives or scallions.

    Marinated Peppers, from Jane Fisher-Merritt

    2 cups vinegar
    2 cups olive oil
    2 cups water
    4 tablespoons sugar
    2 tablespoons salt
    (+ 1 clove garlic & 1/2 teaspoon oregano in each jar)

    1. Cut peppers into 1/8″ -1/4″ slices. Pack into hot sterile jars w/ 1 clove garlic & 1/2 teaspoon oregano in each jar.
    2. Combine vinegar, olive oil, water, sugar & salt in a medium saucepan. Bring to a hard boil.
    3. Pour brine mixture over peppers, leaving a 1/2″ of headspace.
    4. Process for 15 minutes in a boiling water canner.

    For the farm crew,

    Charlie

    Summer CSA Week 13, 2023

    This past week, while harvesting carrots, we found bees… or rather, they found me. Maybe it was the lavender soap I had used that morning, maybe it was my sweet disposition, but whatever it was the bees seemed to swarm to it. Each time the carrot harvester made a lap around the edge of the field with the bee boxes I would pick up a stinger or two. I had just about had enough when Janaki hooked me up with a nice bee keepers hat. After which, I was able to complete the harvest much more comfortably than it had begun.

    While I was communing with the bees, most of the other crew members gathered around the barrel washer to sort, clean & taste the carrots as they came from the field. The colder nights we had last week really seemed to help bring out their sweetness, and it was great to get them out of the ground before the heat sapped their flavor!

    It’s starting to be that time of year when some of the summer crops start to slow down. The outside cucumbers have wrapped up, while the zucchini are hanging on for just a little longer. We were hoping to hoard some melons for the weeks to come, but decided to send what we have for fear of them going bad before they make it to the shares.

    We have an exciting new addition this week, however, in the Carmen pepper. Carmen is a unique sweet pepper variety known for its distinctive shape. Unlike the traditional bell pepper shape that most people associate with sweet peppers, Carmen peppers have a more elongated and tapered form, which lead some folks to mistakenly believe they’re hot (there are also green Jalapenos in the share today, and they are hot!) Carmen peppers exhibit their sweetest flavor when they ripen to a vibrant red, but they are also very sweet when they’ve just begun to turn color. Other sweet peppers (like the bell) tend to be more bright and grassy, rather than sweet, in their green state.


    In your share this week:

    Beans – Beets – Carrots – Cilantro – Cucumbers – Kale – Melons – Onions

    Hot PeppersSweet Red Peppers – Potatoes – Tomatoes – Zucchini


    When Catherine sent the “best guess” email for the share this week, my mind initially jumped to vegetable enchiladas. This would be a great bounty to prepare something like that, but after melting in the heat all day yesterday, I decided that hot enchiladas was not the move. In an effort to keep the oven off this week, I decided to share a recipe for gazpacho along with a zesty salad dressing that would pair nicely with the kale this week.


    Gazpacho, from cookie & kate

    2 ½ pounds ripe red tomatoes (about 4 large or 9 small)
    1 small sweet yellow onion (½ pound), peeled and cut into rough 1″ chunks
    1 small cucumber (½ pound), peeled and seeded
    1 medium sweet red pepper, cored and seeded
    ¼ cup fresh basil leaves, plus extra for garnish
    1 large garlic clove, peeled
    ¼ cup extra-virgin olive oil
    2 tablespoons sherry vinegar or red wine vinegar
    ¾ teaspoon fine sea salt
    Freshly ground black pepper

    1. To prepare your veggies, place your blender bowl, a medium serving bowl, and a small bowl on the counter. Core the tomatoes and cut them into rough 1″ chunks. Reserve about ¼ cup of the juicy tomato seeds and place them in your small bowl (we’ll use them as a garnish later). Add half of the tomato chunks to the blender, and the other half to your serving bowl. Add all of the onion chunks to the blender.
    2. Cut off about one-fourth of the cucumber. Finely chop that piece and place it in the small bowl. Slice the rest of the cucumber into rough 1″ chunks, and divide them between the blender and the serving bowl. Cut off about one-fourth of the bell pepper, finely chop that piece, and add it to the small bowl. Slice the rest of the bell pepper into rough 1″ chunks and divide them between the blender and the serving bowl.
    3. To the blender, add the basil, garlic, olive oil, vinegar, salt and about 10 twists of black pepper. Securely fasten the lid and blend, starting on low and increasing to high speed, until the mixture is completely smooth, about 2 minutes.
    4. Pour the contents of the serving bowl (the remaining chunks of tomato, cucumber and bell pepper) into the blender. Fasten the lid and blend for just 10 to 20 seconds, until the ingredients are broken up into small pieces. Stop there, or blend a little longer if you prefer smaller pieces.
    5. Add a small pinch of salt to the small bowl of garnishes, stir, and store it in the fridge. Chill the soup for at least 2 hours, or up to 24 hours.
    6. Before serving, taste, and add additional salt (I sometimes add another ¼ teaspoon) and/or black pepper if necessary. To serve, divide the soup into small bowls or cups, and top with the reserved cucumber and bell pepper. Top with a few tiny or torn basil leaves and a light sprinkle of pepper. Leftover servings keep well, covered and refrigerated, for 3 to 4 days.

    Jalapeño Honey Mustard Dressing, from kroll’s korner

    1/3 cup olive oil
    1/4 cup honey
    1/4 cup dijon mustard
    2 tablespoons lime juice
    1/2 teaspoon lime zest
    1/2 jalapeño, diced
    2 teaspoons thyme, chopped
    Salt & pepper, to taste

    1. In a medium sized bowl, whisk all ingredients together until well combined. Or you can combine all ingredients in a mason jar and give it a nice shake until combined so you don’t have to dirty a bowl! Taste and adjust ingredients as desired. Store in a mason jar or airtight container in the fridge for 1-2 weeks. Makes ~1 cup.

    For the farm crew,

    Charlie

    Summer CSA Week 12, 2023

    It was so nice to see Food Farm folks this Saturday–we enjoyed speaking with so many of you and show off our hard work!

    As some of you may have noticed, the root cellar is gradually filling up with a colorful abundance of carrots, beets, cabbage and potatoes. The farmers have been diligently packing up more and more of these vibrant vegetables, destined for grocery store shelves and eager CSA members.

    Moreover, last week marked the collapse of our onion tops. This may sound slightly catastrophic, but don’t worry – it’s a good thing! The leaves fall over simply because the plant has matured and is no longer developing. It’s also how we know they are ready for harvest. In the photo (see left), you can see Teri & Aaron gently lifting them from the ground before laying them out to dry. Careful handling is essential during harvest to avoid bruising, which makes the bulbs susceptible to storage rot. Following the uprooting, these onions will begin their curing process in the fields for a week or so before having their tops removed and transferred to a well-ventilated indoor storage space.


    In your share this week:

    Basil – Beans – Broccoli – Cauliflower – Carrots – Celery – Cucumber – Melons

    Sweet Onions – Bell Peppers – Potatoes – Tomatoes – Zucchini


    The recipes this week have a lot of room to make them your own. Either one would be good with just about any item in the share (excluding the melons). So feel free to follow them as directed or create your own pizza & curry experiments…


    Zucchini Crust Pizza, from The Cozy Cook

    2 cups shredded zucchini
    1/4 teaspoon salt
    3 large eggs, beaten
    1/2 cup all purpose flour (almond flour, coconut flour, and whole wheat flour may also be used)
    1/3 cup shredded parmesan

    1. Preheat oven to 350°.
    2. Spread the shredded zucchini out on a lightly greased baking sheet and sprinkle lightly with salt. Bake for 15 minutes. Remove and transfer the zucchini to paper towels or a cheesecloth.
    3. Increase oven temperature to 450°.
    4. Squeeze out as much additional moisture from the zucchini as possible. Add the zucchini to a large bowl along with the whisked eggs.
    5. Sprinkle the flour in gradually, stirring to incorporate. Continue to add flour until desired consistency is obtained. (I use the entire ½ cup for all-purpose flour.)
    6. Spread out onto a lightly greased 12-inch pizza pan, leaving 1-inch or so around the edges.
    7. Top with shredded Parmesan cheese and bake for 18 minutes, until it begins to brown slightly. Remove from oven.
    8. Reduce heat to 400°.
    9. If possible, let the crust cool for extra crispy results.
    10. Top with desired pizza toppings. Bake for ~10 minutes, until the cheese is melted and bubbly.

    Summer Vegetable Curry, Inspired by Half Baked Harvest

    Basil Coconut Ginger-Lime Rice:

    1 (14 ounce) can coconut milk
    1 cup jasmine or basmati rice
    1 tablespoon fresh ginger grated
    1 lime juiced + zest

    1. Add the coconut milk to a medium size pot. Bring to a low boil and then add the rice, salt, and ginger. Stir to combine and then place the lid on the pot and turn the heat down to the lowest setting possible. Allow the rice to cook ten minutes on low and then turn the heat off completely and let the rice sit on the stove, covered for another 20 minutes (don’t take any peeks inside!). After 20 minutes remove the lid and add the lime juice + zest.

    Curry:

    4 tablespoons extra virgin olive oil
    1 pound boneless, skinless chicken, diced
    2 bell peppers, chopped
    1 zucchini, chopped
    2 cups green beans, chopped
    1 cup broccoli, diced
    1 cup cauliflower, diced
    1 cup carrots, diced
    1 tablespoon fresh ginger, grated
    2 cloves garlic, grated or minced
    2-3 tablespoon thai red curry paste
    1 (14 ounce) can coconut milk
    1 tablespoon fish sauce
    1/2 cup fresh basil, chopped
    1 mango, diced
    1 jalapeño, seeded + diced
    fresh naan and goat cheese, for serving

    1. Heat a little olive oil in a large skillet over high heat. Add the chicken and cook until browned and cooked through, about 5-10 minutes.
    2. Add another drizzle of olive oil to the skillet. Add the peppers, zucchini, beans, broccoli, cauliflower, carrots, ginger and garlic. Cook the veggies 5 minutes or until they just begin to soften.
    3. Add the coconut milk, curry paste, and fish sauce. Stir to combine, bring the mixture to a boil, cook 5 minutes or until the sauce thickens slightly. Remove from the heat and stir in the basil.
    4. In a small bowl toss together the mango and jalapeño.
    5. Serve the curry over the rice. Add a spoonful of the mangos and a sprinkle of goat cheese. Eat with Naan!

    For the farm crew,

    Charlie

    Summer CSA Week 11, 2023

    It’s farm tour time–this Saturday from 10-noon, we’d love to see you!

    It’s melon mayhem at the Food Farm! We recently set our new daily harvest record with a whopping 377 cantaloupe. That is more than 800 pounds of weight to pull from the field! We expect them to slow down soon, so enjoy it while it lasts.

    In other news that is orange, the crew christened a “new-to-us” carrot harvester. A lucky few climbed aboard as it took its maiden voyage through the fields, while the rest of the crew assembled at the washing stations. There were certainly some wrinkles to iron out, as there often is with any new piece of machinery, but by the end of the week the process seemed to be moving along rather quickly.


    Beans – Broccoli – Carrots – Cilantro – Cucumbers – Dill – Greens Mix – Melons

    Onion – Bell Peppers – Hot Peppers – Potatoes – Tomatoes – Zucchini


    Usually the melons are best enjoyed straight up in all their glory. That way you can fully appreciate the depth of their flavor. This week though, because there are so many, I thought it would be nice to include a recipe with them in it. It does include basil, which we are not sending this week… I’m hoping some of you still have a few sprigs leftover from last weeks share, or can maybe snag some from a friendly neighbor’s garden.

    P.S. The vinaigrette would also go great on the greens mix in today’s share 🙂

    Melon Caprese Salad, from Half Baked Harvest

    Honey Herb Vinaigrette:
    1/4 cup extra virgin olive oil
    2 tablespoons honey
    Juice of 1 lemon
    1 tablespoon white balsamic
    1 cup fresh basil
    1 tablespoon toasted pine nuts
    1 pinch flaky sea salt

    1. To make the vinaigrette, combine all ingredients in a blender and blend until smooth.

    3 balls fresh burrata cheese
    4 cups melon balls
    1/2 cup fresh basil leaves
    2 tablespoons fresh mint
    6 slices prosciutto

    1. Break the burrata in half and place each half in the bottom of a small bowl or glass (about 8 ounces). Over the burrata, layer the melon balls, basil, and mint. Top with a slice of prosciutto. 
    2. At this point the salad can be covered and placed in the fridge for up to 6 hours. 
    3. Before serving, drizzle over the vinaigrette.

    Blistered Green Beans w/ Tomato-Almond Pesto, from Bon Appétit

    1 1/4 cups diced tomatoes
    1/8 cup unsalted, roasted almonds
    1 garlic clove, grated
    1 tablespoons olive oil
    1 tablespoons Sherry vinegar or red wine vinegar
    1/2 teaspoon paprika
    Pinch of cayenne pepper
    Kosher salt, freshly ground pepper
    1 1/2 teaspoons vegetable oil
    1 pounds green beans, trimmed

    1. Preheat oven to 450°F. Roast tomatoes on a rimmed baking sheet, turning once, until blistered and lightly charred, 15-20 minutes. Let cool slightly. Finely chop almonds in a food processor. Add garlic, olive oil, vinegar, paprika, cayenne, and half of tomatoes; pulse to a coarse pesto consistency. Season with salt and pepper.
    2. Heat 3/4 tsp. vegetable oil in a large skillet over medium-high. Add half of beans; cook, undisturbed, until beginning to blister, about 2 minutes. Toss and continue to cook, tossing occasionally, until tender, 7–9 minutes; season with salt and pepper. Spread beans out on a platter; let cool. Repeat with remaining vegetable oil and beans.
    3. Toss beans with pesto; season with salt and pepper if needed. Add remaining tomatoes and transfer to a platter.

    Summer-Vegetable Casserole, from Food & Wine

    Extra-virgin olive oil, for drizzling
    1/2 pound potatoes, peeled and sliced 1/4 inch thick
    Salt and freshly ground pepper
    1 bell pepper, thinly sliced
    1 small onion, thinly sliced
    1 large garlic clove, minced
    1 teaspoon thyme leaves
    1/2 pound tomatoes, sliced 1/4 inch thick
    1 medium zucchini, sliced on the diagonal 1/4 inch thick
    3 tablespoons freshly grated Parmigiano-Reggiano cheese

    1. Preheat the oven to 350°. Coat a 9-inch baking dish with olive oil. Spread the potatoes in the dish in an even layer; drizzle with oil and season with salt and pepper. In a bowl, combine the bell pepper, onion, garlic and thyme and season with salt and pepper. Arrange two-thirds of the bell pepper mixture over the potatoes and drizzle with oil. Top with the tomatoes and the zucchini; drizzle with oil and season with salt and pepper. Cover with the remaining bell pepper mixture and sprinkle with the cheese.
    2. Cover the casserole with foil and bake for 40 minutes. Increase the oven temperature to 425°. Uncover the casserole and bake for about 20 minutes longer, until the vegetables are tender and glazed on top. Let stand for 10 minutes. Serve warm.

    For the farm crew,

    Charlie