Summer CSA Week 3

This week was filled with more rain. If any of you know Mother Nature personally, will you please let her know that we are good on rain, and could really use some sunshine. We would especially like to see some sun now that we’ve reached the official start of Summer! I’ve always been told that the Summer Solstice is the longest day of the year to allow us more time to find joy in the constant change that is happening around us.  

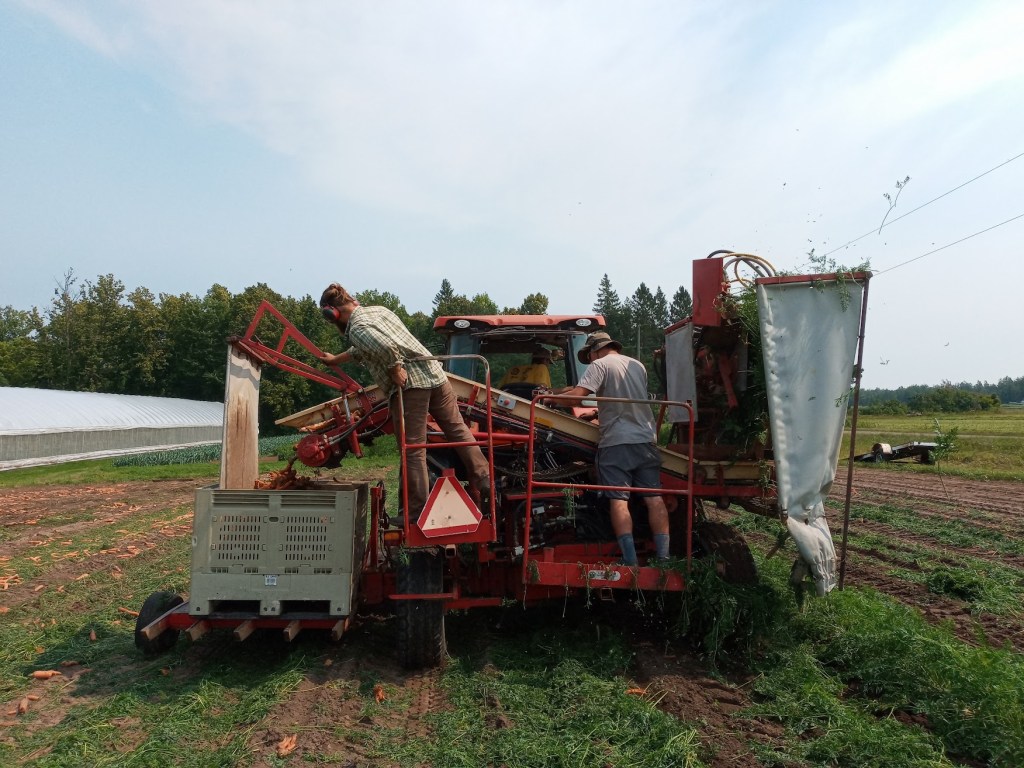
One of the big, and exciting changes that happened on the farm last week was the debut of the new chopper box (also known as a forage wagon). Thanks to all of your support, the farm was able to purchase a new to us, chopper box earlier this Spring. 

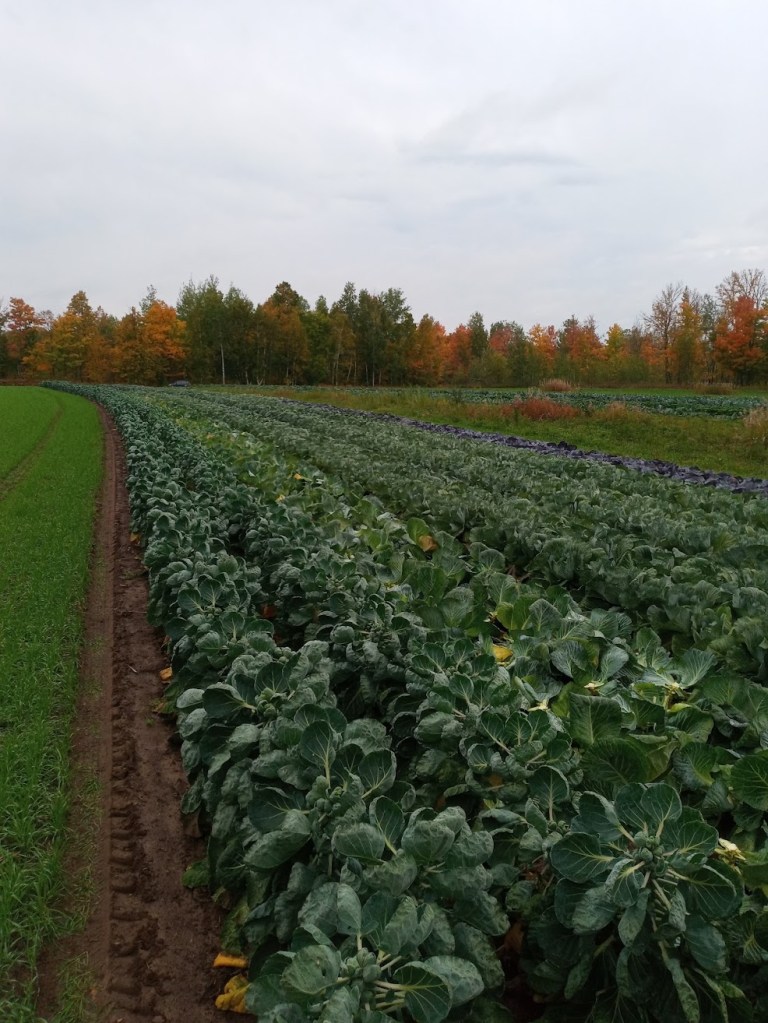
Every fall, after harvest, we plant a cover crop of rye. The rye goes dormant over the winter, and starts to grow again in the Spring. While it’s growing, it’s adding fertility to the soil, supporting soil life, suppressing weeds, and preventing soil erosion from happening (something we are really thankful for this year). Right before the rye goes to seed, we cut the rye, and it’s blown through a chute into the chopper box. An auger inside the box then pushes it out onto Janaki’s handmade ramp, and drops it in the aisleways between the onion beds. The crew then smooths it out to make sure it will be effective. This is what we spent most of last week doing. In the coming weeks, we will spread mulch around the outdoor tomatoes once they’ve dried off a bit. 

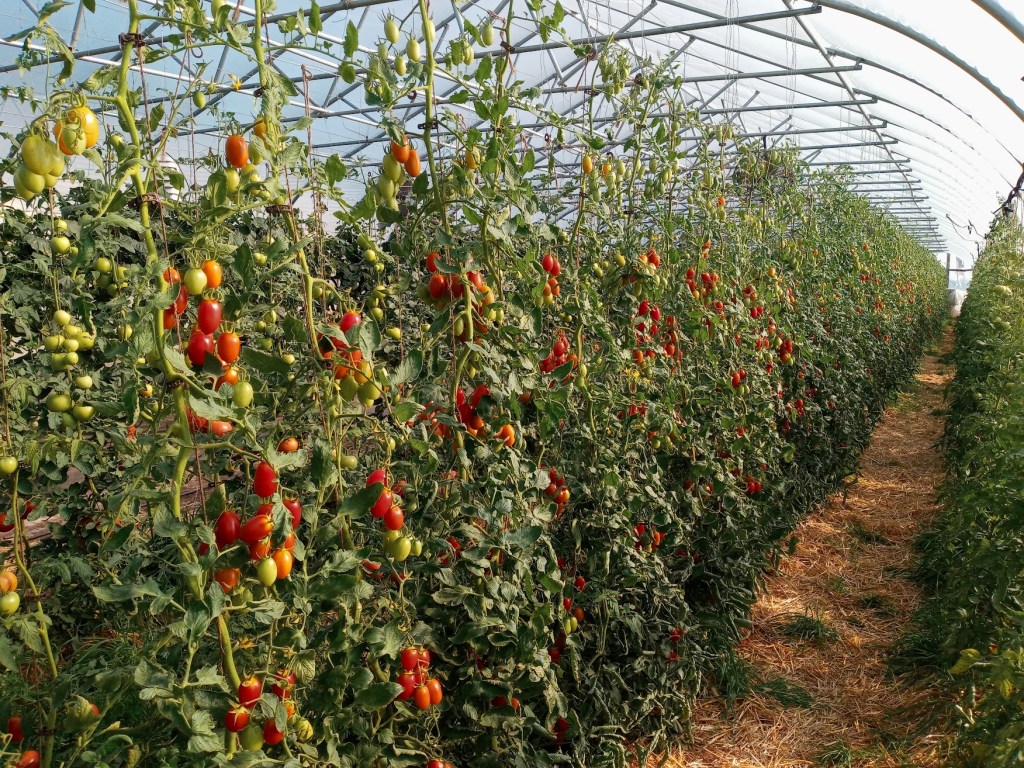
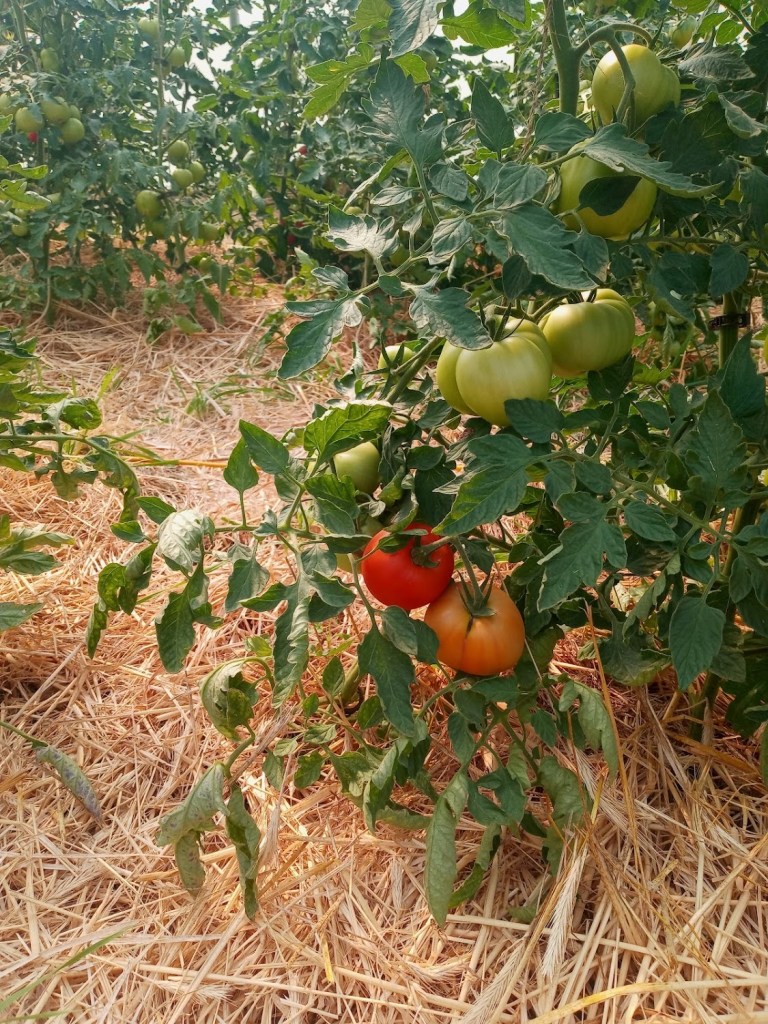
The rye mulch serves multiple purposes for different crops. For the onions, we mainly use it to suppress weeds. Less weeds means less use of the tractors for cultivation, and less labor needed to weed by hand in the places the tractor can’t access. It also creates earthworm habitat and food, leaving the field healthier than before the season. For the tomatoes, we use the mulch as a weed suppression, disease prevention, and as a way to retain moisture. Tomatoes appreciate a warm environment which leads to faster water evaporation. The mulch slows that evaporation which lessens the frequency at which we need to water, and prevents soil from splashing onto leaves.

To me, one of the coolest parts of the mulch is that we don’t remove it once the vegetables are harvested. We leave all of the mulch exactly where it is, and Farmer Janaki tills it into the soil before he plants another cover crop in that field. This adds organic matter which improves the health of the soil, and provides a habitat for organisms. Some of those organisms will prevent diseases, and help to control the levels of pests.  

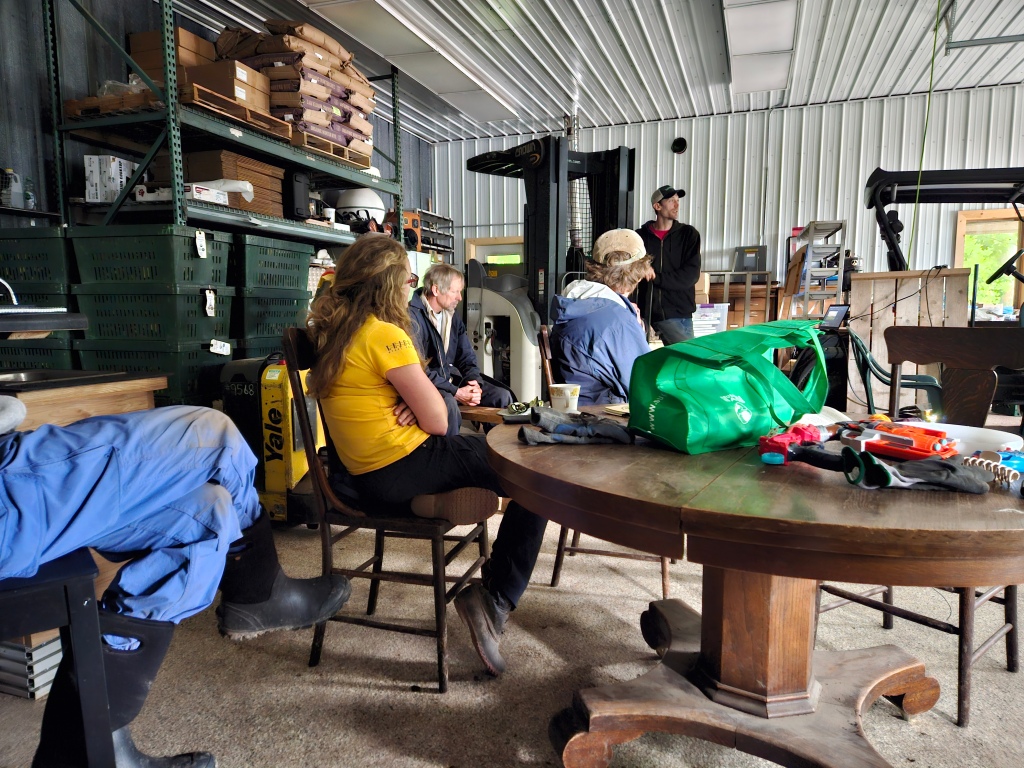
The farm crew was able to learn all this information about cover crops during what we called “classroom time”, a few weeks ago. This was an unusual occurrence considering we are normally too busy with field work to all come together for an educational session, but when the fields are too wet to work, we finally have time to talk about the behind the scenes of farming. This is just another one of the many ways the farm crew is embracing the changes being thrown at us thanks to mother nature and her abundance of rain. Fingers (and toes and arms and legs) crossed this week stays a little drier, so our outdoor vegetables can get some much needed love and attention.

In your share this week:

Broccoli – Lettuce – Spinach – Green Onions – Pac Choi

If you’re looking for some non-salad ways to use up greens, Deb has a few more ideas for you!

Cannellini Beans and Wilted Greens 

2 cans cannellini beans

1 large bunch spinach, pac choi, or mixed greens (appx 1/2 lb)

1-2 cloves garlic

1/4 cup olive oil

1.5 tsp rosemary, chopped

Wash and prepare greens.  Drain beans and reserve liquid.  Finely chop garlic and sauté in olive oil with the rosemary for 1 minute.  Add the beans and 3/4 cup bean liquid and simmer for 5 minutes, until some of the beans have fallen apart.  Add the greens to the beans and stew until they are wilted and tender.  Add more liquid if needed.  Salt and pepper to taste.  

Serve as a side-dish with olive oil drizzled over the surface

Lentils with Greens and Ginger 

1 cup green lentils, rinsed

2 1/2 cups water

1-2 hot green chilies, finely sliced (optional!!)

1 tsp finely grated ginger

1/2 cup chopped cilantro

1-1/4 lbs spinach 

1 tsp salt

Black pepper to taste 

2 tbsp lemon juice

Cook lentils in water until soft.  Put oil in large sauté pan (large enough to hold spinach) over medium heat.  When hot, add chilis and ginger- stir and fry for 10 seconds.  Add cilantro and spinach.  Continuously stir and cook until spinach has wilted.  Add cooked lentils (with any remaining cooking water)and salt.  Stir to mix and bring to simmer.  Cover and cook gently for 10 minutes- add pepper and lemon juice.  Cook for 5 minutes. Serve with rice

For the farm crew,

Jennifer

Summer CSA Week 2

It’s the second week of Summer CSA season, and the crew is getting back into the harvesting rhythm. 

Last week was a big week for us on the farm. We needed to play catch up on some plantings. It was a daunting task, but our crew worked extra hard to get it all done, with time to spare. 

Thanks to dryer days, and all hands on deck, we had time to accomplish a few additional things last week as well. The most noteworthy was the caterpillar tunnel the crew put together on Friday.

This tunnel is part of an experiment we are trying on the farm with some of our outdoor tomatoes. The main variety of slicing tomatoes you will be receiving in your box this season is called Geronimo. These tomatoes are know for being prolific producers, resistant to some common diseases, and for producing uniform fruit. The downside that they do best in a greenhouse and often crack before they’re ready to be harvested when subjected to the elements. We have several permanent greenhouses that house our earliest planting of tomatoes, but the tomatoes are more flavorful when grown in field soil rather than soil that’s been permanently protected. Our hope with the caterpillar tunnel is that it will give us the best of both worlds. Since they can be moved easily each year, we get the delicious flavor from the outdoor soil, but we get the protection of a greenhouse. 

As any of our science-loving members know, a good experiment always has a control group. We have standard greenhouse tomatoes, and we have standard outdoor tomatoes serving as our control groups. We can use these control group tomatoes to compare against our experimental tomatoes, to see if the quality and flavor are the same or different. 

I am very excited for this experiment. Mostly because I love tomatoes, but also because it’s refreshing to know that after many decades, and 2 generations, Farmer Janaki is still learning. Often we look at farms of this size and think they must know it all, and do everything perfectly. Nope! Janaki and the farm crew are learning and trying new things every day just like all of you. I believe that every experiment is worth it because even if it doesn’t go as planned, you always learn something from the process, and I think learning is half the fun of trying something new. 

You’ll still have to wait a little while for any tomatoes, but this week in your share you can expect to see: 

Turnips – Broccoli – Lettuce – Rhubarb – Greens mixRadish


We’ve been giving you lots of lettuce lately, if you are stumped on fun ways to enjoy it, one of my favorite ways is to grill it before putting it on a sandwich or chopping it up to add to a salad. Grilling the lettuce will add a smoky flavor, and takes out some of the bitterness. This works best with Romaine lettuce because it’s a little firmer. With the Butter Crunch, or softer lettuce, I like to use the leaves as lettuce wraps. It’s a nice way to lighten any dish that you would usually use bread or a tortilla with. On a hot summer day, a lighter dinner is just what I crave after a long day on the farm.

Another fun way to use lettuce is as a dip for bread, veggies, or whatever you can think of. I like this Peruvian Aji-style sauce.

Ingredients

  • 1 head lettuce, stem-end trimmed and discarded
  • ½ bunch fresh cilantro, stems removed
  • 5 green onions
  • ¼ cup mayonnaise or olive oil
  • 2 jalapeno peppers, seeded
  • 1 clove garlic
  • salt and ground black pepper to taste

Directions

  1. Place lettuce, cilantro, green onions, mayonnaise (or oil), jalapeño peppers, garlic, salt, and black pepper into a blender; blend until smooth, about 2 minutes.

Honey-Glazed Radishes and Turnips

Ingredients

  • 2 Tbsp. margarine or butter
  • 1 large shallot, sliced
  • 1 1/2 lb. radishes, halved
  • 1 1/2 lb. small turnips, halved or quartered
  • 1/3 c. water
  • 1/4 c. lower-sodium chicken broth
  • 1 Tbsp. honey
  • Kosher salt and freshly ground pepper
  • 2 Tbsp. thinly sliced mint leaves
  • 1 Tbsp. finely chopped chives

Directions

  1. Step 1In 12-inch skillet, melt margarine or butter on medium-high. Add shallot and cook 2 minutes or until golden and tender, stirring occasionally. Add radishes and turnips; stir until well coated. Stir in water, broth, honey, 1/4 teaspoon salt, and 1/4 teaspoon freshly ground black pepper. Heat to boiling. Reduce heat to medium-low; cover and cook 15 minutes.
  2. Step 2Uncover and cook 7 to 10 minutes longer or until vegetables are glazed and most of liquid has evaporated, stirring occasionally. Remove from heat and stir in mint and chives. Transfer to serving platter and garnish with mint leaves

For the farm crew, 

Jennifer 

Summer CSA Week 17, 2023

It appears that we’ll be experiencing a couple of unexpectedly warm days following the rainy spell that persisted throughout last week. It sure would have been nice to have received some of this rain a little more spaced out and during the summer months, but the plants seem to be hanging on nonetheless. After a bout of rain, it’s essential for plants to have an opportunity to dry off to prevent the onset of disease. Rain can leave leaves and stems damp, creating an ideal environment for fungal and bacterial pathogens to thrive. If moisture lingers on plant surfaces for extended periods, it can weaken the plant’s defenses, making it more vulnerable to infections. Adequate air circulation and sunlight play crucial roles in allowing plants to dry naturally, effectively reducing the risk of diseases.

We spent the day Friday harvesting storage cabbage, the biggest one we got was 14 1/2 pounds! Fortunately we sell about 6000 pounds per year for our friends over at Spirit Creek Farm for their delicious kraut and kim chi, and a few restaurants also use it for their cole slaw and kraut as well. So don’t worry, you won’t be getting any cabbages that big in your share!


In your share this week:

Broccoli – Carrots – Cilantro – Cukes – Leeks – Onions Red Peppers

Hot Peppers – Potatoes – Spinach – Delicata Squash – Tomatoes Pumpkins!


A note regarding this week’s spinach: There has been a recent congregation of cut worms gathering in the greenhouse that our current planting of spinach calls home. While it may be disheartening to discover cutworms feasting on our spinach plants, there’s no need to despair. Cutworms are a common garden pest known for their big appetite, but their presence doesn’t render your spinach inedible. With proper care, you can still enjoy the greens. Simply pick out any affected leaves that we may have missed in the commotion of harvesting, give the remaining spinach a good wash to remove any potential residue, and it will be perfectly safe to include in your meals.


Apple Spinach Salad, from Gimme Some Oven

Salad Ingredients:

5 ounces fresh spinach
2 small apples, cored and thinly sliced
half of a small onion, thinly sliced
1/2 cup chopped walnuts, toasted
1/3 cup dried cranberries
3 ounces crumbled goat cheese

Apple Cider Vinaigrette Ingredients:

1/4 cup extra virgin olive oil
2 tablespoons apple cider vinegar
2 teaspoons honey
1 teaspoon Dijon mustard
1 small garlic clove, peeled and minced
a generous pinch of salt and black pepper

  1. Make the vinaigrette. Combine all of the vinaigrette ingredients together in a bowl and whisk vigorously (or shake them together in a mason jar) to combine.
  2. Toss the salad. Add spinach, apples, onion, walnuts, dried cranberries, and half of the goat cheese to a large bowl.  Drizzle with the vinaigrette, and toss to combine.
  3. Serve. Serve immediately, garnished with the remaining goat cheese, and enjoy!

Delicata Squash Gratin, from Feasting At Home

Yield: 8 servings

2lb delicata squash
2 tablespoons olive oil or butter
2 medium leeks, thinly sliced
4 garlic cloves, rough chopped

15 sage leaves, chopped (8 more for crispy sage leaf garnish – optional)
1 cup heavy cream (or sub coconut milk)
1/2 teaspoon salt and peppers
1/2 teaspoon nutmeg
1/2 teaspoon onion powder, optional

1/4 cup water
3 ounces gruyere cheese (or sub parmesan)
1/2 cup walnuts, chopped

  1. Preheat oven to 375°
  2. Prep Delicata: Thinly slice the squash into 1/8 -inch thick rounds. When you get to the seeds, scoop them out and continue slicing.
  3. Cook the Leeks: Slice and rinse the leeks- the moisture here will help them soften. Heat oil or butter in a large skillet over medium heat. Sauté the leeks, for 8-10 minutes, covering part way through so they soften. Add the garlic, sage and a pinch of salt, cook 2-3 more minutes. Turn heat off.
  4. Whisk: the cream with the salt, pepper, nutmeg and onion powder in a medium bowl.
  5. Layer: Grease a large 9 x 13-inch baking dish or 11-12 inch round baking dish. A big shallow pan is best to ensure even cooking. Grease the pan, add 1/4 cup of water to the bottom of the pan. Layer with squash overlapping slightly. Sprinkle with half of the sautéed leeks. Drizzle with 1/3 cup cream mixture. Sprinkle with one ounce of Gruyere (about 3-4 tablespoons grated). Add the 2nd layer of squash- using up any misshapen pieces here. Scatter with the remaining leeks. Drizzle with 1/3 cup cream mixture and sprinkle with grated gruyere cheese. Add the final layer of squash, overlapping and pressing down so not domed in the middle. Drizzle the remaining cream mixture over top, lightly sprinkle with cheese and the walnuts. Give the pan a little shake, press down in the center again so gratin is level, not domed. Cover, using parchment first as a barrier, under the foil if the foil touches the top of the gratin.
  6. Bake 45 minutes covered. Uncover, confirming the delicata is tender using the tip of a knife, then bake at 400 F uncovered, 15 minutes until beautifully golden
  7. To make the crispy sage leaf garnish, heat 1-2 tablespoons oil or butter in a pan over medium heat, add 8 whole sage leaves, saute each side 30 seconds or so until crisp (try a tester first) and place on a paper towel to cool for a couple of minutes. Arrange over the gratin.

For the farm crew,

Charlie

Summer CSA Week 16, 2023

Greetings, fellow Food Farm enthusiasts! As we bid adieu to the vibrant greens of summer and warmly embrace the gold & red arrival of autumn, we find ourselves hard at work in the changing landscape of the farm. With Saturday’s equinox marking the official start of fall, we ready ourselves for the snow to fly. Hopefully not too soon though, as there is a lot left to harvest! With only two more summer CSA shares remaining (after this week), the harvesting has shifted more and more to winter storage items. Last week, the big to-do was clipping and bringing all the squash varieties in from the field. This year we grew six different varieties: Delicata, Kabocha (green, winter sweet & sunshine), Acorn & pumpkins!

Apart from our usual CSA packing and retail orders, the squash took just about the entire week to complete. It is one of the more physically demanding tasks we do here and that is much in part to the sheer weight that needs to be moved to and fro – over 20,000 pounds of squash! Many hands do not make light work in this case, although it is always fun when the whole crew gets to work together on a singular task.


In your share this week:

Northeaster Beans – Broccoli – Carrots – Celery – Cucumbers – Lettuce – Onions

Red Peppers – Red Potatoes – Spinach – Winter Squash


New to the shares last week and featured again this week are the northeaster beans. Upon being greeted by them in the greenhouse, it is easy to imagine someone dreaming up the fairytale of Jack and the Beanstalk. The vigorous pole beans enthusiastically scale the framing of the greenhouse, almost as if they would keep climbing and climbing until out of sight if not for the layer of plastic containing them to safe picking heights.

This week’s share also includes what will likely be the last of the broccoli for the year. To celebrate I have included a recipe for broccoli cheddar soup that will help us feel extra cozy through all this dreary weather.


Ina Garten’s Butternut Squash Salad Recipe, from fool proof living

Yield: 4 servings

1 1/2 pounds winter squash, ¾ inch slices
1 tablespoon maple syrup
2 tablespoons + 1/4 cup olive oil, divided
2 teaspoons Kosher salt, divided
1 teaspoon coarsely ground black pepper, divided
3 tablespoons dried cranberries or raisins
3/4 cup apple juice or apple cider
2 tablespoons apple cider vinegar
2 tablespoons onion minced + dash of garlic powder
2 teaspoons Dijon Mustard
6-8 cups lettuce & spinach
1/2 cup walnut halves, toasted
1/4 cup shaved Parmesan cheese

  1. Prep the oven and squash seasoning: Preheat the oven to 400°F.
  2. Toss the squash: Place the squash on a baking sheet. Drizzle it with maple syrup and 2 tablespoons of olive oil. Sprinkle it with 1 teaspoon kosher salt, and ½ teaspoon black pepper. Toss to ensure that all of the squash is coated.
  3. Roast and turn: Place it in the oven and roast for 20-25 minutes until tender, turning once halfway through. In the last 5 minutes, add the cranberries.
  4. Make the vinaigrette: Place apple juice, cider vinegar, and minced onion + dash of garlic powder in a small saucepan and bring to a boil over medium-high heat. Cook for 6-8 minutes, or until reduced to 1/4 cup. Remove from heat.
  5. Finish the dressing: Off the heat, whisk in the Dijon mustard, 1/4 cup of olive oil, 1 teaspoon salt, and 1/2 teaspoon pepper. Whisk until emulsfied.
  6. Assemble the salad: Place the lettuce & spinach in a large salad bowl. Pour over the dressing and give it a big toss. Add the roasted butternut squash and cranberries.
  7. Finish and serve: Top it off with toasted walnuts and shaved Parmesan cheese. Taste and season with salt and pepper, if necessary. Enjoy!

Broccoli Cheddar Soup, from Gimme Delicious

Yield: 4 servings

4 tablespoons butter
1/2 medium onion, chopped
2-3 cloves garlic, minced
4 tablespoon AP flour
2 cups low sodium chicken or vegetable stock
1 teaspoon kosher salt
1/2 teaspoon black pepper
1/2 teaspoon paprika (or ground nutmeg), optional
3 cups broccoli florets (1 large head), cut into small pieces
1 large carrot, grated
2 cups half & half, heavy cream or milk
8 oz block grated cheddar cheese

  1. Melt butter in a large dutch oven or pot over medium-high heat. Add the onion and cook 3-4 minutes or until softened and light gold. Add the garlic and saute for another minute.
  2. Add flour and whisk for 1-2 minutes or until the flour begins to turn golden in color. Pour in the chicken stock, broccoli florets, carrots, and seasoning. Bring to a boil then reduce heat to medium-low and simmer for 15 minutes or until the broccoli and carrots are cooked through.
  3. Stir in half & half and cheddar cheese and simmer for another minute. Taste and adjust seasoning if needed.
  4. Serve with toasted crusty bread or in a bread bowl if desired.

For the farm crew,

Charlie

Summer CSA Week 13, 2023

This past week, while harvesting carrots, we found bees… or rather, they found me. Maybe it was the lavender soap I had used that morning, maybe it was my sweet disposition, but whatever it was the bees seemed to swarm to it. Each time the carrot harvester made a lap around the edge of the field with the bee boxes I would pick up a stinger or two. I had just about had enough when Janaki hooked me up with a nice bee keepers hat. After which, I was able to complete the harvest much more comfortably than it had begun.

While I was communing with the bees, most of the other crew members gathered around the barrel washer to sort, clean & taste the carrots as they came from the field. The colder nights we had last week really seemed to help bring out their sweetness, and it was great to get them out of the ground before the heat sapped their flavor!

It’s starting to be that time of year when some of the summer crops start to slow down. The outside cucumbers have wrapped up, while the zucchini are hanging on for just a little longer. We were hoping to hoard some melons for the weeks to come, but decided to send what we have for fear of them going bad before they make it to the shares.

We have an exciting new addition this week, however, in the Carmen pepper. Carmen is a unique sweet pepper variety known for its distinctive shape. Unlike the traditional bell pepper shape that most people associate with sweet peppers, Carmen peppers have a more elongated and tapered form, which lead some folks to mistakenly believe they’re hot (there are also green Jalapenos in the share today, and they are hot!) Carmen peppers exhibit their sweetest flavor when they ripen to a vibrant red, but they are also very sweet when they’ve just begun to turn color. Other sweet peppers (like the bell) tend to be more bright and grassy, rather than sweet, in their green state.


In your share this week:

Beans – Beets – Carrots – Cilantro – Cucumbers – Kale – Melons – Onions

Hot PeppersSweet Red Peppers – Potatoes – Tomatoes – Zucchini


When Catherine sent the “best guess” email for the share this week, my mind initially jumped to vegetable enchiladas. This would be a great bounty to prepare something like that, but after melting in the heat all day yesterday, I decided that hot enchiladas was not the move. In an effort to keep the oven off this week, I decided to share a recipe for gazpacho along with a zesty salad dressing that would pair nicely with the kale this week.


Gazpacho, from cookie & kate

2 ½ pounds ripe red tomatoes (about 4 large or 9 small)
1 small sweet yellow onion (½ pound), peeled and cut into rough 1″ chunks
1 small cucumber (½ pound), peeled and seeded
1 medium sweet red pepper, cored and seeded
¼ cup fresh basil leaves, plus extra for garnish
1 large garlic clove, peeled
¼ cup extra-virgin olive oil
2 tablespoons sherry vinegar or red wine vinegar
¾ teaspoon fine sea salt
Freshly ground black pepper

  1. To prepare your veggies, place your blender bowl, a medium serving bowl, and a small bowl on the counter. Core the tomatoes and cut them into rough 1″ chunks. Reserve about ¼ cup of the juicy tomato seeds and place them in your small bowl (we’ll use them as a garnish later). Add half of the tomato chunks to the blender, and the other half to your serving bowl. Add all of the onion chunks to the blender.
  2. Cut off about one-fourth of the cucumber. Finely chop that piece and place it in the small bowl. Slice the rest of the cucumber into rough 1″ chunks, and divide them between the blender and the serving bowl. Cut off about one-fourth of the bell pepper, finely chop that piece, and add it to the small bowl. Slice the rest of the bell pepper into rough 1″ chunks and divide them between the blender and the serving bowl.
  3. To the blender, add the basil, garlic, olive oil, vinegar, salt and about 10 twists of black pepper. Securely fasten the lid and blend, starting on low and increasing to high speed, until the mixture is completely smooth, about 2 minutes.
  4. Pour the contents of the serving bowl (the remaining chunks of tomato, cucumber and bell pepper) into the blender. Fasten the lid and blend for just 10 to 20 seconds, until the ingredients are broken up into small pieces. Stop there, or blend a little longer if you prefer smaller pieces.
  5. Add a small pinch of salt to the small bowl of garnishes, stir, and store it in the fridge. Chill the soup for at least 2 hours, or up to 24 hours.
  6. Before serving, taste, and add additional salt (I sometimes add another ¼ teaspoon) and/or black pepper if necessary. To serve, divide the soup into small bowls or cups, and top with the reserved cucumber and bell pepper. Top with a few tiny or torn basil leaves and a light sprinkle of pepper. Leftover servings keep well, covered and refrigerated, for 3 to 4 days.

Jalapeño Honey Mustard Dressing, from kroll’s korner

1/3 cup olive oil
1/4 cup honey
1/4 cup dijon mustard
2 tablespoons lime juice
1/2 teaspoon lime zest
1/2 jalapeño, diced
2 teaspoons thyme, chopped
Salt & pepper, to taste

  1. In a medium sized bowl, whisk all ingredients together until well combined. Or you can combine all ingredients in a mason jar and give it a nice shake until combined so you don’t have to dirty a bowl! Taste and adjust ingredients as desired. Store in a mason jar or airtight container in the fridge for 1-2 weeks. Makes ~1 cup.

For the farm crew,

Charlie

Summer CSA Week 12, 2023

It was so nice to see Food Farm folks this Saturday–we enjoyed speaking with so many of you and show off our hard work!

As some of you may have noticed, the root cellar is gradually filling up with a colorful abundance of carrots, beets, cabbage and potatoes. The farmers have been diligently packing up more and more of these vibrant vegetables, destined for grocery store shelves and eager CSA members.

Moreover, last week marked the collapse of our onion tops. This may sound slightly catastrophic, but don’t worry – it’s a good thing! The leaves fall over simply because the plant has matured and is no longer developing. It’s also how we know they are ready for harvest. In the photo (see left), you can see Teri & Aaron gently lifting them from the ground before laying them out to dry. Careful handling is essential during harvest to avoid bruising, which makes the bulbs susceptible to storage rot. Following the uprooting, these onions will begin their curing process in the fields for a week or so before having their tops removed and transferred to a well-ventilated indoor storage space.


In your share this week:

Basil – Beans – Broccoli – Cauliflower – Carrots – Celery – Cucumber – Melons

Sweet Onions – Bell Peppers – Potatoes – Tomatoes – Zucchini


The recipes this week have a lot of room to make them your own. Either one would be good with just about any item in the share (excluding the melons). So feel free to follow them as directed or create your own pizza & curry experiments…


Zucchini Crust Pizza, from The Cozy Cook

2 cups shredded zucchini
1/4 teaspoon salt
3 large eggs, beaten
1/2 cup all purpose flour (almond flour, coconut flour, and whole wheat flour may also be used)
1/3 cup shredded parmesan

  1. Preheat oven to 350°.
  2. Spread the shredded zucchini out on a lightly greased baking sheet and sprinkle lightly with salt. Bake for 15 minutes. Remove and transfer the zucchini to paper towels or a cheesecloth.
  3. Increase oven temperature to 450°.
  4. Squeeze out as much additional moisture from the zucchini as possible. Add the zucchini to a large bowl along with the whisked eggs.
  5. Sprinkle the flour in gradually, stirring to incorporate. Continue to add flour until desired consistency is obtained. (I use the entire ½ cup for all-purpose flour.)
  6. Spread out onto a lightly greased 12-inch pizza pan, leaving 1-inch or so around the edges.
  7. Top with shredded Parmesan cheese and bake for 18 minutes, until it begins to brown slightly. Remove from oven.
  8. Reduce heat to 400°.
  9. If possible, let the crust cool for extra crispy results.
  10. Top with desired pizza toppings. Bake for ~10 minutes, until the cheese is melted and bubbly.

Summer Vegetable Curry, Inspired by Half Baked Harvest

Basil Coconut Ginger-Lime Rice:

1 (14 ounce) can coconut milk
1 cup jasmine or basmati rice
1 tablespoon fresh ginger grated
1 lime juiced + zest

  1. Add the coconut milk to a medium size pot. Bring to a low boil and then add the rice, salt, and ginger. Stir to combine and then place the lid on the pot and turn the heat down to the lowest setting possible. Allow the rice to cook ten minutes on low and then turn the heat off completely and let the rice sit on the stove, covered for another 20 minutes (don’t take any peeks inside!). After 20 minutes remove the lid and add the lime juice + zest.

Curry:

4 tablespoons extra virgin olive oil
1 pound boneless, skinless chicken, diced
2 bell peppers, chopped
1 zucchini, chopped
2 cups green beans, chopped
1 cup broccoli, diced
1 cup cauliflower, diced
1 cup carrots, diced
1 tablespoon fresh ginger, grated
2 cloves garlic, grated or minced
2-3 tablespoon thai red curry paste
1 (14 ounce) can coconut milk
1 tablespoon fish sauce
1/2 cup fresh basil, chopped
1 mango, diced
1 jalapeño, seeded + diced
fresh naan and goat cheese, for serving

  1. Heat a little olive oil in a large skillet over high heat. Add the chicken and cook until browned and cooked through, about 5-10 minutes.
  2. Add another drizzle of olive oil to the skillet. Add the peppers, zucchini, beans, broccoli, cauliflower, carrots, ginger and garlic. Cook the veggies 5 minutes or until they just begin to soften.
  3. Add the coconut milk, curry paste, and fish sauce. Stir to combine, bring the mixture to a boil, cook 5 minutes or until the sauce thickens slightly. Remove from the heat and stir in the basil.
  4. In a small bowl toss together the mango and jalapeño.
  5. Serve the curry over the rice. Add a spoonful of the mangos and a sprinkle of goat cheese. Eat with Naan!

For the farm crew,

Charlie

Summer CSA Week 11, 2023

It’s farm tour time–this Saturday from 10-noon, we’d love to see you!

It’s melon mayhem at the Food Farm! We recently set our new daily harvest record with a whopping 377 cantaloupe. That is more than 800 pounds of weight to pull from the field! We expect them to slow down soon, so enjoy it while it lasts.

In other news that is orange, the crew christened a “new-to-us” carrot harvester. A lucky few climbed aboard as it took its maiden voyage through the fields, while the rest of the crew assembled at the washing stations. There were certainly some wrinkles to iron out, as there often is with any new piece of machinery, but by the end of the week the process seemed to be moving along rather quickly.


Beans – Broccoli – Carrots – Cilantro – Cucumbers – Dill – Greens Mix – Melons

Onion – Bell Peppers – Hot Peppers – Potatoes – Tomatoes – Zucchini


Usually the melons are best enjoyed straight up in all their glory. That way you can fully appreciate the depth of their flavor. This week though, because there are so many, I thought it would be nice to include a recipe with them in it. It does include basil, which we are not sending this week… I’m hoping some of you still have a few sprigs leftover from last weeks share, or can maybe snag some from a friendly neighbor’s garden.

P.S. The vinaigrette would also go great on the greens mix in today’s share 🙂

Melon Caprese Salad, from Half Baked Harvest

Honey Herb Vinaigrette:
1/4 cup extra virgin olive oil
2 tablespoons honey
Juice of 1 lemon
1 tablespoon white balsamic
1 cup fresh basil
1 tablespoon toasted pine nuts
1 pinch flaky sea salt

  1. To make the vinaigrette, combine all ingredients in a blender and blend until smooth.

3 balls fresh burrata cheese
4 cups melon balls
1/2 cup fresh basil leaves
2 tablespoons fresh mint
6 slices prosciutto

  1. Break the burrata in half and place each half in the bottom of a small bowl or glass (about 8 ounces). Over the burrata, layer the melon balls, basil, and mint. Top with a slice of prosciutto. 
  2. At this point the salad can be covered and placed in the fridge for up to 6 hours. 
  3. Before serving, drizzle over the vinaigrette.

Blistered Green Beans w/ Tomato-Almond Pesto, from Bon Appétit

1 1/4 cups diced tomatoes
1/8 cup unsalted, roasted almonds
1 garlic clove, grated
1 tablespoons olive oil
1 tablespoons Sherry vinegar or red wine vinegar
1/2 teaspoon paprika
Pinch of cayenne pepper
Kosher salt, freshly ground pepper
1 1/2 teaspoons vegetable oil
1 pounds green beans, trimmed

  1. Preheat oven to 450°F. Roast tomatoes on a rimmed baking sheet, turning once, until blistered and lightly charred, 15-20 minutes. Let cool slightly. Finely chop almonds in a food processor. Add garlic, olive oil, vinegar, paprika, cayenne, and half of tomatoes; pulse to a coarse pesto consistency. Season with salt and pepper.
  2. Heat 3/4 tsp. vegetable oil in a large skillet over medium-high. Add half of beans; cook, undisturbed, until beginning to blister, about 2 minutes. Toss and continue to cook, tossing occasionally, until tender, 7–9 minutes; season with salt and pepper. Spread beans out on a platter; let cool. Repeat with remaining vegetable oil and beans.
  3. Toss beans with pesto; season with salt and pepper if needed. Add remaining tomatoes and transfer to a platter.

Summer-Vegetable Casserole, from Food & Wine

Extra-virgin olive oil, for drizzling
1/2 pound potatoes, peeled and sliced 1/4 inch thick
Salt and freshly ground pepper
1 bell pepper, thinly sliced
1 small onion, thinly sliced
1 large garlic clove, minced
1 teaspoon thyme leaves
1/2 pound tomatoes, sliced 1/4 inch thick
1 medium zucchini, sliced on the diagonal 1/4 inch thick
3 tablespoons freshly grated Parmigiano-Reggiano cheese

  1. Preheat the oven to 350°. Coat a 9-inch baking dish with olive oil. Spread the potatoes in the dish in an even layer; drizzle with oil and season with salt and pepper. In a bowl, combine the bell pepper, onion, garlic and thyme and season with salt and pepper. Arrange two-thirds of the bell pepper mixture over the potatoes and drizzle with oil. Top with the tomatoes and the zucchini; drizzle with oil and season with salt and pepper. Cover with the remaining bell pepper mixture and sprinkle with the cheese.
  2. Cover the casserole with foil and bake for 40 minutes. Increase the oven temperature to 425°. Uncover the casserole and bake for about 20 minutes longer, until the vegetables are tender and glazed on top. Let stand for 10 minutes. Serve warm.

For the farm crew,

Charlie

Summer CSA Week 10, 2023

Let’s take a moment to say thank you for the bit of rain that came last week. The farm was lucky enough to get three quarters of an inch, which isn’t that much in the grand scheme of things, but as my mother likes to say “beggars can’t be choosers.” The problem is that we need rain consistently to make much of an impact. Every hotter-than-normal, rainless day with ample sunshine dries the soil out. We do have a pond toward the back of the farm property, which we are able to pump water from to aid in our irrigation efforts, but it certainly wouldn’t hurt if we all put some collective energy into wishing for more rain to fall 🙂

We are getting to that time of year where every day is a harvest day. Whether it’s digging beets, carrots & potatoes, picking canning tomatoes, or slicing bunches of kale, there just doesn’t seem to be enough time in the day. One fun item that got added to the list this week is cantaloupe. This is a crop that can be difficult to grow in our area, but through a lot of trial an error, we have managed to grow consistently for the last five or so years. It has become somewhat of a crowd favorite and for good reason! Nothing quite cuts the summer heat like a freshly sliced melon!


Carrots – Cilantro – Cukes – Kale – Lettuce – Green Onions – Green Peppers

Green BeansHot Peppers – Parsley – Potatoes – Tomatoes – Zucchini – Melons


Feel free to get creative with the salad recipe below… As is, it uses up a good chunk of the ingredients in your share this week, but it could feature even more farm goodness if you happen to have some leftover cabbage or snap peas hiding in your fridge from weeks prior. The dressing itself is also pretty versatile and would make a wonderful marinade or stir fry sauce.

Salad w/ Peanut Butter Dressing

2 medium cucumbers
1/2 cup shredded carrots
1 green onion, thinly sliced
1/4 cup salted & roasted peanuts, chopped
2 tablespoons cilantro, chopped
1-2 hot pepper, finely diced (optional)

PB Dressing, from theendlessmeal.com:
1/2 cup peanut butter
1/4 cup lime juice
1 tablespoon soy sauce
1 tablespoon ginger, finely minced
2 teaspoons toasted sesame oil
2 cloves garlic, finely minced
1/4 – 1/2 cup water
sea salt, to taste

  1. In a medium-sized bowl, whisk the peanut butter, lime juice, soy sauce, ginger, sesame oil, and garlic. Thin with the water, starting with ¼ cup. (The amount of water you’ll need to add will depend on how thick your peanut butter is and how thick or thin you’d like the dressing to be).
  2. Taste and add salt as needed.
  3. Dress the salad as you see fit!

Potato Salad w/ Grilled Kale, from Bon Appétit

5 tablespoons olive oil, divided, plus more
2 pounds potatoes
1 pound shallots, unpeeled
3 tablespoons lemon juice
1 tablespoon apple cider vinegar
freshly ground black pepper
1/4 cup chopped pickles
2 tablespoons drained capers (optional)
1 bunch kale, ribs and stems removed
3 green onions, sliced
1 cup parsley leaves w/ tender stems

  1. Prepare a grill for medium-high heat; lightly oil grate. Place potatoes in a large saucepan and pour in cold water to cover by 1″. Season with salt and bring to a boil. Reduce heat; simmer until tender, 15–18 minutes. Drain and return to saucepan.
  2. Meanwhile, grill shallots, turning occasionally, until skins are blackened and flesh is tender, 15–20 minutes. Let cool. Halve lengthwise and scoop out insides (discard skins).
  3. Whisk lemon juice, vinegar, and 3 Tbsp. oil in a large bowl; season with salt and pepper. Add cornichons, capers, and potatoes and toss to coat.
  4. Toss kale and remaining 2 Tbsp. oil in a medium bowl; season with salt. Grill, turning often, until charred and crisp-tender, about 1 minute. Fold into salad along with scallions, parsley, and shallots.
  5. Do Ahead: Potato salad can be made 1 hour ahead. Store tightly covered at room temperature.

For the farm crew,


Charlie

Summer CSA Week 8, 2023

Garlic season has arrived! Last Wednesday was all hands on deck as the crew shuttled wagon load after wagon load of freshly harvested German Extra Hardy to washing stations. Once washed the garlic was gently laid out on wire racks (see below). Although it is edible right from the ground, you won’t be seeing it in the shares for at least a couple weeks. To stay fresh in the pantry for any extended period of time, it must go through the curing process – essentially just letting it dry out. As the garlic dries, the skin shrinks and turns papery, forming a protective barrier against moisture and mold.

As we wait for the garlic to be ready, we can take a little time to enjoy another new addition to this weeks box… Potatoes! Not just any old potatoes, but new potatoes. New potatoes are essentially young potatoes that are harvested before they reach full maturity. They are the same varieties as their larger counterparts but are picked early in the growing season, typically about three to four months after planting. Because they are harvested at this young stage, new potatoes are sweeter and more delicate in flavor than mature potatoes. Their skin is thin, tender, and often flaky, which makes them particularly appealing for potato salad. This week i’ve included one of my favorite recipes for just that.


In your share this week:

Cabbage – Carrots – Cilantro – Dill – Cucumbers – Lettuce – Green Onions – Snap Peas

Jalapeño Peppers – New Red Potatoes – Tomatoes – Zucchini


Herby Potato Salad, from Half Baked Harvest

Yield: 6 servings

2 pounds new potatoes
3 cloves garlic
kosher salt
1/2 cup raw cashews, soaked in hot water for 30 minutes, then drained
1 tablespoon dijon mustard
1/3 cup olive oil
1 cup fresh basil, chopped
1/4 fresh dill, chopped
2 chives, chopped
flakey sea salt and black pepper
1 pinch crushed red pepper flakes
juice of 1 lemon

1. Place the potatoes, garlic and a tablespoon of salt in a large pot and fill with water. Bring to a boil over high heat and then reduce the to heat to medium, simmer 10-15 minutes or until the potatoes are just fork tender. Drain. Place the potatoes back in the hot pot. Remove the garlic cloves. Cover the pot and let the potatoes steam for another 20 minutes.

2. Meanwhile, combine the cooked garlic, drained cashews, mustard, and olive oil in a food processor. Pulse until smooth and creamy, adding water if needed to thin slightly. 

3. Cut the potatoes in half and add to a large serving bowl. Add the cashew sauce, basil, dill, chives, lemon juice, and a pinch each of salt, pepper, and crushed red pepper flakes. Toss well to combine. Taste and adjust salt and pepper to your liking. Serve warm or cover and place in the fridge. Can be served at room temp or cold.


Cilantro Lime Slaw, from Gimme Some Oven

Yield: 4-6 servings

1 cup plain Greek yogurt
1/2 cup tightly-packed fresh cilantro
1/4 cup freshly-squeezed lime juice
1/2 teaspoon ground cumin
1/2 teaspoon fine sea salt
1/4 teaspoon freshly-cracked black pepper
3 green onions (just the green parts)
2 garlic cloves
1 jalapeño or serrano pepper, stemmed and cored
14 ounces cabbage, thinly sliced

1. Combine the Greek yogurt, cilantro, lime juice, cumin, salt, black pepper, green onions, garlic and jalapeño in a blender or food processor*.  Pulse briefly a few times until the mixtures is combined.

2. Place the cabbage in a large mixing bowl. Drizzle the sauce on top of the cole slaw, then toss until the mixture is evenly combined.  Season with extra pepper and/or lime juice if needed.

3. Serve immediately, or cover and refrigerate for up to 24 hours.


For the farm crew,

Charlie

Summer CSA Week 7, 2023

In our region, July is known for claiming the title of the hottest month of the year. Last week you wouldn’t have guessed it as the crew enjoyed slightly cooler temps. We won’t be so lucky this week, however, with the forecast pushing 90° for the next few days. Such high temps may be hard on the farm crew, but many of the vegetable varieties are going to love it!

This weeks box brings a few new additions in cilantro, dill and even a couple of salad tomatoes 🙂

Dill is an especially exciting one for me. While it is often associated with dill pickles and potato salad, its culinary significance spans centuries across Europe and Asia, enriching a wide array of cuisines. Due to its distinct and potent flavor, even a small quantity of dill can make a significant impact, making it an excellent choice as a garnish. The delicate, feathery texture of dill leaves adds a touch of beauty, while a mere sprig can infuse a dish with a noticeable and delightful aroma. Moreover, dill finds its place in salads and serves as a crucial component, along with buttermilk, in bestowing homemade ranch dressing with its unique and flavorful character.

When considering planting dill, it’s worth noting that this annual herb, related to celery, possesses a natural tendency to self-replant and propagate extensively, adding to its appeal as a versatile and abundant addition to your garden space.


In your share this week:

Beets – Broccoli – Carrots – Chard – Cilantro – Cucumbers

Dill – Lettuce – Tomatoes – Green Onions – Snap Peas – Zucchini


Dilly Ranch Dressing, from Feasting at Home

Yield: 1 1/4 Cup

1/3 cup mayo
1/3 cup buttermilk
1/3 cup sour cream
1-2 garlic cloves, finely minced
1/2 cup fresh dill
2 tablespoons tarragon
1 tablespoon parsley, chopped
1/2 teaspoon salt, more to taste
1 teaspoon pepper
1 tablespoon lemon juice, more to taste
1 teaspoon apple cider vinegar

  1. Whisk the mayo, buttermilk, and sour cream in a medium bowl until smooth.
  2. Stir in the remaining ingredients: garlic, herbs, salt, pepper, lemon juice, and vinegar.
  3. Taste- you want this slightly salty and tangy- so adjust salt and lemon juice to bump up the flavor.
  4. Place in a sealed jar and chill. You want this cold!

Cucumber Salsa, from Lemon Tree Dwelling

The farm peppers will be in your shares soon enough, but for now store bought will have to do for this recipe…

Yield: 8 servings

1 large English cucumber, about 2 1/2 cups chopped
1/4 cup red onion, chopped
1/3 cup yellow bell pepper, chopped
1/3 cup green bell pepper, chopped
2 tomatoes, chopped
1 jalapeño, minced
1/4 cup cilantro, minced
2 cloves garlic, minced
juice of 1/2 lemon
juice of 1/2 lime
1 teaspoon salt

  1. Chop the cucumbers, peppers, tomatoes, and onions into small pieces, about 1/4 inch. Add them to a medium mixing bowl.
  2. Mince the jalapeño (remove seeds for less heat as desired), cilantro, and fresh garlic. Add it to the chopped veggies in the bowl. 
  3. Squeeze in the fresh citrus juices and add the salt.
  4. Stir well; enjoy immediately or refrigerate until ready to use.

Carrot, Date and Feta Salad; from Food Network

Yield: 4 servings

3 medium carrots
2 tablespoons roughly chopped fresh cilantro
1 1/2 tablespoons extra-virgin olive oil
2 teaspoons honey
Kosher salt
Juice of 1 lime
1/4 cup crumbled feta cheese
2 tablespoons chopped toasted almonds
2 tablespoons finely chopped dates

  1. Thinly slice the carrots into ribbons using a vegetable peeler or mandolin, including any remaining “stubs” of carrot. Soak in ice water until the ribbons firm up and curl, about 15 minutes. Drain and pat dry. 
  2. Whisk together the cilantro, olive oil, honey, 1/2 teaspoon salt and the lime juice in a medium bowl. Add the carrots along with the feta cheese, almonds and dates, and toss until evenly combined. Serve immediately, or let the salad marinate a bit before serving. 

When I first started working at the farm, a little over a year ago, I thought that all of the job would be directly dealing with plants or dirt. I quickly learned, however, that there are many tasks we do that don’t necessarily pop into your mind when you think farming. A lot of the equipment we use here is quite old. The thing about old stuff is that it tends to break. It would be really nice to just replace something when it breaks, but new stuff is rather expensive. We will usually opt for the fix it yourself mentality – something Janaki and Dave are rather good at.

Above you can see Dave hard at work as he repairs our flail mower.

For the farm crew,

Charlie