Summer CSA Week 17

Last week was all about garlic and squash. 

The end of September marks garlic sorting time. This is when a few lucky crew members get to sort through each of the garlic bulbs to decide if they will be used as seed garlic, or if they will be sent to shares or sold. Last year we planted over 6,700 cloves of garlic. Every clove that you plant gets turned into a bulb that you harvest. That means over 6,700 bulbs of garlic were sorted one by one. We look at each bulb to see how many cloves it contains, the size of the cloves, and the overall appearance of the bulb. When looking for garlic that will be used as seed for this year, we look for bulbs that have 4,5, or 6 cloves in it. Any more or less and the bulb gets sent directly to the shares/sell pile. Once we’ve counted the cloves, we look at the size of each clove. We want the largest cloves that we can find. This is for 3 main reasons: 1) larger cloves have more energy in them to help the plant gets started. We don’t want the plants struggling and stressed from the very beginning. 2) larger cloves produce a stronger root system early in the growing season. This can improve their ability to access water and nutrients from the very beginning. 3) larger cloves are more resistant to frost. This allows them to better withstand our cold Minnesota winters, and it helps them recover more quickly if they do get a little too cold. For those reasons, anything with small cloves will get put in the shares/sell pile. 

As we’re looking at the size of the cloves, it’s also important to make sure that we are choosing bulbs with similarly sized cloves. If they are all different sizes, they have the potential to grow and mature at different rates. Since we are growing such a large amount, making sure everything is growing and maturing at the same rate is very important. 

The final inspection is the overall look of the bulb. We look for any signs of disease, internal mold, improper drying, and any other abnormalities. These all get pulled out and set aside for further inspection. planting bulbs with any of these “imperfections” could result in the cloves not germinating, or in them spreading disease to the soil and/or other garlic plants. We always prefer to be cautious and not chance it. 

Once we have all our garlic separated into the two piles, we then do the math to figure out how many cloves we will need for planting. We figure out the length of the fields, how many beds we plan to plant, how far apart each clove will get planted, and possible increase or decrease in crop yield. I say we as if all of us are doing this math, but in actuality, Janaki does all of this math for us so only one person has to hurt their brain crunching all the numbers. Thanks to all of your interest in our garlic preserving shares this year, and the fact that we are planning to plant on a longer field than last year, we increased our seed number by 15%. This means at the end of October, the crew will hand plant over 7,700 cloves of garlic. Anything not deemed seed quality, got set aside to be sent as preserving shares or will be saved for winter share deliveries. In past years we’ve also sold a fair amount to restaurants and other local outlets, but this year that’s not possible because we’re saving extra seed. 

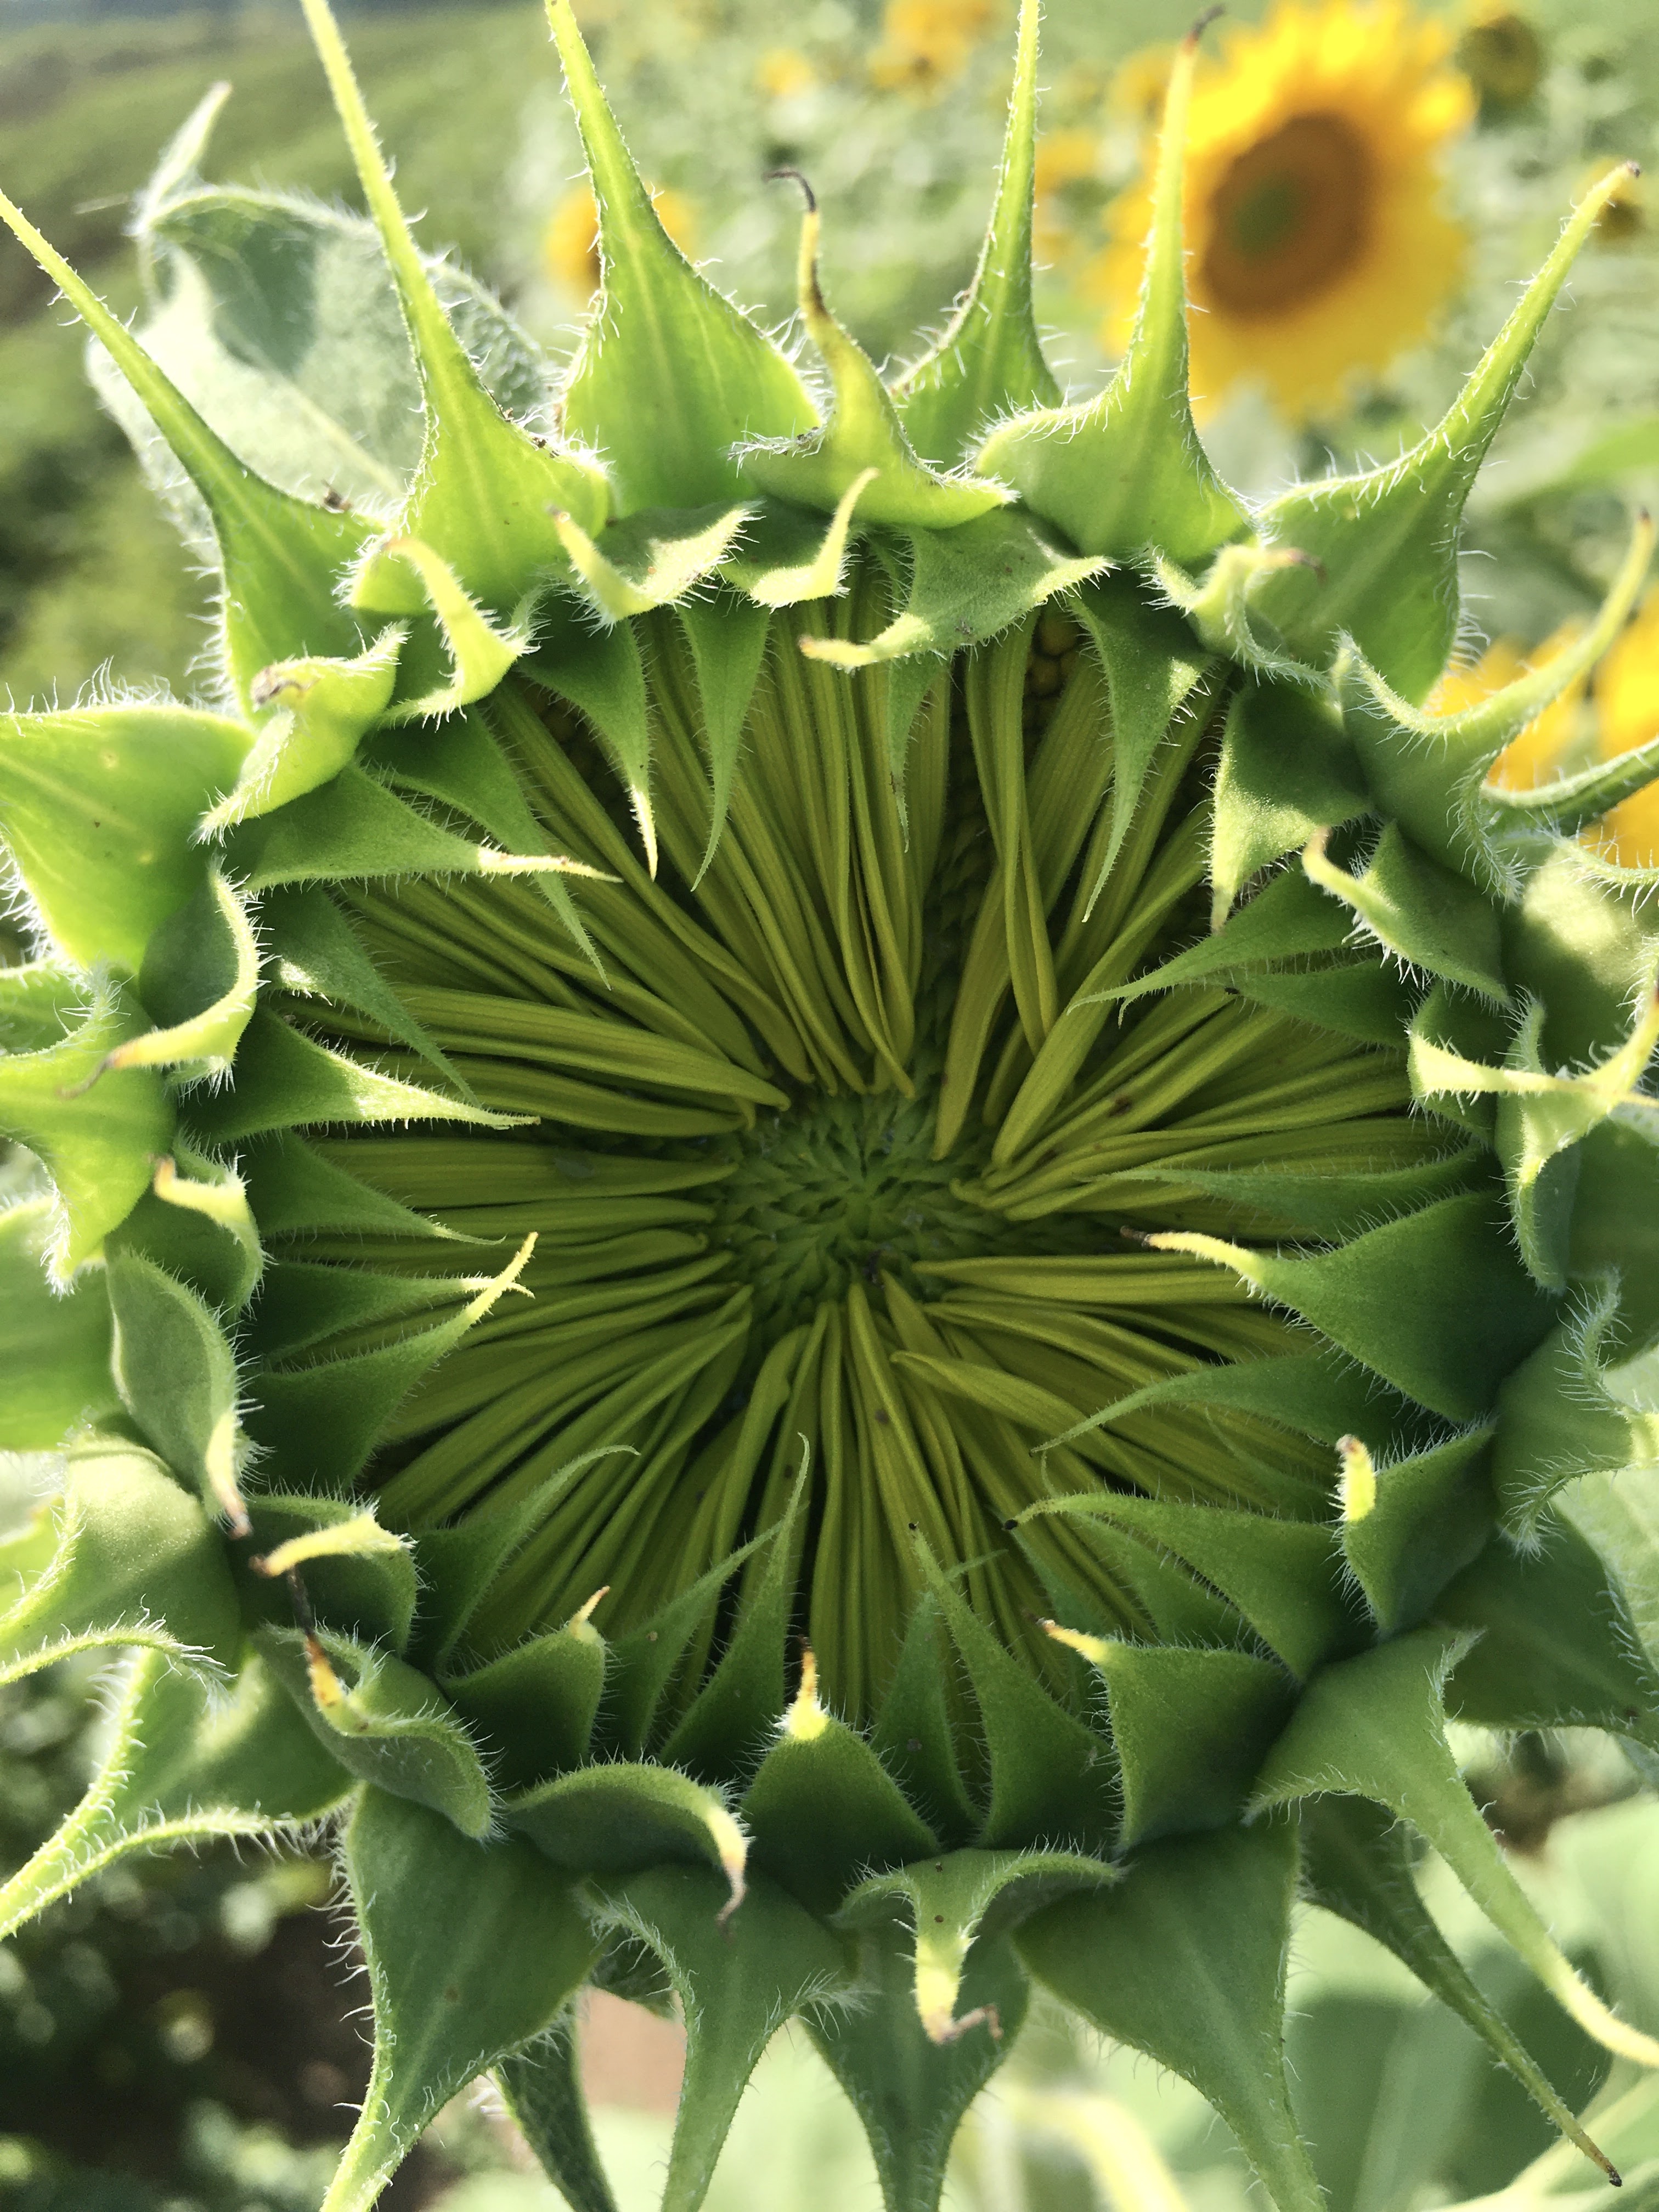
As the same time garlic sorting was happening, the rest of the crew was out getting all the winter squash from the fields. This meant clipping, throwing, stacking, loading, unloading, counting, and organizing thousands of squash. This is a long process because 1) it’s a lot of squash! 2) the Squash are split into different fields. One is on the main part of the farm, and the other is across the road. We had all the delicata, acorn, and some sunshine squash on the main part of the farm. The delicata made up the majority of this field since it’s the squash we will send with every winter share until we run out. This is also the popular seller to local businesses, and a favorite for most of the farm crew, so we plant quite a bit. Across the road was the rest of the sunshine, the kabocha, and all of the pumpkins. 

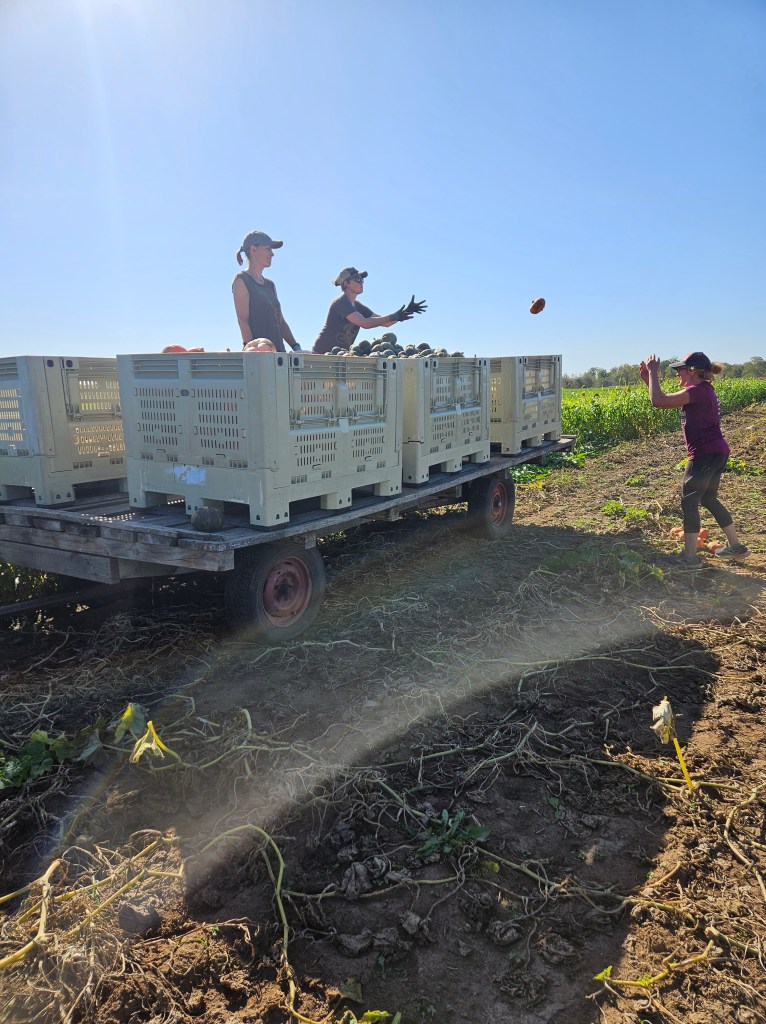
It was a lot of work, but we got all the Squash and pumpkins out of the field by the end of the work day on Friday. Now we begin the curing process for most of the squash so they will stay fresh through the winter months. As for the pumpkins, those get to go home with all of you this week! As you’re carving your pumpkins, feel free to share these fun facts:

-the first vegetable to be carved into a Jack o’lantern was actually a turnip

– Pumpkins need honey bees to pollinate their flowers. The more honey bee visits a flower gets, the more perfect the pumpkin will be

– pumpkins are grown on every continent except Antarctica

In your share this week:

Hot Peppers – Red Peppers – Northeaster Pole Beans – Basil – Carrots – Celery

Onion – Potatoes – Rutabaga – Spinach – Winter Squash – Tomatoes

Salade Nicoise 

3-5 medium potatoes

1 cup your favorite vinaigrette (mustard vinaigrette is delicious for this!)

3 cups fresh green beans (cut the Nor’easters on the diagonal)

1 head butter lettuce or spinach

3 ripe tomatoes, quartered

1 cap of canned tuna (optional)

3 hard boiled eggs, halved

1/2 cup Mediterranean style olives

Fresh herbs

Boil potatoes until just tender.  Drain and rinse in cold water and slip off the skins.  While still warm, cut into 1/8″ slices and gently toss with about 1/3 cup of the dressing.  Just before serving, toss greens with vinaigrette and arrange on a platter.  Arrange all the other ingredients in clusters around the platter, drizzling on the remaining vinaigrette.  Dress the salad with the fresh herbs and serve.

NOTE:  you can add any veggie to this salad– carrots, celery, and peppers add depth and color

Rutabaga Hash

  • 22 ounces rutabaga, peeled and diced (about 1 large rutabaga)
  • 6 ounces green cabbage, chopped (about half a head of green cabbage)
  • 1 leek, cut into strips (white parts only, green stems removed)
  • 3 tablespoons avocado oil (or any cooking oil or butter)
  • 1 teaspoon salt 
  • ½ teaspoon black pepper 
  • 1 teaspoon Italian seasoning 
  • 8 ounces bacon, cut into pieces
  • basil for garnish

  • Preheat your oven to 425°F. Add avocado oil, followed by rutabaga, cabbage, leeks, and bacon to the cast iron skillet.
  • Season with salt, pepper and Italian seasoning. Mix until well combined.
  • Roast in the oven for 25 minutes, then take the veggies out, and mix around before returning to oven for another 20-30 minutes, because you want all the vegetables to get a little crisp on them.
  • Finally, garnish with basil if you want, then eat!

For the farm crew, 

Jennifer 

Summer CSA Week 2

It’s the second week of Summer CSA season, and the crew is getting back into the harvesting rhythm. 

Last week was a big week for us on the farm. We needed to play catch up on some plantings. It was a daunting task, but our crew worked extra hard to get it all done, with time to spare. 

Thanks to dryer days, and all hands on deck, we had time to accomplish a few additional things last week as well. The most noteworthy was the caterpillar tunnel the crew put together on Friday.

This tunnel is part of an experiment we are trying on the farm with some of our outdoor tomatoes. The main variety of slicing tomatoes you will be receiving in your box this season is called Geronimo. These tomatoes are know for being prolific producers, resistant to some common diseases, and for producing uniform fruit. The downside that they do best in a greenhouse and often crack before they’re ready to be harvested when subjected to the elements. We have several permanent greenhouses that house our earliest planting of tomatoes, but the tomatoes are more flavorful when grown in field soil rather than soil that’s been permanently protected. Our hope with the caterpillar tunnel is that it will give us the best of both worlds. Since they can be moved easily each year, we get the delicious flavor from the outdoor soil, but we get the protection of a greenhouse. 

As any of our science-loving members know, a good experiment always has a control group. We have standard greenhouse tomatoes, and we have standard outdoor tomatoes serving as our control groups. We can use these control group tomatoes to compare against our experimental tomatoes, to see if the quality and flavor are the same or different. 

I am very excited for this experiment. Mostly because I love tomatoes, but also because it’s refreshing to know that after many decades, and 2 generations, Farmer Janaki is still learning. Often we look at farms of this size and think they must know it all, and do everything perfectly. Nope! Janaki and the farm crew are learning and trying new things every day just like all of you. I believe that every experiment is worth it because even if it doesn’t go as planned, you always learn something from the process, and I think learning is half the fun of trying something new. 

You’ll still have to wait a little while for any tomatoes, but this week in your share you can expect to see: 

Turnips – Broccoli – Lettuce – Rhubarb – Greens mixRadish


We’ve been giving you lots of lettuce lately, if you are stumped on fun ways to enjoy it, one of my favorite ways is to grill it before putting it on a sandwich or chopping it up to add to a salad. Grilling the lettuce will add a smoky flavor, and takes out some of the bitterness. This works best with Romaine lettuce because it’s a little firmer. With the Butter Crunch, or softer lettuce, I like to use the leaves as lettuce wraps. It’s a nice way to lighten any dish that you would usually use bread or a tortilla with. On a hot summer day, a lighter dinner is just what I crave after a long day on the farm.

Another fun way to use lettuce is as a dip for bread, veggies, or whatever you can think of. I like this Peruvian Aji-style sauce.

Ingredients

  • 1 head lettuce, stem-end trimmed and discarded
  • ½ bunch fresh cilantro, stems removed
  • 5 green onions
  • ¼ cup mayonnaise or olive oil
  • 2 jalapeno peppers, seeded
  • 1 clove garlic
  • salt and ground black pepper to taste

Directions

  1. Place lettuce, cilantro, green onions, mayonnaise (or oil), jalapeño peppers, garlic, salt, and black pepper into a blender; blend until smooth, about 2 minutes.

Honey-Glazed Radishes and Turnips

Ingredients

  • 2 Tbsp. margarine or butter
  • 1 large shallot, sliced
  • 1 1/2 lb. radishes, halved
  • 1 1/2 lb. small turnips, halved or quartered
  • 1/3 c. water
  • 1/4 c. lower-sodium chicken broth
  • 1 Tbsp. honey
  • Kosher salt and freshly ground pepper
  • 2 Tbsp. thinly sliced mint leaves
  • 1 Tbsp. finely chopped chives

Directions

  1. Step 1In 12-inch skillet, melt margarine or butter on medium-high. Add shallot and cook 2 minutes or until golden and tender, stirring occasionally. Add radishes and turnips; stir until well coated. Stir in water, broth, honey, 1/4 teaspoon salt, and 1/4 teaspoon freshly ground black pepper. Heat to boiling. Reduce heat to medium-low; cover and cook 15 minutes.
  2. Step 2Uncover and cook 7 to 10 minutes longer or until vegetables are glazed and most of liquid has evaporated, stirring occasionally. Remove from heat and stir in mint and chives. Transfer to serving platter and garnish with mint leaves

For the farm crew, 

Jennifer 

Summer CSA Week 16, 2023

Greetings, fellow Food Farm enthusiasts! As we bid adieu to the vibrant greens of summer and warmly embrace the gold & red arrival of autumn, we find ourselves hard at work in the changing landscape of the farm. With Saturday’s equinox marking the official start of fall, we ready ourselves for the snow to fly. Hopefully not too soon though, as there is a lot left to harvest! With only two more summer CSA shares remaining (after this week), the harvesting has shifted more and more to winter storage items. Last week, the big to-do was clipping and bringing all the squash varieties in from the field. This year we grew six different varieties: Delicata, Kabocha (green, winter sweet & sunshine), Acorn & pumpkins!

Apart from our usual CSA packing and retail orders, the squash took just about the entire week to complete. It is one of the more physically demanding tasks we do here and that is much in part to the sheer weight that needs to be moved to and fro – over 20,000 pounds of squash! Many hands do not make light work in this case, although it is always fun when the whole crew gets to work together on a singular task.


In your share this week:

Northeaster Beans – Broccoli – Carrots – Celery – Cucumbers – Lettuce – Onions

Red Peppers – Red Potatoes – Spinach – Winter Squash


New to the shares last week and featured again this week are the northeaster beans. Upon being greeted by them in the greenhouse, it is easy to imagine someone dreaming up the fairytale of Jack and the Beanstalk. The vigorous pole beans enthusiastically scale the framing of the greenhouse, almost as if they would keep climbing and climbing until out of sight if not for the layer of plastic containing them to safe picking heights.

This week’s share also includes what will likely be the last of the broccoli for the year. To celebrate I have included a recipe for broccoli cheddar soup that will help us feel extra cozy through all this dreary weather.


Ina Garten’s Butternut Squash Salad Recipe, from fool proof living

Yield: 4 servings

1 1/2 pounds winter squash, ¾ inch slices
1 tablespoon maple syrup
2 tablespoons + 1/4 cup olive oil, divided
2 teaspoons Kosher salt, divided
1 teaspoon coarsely ground black pepper, divided
3 tablespoons dried cranberries or raisins
3/4 cup apple juice or apple cider
2 tablespoons apple cider vinegar
2 tablespoons onion minced + dash of garlic powder
2 teaspoons Dijon Mustard
6-8 cups lettuce & spinach
1/2 cup walnut halves, toasted
1/4 cup shaved Parmesan cheese

  1. Prep the oven and squash seasoning: Preheat the oven to 400°F.
  2. Toss the squash: Place the squash on a baking sheet. Drizzle it with maple syrup and 2 tablespoons of olive oil. Sprinkle it with 1 teaspoon kosher salt, and ½ teaspoon black pepper. Toss to ensure that all of the squash is coated.
  3. Roast and turn: Place it in the oven and roast for 20-25 minutes until tender, turning once halfway through. In the last 5 minutes, add the cranberries.
  4. Make the vinaigrette: Place apple juice, cider vinegar, and minced onion + dash of garlic powder in a small saucepan and bring to a boil over medium-high heat. Cook for 6-8 minutes, or until reduced to 1/4 cup. Remove from heat.
  5. Finish the dressing: Off the heat, whisk in the Dijon mustard, 1/4 cup of olive oil, 1 teaspoon salt, and 1/2 teaspoon pepper. Whisk until emulsfied.
  6. Assemble the salad: Place the lettuce & spinach in a large salad bowl. Pour over the dressing and give it a big toss. Add the roasted butternut squash and cranberries.
  7. Finish and serve: Top it off with toasted walnuts and shaved Parmesan cheese. Taste and season with salt and pepper, if necessary. Enjoy!

Broccoli Cheddar Soup, from Gimme Delicious

Yield: 4 servings

4 tablespoons butter
1/2 medium onion, chopped
2-3 cloves garlic, minced
4 tablespoon AP flour
2 cups low sodium chicken or vegetable stock
1 teaspoon kosher salt
1/2 teaspoon black pepper
1/2 teaspoon paprika (or ground nutmeg), optional
3 cups broccoli florets (1 large head), cut into small pieces
1 large carrot, grated
2 cups half & half, heavy cream or milk
8 oz block grated cheddar cheese

  1. Melt butter in a large dutch oven or pot over medium-high heat. Add the onion and cook 3-4 minutes or until softened and light gold. Add the garlic and saute for another minute.
  2. Add flour and whisk for 1-2 minutes or until the flour begins to turn golden in color. Pour in the chicken stock, broccoli florets, carrots, and seasoning. Bring to a boil then reduce heat to medium-low and simmer for 15 minutes or until the broccoli and carrots are cooked through.
  3. Stir in half & half and cheddar cheese and simmer for another minute. Taste and adjust seasoning if needed.
  4. Serve with toasted crusty bread or in a bread bowl if desired.

For the farm crew,

Charlie

Summer CSA Week 17

Don’t blink, or you’ll miss it!

I am thinking of the autumn colors, naturally. They are so lovely and so fleeting. Unlike the turn of season at the end of winter, which seems to drag on and on through slush and grime, autumn is so fast, and so crisp. It is the snap of an apple, hands on a cold steering wheel, wind in your face, yard work hastily finished. It’s clean and clear and cold and beautifully strips away the things of summer and gets us ready for a long tuck-in time.

Don’t blink or you’ll miss it!

The CSA season usually feels like it goes so fast. One week left, and poof, there go 18 weeks. This year has felt a little slower in some ways (because this year has been 500 years long), but quick enough that I just realized I need to start using my frozen rhubarb and not wait for next April like I have some years. The time is now! Switch out those early summer/spring items to make way for frozen squash or soups or greens.

Like any new parent, I can say how much faster time goes with a baby. They say that the days are long and the years are short, but even the days seem so quick with him when I realize it’s already late afternoon and there’s still so much I “need” to do (like laundry, always) and there’s still so much he “should do” like hear big words or classical music or whatever. It’s nice to have him around to remind me of how much is worth exploring in just a few square feet of forest, or living room.

Having autumn, slow food, or little people to slow down for so we don’t over look the fleeting beauty and bounty of the world is such a blessing. I hope in the often craziness of life this week there are moments that spark your curiosity or rekindle your joy.

For the farm crew,

Karin

This carrot took the scenic route!

In your share this week:

Northeaster Green Beans – Beets – Broccoli – Red Cabbage – Carrots – Cucumber – Lettuce Mix – Onions – Parsley – Yellow Potatoes – Pumpkins – Sunshine Squash – Tomatoes

MISO ROASTED ROOT VEGGIE NOODLE BOWL
From The Leek and the Carrot

Serves 4-6
Takes 1 hour

1 1/2 pounds carrots, topped and peeled
1 1/2 pound beets, topped and peeled
3 tablespoons olive oil
1 tablespoon white miso paste
2 tablespoons maple syrup, divided
1 tablespoon soy sauce
1 tablespoon toasted sesame oil
4 cups roughly chopped mushrooms (I used a mixture of shittakes and cremini)
8-10 ounces rice noodles (I love the Lotus Foods Millet & Brown Rice Ramen)
4-5 ounces lettuce mix
2-3 avocados, sliced
1/2 cup Almond Miso Dressing (see below)
2 tablespoons white or black sesame seeds, optional
Kimchi, optional

  1. Preheat oven to 400 degrees.
  2. Cut beets in half and then cut each half into quarters. Cut carrots in half in the middle and then quarter each half lengthwise. Spread out on a parchment paper-lined baking sheet.
  3. In a small bowl, whisk together olive oil, white miso paste and 1 tablespoon maple syrup until smooth. Brush carrots and beets with this mixture then roast for 20 minutes. Remove from the oven, toss veggies and then roast 20 minutes longer.
  4. In a medium saucepan, mix together soy sauce, toasted sesame oil and remaining 1 tablespoon maple syrup. Add mushrooms and toss until they’re well-coated. Cook over medium low heat for 15-20 minutes. The mushrooms will first release a lot of liquid, then reduce down. Once fully cooked and soft, remove from the heat.
  5. Cook noodles according to package directions.
  6. Divide lettuce mix evenly into dinner bowls. Top with noodles and miso roasted veg. Spoon mushroom mixture (sauce and mushrooms) over noodles. Add 1/2 avocado to each bowl. Drizzle 2-3 tablespoons of Almond Miso dressing and then sprinkle with sesame seeds. Add kimchi to your preference.

Almond Miso Dressing
1/2 cup almonds
5 tablespoons olive oil
3 tablespoons water
2 tablespoons rice wine vinegar
1 tablespoon white miso
1 tablespoon maple syrup

  1. In a food processor, process almonds until finely chopped (so it looks roughly like minced garlic). Add remaining ingredients and process until smooth. You may have to scrape down edges a couple times.

Creamy Roasted Carrot Soup

2 pounds carrots
3 tablespoons extra-virgin olive oil, divided
¾ teaspoon fine sea salt, divided, to taste
1 medium yellow onion, chopped
2 cloves garlic, pressed or minced
½ teaspoon ground coriander
¼ teaspoon ground cumin
4 cups vegetable broth (or water)
2 cups water
1 to 2 tablespoons unsalted butter, to taste
1 ½ teaspoons lemon juice, to taste
Freshly ground black pepper, to taste

INSTRUCTIONS

  1. Preheat the oven to 400 degrees Fahrenheit. Line a large rimmed baking sheet with parchment paper for easy cleanup, if desired.
  2. To prepare your carrots, peel them and then cut them on the diagonal so each piece is about ½″ thick at the widest part (see photos).
  3. Place the carrots on the baking sheet. Add 2 tablespoons olive oil and ½ teaspoon of the salt. Toss until the carrots are lightly coated in oil and seasonings. Arrange them in a single layer.
  4. Roast the carrots until they’re caramelized on the edges and easily pierced through by a fork, 25 to 40 minutes, tossing halfway.
  5. Once the carrots are almost done roasting, in a Dutch oven or soup pot, warm the remaining 1 tablespoon olive oil over medium heat until shimmering. Add the onion and ¼ teaspoon salt. Cook, stirring occasionally, until the onion is softened and turning translucent, 5 to 7 minutes.
  6. Add the garlic, coriander and cumin. Cook until fragrant while stirring constantly, about 30 seconds to 1 minute. Pour in the vegetable broth and water, while scraping up any browned bits on the bottom with a wooden spoon or sturdy silicone spatula.
  7. Add the roasted carrots to the pot when they are out of the oven. Bring the mixture to a boil over high heat, then reduce the heat as necessary to maintain a gentle simmer. Cook for 15 minutes, to give the flavors time to meld.
  8. Once the soup is done cooking, remove the pot from the heat and let it cool for a few minutes. Then, carefully transfer the hot soup to a blender, working in batches if necessary.
  9. Add the butter, lemon juice, and several twists of black pepper. Blend until completely smooth. Add additional salt and pepper if necessary, to taste. Add another tablespoon of butter if you’d like more richness, or a little more lemon juice if it needs more zing. Blend again, and serve.
  10. This soup keeps well in the refrigerator, covered, for about four days, or for several months in the freezer.

Summer CSA Week 13

I love the little chill in the air that we have in the morning and evening now. On the farm, we’ve put in our time with some very hot and humid days! -and it’s good for a break.
Ever since I can remember I have loved this time of year, mostly. Knowing school was starting back up wasn’t usually the best part, but even the settling back into routine ended up being good for me as a kid. And as an adult, I think I always started college semesters off feeling strong and hopeful and organized (even if it ended in panicked 3am paper editing  by mid-December).

This year it feels like the shift back to school for kids and adults, and all those that teach or work with/around them is clouded in a troubling unknown. Whether you have or know children in school (however it looks), or you work with or around students in some capacity, we wish you the best as you start this next school year.
I know so many people have wondered and dreamed about what it would be like to send a child to Kindergarten one day, or to pack up for college… none of us would have dreamed this up to add to the list of worries along the way.

I think we’re all pretty sick of so many aspects of life feeling harder, or sadder, or more complicated and divisive than normal (show of hands for who thought there was more than enough of that to begin with…). I hope that there are bright spots in the midst of all of it for you as well, whether it’s been family time, or new habits or getting outside more.

As we move forward as a country with so many returning to school, I hope that in your home (regardless of connection to a school, after all, we’re all connected in this) the dinner table, or maybe breakfast table, can be a place were connection is found, worries heard and validated, and wholesome sustenance consumed to see you through incredibly challenging days.

For the farm crew,

Karin


In your share this week: Green Beans, Green Cabbage, Carrots, Cilantro, Cucumbers, Sweet Onions, Parsley, Red and Hot Peppers, Red Potatoes, Tomatoes, Zucchini


img_1241

Green Bean Salad

From The Leek and the Carrot

1 pound green beans, ends trimmed and cut in half if large (about 4-5 cups)
1 head washed lettuce, thinly sliced
1 large shallot or onion, halved and thinly sliced
1 cup crumbled feta cheese
2 cups chopped tomatoes
1 cup chopped toasted walnuts
1/2 teaspoon dried oregano
2 minced garlic cloves
1 tablespoon sherry or red wine vinegar
1/2 teaspoon dried oregano
1/2 teaspoon Kosher salt
1/4 teaspoon freshly ground black pepper
2 minced garlic cloves
3 tablespoons olive oil
Flaky sea salt, for serving

  1. Bring a large pot of water to a boil. Add green beans and cook for 4 minutes then rinse under cold water. Pat dry with a towel.
  2. Toss together lettuce, beans, shallots and tomatoes in a large bowl (or four small bowls). Top with feta and walnuts.
  3. Whisk sherry vinegar with dried oregano, salt, pepper, and garlic. Once combined, whisk in olive oil. Taste and adjust flavors as desired. Drizzle over salad. Sprinkle with a little extra flaky sea salt right before serving.

Parsley Pesto

2 cloves garlic

2 cups packed, stemmed Italian parsley

Course salt

1/4 cup walnuts

1/2 cup freshly grated Parmesan cheese, or to taste

2/3 cup olive oil

Salt and pepper

Directions

  1. In a food processor place the garlic, parsley, pinch salt, walnuts, and cheese. Process until they form a paste. Gradually blend in olive oil, taste adjust your seasoning if necessary. Great with pasta, poultry, vegetables and rice.