Summer CSA Week 18

Today marks the final Summer CSA delivery.  We are sad to see this part of our season come to a close, but what a wonderful season it has been. This year has been filled with seeding, planting, harvesting, learning, laughing, and gratitude. 

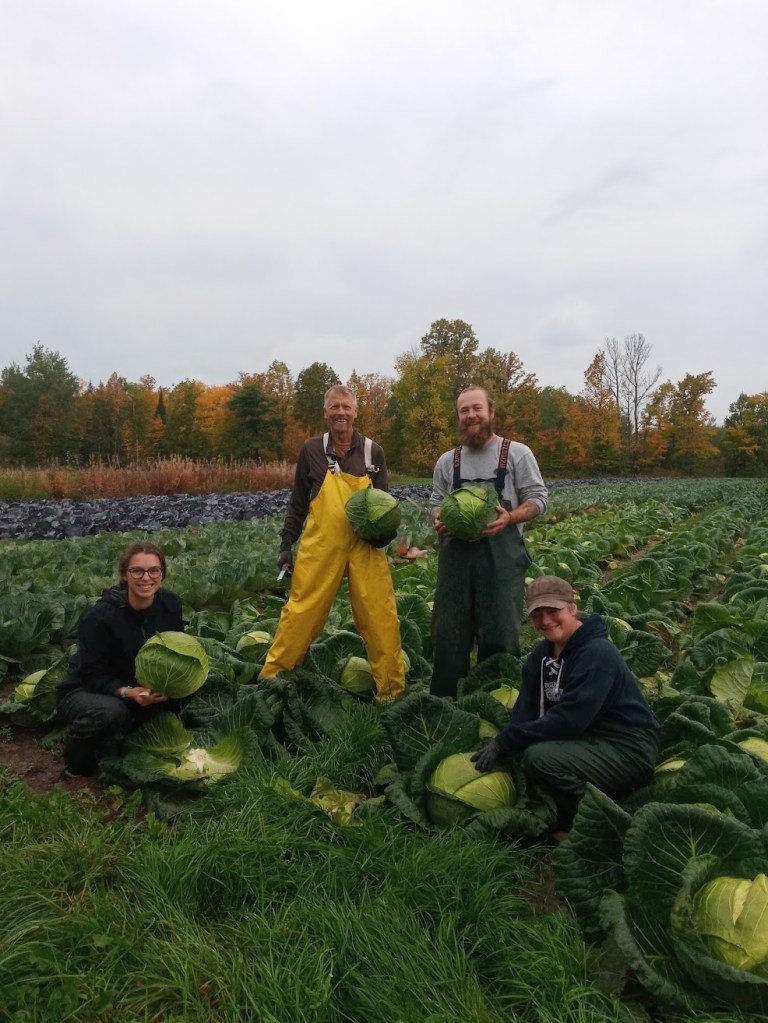
Our Farm crew shows up and works incredibly hard every day, but as the saying goes, many hands make light work. On Mondays and Thursdays we are grateful for our wonderful volunteers that help to lighten the load. This year we had quite the list of volunteers come out to help–if you braved the weather to come bag vegetables, harvest, weigh items, fill boxes, wash veggies, or cheer us on while we did those things, we appreciate you and your time more than words could express! Our CSA deliveries also wouldn’t be possible without our wonderful site hosts. Thank you to all of you who allowed us to use space at your home or business. This allows us to get local veggies onto the plates of more families by making pick up locations closer to their homes. 

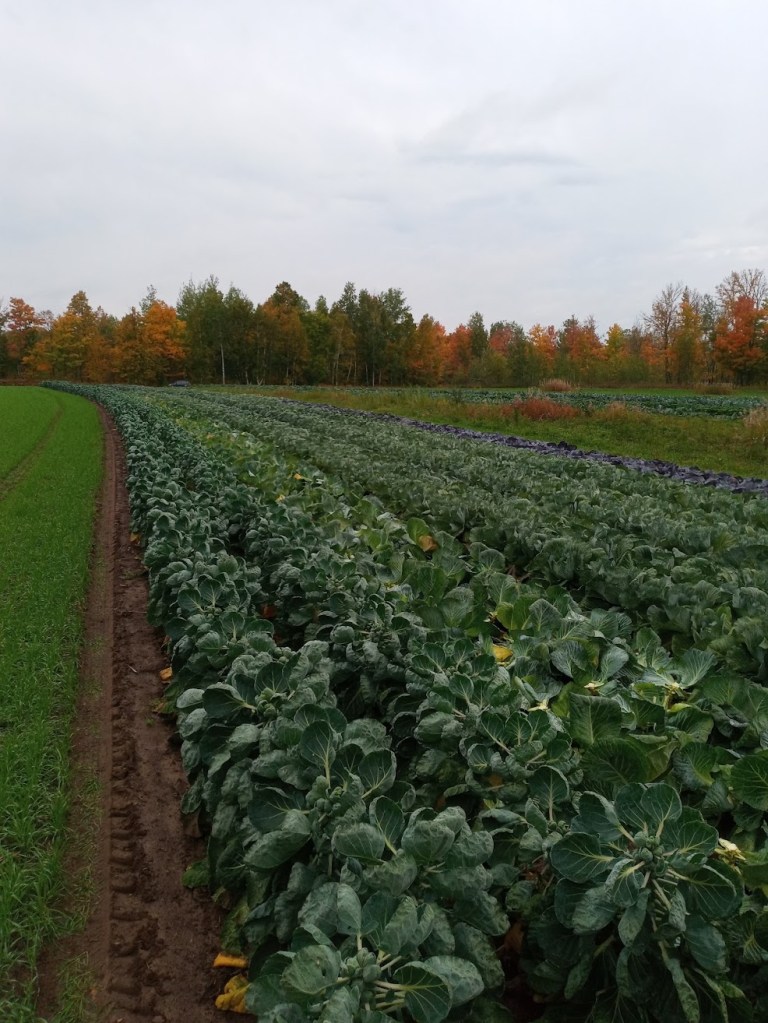
Today may end the CSA season, but it doesn’t end the farming season. These next 3 weeks are crunch time for us. We still have lots of veggies in the field that can handle a light frost ( and remember from last week, some of them even taste better), but too much frost can damage the crops. We also had a hard start to the growing season with how wet this spring was, so the longer we can let the plants grow, the better.

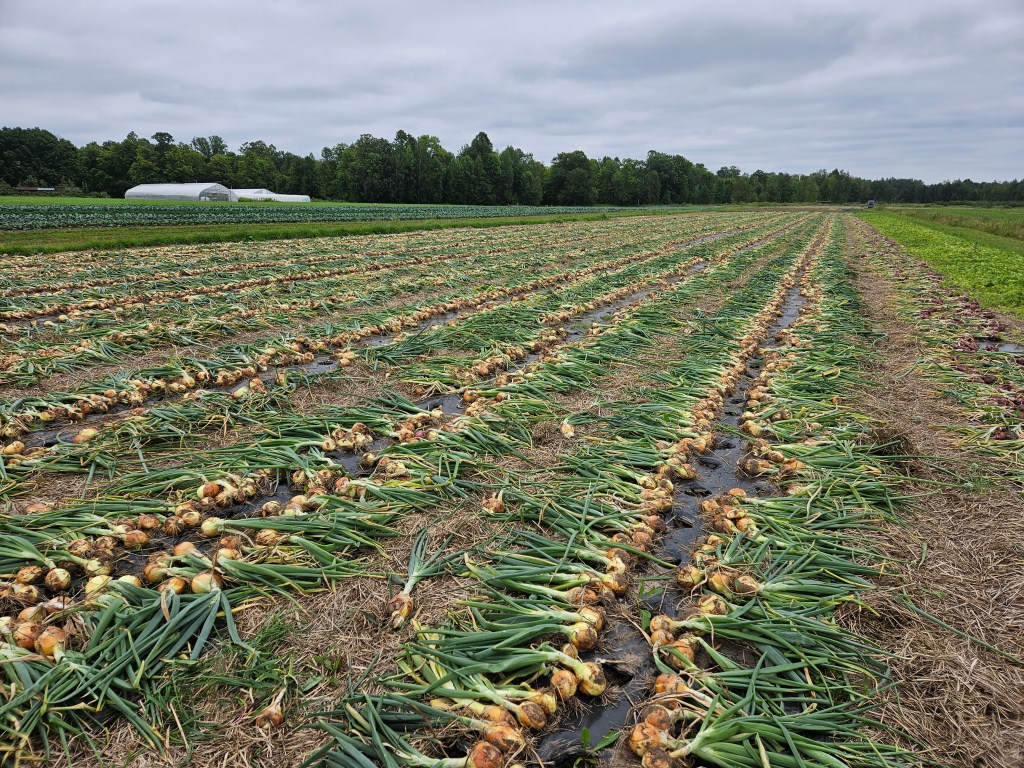
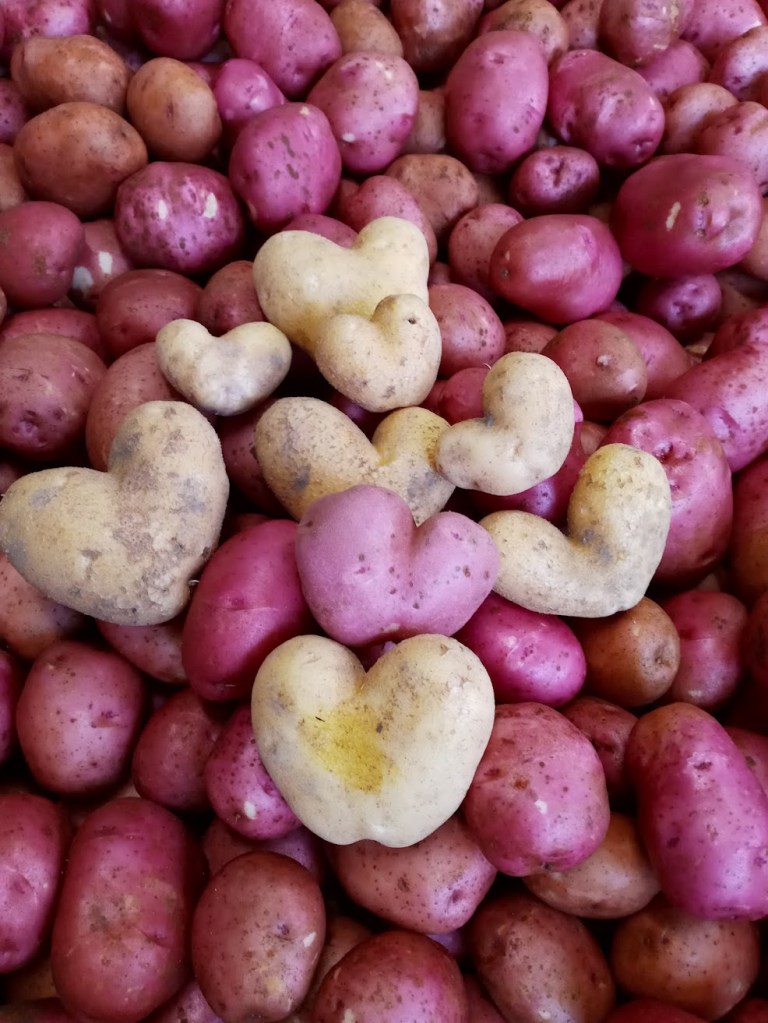
We will start the harvesting with things that shouldn’t get too cold such as potatoes and brussels sprouts. We will finish the harvest with our most cold hardy vegetables such as carrots and parsnips. By the end of October, all of the fields will be empty and everything that shows up on grocery store shelves, or in the Winter CSA boxes has been carefully stored over many months. Vegetables can last for a very long time if they are properly stored. We are grateful for our root cellar that will soon get packed from floor to ceiling with vegetables. This year was finally time to admit that we might be growing more vegetables than we have storage for. Janaki applied for, and got approved for a grant that will allow us to expand our cold storage area. By the end of the project, we will have increased our cold storage by over 50%, and give us a bit more space to wash and pack those veggies as well. If the mild weather continues, the plan is to get the footings in place before snow flies. The rest of the project will have to wait until Spring, so check back for more updates. 

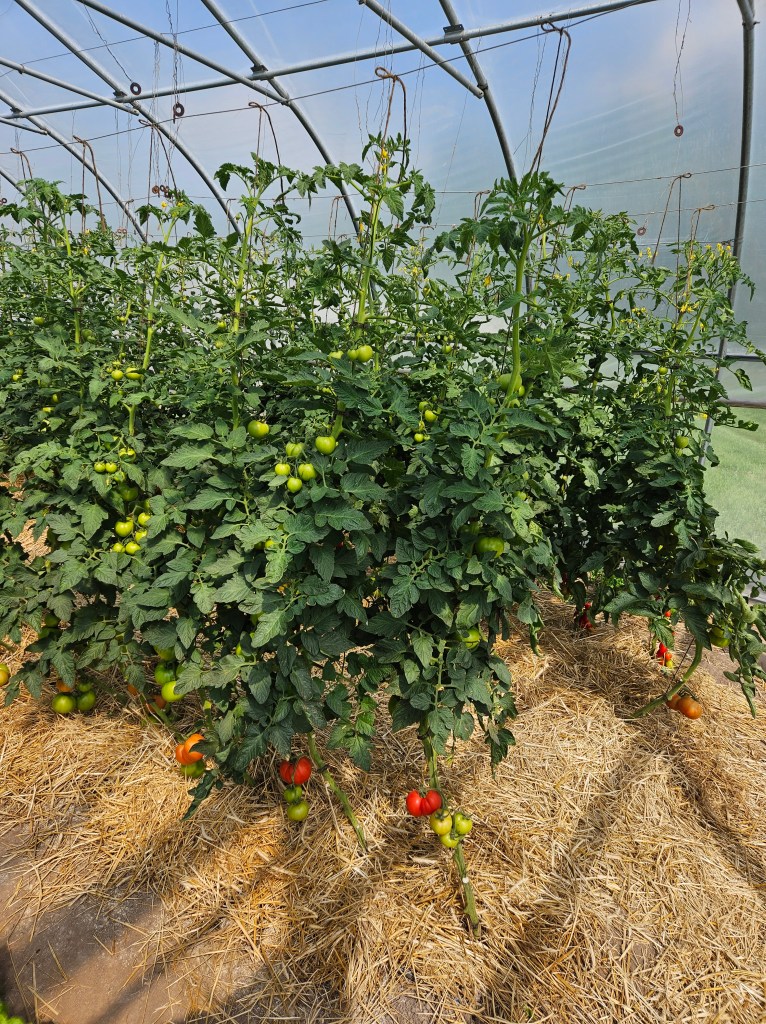
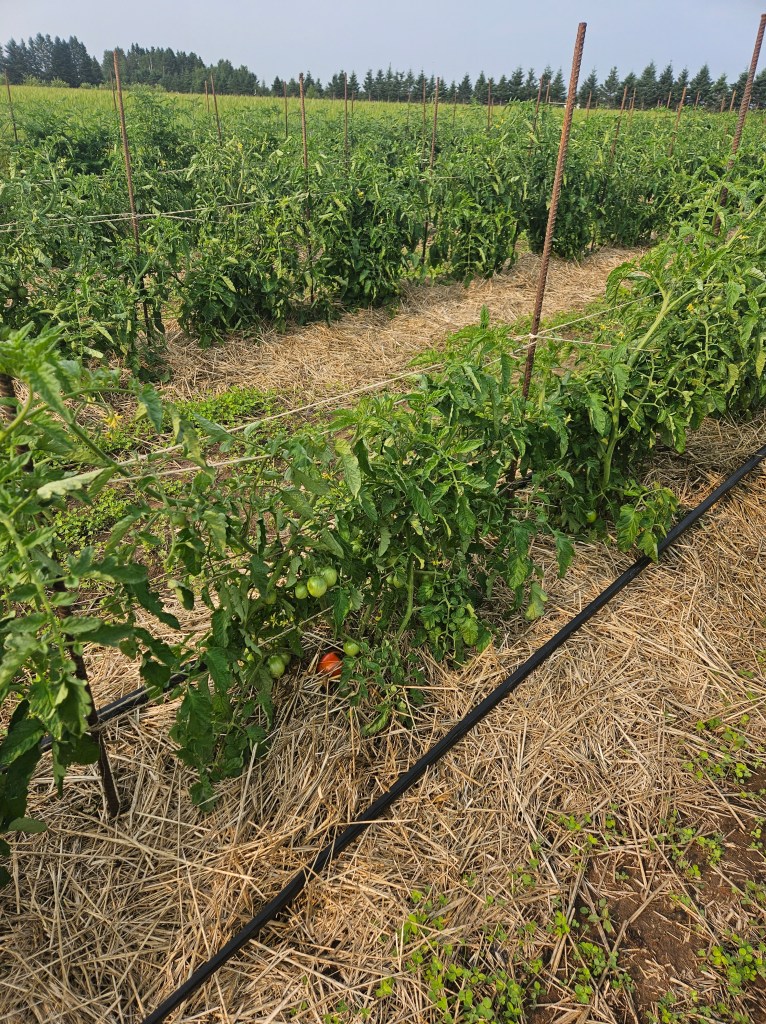
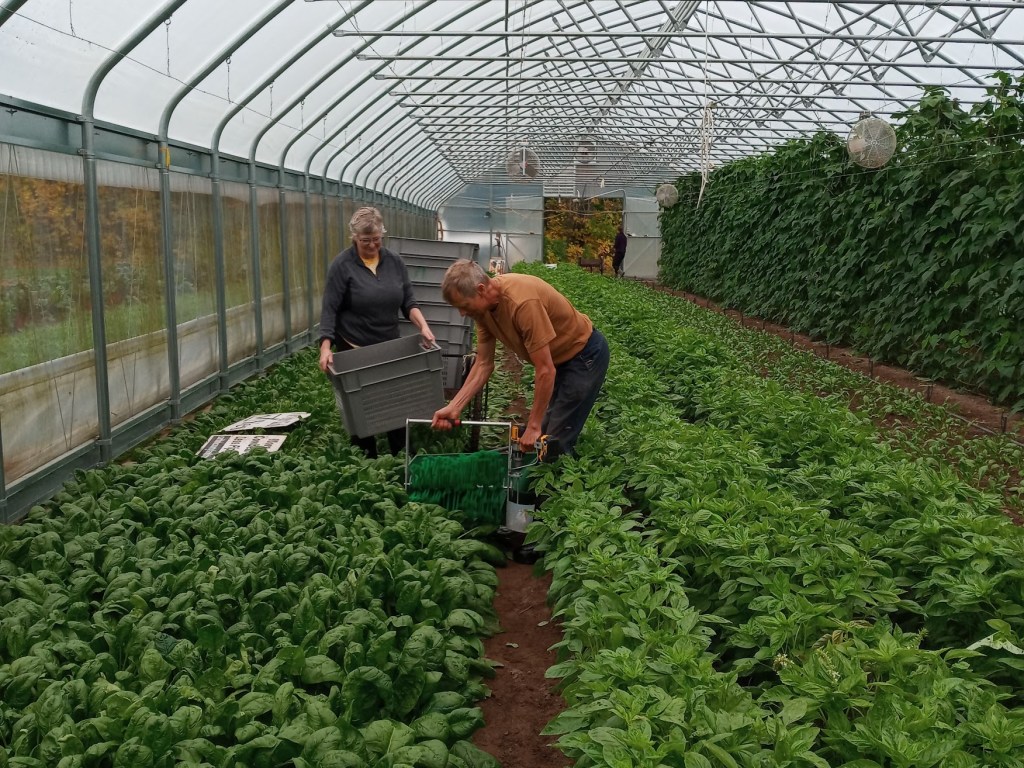
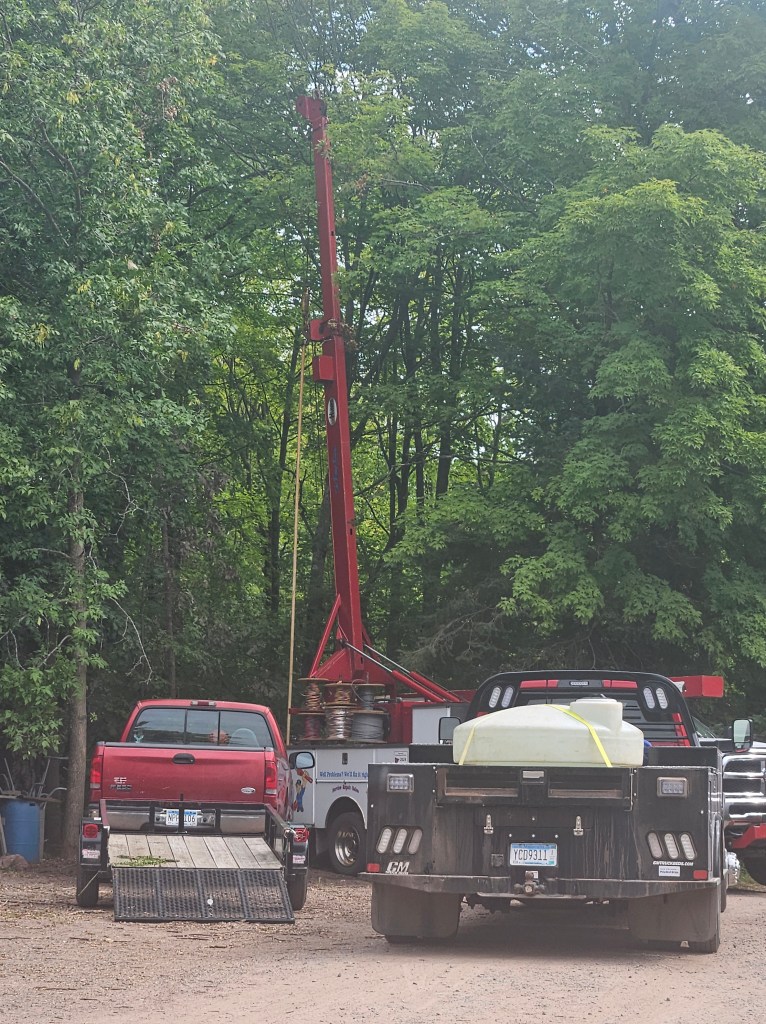
Another fun project we have in the works is adding another well. Up to this point, we’ve been using our household well to irrigate all of our greenhouses and tunnels, as well as a few of the smaller fields that don’t fit our larger irrigation equipment. This has required a careful dance to make sure everything gets watered and we still have pressure to wash and pack everything we need to. We hired a crew to come out a few weeks ago and dig the new well, and they’ll be coming back soon to install the pump and run new pipe to connect the buildings. We’re looking forward to having easy access and enough water pressure to provide water to the greenhouses, pack shed, and maybe even run a load of laundry at the same time.

Once November hits, we say goodbye to most of our summer crew. A couple people will stay on to fill retail orders, box Winter shares, wash vegetables (there isn’t always enough time to harvest and wash before the season ends) and do various tasks over the winter. The Summer crew will rejoin in late April or early May to start the cleaning process and take everything out of storage so we can do this all over again next year. 

Before we end this last newsletter, we need to say a big thank you to all of you. Thank you for supporting us. Thank you for believing in us. Thank you for being here with us through the twists and turns. Farming isn’t easy. We give up a lot of control to mother nature, and hope things work out how we want them to…and sometimes they do! Having your support makes the challenges a little easier. Thank you for putting your trust in us, for supporting your local farmers, and for allowing us to wake up each day and do what we love. We hope to see you all again next year!

In your share this week:

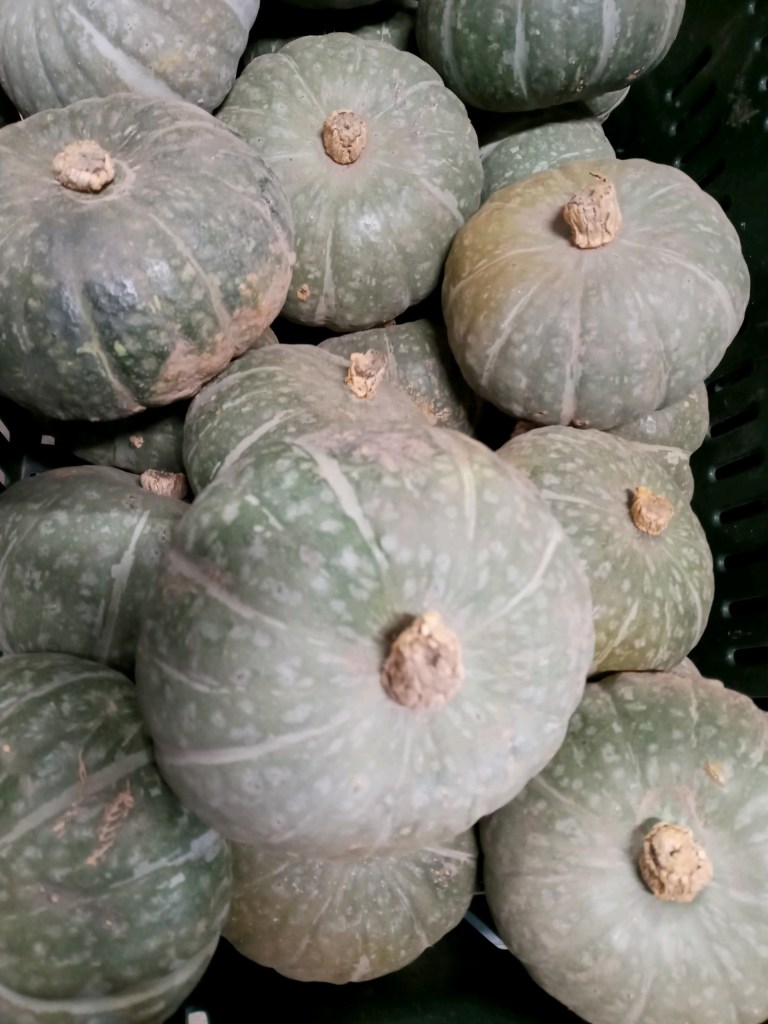
Arugula – Northeaster Beans – Beets – Brussels Sprouts – Cabbage – Carrots – Cucumbers – Lettuce – Onions – Peppers – Potatoes – Winter Squash – Tomatoes

Egyptian red lentil soup

One large onion, chopped

One carrot finely chopped

4 to 5 garlic cloves, finely chopped

3 tablespoons olive oil

1 1/2 cups split red lentils

8 1/2 cups chicken or vegetable stock

2 teaspoons ground cumin

1 1/2 teaspoons ground coriander

One good pinch, hot pepper flakes

Juice of one lemon

Salt and pepper to taste

Soften the onion, carrot and garlic in the olive oil in a large pan over low heat for about 10 minutes. Add the lentils in stock to the pan bring to boil and skim off the foam that forms on the top simmer for 20 to 40 minutes until the lentils have disintegrated.  Stir in the spices and lemon juice and season with salt and pepper. Simmer for five minutes more – if the soup needs thinning, add water and bring to boil again.

Winter Salad

For the Salad:

  • 6 oz. shredded kale
  • 1/2 small lemon, juiced
  • 1 Tbsp. extra-virgin olive oil
  • 6 oz. shredded vegetables, such as Brussels sprouts, cabbage, carrots
  • 2 medium apples, cored and diced
  • 1 1/2 c. candied pecans
  • 4 oz. crumbled goat cheese
  • 1 1/2 c. roasted winter squash
  • 1/2 c. pomegranate arils

For the Dressing:

  • 1/2 c. red wine vinegar
  • 4 tsp. whole grain or dijon mustard
  • 4 tsp. pure maple syrup
  • 1 tsp. kosher salt
  • 1/2 tsp. ground black pepper
  • 1/2 c. extra-virgin olive oil

Directions

  • Place the shredded kale in a very large salad bowl. Add the lemon juice and oil. Use your hands to massage the lemon juice and oil into the greens, about a minute or so. The greens should wilt slightly and take on a deep green color.
  • Add the other shredded vegetables to the bowl as well as the chopped apple.
  • Make the dressing by combining all of the dressing ingredients in a mason jar. Shake vigorously for 30 seconds and then pour it over the salad. Toss well to combine.
  • Add the pecans, goat cheese, squash, and pomegranate arils on top. Serve.

For the farm crew,

Jennifer

Summer CSA Week 13

Last week I promised you all an official update on how the caterpillar tunnel experiment went. I know a few of you were heartbroken to learn that this was not in fact a fun tunnel that we let caterpillars run through all day, but instead it was an effort to save our sad looking tomatoes.

At the beginning of the season, before we put the caterpillar tunnel up, the field tomatoes looked very stressed. They had gotten their leaves pelted by so much rain and the soil was soaked. As we hustled to get the tunnel up before yet another 2″ rain, we worried that it might be too late for them to recover. I am happy to report that the exact opposite happened. We put the caterpillar tunnel over the tomatoes, and in just a few weeks, they looked like entirely different plants. The leaves went from a dry, shriveled, brown color to a soft, vibrant green color. The plants started producing more leaf sets, growing taller, and eventually putting on flowers and fruit. We think the protection from the elements really saved them because the rest of the field tomatoes developed early blight.

The fruit has been slow to ripen, but that could be because we pinched off the first one or two sets of flowers in an effort to convince the plant to focus on getting healthy rather than producing fruit. We have been able to harvest a few tomatoes, but most of the fruit on the plants is still green.

The most important factor in determining if this tunnel was a success came down to the taste. First, for background, we haven’t been satisfied with our greenhouse tomatoes for a few years so this year we tested out new fertility sources. Previously, our nitrogen source was coming from fish fertilizer, and our potassium source was mineral based. Nitrogen is important for the chlorophyll formation in plants. Chlorophyll is what makes plants green which allows them to absorb sunlight through photosynthesis. Without adequate nitrogen, plants won’t be “green” enough to absorb sunlight thus stunting their growth, and possibly preventing them from fully maturing. Potassium is important for plants because it aids in regulating the rate of photosynthesis, and it is associated with the movement of water and nutrients throughout the plant. Without adequate potassium, plants have reduced yield, stunted growth, and poor flavor. 

Our previous fertilizer mixture worked okay (though applying fish fertilizer through drip tape is a smelly hassle), but we wanted to see if we could do better so we tried an amino acid based nitrogen. This is beneficial to the plants because amino acids are immediately available for the plants to absorb. The fish fertilizer delivered nitrogen in the form of proteins which can take a while to break down so they can be absorbed by the plants. We also switched to using a plant based potassium source instead of a mineral based source. Mineral based sources can often lead to a build up of minerals at the roots of the plant, preventing the plant from being able to absorb other nutrients. We also added calcium and micronutrients to round out the program.  

Farmer Janaki thought this new fertilizer combination made the greenhouse tomatoes taste significantly better than in previous years. This meant the caterpillar tunnel tomatoes had to be really great in order to earn the top spot for best tomatoes on the farm this year. We had lots of people taste testing, and we all came to the same conclusion: for our Geronimo (large slicing tomatoes) we compared one from our regular greenhouse and one from our caterpillar tunnel, and the greenhouse won. They both had a similar texture, but the greenhouse tomato had more flavor. We also compared an Early Cascade (small canning tomato) from outside and one from the caterpillar tunnel. In this test the caterpillar tunnel won. Again, they had similar textures, but the appearance and flavor of the caterpillar tunnel tomatoes was better. Oddly, the caterpillar tunnel fruit ripened later than both the high tunnel and field tomatoes. We only did a small sample so far, and this is just one year, so we are excited to keep this in mind and see if we feel the same again next year. In farming, there are so many variables that it’s hard to run true experiments that inform results year-to-year, but we keep trying to zero in on better ways of growing healthy food!

In your share this week:

Green Beans – Broccoli – Cucumbers – Zucchini – Tomatoes – Sweet Onions – Carrots

Hot Peppers – Sweet Peppers – Potatoes – Melons – Lavender

Marcella Hazan’s Tomato Sauce 

2 cups of tomatoes with juices

5 tablespoons of butter

One onion, peeled and cut in half

Salt

Combine tomatoes and juices, butter and the onion halves in a sauce pan with one or two pinches of salt.  

Place over medium heat and bring to a simmer. Cook uncovered for 45 minutes occasionally stirring and breaking up chunks of tomatoes with the back of the spoon.

Discard the onion before pouring sauce on cooked pasta.  This recipe creates enough sauce for 1 pound of pasta.

Marinated Vegetable Antipasto

Vegetable suggestions: Blanched and chilled broccoli, cauliflower, and carrots.  Onion, celery, sweet peppers, zucchini

Marinade:

1/2 cup water

1-1/2 cups wine vinegar

1 cup olive oil

2 tbsp sugar

2 tsp fresh oregano, minced

1/2 cup pitted olives

Salt and pepper to taste

Prepare appx 8 cups vegetables by cutting into bite-size pieces.  Bring marinade ingredients to a boil in a larger saucepan.  Add approximately 2 quarts of cut up vegetables – cover and cook 3 to 4 minutes, stirring once.   Uncover, cool and refrigerate for at least two hours. Drain before serving.

Summer CSA Week 12

Thanks to everyone who spent their Saturday with us. We loved getting to meet so many of you, and having the opportunity to show all of you this beautiful space we love!

Last week was BUSY here on the farm! We spent the beginning of the week getting the rest of the first two plantings of carrots out of the field and washed. We now have about 7,200 pounds of carrots in our root cellar waiting to be put in your weekly share boxes, and eventually hitting grocery store shelves and restaurant plates.

Now that the first two plantings of carrots are out of the field and washed, we were able to turn our attention to other crops. We spent time pulling all of the onions, and laying them on the plastic mulch to begun the drying process. We leave the onions here for a week or two to let the sun and wind naturally start drying them out. After the onions have begun to dry and form their protective outer shells, we cut off the stem, move them to drying racks in the greenhouse and place them in front of fans to fully dry for winter storage. We usually dry the garlic and have plenty of time to put all the garlic away and clean up the greenhouse before it’s time for the onions to dry. However, if you haven’t caught it yet, this year has been a wild and unpredictable year on the farm. We had to pull the onions a little early this year because some of them had started to bolt. Bolting is when a plant prematurely puts on flowers.

Onions are considered a biennial plant. This means in the first year, we plant the onions from seed and they will create the onion bulbs we all know and love. If we left them in the ground over winter, the next summer the onions would put on a flower and eventually that flower would create seeds (the same ones we plant to create this cycle). Every once in a while, the changes in the environment can confuse the onion into thinking it’s in its second year of growing and needs to put on a flower. Some of these environmental factors are too hot, too cold, too much water, or too little water. My research led me to learn that specifically when temps dip below 45°, the plant thinks it has entered “winter”, then when it warms back up, the plant thinks it has entered summer in year two leading it to put on flowers. Our best guess is that those few overnights in the end of June/early July that got down to low 40s, tricked the onions into believing they were in winter.

When the onions start to bolt, it’s important to get them out of the ground sooner rather than later because the big, thick stems, has the possibility to prevent the onions from properly drying. We rely on the dried onions in the winter for our Winter CSA boxes, and for selling to local restaurants. This means this year we will be drying garlic and onions at the same time. The greenhouse space isn’t big enough to handle both at once (hence why we usually dry one then the other), so we’ve had to get creative clearing out some other spaces to house the onions for a while.

We also picked the first tomatoes from our caterpillar tunnel. We’ve learned a lot from having this new tunnel, but the taste of the tomatoes is the most important part. Beautiful looking plants don’t mean as much to us if the fruit it produces doesn’t taste good. We are doing a taste test of the tomatoes this week. We plan to compare the regular greenhouse tomatoes to the caterpillar tunnel tomatoes to see if one tastes better than the other, or if they are equally delicious. We plan to give you all a thorough update next week on both the tunnel itself and the taste of the tomatoes, so stay tuned!

In your share this week:

Thyme – Onions – Kale – Basil – Green Beans – Carrots – Tomatoes

Zucchini – Cucumber – Cilantro – Green Peppers – Hot Peppers – New Potatoes

Lemon Thyme Shortbread cookies

Ingredients

  • 3/4 cup unsalted butter, softened 
  • 1 1/2 cups powdered sugar, divided
  • 2 Tbsp. lemon zest, plus more for garnish
  • 1 1/2 tsp. chopped fresh thyme, plus more for garnish
  • 1/2 tsp. vanilla bean paste or extract
  • 1 1/2 cups all-purpose flour, plus more for work surface and cutters
  • 1/2 tsp. kosher salt
  • 2 Tbsp. fresh lemon juice (from 1 lemon)

Directions

  1. Beat butter and 1/2 cup of the powdered sugar in a stand mixer fitted with a paddle attachment on medium speed until smooth, about 1 minute. Beat in lemon zest, thyme, and vanilla until combined, about 30 seconds.
  2. Whisk together flour and salt in a medium bowl until combined. With mixer on low speed, gradually add flour mixture to butter mixture, beating just until dough comes together, about 1 minute, stopping to scrape down sides of bowl as needed. Shape dough into a 6-inch disk, and wrap in plastic wrap. Let chill until firm, at least 1 hour or up to 24 hours.
  3. Preheat oven to 350°F. Line a large rimmed baking sheet with parchment paper. Roll out dough on a lightly floured work surface to 1/4-inch thickness. Cut desired shapes using lightly floured 2-inch cookie cutters. Chill, reroll, and cut dough scraps as needed. Transfer shapes to prepared baking sheet, spacing 1 inch apart. Freeze until firm, about 10 minutes.
  4. Bake in preheated oven until the edges are set, 14 to 16 minutes. Let cool on baking sheet for 5 minutes. Transfer cookies to a wire rack; let cool completely, about 30 minutes.
  5. In a medium bowl, whisk together lemon juice and remaining 1 cup powdered sugar until smooth. Dip, drizzle, or spread glaze over cooled cookies as desired. Sprinkle additional lemon zest and thyme over cookies. Let stand until glaze is set, about 30 minutes.

African Peanut Soup

  • 2 tbsp olive oil
  • 1 medium onion, chopped (1 cup)
  • 1 tbsp ginger, minced
  • 1 jalapeño, seeds and ribs removed, diced
  • 4 garlic cloves, minced (1 tbsp)
  • 1/2 tsp pepper
  • 2 tsp cumin
  • 2 tbsp tomato paste
  • 14 oz crushed tomatoes
  • 4 cups chicken stock
  • 1 sweet potato, peeled and diced
  • 1 (14 oz) can chickpeas, drained
  • 1 cup creamy natural peanut butter
  • 4 cups kale, roughly chopped
  • 1.5 lbs skinless, boneless chicken breast, cooked, shredded
  • 1 tsp salt (to taste)
  • peanuts, crushed
  • cilantro, chopped (optional) for garnish
  1. In a large pot heat olive oil over medium heat. Add onions and sauté until softened, about 3-4 minutes.
  2. Add in ginger, jalapeno and garlic and stir until fragrant about 1 min. Add the pepper, cumin and tomato paste and cook for another 2 minutes, stirring, until paste darkens.
  3. Add the crushed tomatoes, stock, sweet potatoes, chickpeas and peanut butter. Bring to a boil and stir until fully combined. Turn the heat down to low and simmer for 15 minutes, until sweet potatoes are tender.
  4. Add in kale and shredded chicken and cook for another 5 minutes. Taste the soup before adding salt. Depending on how salty your stock and/or peanut butter was, it may not need anymore salt. If you use low sodium stock and salt-free peanut butter, it will need a full teaspoon salt, maybe more. Adjust to your own liking.
  5. Serve warm topped with cilantro and crushed peanuts. Enjoy!

For the farm crew,

Jennifer

Summer CSA Week 10

First things first, let’s get the business out of the way. It ‘s now August which means Coffee on the Farm is right around the corner. Please join us on Saturday, August 24th from 10am-12pm to have some delicious coffee, tour the farm, meet other CSA members, and taste some veggies straight out of the ground. This event is open to CSA members and those who are farm-curious. Bring your friends, family, neighbors, or anyone else you know who likes coffee and veggies!

Now for the fun! Last week, Janaki enjoyed some much deserved time off with his family. Thankfully he has an awesome crew who keeps things going while he’s away. This annual vacation marks 2 important timelines on the farm: garlic harvest and what I like to call “crop transition”. This is the beautiful time of year where we say our official goodbye to early season crops, and welcome the vegetable abundance that comes with the warmer weather crops.

We finished up harvesting all of the garlic, and it is set to spend the next few weeks drying away with the first group of garlic that we harvested 2 weeks ago. This marks the first empty field of the year. an exciting, but bittersweet moment.

We spent the rest of the week giving our attention to the crop transition that comes with veggie abundance. This meant saying goodbye to spring and early season crops like snap peas, napa cabbage, and Pak Choi. This meant getting any of these vegetables that might be remaining, out of the field, and taking down the pea fencing so we can put it into storage until next year.
Now we can start paying more attention to our warm weather crops such as outdoor cucumbers, tomatoes, zucchini, and peppers. It’s their time to shine, and thanks to that heat wave we got, the plants are thriving!

Last week marked the first of our peppers going out. It was great to get some peppers off the plants so smaller fruit has more space to grow. You’ll get to enjoy green peppers for a while, and as the season progresses, so will the plants resulting in delicious red peppers. Did you know that a green pepper is a pepper at its first point of maturity? Most bell peppers start out green, and as they mature they turn red, yellow or orange depending on the variety. The Jalapenos are also loving the weather lately, and we are excited to introduce these to you all this week. Be warned: these beauties pack some serious heat, so a little goes a long way.

Our zucchini got kind of a rough start this year, but looks like they’re finally coming around. When we first planted them, they immediately got attacked by squash and cucumber beetles. This left the plants weak and struggling. We put a clay spray on the plants to make them less tasty for the bugs, and it worked. The plants started growing and began producing fruit and flowers. The zucchini flowers need to be pollinated in order for fruit to grow. Ours weren’t pollinated consistently for the first few weeks, which results in strange and deformed fruit. These still taste okay, but they are unsightly and only last a day or two before they get wiggly or start to rot so we don’t send them to shares. We suspect the issue is that we planted the zucchini right next to a bed of melons, and the bees seem more interested in melon flowers rather than the zucchini flowers. This means fewer zucchini in your share, but hopefully lots of delicious and juicy melons later this month.

The outdoor tomatoes are starting to ripen, and the greenhouse tomatoes continue to get bigger and ripen at rapid speed. If you get overwhelmed by tomatoes, a great option is to freeze them and use them later for sauces, stews, salsa, or many other things. If you freeze the tomatoes with the skin on, once they’ve defrosted, the skin slides right off. No boiling necessary. This is my favorite trick to be able to enjoy the delicious taste of fresh tomatoes in the middle of winter when we’re all thinking of warmer times.

Another new introduction to your share this week is potatoes. You already got to try two of our other pre-storage crops with the green garlic and the onions. Potatoes are the next addition to this collection. We call them “new potatoes”. This means that they are young and not fully developed. They have a thin skin, and delicious flavor. We love sharing these with you as soon as possible. However, this means they aren’t fully mature. You’ll likely notice that their skin is really thin and flaky. This is because they haven’t been in the ground long enough to create the sturdy outer skin we are all used to. On the plus side, this means no peeling needed. On the downside, this means they won’t store as long, and they should be kept in the fridge. The outer skin protects the potatoes and allows them to be stored longer. Without the shell, the potatoes will turn brown and spoil quite quickly if left out at room temp for too long.

In your share this week:

Beets – Beans – Cucumbers – New Potatoes Zucchini – Baby Carrots

Broccoli – Greens Mix – Cilantro – Cucumbers – Hot Peppers – Onions – Green PeppersOregano – Tomatoes

Broccoli Pasta Salad

Ingredients

  • 3 cups small broccoli florets
  • 1 cup cut green beans
  • 2 cups uncooked gluten free fusilli pasta
  • 1 small zucchini, thinly sliced and cut into half moons (or spiralized)
  • 1 cup sliced cherry tomatoes
  • 4 oil-packed sun-dried tomatoes, chopped
  • 8 fresh basil leaves, thinly sliced
  • ¼ cup pine nuts
  • sea salt and freshly ground black pepper
  • Lemon Tahini dressing: (can be made ahead)
  • 3 tablespoons extra-virgin olive oil
  • 3 tablespoons tahini
  • 3 tablespoons fresh lemon juice, more for squeezing at the end
  • 2 tablespoon white wine vinegar
  • 1 garlic clove, minced
  • ½ teaspoon Dijon mustard
  • ½ teaspoon maple syrup
  • ½ teaspoon sea salt
  • 3 tablespoons water
  • Instructions:
  • In a small bowl, whisk together the olive oil, tahini, lemon juice, vinegar, garlic, mustard, maple syrup, salt and water. Set aside.
  • Prepare a large pot of salted boiling water and a large bowl of ice water. Drop the broccoli and green beans into the boiling water and blanch for 1-2 minutes, until tender but still bright green. Remove and immediately immerse in the ice water to stop the cooking processing. Keep in the ice water long enough to cool completely, about 15 seconds. Then, drain and and place on a kitchen towel to dry.
  • In a large pot of salted boiling water, prepare the pasta according to the instructions on the package, cooking until al dente. Drain and rinse with cold water.
  • In a large bowl, combine the broccoli, green beans, zucchini, tomatoes, basil and the pasta. Drizzle with the dressing and toss. Season to taste with salt, pepper, and squeezes of lemon, if desired. Sprinkle with the pine nuts and chill for 15 minutes. Can be stored in the refrigerator for up to 2 days.

Veggie Fajitas

SIMPLE PICO

  • 2 tomatoes, diced small
  • 1 garlic clove, minced
  • 1 jalapeño, minced
  • 1 lime, juiced
  • 1 small onion, diced small
  • 1/2 tsp. kosher salt
  • 1/4 tsp. black pepper
  • 3 Tbsp. fresh cilantro, chopped

FAJITAS

  • 2 Tbsp. salted butter, divided
  • 2 Tbsp. olive oil, divided
  • 6 oz. white button mushrooms, halved
  • 1 small red onion, sliced
  • 1 Tbsp. steak seasoning
  • 1 bell pepper, sliced into strips
  • 1 poblano pepper, sliced into strips
  • 1 small yellow squash, halved lengthwise and cut into half-moons
  • 1 small zucchini, halved lengthwise and cut into half-moons
  • 2 limes, juiced
  • 1 Tbsp. honey

Directions

For the simple pico: Combine the tomato, garlic, jalapeño, lime juice, onion, salt, pepper, and cilantro in a medium bowl.

For the fajitas: Heat 1 tablespoon of the butter and 1 tablespoon of the oil in a large heavy-bottom skillet over medium-high heat. Add the mushrooms and onions in a single layer. Let cook undisturbed for 2 to 3 minutes, allowing the vegetables to char. Season with half of the steak seasoning, and stir. Remove to a plate and set aside.

Add the remaining 1 tablespoon butter and 1 tablespoon olive oil to the skillet and heat over medium-high heat. Add the bell pepper, poblano, yellow squash, and zucchini in a single layer. Let cook undisturbed for 2 to 3 minutes, allowing the vegetables to char. Season with the remaining steak seasoning, then stir in the reserved mushrooms and onions. Let cook until the vegetables are tender but still have some bite, about 2 minutes more. Stir in the lime juice and honey, and remove from the heat.

Serve the fajitas with the simple pico, tortillas, cheddar jack, crema, lime wedges, and hot sauce.

Summer CSA week 7

Last week felt like it was all about tomatoes here on the farm. This can only mean one thing, TOMATO SEASON IS HERE! Our crew member Catherine, and our lovely volunteer, Patricia, spend a lot of time in the Spring and Summer keeping the greenhouse tomatoes happy and healthy while the rest of the farm crew tends to all of the outdoor tomatoes. It’s helpful to dedicate specific people to each location since the tomatoes are grown in different ways, which requires different levels of attention. 

In the greenhouse, we vertically trellis the tomatoes using the single leader system. In non-farm speak, this essentially means that we force the tomato plants to grow on one single stem, and we use a small circular clip to connect the twine to the tomato stem as a means of supporting the plant as it continues to grow. Tomatoes love to grow what we call suckers, also known as side shoots. These are shoots that sprout out from where the main stem and a leaf meet. If we left the suckers on the plant, they would eventually grow into another top, so the plant forms a bush. This sounds really cool because most people think it means extra tomatoes, but it can actually mean the exact opposite. By leaving the suckers, the plant then has more stems and leaves to distribute nutrients to. As the plants grow taller, this can take a lot longer for the nutrients to get past all the suckers and make its way to the top of the plant. This means more of the plant’s attention is put into vegetation rather than fruit. Too much foliage also reduces air movement which is one of the many ways tomato plants can get and spread disease. In order to achieve this, once a week, Catherine and Patricia spend time pruning off any suckers and adding clips to the plant to keep it supported. This week, Catherine also spent time taking off any of  the leaves that were growing below the first set of fruit. This does two things, it speeds ripening by allowing more light to reach the fruit, and creates better air circulation. With the hot weather we’ve recently been getting, and the plants being grown in an already hot greenhouse, more air flow is very welcomed by the plants. 

The outside tomatoes are a whole different story. We don’t do any pruning on those tomatoes. Airflow is better outside, and space isn’t at as much of a premium, so we’re able to plant the tomatoes farther apart without causing disease or shading. Another major difference between the inside and outside tomatoes is how they are trellised. Since there isn’t a pole or wire above the tomatoes, and we aren’t pruning them to follow the single leader system, the easiest way to trellis these crazy tomatoes is to use what is called the “Florida Weave” or “Basket Weave” method. With this method, posts are evenly spaced between the tomato plants, and string or twine is tightly run, horizontally, on either side of the plant. This method works to compress the plant so it stays tight and tidy in its space. It helps to lift the leaves off the ground so they are less likely to pick up diseases from the soil splashing on the leaves when it rains.  Most home growers will use a tomato cage which creates a similar effect. However, with the cages, the plant will eventually grow over the top of the cage and run out of support, and cages are prone to falling over unless they’re large, which can make harvesting tedious. With the Florida Weave method, a new set of twine is added every week or so as the plant grows to continue giving it support. At this point in the season, the outdoor tomatoes have 3 sets of twine holding them up, and we plan to add another 3 or 4 as the season progresses. 

The cool thing about these trellising methods is that they aren’t exclusive to tomatoes. You can use either method for trellising many other vegetables. On the farm, we use the single leader, vertical trellising for all of our greenhouse cucumbers. In the coming weeks, we will use the Florida Weave method as a form of trellising all of our pepper plants. 

In your share this week:

Beets – Broccoli/Cauliflower – Cilantro – Chard – Carrots Green Onions – Snap Peas – Juliet tomatoes (just a couple today, but more to come!) 

Fried Rice

3 tablespoons oil

One medium onion, chopped

1 clove garlic, minced

One bell pepper, chopped

Two carrots, chopped

Broccoli or cauliflower chopped

Chard cut into ribbons

Snap peas, chopped

Green onions, chopped

1/4 cup Cilantro, minced

Tomatoes, optional

2 eggs, whisked

3 to 4 cups of cooked rice, cooled

1/4 c water

2tbsp soy sauce

1 tbsp sesame oil

Salt and pepper to taste

Put 1 tablespoon of oil into a wok or large skillet.   When it begins to shimmer add the chopped onion, garlic, carrots, pepper, broccoli, and cauliflower.  Sauté a few minutes and then add the peas, chard and tomatoes.  Fry  until partially cooked, but still crisply textured. 

Remove vegetables. Add remaining oil to pan or wok.  When the oil shimmers, add the rice.  Break up clumps and stirfry. Make a well in the center and pour the eggs into the well.  Scramble the eggs in the middle of the rice and when they’re cooked, add all the vegetables.

Add water, soy sauce, sesame oil and salt + pepper.   Stir.   Top with cilantro and green onions

For the farm crew,

Jennifer

Summer CSA week 6

Last week was a very busy week for the farm crew. Along with the heat, more of our time is dedicated to harvesting in addition to weeding and other tasks. Now that we have more consistent supply of a few items, we are beginning to ramp up deliveries to our wholesale customers. In addition to our CSA members, we also harvest and deliver vegetables to local grocery stores, co-ops, and restaurants. Once Fall hits and kids are back in school, we will also start selling some of our vegetables to local schools. We sell a more limited mix of crops to these outlets, and their deliveries start later than the CSA because of the risk and inconsistency of the wholesale market. Having these outlets does provide great balance for the farm, though, since it allows us to to stabilize the supply of staple crops to the CSA boxes and grow these crops at a scale and efficiency that wouldn’t be possible with CSA alone. It also is great outreach and helps expose the broader public to the exceptional quality and flavor of local produce.

We harvested an early planting of cabbage last week as well. This is always a fun activity on the farm. You know when your parents always told you “don’t play with your food”? Yeah, well, we don’t listen to that here on the farm. When it comes to cabbage harvest, we play with our food. The way it works is we usually have one group of people who are cutting the cabbages, and one group of people who are catching the cabbages. The first group cuts the cabbages, removes the outer leaves, then they throw the head to someone that’s catching, and they place it into the pallet box which gets put into the root cellar for storage. It’s a fun activity that always creates a lot of smiles, laughs, and teamwork, but takes a little while to bring back our muscle memory on how to toss around a 4 pound cabbage without dropping it or hurting anyone. These small cabbage harvests will give the crew plenty of practice time before the big fall cabbage harvest. You’re getting tender Napa Cabbage in your shares today, but regular cabbage will be on its way in a couple of weeks.

Last Friday, we did something I didn’t think we would ever have to do this season and that was lay irrigation pipe. The way the season started, it seemed as though mother nature was going to take care of the irrigation for us, but with the warm and dry days we got last week and more being predicted for this week, it was time to haul out the irrigation pipe. On the farm we always try to push the envelope on sustainability. One of the ways we do this is by utilizing a pond for watering our crops, rather than groundwater alone. Each year this pond fills up with snow melt and rain water, which we then pump about 1/4 mile to the vegetable fields. The pond also catches the water coming from our underground drainage tile system that has helped keep our fields from becoming too waterlogged this year.

If you grow anything at home, you probably use a garden hose and sprinkler. We have similar set up, only industrial sized. The way it works is we turn on a pump by the pond that sucks water from the pond. The water then travels through many 40 foot sections of pipe until it reaches the water reel that’s placed at the end of the field we wish to irrigate. The water reel is a big fancy looking hose reel. Think of those things you can put on the side of your house to wind up your garden hose but imagine that it’s 12 feet tall. It has an 1100′ long hose that attaches to a sprinkler system that’s on wheels. We pull the hose and sprinklers to the end of the field we wish to irrigate. Once you turn on the pump, the water starts flowing and irrigating the plants. The coolest thing, and probably the biggest difference from a home set up is that you don’t have to move the sprinkler down the field. The reel slowly retracts the hose which moves the sprinkler. From far away, it looks like it’s not moving at all, but up close, you can see that it is moving about two feet per minute. This is a wonderful set up because it allows us to irrigate a lot of acreage efficiently.

In your share this week:

Cucumbers – Napa Cabbage – Snap Peas – Carrots – Garlic Scapes

Green Onions – Lettuce – Cauliflower or Broccoli (we didn’t have enough for everyone but we’ll switch sites next week to make sure everyone gets some of each!)

Sesame Carrots (from Vegetable Heaven by Mollie Katzen)

2 tsp sesame oil

1.5-2 cups carrots, sliced into coins

2 tbsp unseasoned rice wine

2 tbsp honey

2 tsp tahini

One clove of garlic, minced (or several scapes minced)

1 teaspoon vegetable oil

 3 cups of chopped onion

6 cups chopped Napa cabbage

1 tsp salt

Freshly ground pepper

Heat a large skillet and add the sesame oil, carrots and half a teaspoon of salt. Stirfry over medium high heat for five minutes. Cover, and cook for another five minutes.

Turn heat down to medium and add the vinegar cover again and cook for an additional five minutes. Stirring the honey tahini, and the garlic and cook, uncovered, stirring frequently for 5 to 8 more minutes or until carrots are tender, and starting to brown.

At the same time in a second skillet and add the vegetable oil, onion and the remaining half a teaspoon of salt. Stirfry over medium heat add cabbage.  Keep the heat high and stirfry for another five minutes or until the cabbage wilts (it will be slightly crunchy).  Transfer to a serving platter. Spoon the carrots on top of the cabbage. Grind some black pepper over the top and serve hot warm or at room temperature.

Quinoa Salad (from NYT Cooking)

4 cups water 

2/3 of a cup dried fruit, such as apricots, raisins, craisins, or currents

1/4 cup chopped cilantro

1/4 cup chopped mint

1/4 cup chopped parsley

Salt to taste

One cup, red or rainbow quinoa

1/4 cup toasted pistachios 

1/4 cup toasted almonds

1/4 cup toasted walnuts

2 tsp lemon zest

Dressing:

1/4 cup lemon zest

Salt to taste

1 small garlic clove, pureed (optional) (or use minced scapes!)

1/4 tsp cinnamon

1 tsp balsamic vinegar

1/3 c olive oil

Bring water to boil and add quinoa and salt.  Bring back to a boil, then turn down and simmer for 20 minutes until the thread separates from the quinoa grains.  Drain and shake well in the strainer then return to the pot. Cover the pot with a dish towel and put the top back on it and let it sit for 10 to 15 minutes. Place quinoa in a large bowl.

Meanwhile, mix all the dressing ingredients together. Add remaining ingredients and toss place on a large platter or in a large serving bowl.

***  add chopped up pea pods, broccoli florets, raw carrots, or any of the delicious vegetables you receive this week in your share to increase the vegetable content of this dish

For the farm crew,

Jennifer

November Winter Share

The first winter CSA delivery is upon us! For our new members: Welcome to our veggie community and thank you for choosing local and organic 🙂 For our season to season members: Thank you for your continued support and welcome back! It’s been a little over a month since our last summer share box was delivered. We hope the short break in your Food Farm veggie action has not been too much to bear. Despite a pause in share deliveries, the farm crew has done anything but pause…

Next year’s garlic crop all tucked in for the winter

It has been a mad dash to get us set up for winter! A short three weeks ago we were digging the last of our storage potatoes from the ground (a remarkable feat in its own regard), thinking to ourselves “How in the heck are we gonna get 35 tons of carrots, four tons of beets, a couple tons of parsnips and a few thousand pounds of rutabagas from the rapidly cooling earth before it freezes in four days?”

Well… we did things a little differently this year, that’s how.

Usually, during peak harvest time, we operate with two crews. One crew harvesting and another washing. This year, because of the hard freeze during the last week of October, we used all hands on deck (along with some volunteers from Fond du Lac Community College) to harvest everything as quickly as we could. Just in the nick of time, we packed the veggies in pallet boxes and stacked them to the ceiling of our root cellar with dirt still clinging to their skin. We then began November by pulling it all back out, one pallet box at a time, to gently roll or tumble through our washing assembly. We took the occasional break to knock ice free from the spray nozzles and it was a chilly process indeed, but Dave brought lots of extra winter gear and by the end the veggies were shining in vibrant shades of orange, purple & parsnip. It also helped that Janaki kept us fed and happy with hot cocoa, cookies & pizza during our lunch breaks. The morale boost was at times needed.

All in all, it was a year filled with joys and challenges, but we got through it and at the end of the day, that’s farming!


In your share this month:

Beets – Brussels Sprouts – Carrots – Celery – Onions

Red & Yellow Potatoes Delicata & Sunshine Winter Squash – Tatsoi


Thriving under the shelter of Catherine’s hoop houses, the celery reached rather impressive height this fall. We had to cut the stalks in half just to fit them in the share box. Because of this, we went ahead and left the leaves on – something we don’t often do in the summer shares. The leaves present a concentrated flavor that is more robust than the stalks. They can be used in a variety of dishes, including soups, stocks, salads, and as a garnish. Or maybe you would like to include them in your stuffing this holiday season… Included below is a recipe for just that!


Classic Thanksgiving Stuffing (by Anna from crunchycreamysweet.com)

Yield: 6 servings

1 fresh French bread or 10 cups dried cubed bread
1 ½ sticks unsalted butter, divided
1 ½ cup chopped celery
½ cup celery leaves, chopped
1 large yellow onion, chopped
1 tablespoon chopped fresh sage
1 tablespoon fresh thyme
1 tablespoon chopped fresh rosemary
1 teaspoon salt
½ teaspoon black pepper
1 ½ cups broth chicken, turkey or vegetable

  1. If you are using fresh French bread: slice it into ½″ slices, then each slice into ½″ cubes. Place bread cubes on a baking sheet (most likely you will need at least two sheets), in a single layer, then let it air-dry in room temperature overnight OR preheat oven to 250° F and bake bread for 30 to 35 minutes, shaking the pans every 15 minutes. If using already dried bread, place 10 cups in a large bowl.
  2. Preheat oven to 350° F. Butter a 13″x9″ baking dish or 3 quart baking dish. Set aside.
  3. In a skillet, melt 1 stick (½ cup) of butter. Add chopped onion and celery. Saute until veggies are soft.
  4. Add veggies to bread.
  5. Add herbs, celery leaves, salt and pepper. Stir in.
  6. Add broth and stir in gently. Place in buttered dish.
  7. Melt remaining butter and pour over the stuffing.
  8. Cover the dish with aluminum foil.
  9. Bake in preheated oven for 30 to 35 minutes. You can uncover it for the last 5 minutes to toast up the top pieces, if desired.
  10. Let cool for 10 minutes, then serve.

P.S. – For the best texture, bake the stuffing the same day you will serve it. You can prep everything the day before: dry the bread and sauté veggies. The next day just assemble everything and bake!


Bacon & Brussels Sprout Salad (from pinchofyum.com)

Yield: 8-10 servings

Dressing:
1 lemon
1 orange
1-2 tablespoons of apple cider, maple syrup or honey (something for sweetness)
1 shallot, minced
1/2 cup olive oil
1/2 teaspoon salt & pepper to taste

Salad:
4 dozen brussels sprouts
1 cup almonds
6 slices of cooked bacon, crumbled or chopped
1 cup grated parmesan cheese

  1. Combine the lemon juice, orange juice, apple cider, and shallots in a small bowl. Add the olive oil in a steady stream and whisk for a minute or two, until it becomes creamy-looking.
  2. Slice the brussels sprouts with a mandoline, taking care of your fingers! and slicing them as thin as possible. This works best when you hold the stem, slice from the top, and stop with a little bit left at the bottom, discarding the remaining bottom stem part since it’s not very leafy anyway. The thinner the shreds, the better the salad! Toss the shreds and loosen them with your fingers to they separate and fluff a little bit.
  3. Pulse the almonds in a food processor until finely chopped.
  4. Toss the brussels sprouts, almonds, bacon, cheese, and dressing together. Serve immediately or within a few hours of tossing.

This next recipe is rather simple, but I haven’t been able to get enough of it in the last couple weeks. I like it as a side, just as the recipe below says, but I also think it would make a great salad if combined with a bed of greens & dressing of your choice.

Delicata, Beets & Goat Cheese w/ Papitas

Yield: 2 servings

1 delicata squash
2 beets
olive oil
salt & pepper to taste

2 tablespoons toasted & salted pepitas
1-2oz. goat cheese

  1. Preheat the Oven: Preheat your oven to 400°F (200°C).
  2. Prepare the Squash: Wash the delicata squash and cut it in half lengthwise. Scoop out the seeds using a spoon. Then, slice the squash into half-moon shapes about 1/2-inch thick. Leave the skin on as it becomes tender when roasted.
  3. Prepare the Beets: Wash the beets thoroughly to remove any dirt. If the beets are large, you can peel them, but small to medium-sized beets can be roasted with the skin on for easy preparation. Cut the beets into even-sized pieces to ensure uniform cooking. You can either slice them into rounds or cube them, depending on your preference.
  4. Arrange on a Baking Sheet: Lay the squash slices in a single layer on one baking sheet & the beet cubes on another. Make sure not to overcrowd to ensure even roasting. Drizzle with olive oil and season with a generous dusting of salt and pepper.
  5. Roast in the Oven: Roast the delicata squash in the preheated oven for approximately 20-25 minutes, or until the edges are golden brown and the squash is tender. You can flip the slices halfway through the cooking time for even browning. Roast the beets for about 30-40 minutes, or until they are fork-tender. Larger pieces may require more time.
  6. Serve and Enjoy: Once the vegetables have cooled, serve with goat cheese & pepitas!

For the farm crew,

Charlie

Summer CSA Week 18, 2023

This is the last Summer Share of the season! Please remember to bring any empty boxes back to your pickup site by next Thursday, the 19th. Winter Shares begin on November 13th.

As the chill of autumn sets in, we find ourselves on the threshold of our last CSA distribution of the summer season. As with most endings, it’s a bittersweet feeling.

The CSA boxes are one of our most straightforward connections to the community. The weekly bounties we harvest, wash, package, and deliver give us an opportunity to share the farm with all of you – something we miss during the longer stretches of the winter.

This time of year also signals the ramping up of end-of-season chores! There’s lots to do on the farm to get ready for winter. A big part of our business is caring for and delivering storage crops throughout the non-growing months. The short break between summer and winter CSA gives us just enough time to pull the cabbage, beets, potatoes, daikon radish, rutabaga, parsnips, & carrots from the fields before they freeze!

A big thanks is also in order to all of the volunteers who helped us in countless ways throughout the season. With so much work still to go, I don’t want to start reflecting too early, but I think it is safe to say “Thank you so so much Patricia, Sandy, Betsy, Rollie, Deb, Diane, Pat & any other names I may be forgetting while typing this.” Your work is really appreciated!


In your share this week:

Beets – Brussel Sprouts – Green Cabbage – Carrots – Garlic – Lacinato Kale – Onions

Parsley – Red Peppers – Potatoes – Rutabaga – Winter Squash


Now you’ve had some winter squash in your share this year, but this week will be your first time seeing green kabocha. You can think of it as a cross between a pumpkin and sweet potato. Its flesh has a sweet, earthy flavor that is denser and drier than the other varieties you’ve tasted this year. This makes it an excellent candidate for soups, stews & curries. It is quite dry right now, but should gain moisture as it cures over the next couple of weeks.

Also joining the lineup are tender brussel sprouts, small but mighty in flavor, and rutabagas!

Usually I am a strong endorser of leaving the skin on vegetables when eating. I do this in part for flavor, in part for valuable nutrients and fiber, but mostly out of laziness. Peeling can feel like an unnecessary chore… the worst kind. This year’s rutabaga is not quite as nice and smooth as usual, due in part to stress from our hot dry summer, and may benefit from being peeled.


Roasted Kabocha Squash Soup, from Simply Recipes

Yield: 4-6 Servings

1/2 large kabocha squash, seeded (about 3 to 4 pounds for the 1/2 squash)
2 1/2 tablespoons extra virgin olive oil, divided
Salt
2 cups chopped or sliced onions
2 ribs celery, sliced
3 cloves garlic (about 1 tablespoon)
1 (2-inch) piece fresh ginger, peeled and grated
1/2 teaspoon ground cumin
1 teaspoon ground coriander
4 cups chicken stock
2 teaspoons kosher salt
1/4 teaspoon black pepper
Lime juice, for serving
Chopped fresh cilantro, optional for serving

  1. Set the oven to 400°F.
  2. Roast The Squash: Use a heavy chef’s knife or cleaver (it helps if you have a rubber mallet as well) to cut the kabocha squash half into a few large pieces. (Kabocha squash is thick and meaty and can be a challenge to cut. So take care! Make sure the squash is stable on your cutting board before you start to cut it. You can create a flat side by shaving off a bit of the outside in one spot.)

    Scoop out the seeds (you can toast them like pumpkin seeds!) and stringy insides. Place the squash pieces on a foil, baking parchment, or Silpat-lined roasting pan. Rub 1 tablespoon olive oil over all sides, and sprinkle with salt.

    Put the squash pieces skin side up on the pan. Roast for 45 to 60 minutes until completely cooked through. The pieces should be soft and caramelized at the edges. Remove from oven and let sit.
  3. Sauté the onions, celery, garlic, ginger, and spices: While the squash is cooling, heat the remaining 1 1/2 tablespoons of olive oil on medium-high heat in a large (4- to 6-quart) thick-bottomed pan. Add the onions and celery. Lower the heat to medium and cook until softened, 8 to 10 minutes.

    Add the garlic, ginger, cumin, and coriander and cook 2 minutes more.
  4. Add the squash, stock, salt, and pepper, then simmer: Once the squash is cool enough to handle, remove and discard the skin. Place the roasted kabocha squash flesh into the pot with the onions and celery mixture. Add the stock, salt, and pepper. Increase the heat to high to bring the soup to a simmer. Then, lower the heat to low. Partially cover and cook 8 to 10 minutes.
  5. Purée the soup: Remove from the heat. Use an immersion blender (or work in batches with a standing blender, only filling the blender bowl 1/3 of the way each time) to purée the soup.

    Add more salt to taste. Sprinkle with lime juice and chopped cilantro to serve.

Maple-Roasted Brussel Sprouts and Rutabaga with Hazelnuts, from Martha Stewart

Yield: 5 Servings

½ cup pure maple syrup
2 ½ tablespoons extra-virgin olive oil
1 tablespoon fresh lemon juice
Coarse salt and freshly ground black pepper
2 pounds rutabaga, skin removed and cut into 1 ½-inch pieces (5 cups)
¾ pound brussels sprouts, trimmed and halved lengthwise
1 ounce toasted hazelnuts, chopped (⅓ cup)

  1. Preheat oven to 400 degrees. Whisk together maple syrup, oil, lemon juice, and 1/4 teaspoon salt in a large bowl. Add rutabaga, and toss.
  2. Transfer rutabaga and all but 2 tablespoons glaze to a rimmed baking sheet (leave remaining glaze in bowl). Spread rutabaga in a single layer, sprinkle with 1/4 teaspoon salt, and roast for 35 minutes, tossing halfway through and making sure rutabaga is spread toward the edges of pan.
  3. Raise oven temperature to 450 degrees. Toss brussels sprouts with remaining glaze in bowl and 1/4 teaspoon salt. Remove sheet from oven, and add sprouts. Toss, and spread in a single layer. Roast vegetables, tossing every 5 minutes, until glaze is very thick and vegetables are deep golden brown, about 20 minutes. Season with pepper and sprinkle with hazelnuts.

For the farm crew,

Charlie

Summer CSA Week 17, 2023

It appears that we’ll be experiencing a couple of unexpectedly warm days following the rainy spell that persisted throughout last week. It sure would have been nice to have received some of this rain a little more spaced out and during the summer months, but the plants seem to be hanging on nonetheless. After a bout of rain, it’s essential for plants to have an opportunity to dry off to prevent the onset of disease. Rain can leave leaves and stems damp, creating an ideal environment for fungal and bacterial pathogens to thrive. If moisture lingers on plant surfaces for extended periods, it can weaken the plant’s defenses, making it more vulnerable to infections. Adequate air circulation and sunlight play crucial roles in allowing plants to dry naturally, effectively reducing the risk of diseases.

We spent the day Friday harvesting storage cabbage, the biggest one we got was 14 1/2 pounds! Fortunately we sell about 6000 pounds per year for our friends over at Spirit Creek Farm for their delicious kraut and kim chi, and a few restaurants also use it for their cole slaw and kraut as well. So don’t worry, you won’t be getting any cabbages that big in your share!


In your share this week:

Broccoli – Carrots – Cilantro – Cukes – Leeks – Onions Red Peppers

Hot Peppers – Potatoes – Spinach – Delicata Squash – Tomatoes Pumpkins!


A note regarding this week’s spinach: There has been a recent congregation of cut worms gathering in the greenhouse that our current planting of spinach calls home. While it may be disheartening to discover cutworms feasting on our spinach plants, there’s no need to despair. Cutworms are a common garden pest known for their big appetite, but their presence doesn’t render your spinach inedible. With proper care, you can still enjoy the greens. Simply pick out any affected leaves that we may have missed in the commotion of harvesting, give the remaining spinach a good wash to remove any potential residue, and it will be perfectly safe to include in your meals.


Apple Spinach Salad, from Gimme Some Oven

Salad Ingredients:

5 ounces fresh spinach
2 small apples, cored and thinly sliced
half of a small onion, thinly sliced
1/2 cup chopped walnuts, toasted
1/3 cup dried cranberries
3 ounces crumbled goat cheese

Apple Cider Vinaigrette Ingredients:

1/4 cup extra virgin olive oil
2 tablespoons apple cider vinegar
2 teaspoons honey
1 teaspoon Dijon mustard
1 small garlic clove, peeled and minced
a generous pinch of salt and black pepper

  1. Make the vinaigrette. Combine all of the vinaigrette ingredients together in a bowl and whisk vigorously (or shake them together in a mason jar) to combine.
  2. Toss the salad. Add spinach, apples, onion, walnuts, dried cranberries, and half of the goat cheese to a large bowl.  Drizzle with the vinaigrette, and toss to combine.
  3. Serve. Serve immediately, garnished with the remaining goat cheese, and enjoy!

Delicata Squash Gratin, from Feasting At Home

Yield: 8 servings

2lb delicata squash
2 tablespoons olive oil or butter
2 medium leeks, thinly sliced
4 garlic cloves, rough chopped

15 sage leaves, chopped (8 more for crispy sage leaf garnish – optional)
1 cup heavy cream (or sub coconut milk)
1/2 teaspoon salt and peppers
1/2 teaspoon nutmeg
1/2 teaspoon onion powder, optional

1/4 cup water
3 ounces gruyere cheese (or sub parmesan)
1/2 cup walnuts, chopped

  1. Preheat oven to 375°
  2. Prep Delicata: Thinly slice the squash into 1/8 -inch thick rounds. When you get to the seeds, scoop them out and continue slicing.
  3. Cook the Leeks: Slice and rinse the leeks- the moisture here will help them soften. Heat oil or butter in a large skillet over medium heat. Sauté the leeks, for 8-10 minutes, covering part way through so they soften. Add the garlic, sage and a pinch of salt, cook 2-3 more minutes. Turn heat off.
  4. Whisk: the cream with the salt, pepper, nutmeg and onion powder in a medium bowl.
  5. Layer: Grease a large 9 x 13-inch baking dish or 11-12 inch round baking dish. A big shallow pan is best to ensure even cooking. Grease the pan, add 1/4 cup of water to the bottom of the pan. Layer with squash overlapping slightly. Sprinkle with half of the sautéed leeks. Drizzle with 1/3 cup cream mixture. Sprinkle with one ounce of Gruyere (about 3-4 tablespoons grated). Add the 2nd layer of squash- using up any misshapen pieces here. Scatter with the remaining leeks. Drizzle with 1/3 cup cream mixture and sprinkle with grated gruyere cheese. Add the final layer of squash, overlapping and pressing down so not domed in the middle. Drizzle the remaining cream mixture over top, lightly sprinkle with cheese and the walnuts. Give the pan a little shake, press down in the center again so gratin is level, not domed. Cover, using parchment first as a barrier, under the foil if the foil touches the top of the gratin.
  6. Bake 45 minutes covered. Uncover, confirming the delicata is tender using the tip of a knife, then bake at 400 F uncovered, 15 minutes until beautifully golden
  7. To make the crispy sage leaf garnish, heat 1-2 tablespoons oil or butter in a pan over medium heat, add 8 whole sage leaves, saute each side 30 seconds or so until crisp (try a tester first) and place on a paper towel to cool for a couple of minutes. Arrange over the gratin.

For the farm crew,

Charlie

Summer CSA Week 16, 2023

Greetings, fellow Food Farm enthusiasts! As we bid adieu to the vibrant greens of summer and warmly embrace the gold & red arrival of autumn, we find ourselves hard at work in the changing landscape of the farm. With Saturday’s equinox marking the official start of fall, we ready ourselves for the snow to fly. Hopefully not too soon though, as there is a lot left to harvest! With only two more summer CSA shares remaining (after this week), the harvesting has shifted more and more to winter storage items. Last week, the big to-do was clipping and bringing all the squash varieties in from the field. This year we grew six different varieties: Delicata, Kabocha (green, winter sweet & sunshine), Acorn & pumpkins!

Apart from our usual CSA packing and retail orders, the squash took just about the entire week to complete. It is one of the more physically demanding tasks we do here and that is much in part to the sheer weight that needs to be moved to and fro – over 20,000 pounds of squash! Many hands do not make light work in this case, although it is always fun when the whole crew gets to work together on a singular task.


In your share this week:

Northeaster Beans – Broccoli – Carrots – Celery – Cucumbers – Lettuce – Onions

Red Peppers – Red Potatoes – Spinach – Winter Squash


New to the shares last week and featured again this week are the northeaster beans. Upon being greeted by them in the greenhouse, it is easy to imagine someone dreaming up the fairytale of Jack and the Beanstalk. The vigorous pole beans enthusiastically scale the framing of the greenhouse, almost as if they would keep climbing and climbing until out of sight if not for the layer of plastic containing them to safe picking heights.

This week’s share also includes what will likely be the last of the broccoli for the year. To celebrate I have included a recipe for broccoli cheddar soup that will help us feel extra cozy through all this dreary weather.


Ina Garten’s Butternut Squash Salad Recipe, from fool proof living

Yield: 4 servings

1 1/2 pounds winter squash, ¾ inch slices
1 tablespoon maple syrup
2 tablespoons + 1/4 cup olive oil, divided
2 teaspoons Kosher salt, divided
1 teaspoon coarsely ground black pepper, divided
3 tablespoons dried cranberries or raisins
3/4 cup apple juice or apple cider
2 tablespoons apple cider vinegar
2 tablespoons onion minced + dash of garlic powder
2 teaspoons Dijon Mustard
6-8 cups lettuce & spinach
1/2 cup walnut halves, toasted
1/4 cup shaved Parmesan cheese

  1. Prep the oven and squash seasoning: Preheat the oven to 400°F.
  2. Toss the squash: Place the squash on a baking sheet. Drizzle it with maple syrup and 2 tablespoons of olive oil. Sprinkle it with 1 teaspoon kosher salt, and ½ teaspoon black pepper. Toss to ensure that all of the squash is coated.
  3. Roast and turn: Place it in the oven and roast for 20-25 minutes until tender, turning once halfway through. In the last 5 minutes, add the cranberries.
  4. Make the vinaigrette: Place apple juice, cider vinegar, and minced onion + dash of garlic powder in a small saucepan and bring to a boil over medium-high heat. Cook for 6-8 minutes, or until reduced to 1/4 cup. Remove from heat.
  5. Finish the dressing: Off the heat, whisk in the Dijon mustard, 1/4 cup of olive oil, 1 teaspoon salt, and 1/2 teaspoon pepper. Whisk until emulsfied.
  6. Assemble the salad: Place the lettuce & spinach in a large salad bowl. Pour over the dressing and give it a big toss. Add the roasted butternut squash and cranberries.
  7. Finish and serve: Top it off with toasted walnuts and shaved Parmesan cheese. Taste and season with salt and pepper, if necessary. Enjoy!

Broccoli Cheddar Soup, from Gimme Delicious

Yield: 4 servings

4 tablespoons butter
1/2 medium onion, chopped
2-3 cloves garlic, minced
4 tablespoon AP flour
2 cups low sodium chicken or vegetable stock
1 teaspoon kosher salt
1/2 teaspoon black pepper
1/2 teaspoon paprika (or ground nutmeg), optional
3 cups broccoli florets (1 large head), cut into small pieces
1 large carrot, grated
2 cups half & half, heavy cream or milk
8 oz block grated cheddar cheese

  1. Melt butter in a large dutch oven or pot over medium-high heat. Add the onion and cook 3-4 minutes or until softened and light gold. Add the garlic and saute for another minute.
  2. Add flour and whisk for 1-2 minutes or until the flour begins to turn golden in color. Pour in the chicken stock, broccoli florets, carrots, and seasoning. Bring to a boil then reduce heat to medium-low and simmer for 15 minutes or until the broccoli and carrots are cooked through.
  3. Stir in half & half and cheddar cheese and simmer for another minute. Taste and adjust seasoning if needed.
  4. Serve with toasted crusty bread or in a bread bowl if desired.

For the farm crew,

Charlie