April Winter Share

April is here…Spring is sort of here…and just like that, the Winter CSA season is officially over!

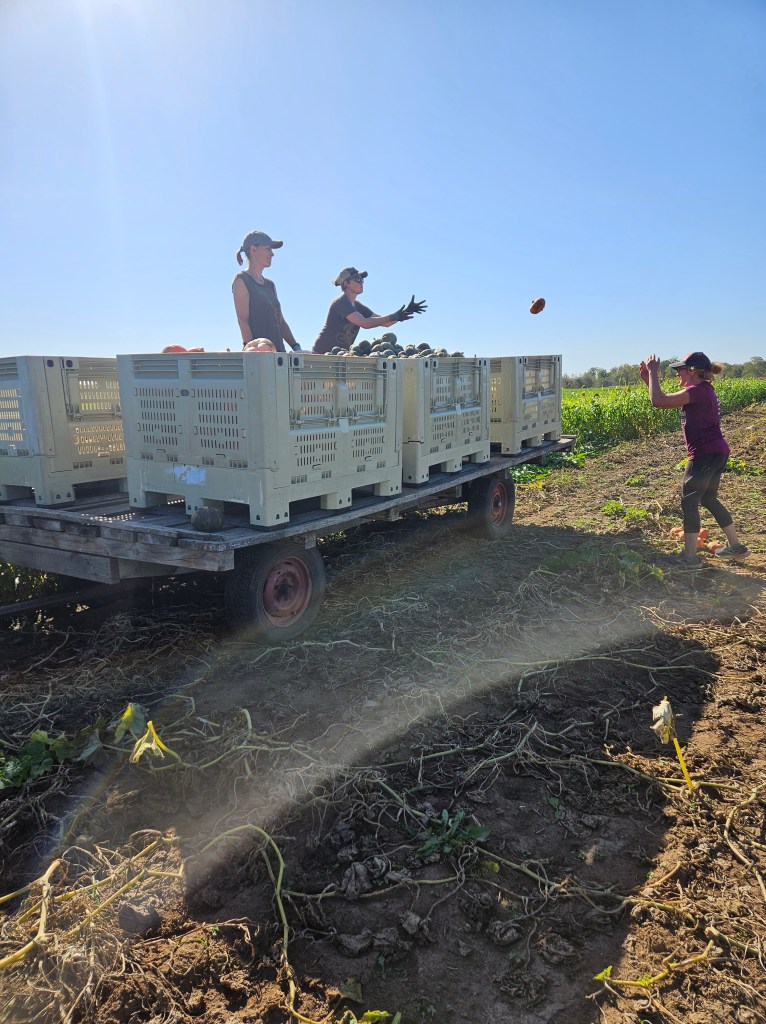
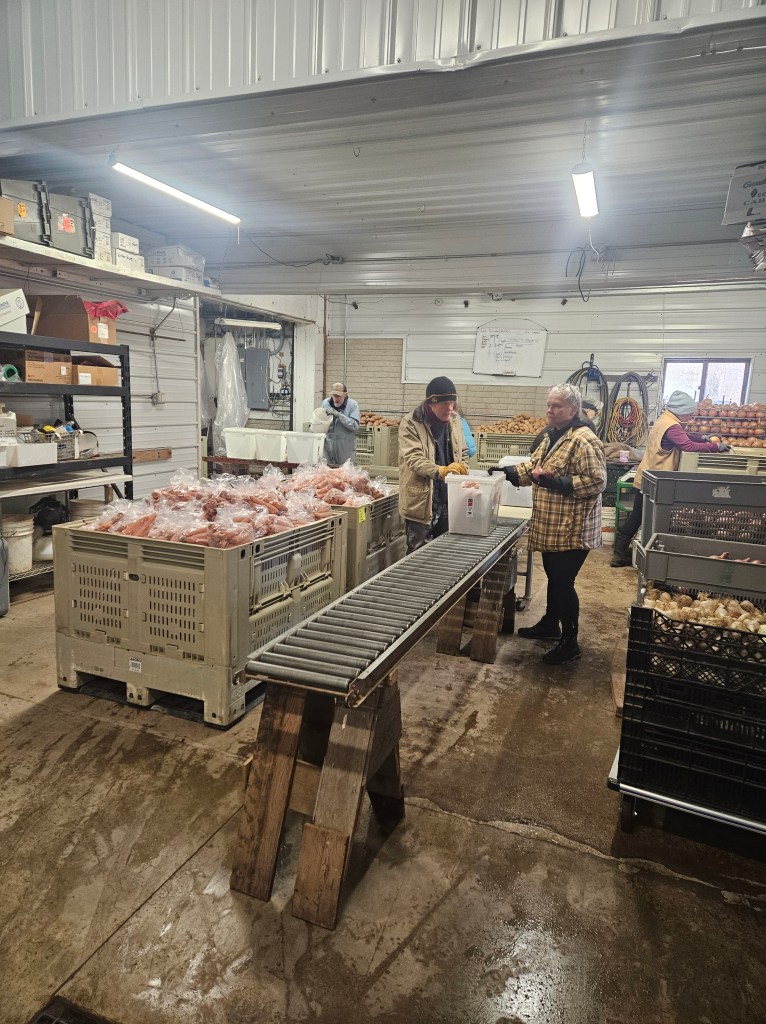
April is crunch time here on the farm. Janaki is finalizing our planting map so we know which crops are going in which fields. We are keeping a close eye on the extended forecast to know when it’s safe for us to begin planting out our cool weather crops such as broccoli, cauliflower, and cabbage. As of right now, it’s looking like these might get planted next week! Dave and Catherine have been busy in the greenhouse getting lots of seeds started. We have onions, brassicas, and greenhouse tomatoes all started and growing like crazy. Teri and I have been busy in the pack shed sending out the last remaining vegetables to our retail partners. We’ve also been organizing things, and putting away our winter items in preparation for Spring deep cleaning to start in the next few weeks.

Greens mix ready to harvest

Conversations are happening about when the new chicks will be arriving, we’re testing out new methods to hopefully streamline some of our pack shed processes, and we’re discussing and planning for farm improvements. Things never stop around here!

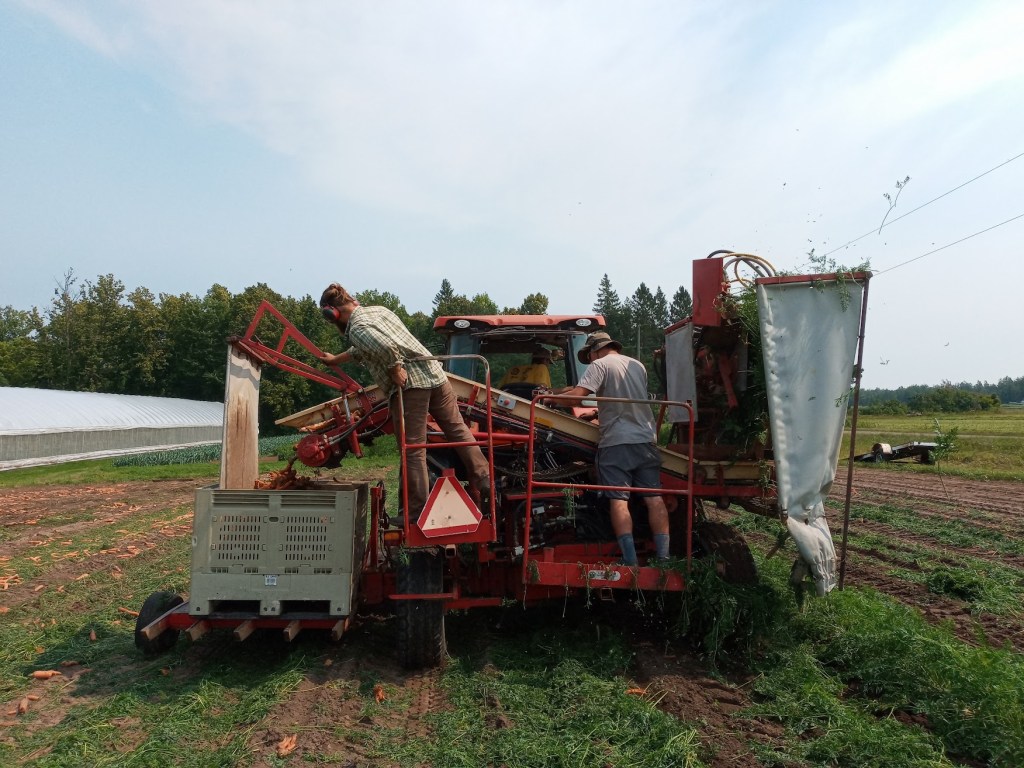
The next few weeks will be especially busy. We’ll start welcoming back crew members who spent their Winter off the farm, we’ll get to welcome a few new crew members, and the greenhouse will get even more full. We have plans to hopefully get brassicas in the ground next week, and onions by the end of the month. Green onions and carrots for early summer shares will get started in a high tunnel in the next few days. Another round of brassicas and outside tomatoes will get seeded today, and later successions really test the capacity of our germination chamber. Seed potatoes will be arriving the end of next week and will keep the crew busy for a few days as they cut and prep all of the potatoes for planting.

The busyness and excitement are felt all around the farm. We’re all ready to break out our Summer clothes, get our hands back in the dirt, and start soaking up some sunshine again. In order to enjoy all of these things, we must also say goodbye to slow mornings, enjoying our coffee while it’s hot, spending entire days in our pajamas, and saying, “We can deal with that later.” We also have to say goodbye to root vegetables and all the hard work that the 2024 crew put in to ensure we could have a bountiful and successful Winter CSA. I always imagine that this hello-but-goodbye-energy is why we try our best to get fresh greens mix in your last Winter CSA box. It’s the perfect way for us to say, “Thanks for enjoying all of our hard work from last year, now get ready for all the hard work and deliciousness of 2025.”

It’s important for us to always remember that we wouldn’t be able to do any of this without your support. Thank you for believing in us, and supporting us through the Winter. A huge thank you to all of our site hosts who kept the veggies safe and warm through the bitter cold. Thank you to all of our volunteers who bundled up every month to help lovingly pack each share. We’re sad to end the Winter CSA, but we hope to see all of you again next Winter…or in just a few weeks if you were lucky enough to snag a Summer Share before they sold out.

Our amazing packing crew boxing up the final Winter share

In your share this month:

Orange Carrots – Purple Carrots – Greens Mix – Rutabaga – Russet Potatoes

Yellow Potatoes – Baby Red Potatoes – Onions – Shallots – Garlic – Beets

This jalapeno popper potato salad from Happy Honey Kitchen Is a spicy take on a classic potato salad. It’s a great recipe for this month because you can use yellow potatoes, red potatoes, or both.

If you’re looking for a more adventurous way to eat your rutabaga this month, try out these tacos from Bon Appetit. The recipe tells you to top the tacos with a mix of kale and watercress. You could substitute some greens mix to further you use up things from your box this month.

If you aren’t ready for salads but need a creative way to use up your greens mix, try this quiche recipe. Your greens mix is delicious fresh or cooked up, so feel free to swap out the spinach or the chard, for greens mix.

For the farm crew,

Jennifer

February Winter Share

Happy February! January always feels like the longest month of the year to me, and those VERY cold days we had didn’t help. Now that February is here, the farming anticipation is growing (pun intended), and we are extra busy.

On February 19th your farmers will be coming to town for the “The Rutabaga Giveaway,” which somehow has become an annual event for us! This is a great opportunity to not only meet other Food Farm members, but also to meet Janaki, Annie, and other farm crew folks. It’s also a great way for friends or neighbors who are interested in being part of the farm to meet us and have their questions answered. We’re holding it this year at the Whole Foods Co-op’s Denfeld location from 4-7 pm. Back in November when we harvested Rutabagas, we set aside the largest ones just for this event. Even if you don’t want to socialize, you might want to come down just to see how big they are!

Drum roll please for the other exciting thing about February…it’s the last month before we start seeds for next year! By the time you are reading this, we are only three weeks away from starting onion seeds and beginning the 2025 growing season. We are all excited thinking about warm, sunny days ahead, but we also aren’t quite ready to give up our slow days of drinking coffee in front of the fireplace. 

This month is also conference season. Over the next few weeks, Janaki and some of the farm crew will be traveling to La Crosse and/or Madison for the opportunityto learn about new/different farming practices, meet other farmers, and reignite our excitement about farming before the season starts.

Now is the time to join in that excitement, because 2025 share sign ups are officially open! They tend to go fast, so sign up as soon as possible. You should have gotten an email letting you know sign ups are open, but if you didn’t, or you can’t find it, you can sign up by going to the Food Farm website

Finally, we are still looking for a couple of seasonal crew members to join us on the farm this summer and fall. More info is available here if you know of someone looking for good work with good folks! Thanks!

In your share this month:

Yellow, Red, and Baby Russet* Potatoes – Red Cabbage – Beets – Orange and Purple Carrots – Parsnips – Red and Yellow Onions – Delicata Squash – Garlic

*The baby russets are perfect for hashbrowns! See our instructions in last year’s newsletter.

I made these Korean Lentils from Crumbs & Caramel for dinner a few nights ago, and can’t get over how delicious it was. It’s an easy meal that gets a lot of color on the plate, and offers room for creativity with the vegetables you use. This is a great way to use some cabbage, and I highly recommend adding some shredded carrot as well.

Potatoes are a delicious and inexpensive way to make soups and chowders more filling. If you’re a meat lover, or you want to make this soup extra filling, ground sausage is a great addition to this meal. The yellow potatoes in your box this month are begging to be used in this Roasted Poblano Corn Chowder by Whip & Wander, and I’m going to add a some parsnips to it as well.

For the farm crew,

Jennifer

Summer CSA Week 17

Last week was all about garlic and squash. 

The end of September marks garlic sorting time. This is when a few lucky crew members get to sort through each of the garlic bulbs to decide if they will be used as seed garlic, or if they will be sent to shares or sold. Last year we planted over 6,700 cloves of garlic. Every clove that you plant gets turned into a bulb that you harvest. That means over 6,700 bulbs of garlic were sorted one by one. We look at each bulb to see how many cloves it contains, the size of the cloves, and the overall appearance of the bulb. When looking for garlic that will be used as seed for this year, we look for bulbs that have 4,5, or 6 cloves in it. Any more or less and the bulb gets sent directly to the shares/sell pile. Once we’ve counted the cloves, we look at the size of each clove. We want the largest cloves that we can find. This is for 3 main reasons: 1) larger cloves have more energy in them to help the plant gets started. We don’t want the plants struggling and stressed from the very beginning. 2) larger cloves produce a stronger root system early in the growing season. This can improve their ability to access water and nutrients from the very beginning. 3) larger cloves are more resistant to frost. This allows them to better withstand our cold Minnesota winters, and it helps them recover more quickly if they do get a little too cold. For those reasons, anything with small cloves will get put in the shares/sell pile. 

As we’re looking at the size of the cloves, it’s also important to make sure that we are choosing bulbs with similarly sized cloves. If they are all different sizes, they have the potential to grow and mature at different rates. Since we are growing such a large amount, making sure everything is growing and maturing at the same rate is very important. 

The final inspection is the overall look of the bulb. We look for any signs of disease, internal mold, improper drying, and any other abnormalities. These all get pulled out and set aside for further inspection. planting bulbs with any of these “imperfections” could result in the cloves not germinating, or in them spreading disease to the soil and/or other garlic plants. We always prefer to be cautious and not chance it. 

Once we have all our garlic separated into the two piles, we then do the math to figure out how many cloves we will need for planting. We figure out the length of the fields, how many beds we plan to plant, how far apart each clove will get planted, and possible increase or decrease in crop yield. I say we as if all of us are doing this math, but in actuality, Janaki does all of this math for us so only one person has to hurt their brain crunching all the numbers. Thanks to all of your interest in our garlic preserving shares this year, and the fact that we are planning to plant on a longer field than last year, we increased our seed number by 15%. This means at the end of October, the crew will hand plant over 7,700 cloves of garlic. Anything not deemed seed quality, got set aside to be sent as preserving shares or will be saved for winter share deliveries. In past years we’ve also sold a fair amount to restaurants and other local outlets, but this year that’s not possible because we’re saving extra seed. 

As the same time garlic sorting was happening, the rest of the crew was out getting all the winter squash from the fields. This meant clipping, throwing, stacking, loading, unloading, counting, and organizing thousands of squash. This is a long process because 1) it’s a lot of squash! 2) the Squash are split into different fields. One is on the main part of the farm, and the other is across the road. We had all the delicata, acorn, and some sunshine squash on the main part of the farm. The delicata made up the majority of this field since it’s the squash we will send with every winter share until we run out. This is also the popular seller to local businesses, and a favorite for most of the farm crew, so we plant quite a bit. Across the road was the rest of the sunshine, the kabocha, and all of the pumpkins. 

It was a lot of work, but we got all the Squash and pumpkins out of the field by the end of the work day on Friday. Now we begin the curing process for most of the squash so they will stay fresh through the winter months. As for the pumpkins, those get to go home with all of you this week! As you’re carving your pumpkins, feel free to share these fun facts:

-the first vegetable to be carved into a Jack o’lantern was actually a turnip

– Pumpkins need honey bees to pollinate their flowers. The more honey bee visits a flower gets, the more perfect the pumpkin will be

– pumpkins are grown on every continent except Antarctica

In your share this week:

Hot Peppers – Red Peppers – Northeaster Pole Beans – Basil – Carrots – Celery

Onion – Potatoes – Rutabaga – Spinach – Winter Squash – Tomatoes

Salade Nicoise 

3-5 medium potatoes

1 cup your favorite vinaigrette (mustard vinaigrette is delicious for this!)

3 cups fresh green beans (cut the Nor’easters on the diagonal)

1 head butter lettuce or spinach

3 ripe tomatoes, quartered

1 cap of canned tuna (optional)

3 hard boiled eggs, halved

1/2 cup Mediterranean style olives

Fresh herbs

Boil potatoes until just tender.  Drain and rinse in cold water and slip off the skins.  While still warm, cut into 1/8″ slices and gently toss with about 1/3 cup of the dressing.  Just before serving, toss greens with vinaigrette and arrange on a platter.  Arrange all the other ingredients in clusters around the platter, drizzling on the remaining vinaigrette.  Dress the salad with the fresh herbs and serve.

NOTE:  you can add any veggie to this salad– carrots, celery, and peppers add depth and color

Rutabaga Hash

  • 22 ounces rutabaga, peeled and diced (about 1 large rutabaga)
  • 6 ounces green cabbage, chopped (about half a head of green cabbage)
  • 1 leek, cut into strips (white parts only, green stems removed)
  • 3 tablespoons avocado oil (or any cooking oil or butter)
  • 1 teaspoon salt 
  • ½ teaspoon black pepper 
  • 1 teaspoon Italian seasoning 
  • 8 ounces bacon, cut into pieces
  • basil for garnish

  • Preheat your oven to 425°F. Add avocado oil, followed by rutabaga, cabbage, leeks, and bacon to the cast iron skillet.
  • Season with salt, pepper and Italian seasoning. Mix until well combined.
  • Roast in the oven for 25 minutes, then take the veggies out, and mix around before returning to oven for another 20-30 minutes, because you want all the vegetables to get a little crisp on them.
  • Finally, garnish with basil if you want, then eat!

For the farm crew, 

Jennifer 

Summer CSA Week 14

Can you all believe it, we only have 4 more weeks of our Summer CSA season!

The final weeks of the CSA season are busy, busy, busy! Mother Nature threw quite the curve ball for us on Friday night with her far too early, danger of frost. Usually we don’t have to start worrying about the dreaded F word until later in the month. We chose the mentality that if you don’t think about it, it won’t happen (it’s actually the only thing any of us thought about all week, but we had good intentions). Things worked out well for us. It did get really chilly on Friday night, but with the exception of a few melon vines the plants appear to have been mostly unaffected. We then had to pull out our warm-ish layers to get ready for our busy Saturday.

On Saturday, we were at Bayfront for Harvest Fest. It’s always a fun event to meet so many people in the community, chat with other local farmers, and show off some new things. If you stopped by our booth, you may have seen our mini carrots in their packaging. The bags arrived just in time for Harvest Fest, and will be hitting some grocery store shelves later this season, so be on the lookout for them. You’ll be getting this variety in your shares this week, but 2 pounds instead of the little bags for market.

In preparation for the remaining few weeks of the CSA season, Janaki starts taking inventory of all the vegetables we have sent to our members so far this season, and starts planning for when we will send the remaining vegetables.  You all have gotten lots of delicious veggies so far, but there are still quite a few things you haven’t seen in your boxes yet. Spoiler Alert: we still have leeks, rutabaga, parsnips, pole beans, red cabbage, winter squash, and brussels sprouts. This week we have a new addition to the line up with Carmen peppers. These peppers look intimidating because their shape resembles that of a spicy pepper, but they are not spicy at all. They are like a sweet red bell pepper but we love the thick walls and robust flavor of the Carmens.

Along with planning what else will go in the boxes for the remaining weeks, Janaki also starts creating a plan for our big Fall harvest that happens at the end of October. A big part of this is pulling out the carrot and potato harvesters to fix anything that got broken/damaged last fall or over the winter in storage, and to dust off the machines and the crew’s sorting abilities that haven’t been used in a year. We used the carrot harvester on Wednesday to get most of the third planting of carrots out of the field, and we used the potato harvester on Thursday to get russets and red potatoes out of the field to bring to Harvest Fest. This means that for the last 13 weeks, every vegetable you’ve received in your box has been lovingly harvested by hand by our hard working farm crew. 

It’s an exciting time when the veggies are large enough and mature enough to use the full sized harvesters. We weren’t able to use the potato harvester until now because the potatoes weren’t mature enough. Their skin was still too delicate for all of the rolling, shaking, and dropping that the potato harvester puts them through. The first two plantings of carrots were large enough and mature enough that we could have used the harvester. However, due to the disease, the carrots required a lot of sorting. This would have required the harvester to go slower so we would have time to sort more accurately. If we run the carrot harvester too slow, the harvester will skip over some carrots leaving them in the field. We actually enjoy hand-harvesting, but when we’re all geared up to go fast it gets pretty irritating in a hurry when things go wrong. 

Aloo Gobi

Ingredients

2 Tbsp. vegetable oil

1 red chili, diced

2 cloves garlic, minced

1 Tbsp. minced ginger

1 tsp. garam masala

1/2 tsp. dried turmeric

1/4 tsp. cayenne pepper

3 potatoes, peeled and chopped into 1″ pieces

1 medium head cauliflower, cut into florets

1 c. low-sodium vegetable broth

Kosher salt

Freshly ground black pepper

Freshly chopped cilantro, for serving

  • Directions
  • Step 1:In a large skillet over medium-high heat, heat oil. Add chili, garlic, and ginger and cook until fragrant, 1 minute. Add garam masala, turmeric, and cayenne and cook until toasted, 1 minute more. 

  • Step 2:Add potatoes, cauliflower, and vegetable broth and season with salt and pepper. Reduce heat and cook, covered, until potatoes and cauliflower are tender, 15 minutes. Garnish with cilantro to serve.

  • Melon and Cucumber Salad

    Ingredients

    • cantaloupe, seeds removed and cubed
    • 1 large cucumber , thinly sliced
    • 1 large red bell pepper, thinly sliced
    • 1/2 large red onion, thinly sliced
    • 3 – 4 tablespoons apple cider vinegar (white wine vinegar ok too)
    • 1 tablespoon olive oil, optional
    • 1/2 teaspoon fresh cracked pepper, or to taste
    • good pinch of salt
    • fresh basil or mint, to garnish (optional)

    Instructions

    Cantaloupe: Slice your cantaloupe in half (doesn’t matter if you slice it horizontally or vertically). Scoop out the seeds with a large spoon and discard. Slice your cantaloupe halves into 5 or 6 slices. Using a sharp knife, cut from one end of the slice to the other as close as you can to the rind, slowly and carefully cutting the orange flesh away from the peel. Slice into bite size pieces.

    Cucumber: Slice off each end and using a vegetable peeler remove the outer skin (leave skin on for extra nutritional value and fiber). Slice the cucumber into 1/8 – 1/4 inch slices.

    Bell Pepper: Wash and core your bell pepper. Slice into 1/4 – 1/8 inch slices. Cut the slices in half.

    Onion: Slice the onion in half lengthwise. Cut off both ends of one of the halves and remove the outer layer. Place the sliced onion, end cut down and slice into 1/8 – 1/4 inch slices. If onion slices seem too long for you, cut them in half.

    Assemble salad: Place ingredients in a large bowl. Add apple cider vinegar, salt and pepper and mix well to coat. Cover and set in the refrigerator for an hour or so to chill and marinate, mix occasionally if you like

    Summer CSA Week 11

    We hope you’re ready! This Saturday, August 24th is our wonderful Coffee On The Farm event. We will have coffee, hay rides, dog pets, and farm tours from 10am-12pm. This is a great event for all, so bring your friends, family, neighbors, or make it a solo outing. We hope to see all of your smiling faces.

    Last week was focused on emptying out some more rows and fields, and dusting off all the washing equipment that hasn’t been used since January when we washed the last of the 2023 carrots. 

    We spent a muddy and rainy afternoon pulling the rest of the Spring/Summer beets out of the field. Seems that every time we do a big harvest of beets, it’s muddy and wet. Thank goodness for outside hoses so we can set up the “human car wash” and hose ourselves off before moving onto the next activity. We had been harvesting beets as needed which allowed the smaller beets to keep getting bigger, and it allowed us to send you the delicious tops along with the beets. It was time to pull the rest of the beets because even the small ones had sized up nicely. Restaurants like Duluth Grill and Ursa Minor will be very excited to receive such big beets that take less time and are easier to process than a handful of smaller beets. On days when we do big beet harvests, we take all the tops off while we are in the field. The tops will get tilled into the soil to add back organic matter to make the field even better the next time we use it. The beets get put into buckets and loaded on a trailer to be brought down to the packing shed. Outside the packing shed, we have our washing station set up. The buckets get dumped into our brush washer where a series of sprayer nozzles and brushes clean all the dirt off of the beets. They pop out the other side where we sort out any odd beets, and give them a final spray to get off any remaining dirt. Once the beets are all approved, they ride the roller table, which is a series of rollers that push the beets along. Eventually they drop into a pallet box where they will stay until they get packed up for CSA or retail orders. We filled one pallet box with the remaining spring/Summer beets which is estimated to be around 1,000 pounds of beets.

    We spent a few days last week across the road, starting to get the first two plantings of outdoor carrots out of the ground. Normally at this time in the year, we would just be removing the first outdoor planting, but disease has hit these carrots pretty hard, so it’s best to get them out sooner rather than later in an attempt to save some of the crop. Our carrots have gotten a disease known as Aster Yellows. A bug called a Leaf Hopper carries this disease. The Leaf Hopper gets the disease when it feeds on an infected plant, then spreads the disease when it starts feeding on a healthy plant. Once a plant is infected, there is no cure, so the only option is to remove the crops or plants before the disease gets worse. We knew the carrots had this because 1) when you touch the carrot tops, hundreds of Leaf Hoppers jump and fly around. 2) from afar, you can tell because it causes the carrot tops to turn a yellow color, and some even get purple and red tops. The really infected carrots will start getting “hairy” this is where they begin to grow extra roots out of the carrot. Once the carrots get hairy, they will also take on a bitter taste. 

    The first planting required lots of hand sorting to find the healthy carrots. We left quite a few carrots in the field, but we were still able to harvest and keep around 1500 pounds of carrots. That’s a lot of carrots, but a far cry from the 6,000 pounds that we should have harvested. The second planting looks a bit healthier, but is still pretty young, so get ready to receive some “baby” carrots in your shares. 

    The annoying thing about Aster Yellows and Leaf hoppers is that they are not exclusive to carrots. Leaf Hoppers can infect a long list of plants including house plants, flowers, and other vegetables. We struggled earlier with asters yellow on some lettuce in a few of our greenhouses. The insects cause the leaves to turn a yellowish green color, and it tastes bitter. We had to do the same thing as with the carrots where we harvested and kept what we could, and the infected lettuce went to our chickens as an unexpected treat. Thankfully, lettuce grows really quickly, so we got a new planting seeded right away, and our chickens were very happy.

    We’ve also found other diseases in our broccoli, outdoor tomatoes, the first planting of potatoes (not the big planting thank goodness), zucchini, and cucumbers. The good thing is, most of these diseases are “normal” for us, so we’ve done a lot of research on ways to slow down the spread such as harvesting infected plants last, and using different harvesting tools for healthy plants vs. infected plants. Janaki has also done a lot of research to see if any organic materials can be used in slowing disease. The downside is, just like Aster Yellows, there is no cure for these diseases. Eventually the plants will get too stressed and weak, causing them to begin either producing funny looking and strange tasting vegetables, or the plants will stop producing entirely. 

    I know this wasn’t as upbeat of a newsletter as normal, but farming isn’t always happiness and sunshine. Farming is all about how you manage and move forward. We’ve never given up when things get hard. We reach out to new resources and experts, we pour an extra cup of coffee, say a few colorful words, and get back to it. This time of year can be hard looking at all the veggies that didn’t make it, but it sure makes us appreciate the veggies that did make it. We hope that this week when you get your box, you take a moment to look at all the beautiful vegetables and know that each one of them was grown with love, sweat, and maybe some dog fur.

    In your share this week:

    Cabbage – Green Beans – Carrots – Celery – Cilantro – Cucumbers – Dill

    Green Onions – Green Peppers – New Potatoes – Tomatoes – Zucchini

    Mixed Salad

    Note:  ingredients are chopped or cut into very small pieces in order to absorb the dressing and each each others’ flavors better. 

    2 tomatoes

    2 small cucumbers

    6 olives

    large raw carrot, peeled

    raw beet

    1-2 avocados, peeled and pitted

    2 potatoes (boiled)

    1 large, mild onion

    1 pepper

    2 hard-boiled eggs

    Chop all the ingredients and cut them into a very small dice. Mix them together in a bowl.  Dress with the following tahini cream dressing and mix well. 

    Tahini Cream

    1 to 3 cloves of garlic (to taste)

    1/2 cup of lemon juice

    1/2 cup of tahini

    1/2 teaspoon ground cumin

    6 tablespoons chopped parsley

    Crushed the garlic with the salt. Mix it with a little lemon juice in a large bowl add the tahini and mix well then add the remaining lemon juice and enough cold water to achieve a thick smooth cream while beating vigorously season salt and cumin.  Add more lemon juice, garlic or salt (all to taste) until the flavor is strong and tart. 

    This dressing may be used for many salads

    For the farm crew,

    Jennifer

    March Winter Share

    It’s the second to last winter CSA delivery and the farm season is just around the corner!

    🌱 Greenhouse Delights: There’s an unmistakable magic in the revival of the greenhouse scents, which is where the crew has gotten to hang out more and more recently 🙂 Our first planting of onions are just starting to poke out of the potting soil, with subsequent plantings not far behind.

    🥕 Carrot Countdown: I am not 100% sure how many pounds of carrots we bagged up this winter, but I do know it was a lot! When the winter began, the root cellar was packed to the ceiling with pallet boxes of them… I mean packed, you could barely move around in there. Now there is but a few pallet boxes remaining and most of them will be reserved for the final CSA delivery in April. This means that this is the last week you will find our carrots in local restaurants and stores!


    In Your Share This Month:

    Beets – Green Cabbage – Purple and Orange Carrots – Onions – Shallots

    Parsnips – Fingerling, Baby Yellow, & Red Potatoes – Rutabagas


    For the recipes this month, it’s back to basics… One of my favorite ways to eat root vegetables is to roast them in the oven with nothing but a little olive oil, salt & pepper. They can then be enjoyed as a side dish, thrown on salads for fiber & flavor, or paired with a tasty sauce… like the caramelized shallot & herb aioli recipe below.

    When roasting, I’m typically a fan of potato skins, but the French fingerlings in this month’s share have a slightly rough texture. They remain delicious, but I do suggest peeling them this time round.


    Roasted Root Vegetables

    Ingredients:

    Assorted root vegetables (such as carrots, potatoes, parsnips, Rutabaga, etc.)
    Olive oil
    Salt and pepper to taste

    Directions:

    1. Preheat your oven to 425°F
    2. Wash and peel the root vegetables, then chop them into similar-sized pieces to ensure even cooking.
    3. Place the chopped vegetables in a large mixing bowl.
    4. Drizzle olive oil over the vegetables, using enough to coat them evenly. Toss the vegetables with your hands or a spoon to ensure they are all well coated with the oil.
    5. Season the vegetables generously with salt and pepper, adjusting the amount to taste.
    6. Spread the seasoned vegetables out in a single layer on a large baking sheet. Make sure they are not overcrowded to allow for even roasting.
    7. Place the baking sheet in the preheated oven and roast the vegetables for about 25-35 minutes, or until they are tender and golden brown, stirring halfway through the cooking time for even browning.
    8. Once the vegetables are roasted to your desired level of doneness, remove them from the oven and transfer them to a serving dish.

    Feel free to customize this recipe by adding other seasonings or herbs such as garlic powder, rosemary, thyme, or paprika for extra flavor!


    Caramelized Shallot & Herb Aioli by newinthekitchen.wordpress.com

    Ingredients:

    3/4 cup light mayonnaise
    2 tablespoons freshly squeezed lemon juice, plus a pinch of zest
    3 tablespoons fresh parsley, chopped finely
    2 tablespoons fresh dill, chopped finely
    1 tablespoon dijon mustard
    1 teaspoon hot sauce (your choice of brand, we enjoy Cholula)
    3 shallots, minced
    Olive Oil
    Salt and pepper, to taste

    Directions:

    1. Heat a saute pan with one tablespoon of olive oil over medium heat.
    2. Add shallots and cooked until browned and caramelized, about 10 minutes.
    3. Allow shallots to cool.
    4. Meanwhile, combine mayonnaise, herbs, lemon juice and zest, dijon mustard, hot sauce, and salt and pepper to taste.
    5. When shallots are cooled, add them to mixture. Stir to combine.
    6. Allow Aioli to chill in the refrigerator for about an hour prior to serving to allow flavors to combine.


    For the farm crew,

    Charlie

    January Winter Share

    The chickens love feasting on reject squash and cabbage leaves!

    Happy New Year!

    After weeks of anticipation, the first real snowfall has finally graced the fields! While the gentle start to winter offered a break from the unrelenting snow removal that defined last year’s snowy season, there was an unanimous sentiment—it’s about time!

    It’s been a whirlwind of activity here in the pack shed, and we can’t express enough gratitude for the support we’ve received from both our valued members and our partners in grocery stores and restaurants. Knowing that our vegetables are making their way onto the plates of our community brings us immense joy. It’s heartwarming to imagine our produce being shared among friends and families, becoming a part of the meals and moments that bring people together. We take pride in cultivating these vegetables and seeing them find their rightful place in the homes and gatherings of our community members.

    Janaki is currently working on the budget and Catherine is prepping the signup software for next season, so we’re hoping to begin 2024 signups in about two weeks!


    In Your Share This Month:

    Chioggia Beets – Carrots – Onions – Parsnips – Yellow Potatoes

    Baby Yellow & Baby Russet Potatoes – Rutabagas – Delicata & Winter Sweet Squash


    This month, a trio of newcomers make their debut from storage in the root cellar: Chioggia beets, rutabagas and parsnips. I love to roast these all together with olive oil, salt, pepper and thyme. It makes a great side dish when fresh from the oven and leftovers are delicious when thrown into a salad. In my opinion, Choigga beets are the star of the show.

    Chioggia beets, often referred to as candy cane beets, originated in the historic fishing town of Chioggia, Italy, just across the lagoon from Venice. These heirloom beets have a mild, sweet taste and slightly less earthy flavor compared to traditional beets. Whether enjoyed raw (thinly sliced, dipped in olive oil, salt, and pepper) for their visual appeal or cooked to showcase their flavor, Chioggia beets impress both the eyes and the taste buds.


    Rutabaga Latkes (by Lisa Richards, CNC)

    Latkes, or potato pancakes fried in oil, need not necessarily be made from potatoes. This recipe uses rutabaga with hemp seeds for added protein.

    Yield: 10 latkes

    1 lb. peeled, grated rutabaga (approx. 3 cups)
    1 scallion, minced
    1 egg, lightly beaten
    1 Tbsp. coconut flour
    3-4 Tbsp. raw, shelled hemp seeds
    1 tsp. salt
    Pepper to taste
    A few gratings of fresh nutmeg
    Olive oil for frying

    1. In a large bowl, add grated rutabaga, minced scallion, beaten egg, coconut flour, hemp seeds, salt, pepper and nutmeg. Mix well.
    2. In a large skillet, heat a good tablespoon of olive oil between medium low and medium heat. Working in batches of 3 latkes, spoon about 2 tablespoons of mixture per latke into skillet, spreading into 3 to 4 inch rounds and frying until the edges begin to brown. Flip and fry until other side is golden brown. Repeat with remaining latke mixture, adding another good tablespoon of olive oil to the skillet for each batch.
    3. When latkes are done frying, place in warm oven on wire racks on a rimmed baking sheet. This keeps latkes crispy until ready to serve.

    Baby Russet Hash Browns

    It wouldn’t feel right to send out baby russets without sharing our recipe for baby russet hash browns. Small russet potatoes have a low moisture content and a high ratio of skin to flesh, so no draining or precooking is required.

    Baby russet potatoes (grated, as many as desired)
    Oil or butter or both
    Season to taste with salt and pepper

    1. Grate baby russet potatoes
    2. Heat a skillet or pan to medium heat and add a generous amount of oil
    3. Spread grated potatoes in a layer no thicker than one inch in the pan. Do not stir or agitate. Cover with a lid until the bottom appears toasted and crispy, then flip the hash browns. (This will likely need to be done in sections around the pan unless you’re just doing a small amount.)
    4. Add a little more oil / butter after flipping
    5. Once the 2nd side is toasted as well, season and serve!

    Janaki’s favorite is to add some grated beets to the mix, but you could also try rutabagas, parsnips, or carrots, too. Feel free to get experimental with this one!


    For the farm crew,

    Charlie

    Summer CSA Week 14, 2023

    The Food Farm had a bustling week and weekend! On Saturday, we took part in the annual Lake Superior Harvest Festival, which brought together over 10,000 people of all ages. The event is dedicated to advancing sustainable local food production, recognizing it as a pivotal element in fostering a more robust economy, preserving the environment, and strengthening the community in the Lake Superior region.

    A lot of extra harvesting goes into preparing for such a big market, but it all feels worthwhile when we get to see so many smiling faces enjoying the fruits of our labor 🙂

    In addition to all the extra harvesting that took place, the crew also managed to trim & clean the garlic that has been curing since being pulled from the fields back in July. It is at this time that Dave carefully selects the best looking heads to be put back in the ground come October.


    In your share this week:

    Broccoli – Carrots – Cucumber – Leeks – Lettuce – Melons – Onions

    Parsley – Red & Green Peppers – Russet Potatoes – Tomatoes


    You will notice the new addition of leeks & russet potatoes this week. As the weather begins to cool down, this dynamic duo has arrived just in time for the start of soup season. The recipe that first comes to mind is the ever-so-comforting potato leek soup. I know I am looking forward to whipping up a double batch when I get home from work today!

    Also included in the share is a large quantity of Carmen red peppers. It may be more than most families get through in a week, so I’ve included Jane Fisher-Merritt’s delicious marinated pepper recipe. Enjoy 🙂


    Potato-Leek Soup, from Serious Eats

    Yield ~ 6 servings

    2 tablespoons unsalted butter
    2 large leeks, white and pale green parts only, rinsed and roughly chopped
    1 quart homemade or store-bought low-sodium chicken stock
    2 medium russet potatoes, peeled and cut into quarters (about 3/4 pound)
    1 bay leaf
    Kosher salt and freshly ground black pepper
    1 cup buttermilk
    1/2 cup heavy cream
    1/2 teaspoon freshly ground nutmeg
    Sliced chives or scallions, for serving

    1. Melt butter in a large saucepan or Dutch oven over medium heat. Add leeks, reduce heat to low, and cook, stirring frequently, until very soft but not browned, 10 to 15 minutes.
    2. Add stock, potatoes, and bay leaf, and season lightly with salt and pepper. Bring to a boil over high heat, reduce to a gentle simmer, cover, and cook until potatoes are fall-apart tender, about 15 minutes.
    3. To Finish With a Ricer (Recommended): Remove potatoes from soup using tongs and transfer to a bowl. Set aside. Discard bay leaf. Transfer remaining soup to a blender. Slowly increase blender speed to high and blend until completely smooth, about 2 minutes. Return soup to a clean pot.
    4. Press potatoes through a potato ricer or food mill into the pot with the soup. Whisk in buttermilk and heavy cream. Whisking frequently, bring soup to a simmer over medium-high heat. Whisk in grated nutmeg. Season to taste with salt and pepper and serve with chives or scallions.
    5. To Finish With a Blender (Faster): Add heavy cream and buttermilk to pot. Discard bay leaf. Working in batches if necessary, transfer soup to a blender. Slowly increase blender speed to high and blend until completely smooth, about 2 minutes. Return soup to a clean pot, pressing it through a fine-mesh strainer with the bottom of a ladle if a smoother texture is desired. Whisking frequently, bring soup to a simmer over medium-high heat. Alternatively, chill completely and serve cold. Whisk in grated nutmeg. Season to taste with salt and pepper and serve with chives or scallions.

    Marinated Peppers, from Jane Fisher-Merritt

    2 cups vinegar
    2 cups olive oil
    2 cups water
    4 tablespoons sugar
    2 tablespoons salt
    (+ 1 clove garlic & 1/2 teaspoon oregano in each jar)

    1. Cut peppers into 1/8″ -1/4″ slices. Pack into hot sterile jars w/ 1 clove garlic & 1/2 teaspoon oregano in each jar.
    2. Combine vinegar, olive oil, water, sugar & salt in a medium saucepan. Bring to a hard boil.
    3. Pour brine mixture over peppers, leaving a 1/2″ of headspace.
    4. Process for 15 minutes in a boiling water canner.

    For the farm crew,

    Charlie

    Summer CSA Week 11, 2023

    It’s farm tour time–this Saturday from 10-noon, we’d love to see you!

    It’s melon mayhem at the Food Farm! We recently set our new daily harvest record with a whopping 377 cantaloupe. That is more than 800 pounds of weight to pull from the field! We expect them to slow down soon, so enjoy it while it lasts.

    In other news that is orange, the crew christened a “new-to-us” carrot harvester. A lucky few climbed aboard as it took its maiden voyage through the fields, while the rest of the crew assembled at the washing stations. There were certainly some wrinkles to iron out, as there often is with any new piece of machinery, but by the end of the week the process seemed to be moving along rather quickly.


    Beans – Broccoli – Carrots – Cilantro – Cucumbers – Dill – Greens Mix – Melons

    Onion – Bell Peppers – Hot Peppers – Potatoes – Tomatoes – Zucchini


    Usually the melons are best enjoyed straight up in all their glory. That way you can fully appreciate the depth of their flavor. This week though, because there are so many, I thought it would be nice to include a recipe with them in it. It does include basil, which we are not sending this week… I’m hoping some of you still have a few sprigs leftover from last weeks share, or can maybe snag some from a friendly neighbor’s garden.

    P.S. The vinaigrette would also go great on the greens mix in today’s share 🙂

    Melon Caprese Salad, from Half Baked Harvest

    Honey Herb Vinaigrette:
    1/4 cup extra virgin olive oil
    2 tablespoons honey
    Juice of 1 lemon
    1 tablespoon white balsamic
    1 cup fresh basil
    1 tablespoon toasted pine nuts
    1 pinch flaky sea salt

    1. To make the vinaigrette, combine all ingredients in a blender and blend until smooth.

    3 balls fresh burrata cheese
    4 cups melon balls
    1/2 cup fresh basil leaves
    2 tablespoons fresh mint
    6 slices prosciutto

    1. Break the burrata in half and place each half in the bottom of a small bowl or glass (about 8 ounces). Over the burrata, layer the melon balls, basil, and mint. Top with a slice of prosciutto. 
    2. At this point the salad can be covered and placed in the fridge for up to 6 hours. 
    3. Before serving, drizzle over the vinaigrette.

    Blistered Green Beans w/ Tomato-Almond Pesto, from Bon Appétit

    1 1/4 cups diced tomatoes
    1/8 cup unsalted, roasted almonds
    1 garlic clove, grated
    1 tablespoons olive oil
    1 tablespoons Sherry vinegar or red wine vinegar
    1/2 teaspoon paprika
    Pinch of cayenne pepper
    Kosher salt, freshly ground pepper
    1 1/2 teaspoons vegetable oil
    1 pounds green beans, trimmed

    1. Preheat oven to 450°F. Roast tomatoes on a rimmed baking sheet, turning once, until blistered and lightly charred, 15-20 minutes. Let cool slightly. Finely chop almonds in a food processor. Add garlic, olive oil, vinegar, paprika, cayenne, and half of tomatoes; pulse to a coarse pesto consistency. Season with salt and pepper.
    2. Heat 3/4 tsp. vegetable oil in a large skillet over medium-high. Add half of beans; cook, undisturbed, until beginning to blister, about 2 minutes. Toss and continue to cook, tossing occasionally, until tender, 7–9 minutes; season with salt and pepper. Spread beans out on a platter; let cool. Repeat with remaining vegetable oil and beans.
    3. Toss beans with pesto; season with salt and pepper if needed. Add remaining tomatoes and transfer to a platter.

    Summer-Vegetable Casserole, from Food & Wine

    Extra-virgin olive oil, for drizzling
    1/2 pound potatoes, peeled and sliced 1/4 inch thick
    Salt and freshly ground pepper
    1 bell pepper, thinly sliced
    1 small onion, thinly sliced
    1 large garlic clove, minced
    1 teaspoon thyme leaves
    1/2 pound tomatoes, sliced 1/4 inch thick
    1 medium zucchini, sliced on the diagonal 1/4 inch thick
    3 tablespoons freshly grated Parmigiano-Reggiano cheese

    1. Preheat the oven to 350°. Coat a 9-inch baking dish with olive oil. Spread the potatoes in the dish in an even layer; drizzle with oil and season with salt and pepper. In a bowl, combine the bell pepper, onion, garlic and thyme and season with salt and pepper. Arrange two-thirds of the bell pepper mixture over the potatoes and drizzle with oil. Top with the tomatoes and the zucchini; drizzle with oil and season with salt and pepper. Cover with the remaining bell pepper mixture and sprinkle with the cheese.
    2. Cover the casserole with foil and bake for 40 minutes. Increase the oven temperature to 425°. Uncover the casserole and bake for about 20 minutes longer, until the vegetables are tender and glazed on top. Let stand for 10 minutes. Serve warm.

    For the farm crew,

    Charlie

    Summer CSA Week 10, 2023

    Let’s take a moment to say thank you for the bit of rain that came last week. The farm was lucky enough to get three quarters of an inch, which isn’t that much in the grand scheme of things, but as my mother likes to say “beggars can’t be choosers.” The problem is that we need rain consistently to make much of an impact. Every hotter-than-normal, rainless day with ample sunshine dries the soil out. We do have a pond toward the back of the farm property, which we are able to pump water from to aid in our irrigation efforts, but it certainly wouldn’t hurt if we all put some collective energy into wishing for more rain to fall 🙂

    We are getting to that time of year where every day is a harvest day. Whether it’s digging beets, carrots & potatoes, picking canning tomatoes, or slicing bunches of kale, there just doesn’t seem to be enough time in the day. One fun item that got added to the list this week is cantaloupe. This is a crop that can be difficult to grow in our area, but through a lot of trial an error, we have managed to grow consistently for the last five or so years. It has become somewhat of a crowd favorite and for good reason! Nothing quite cuts the summer heat like a freshly sliced melon!


    Carrots – Cilantro – Cukes – Kale – Lettuce – Green Onions – Green Peppers

    Green BeansHot Peppers – Parsley – Potatoes – Tomatoes – Zucchini – Melons


    Feel free to get creative with the salad recipe below… As is, it uses up a good chunk of the ingredients in your share this week, but it could feature even more farm goodness if you happen to have some leftover cabbage or snap peas hiding in your fridge from weeks prior. The dressing itself is also pretty versatile and would make a wonderful marinade or stir fry sauce.

    Salad w/ Peanut Butter Dressing

    2 medium cucumbers
    1/2 cup shredded carrots
    1 green onion, thinly sliced
    1/4 cup salted & roasted peanuts, chopped
    2 tablespoons cilantro, chopped
    1-2 hot pepper, finely diced (optional)

    PB Dressing, from theendlessmeal.com:
    1/2 cup peanut butter
    1/4 cup lime juice
    1 tablespoon soy sauce
    1 tablespoon ginger, finely minced
    2 teaspoons toasted sesame oil
    2 cloves garlic, finely minced
    1/4 – 1/2 cup water
    sea salt, to taste

    1. In a medium-sized bowl, whisk the peanut butter, lime juice, soy sauce, ginger, sesame oil, and garlic. Thin with the water, starting with ¼ cup. (The amount of water you’ll need to add will depend on how thick your peanut butter is and how thick or thin you’d like the dressing to be).
    2. Taste and add salt as needed.
    3. Dress the salad as you see fit!

    Potato Salad w/ Grilled Kale, from Bon Appétit

    5 tablespoons olive oil, divided, plus more
    2 pounds potatoes
    1 pound shallots, unpeeled
    3 tablespoons lemon juice
    1 tablespoon apple cider vinegar
    freshly ground black pepper
    1/4 cup chopped pickles
    2 tablespoons drained capers (optional)
    1 bunch kale, ribs and stems removed
    3 green onions, sliced
    1 cup parsley leaves w/ tender stems

    1. Prepare a grill for medium-high heat; lightly oil grate. Place potatoes in a large saucepan and pour in cold water to cover by 1″. Season with salt and bring to a boil. Reduce heat; simmer until tender, 15–18 minutes. Drain and return to saucepan.
    2. Meanwhile, grill shallots, turning occasionally, until skins are blackened and flesh is tender, 15–20 minutes. Let cool. Halve lengthwise and scoop out insides (discard skins).
    3. Whisk lemon juice, vinegar, and 3 Tbsp. oil in a large bowl; season with salt and pepper. Add cornichons, capers, and potatoes and toss to coat.
    4. Toss kale and remaining 2 Tbsp. oil in a medium bowl; season with salt. Grill, turning often, until charred and crisp-tender, about 1 minute. Fold into salad along with scallions, parsley, and shallots.
    5. Do Ahead: Potato salad can be made 1 hour ahead. Store tightly covered at room temperature.

    For the farm crew,


    Charlie