April Winter CSA

Happy Spring, food lovers!
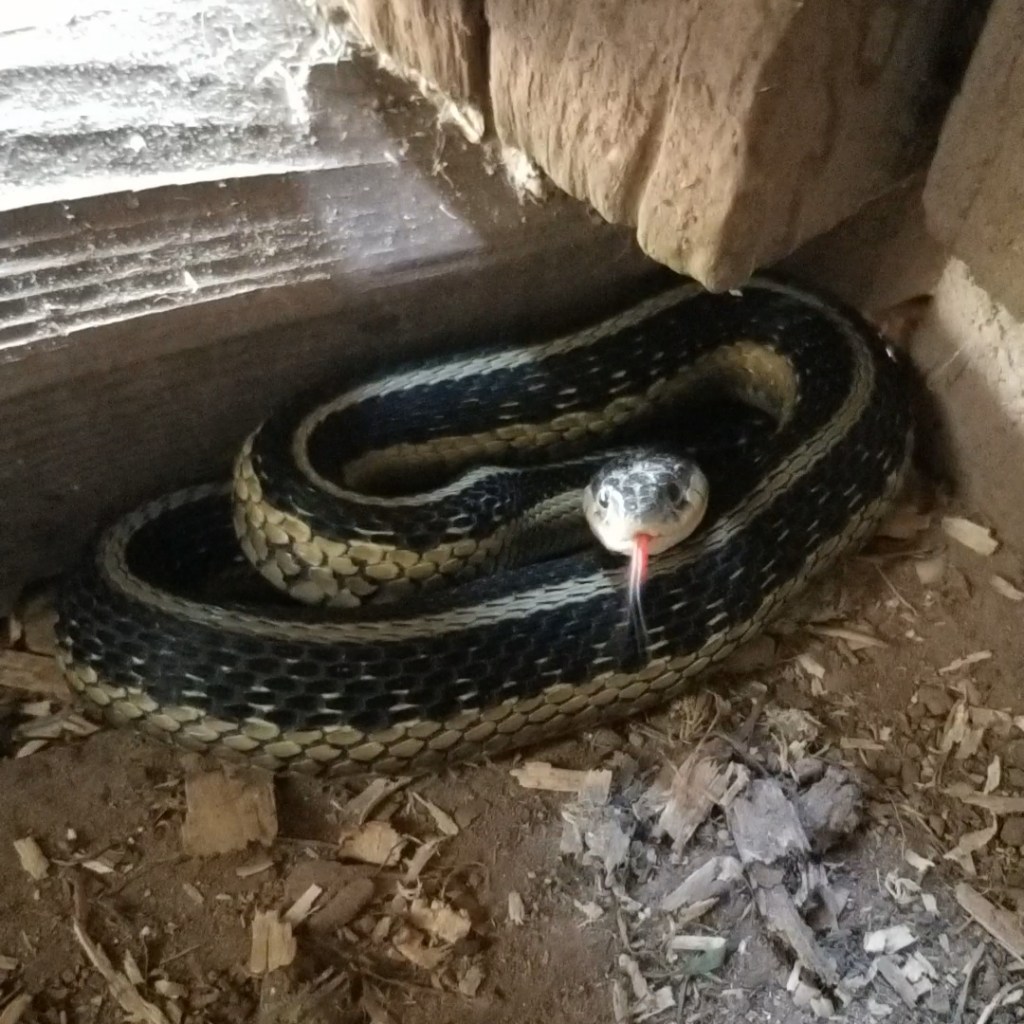
The time has come for our final Winter Share of the season. Whether you’re new to us or a day-one member, we thank you for letting Food Farm feed your family this winter. Our root cellar is almost empty but our hearts are full. It is so rewarding to see the fruits of last year’s labor still providing nourishment at the dawn of a new season. I would also like to give a special shoutout to our wonderful soil and local honey bees for helping us make it all possible.

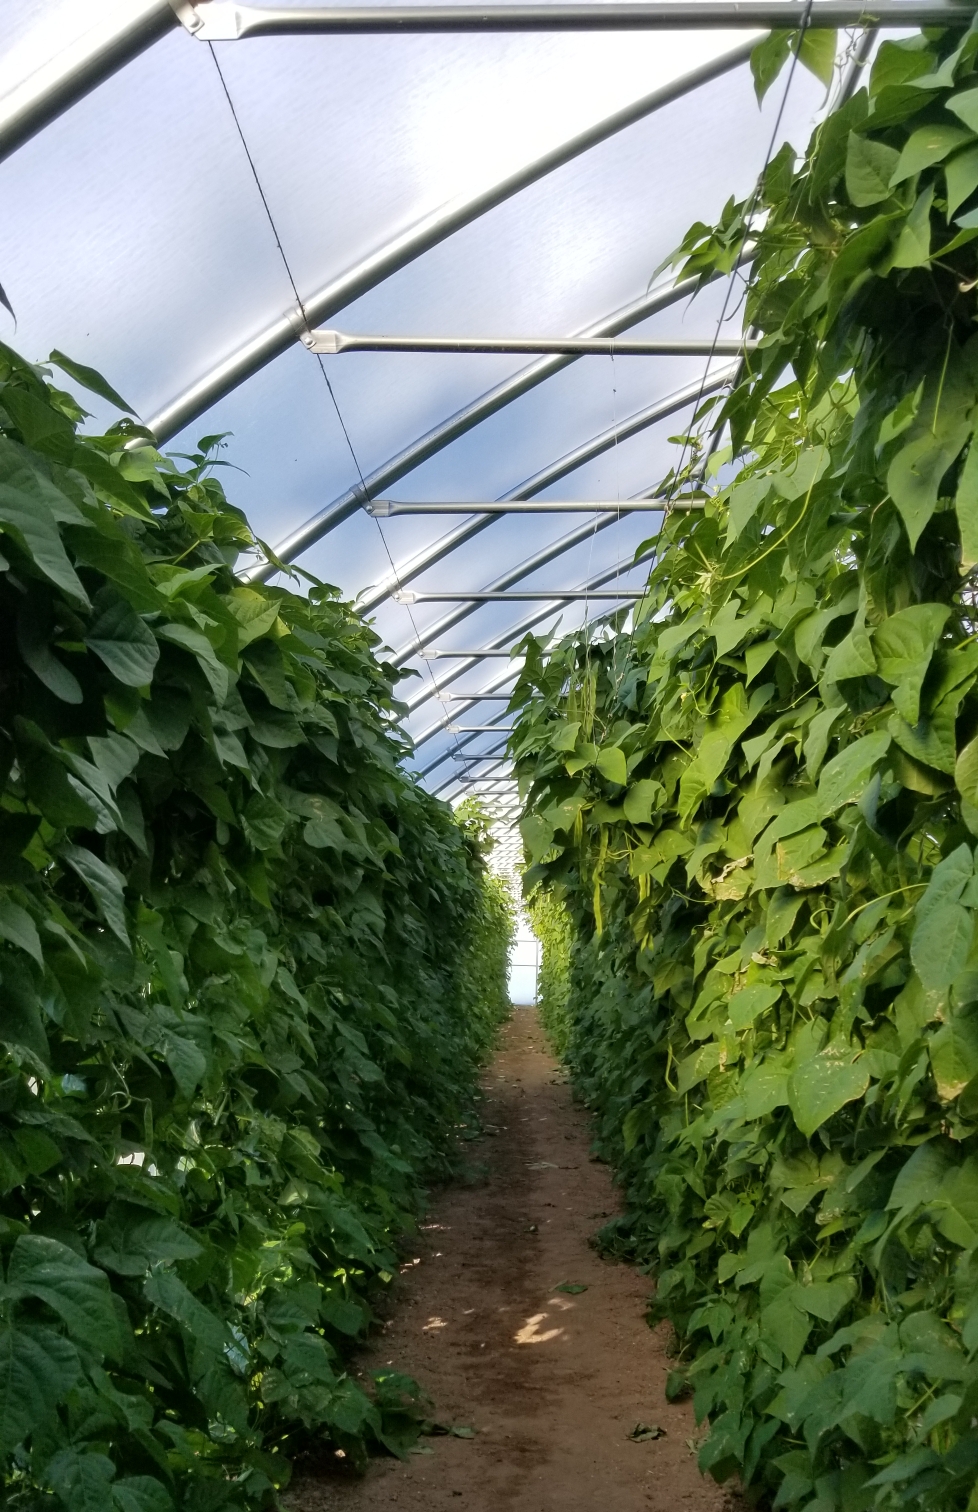
As I mentioned last month, this growing season is already in the works. Our onions and leeks are doing well. We have also started the first batches of tomatoes, peppers, and brassicas. As usual, there are some slight changes we’ve made to each of these crop plantings this year. We often experiment with new varieties in addition to other improvisations and adaptations and it is exciting to watch these changes unfold. The crew is eagerly waiting for the last of the snow to melt so we can get to work full time by the end of the month.

See you in the summertime!

Emily

In your shares this month:
Beets, Carrots, Garlic, Onions, Yellow and Red Potatoes, Shallots, Rutabagas

Your recipes this month would make great sides for Easter dinner!

Carrot Puree
1 lb carrots peeled and cut into coins
Add water to cover generously and bring to a boil. Cook until the carrots are completely tender
(25 or so minutes). Drain and mash carrots with following:
1/2 cup milk or cream
1-1/2 tablespoon butter
1/2 tsp salt
1/2 tsp ground cumin

Rutabaga and Potato Gratin
1-1/2 lbs rutabaga and potatoes (total), peeled and sliced thinly
1/2 clove of grated garlic
1/4 cup finely chopped onion
salt and pepper
1/2 tsp thyme
3/4 cup grated sharp cheddar or Gruyere cheese
1-1/2 cup milk
Heat oven to 400 degrees. Season sliced veggies with salt, pepper, and thyme. Arrange the
veggies in a gratin dish (or 9″x13” pan). Add milk. Bake for 45 minutes, pressing veggies down
into the milk one or two times during baking. After 45 minutes, add the cheese. Stir it into the
veggie mix and return to oven for 20-30 minutes (until veggies are completely soft and easily
pierced with a fork).

Cajun Rutabaga Chips
CHIPS
Rutabaga (peeled)
1.5 lbs
Extra Virgin Olive Oil
0.7 fl oz.
CAJUN SEASONING
Oregano 1 tsp
Thyme 1 tsp
Paprika 0.5 tsp
Cayenne Pepper 0.5 tsp
Garlic Powder 0.5 tsp
Black Pepper 1 pinch
Salt
STEP 1
Peel the rutabaga and then use a mandolin slicer or sharp knife to slice the swede into very thin
chips.
Ensure the chips are 1 to 2 mm thick, or they won’t crisp up as nicely.
STEP 2
Combine the Cajun seasoning ingredients in a small bowl. In another bowl, toss the rutabaga
chips with the olive oil.
Then, tip in the cajun spice mix and rub the chips thoroughly until they’re well coated
STEP 3
Now, arrange the seasoned chips flat on a baking tray lined with parchment paper.
You can keep them close to one another as they will shrink a lot while cooking. As they might
not fit all into one tray, we recommend baking them on multiple trays.
Bake the chips for 25 minutes at 250 °F in fan mode or at 285 °F in static mode.
Once they look smaller and curled up, flip them upside down and swap the trays top to bottom
and front to back.

These chips are best when consumed on the same day as they will lose some of their crispiness when stored longer.

February Winter CSA

Greetings fellow food lovers,

It has been awfully chilly the last few weeks around the farm. Normally, we run around in circles and light veggie scraps on fire to stay warm every morning. We’ve also been curating a new dance routine to really turn up the heat in the packing shed. This helps us pack your veggies faster and also keeps our toes from freezing. Although I am just kidding, I often wonder during these cold midwinter stretches, “Why do I live somewhere that if I stayed outside too long, I would die?” On the other hand, the long winter can be a nice break from all of the summer work we do at the farm, and I love that we have real seasons in the Northland.

Speaking of the Northland, we had a great time seeing our community at Wild State Cider last week for our annual rutabaga giveaway. In case you missed it, this event had a unique twist this year: rutabaga curling! I can’t think of a better way to take advantage of this unique vegetable (aside from, you know, eating it). Plus, curlers can really sweep you off your feet. Our friends helped make a wonderful video with some highlights from the event which you can find on our Facebook page or by clicking this link: https://fb.watch/b8eTjlvrps/.

Make sure you sign up for your summer shares if you haven’t already! These spots tend to fill quickly. More of this information can be found right on our website. Let us know if you have any questions. Throughout these recent times of uncertainty in our food systems, the importance of local farms has really been brought to light. Community Supported Agriculture has given all of us stability and the ability to contribute to something bigger than ourselves. Our crew at the Food Farm continues to take this responsibility seriously and we appreciate our members and your support!

By the time I write the next newsletter, I expect we will have seen warmer days (by warmer days I mean anything above 20 degrees), and we’ll be starting up greenhouse work and seeding onions! Oh, and remember: organic vegetables make the perfect Valentine’s Day gifts.

Stay warm,

Emily

Your CSA farmers love you!

In your shares this month:

Beets – Carrots – Green Cabbage – Parsnips – Baby Red and Russett Potatoes – Onions – Garlic – Delicata Squash

Mulligan Stew (The Soup and Bread Cookbook, B. Ojakangas)

  • 2 lbs beef stew meat cut into 1″ cubes (or substitute beans for a vegetarian version)
  • 4 medium thin skinned potatoes, yellow or red, washed, unpeeled and quartered
  • 4 medium carrots, cut into 2″ pieces
  • 4 small onions, quartered
  • 1 (1/2 lb) rutabaga, peeled and cut into 1″ cubes
  • 3 sprigs parsley
  • 1 tbsp sugar
  • 2 tsp salt
  • 1/4 tsp black pepper
  • 2 tbsp flour
  • 1/2 cup red wine or water

In a 4-qt soup pot, combine the meat and cold water to cover and bring to a boil.  Add the potatoes, carrots, onions, rutabaga, parsley, sugar, salt, and pepper.  Simmer, tightly covered, over low heat until the meat is tender, about 2 hours and 30 minutes.

In a cup, mix the flour and wine/water until smooth.  Stir into the stew and cook for 15 minutes, stirring frequently to thicken the stew. 

Kalldolmer (Danish cabbage rolls)(Danish Food Cookbook)

  • 3/4 lb ground beef
  • 1/4 lb ground pork
  • 1 egg
  • 1/2 cup cooked rice or 1/4 cup breadcrumbs
  • 1/2 cup milk
  • 1 small onion, grated
  • 1 tsp salt 
  • 1/2 tsp pepper
  • 2 cans stewed tomatoes
  • 12 cabbage leaves (large)

Mix meats, rice/bread crumbs, onion, milk, egg, salt and pepper in a bowl.  Rinse a large cabbage head and remove about 12 large leaves.  Drop the leaves into boiling water for a few minutes to soften them.  Drain the leaves.  Place about 1/4 cup of meatball mix into the center of the leaf and wrap it like a package.  Brown in a frying pan and then place seam side down in a 9″x13″ baking pan.  Pour the tomatoes over them.  Bake 350F for about an hour.

January Winter CSA

Happy New Year, food lovers!

2022 will be the 29th season of community supported agriculture here at the farm. That is over 500 weeks of delivering summer shares to thousands of local community members. We have seen a great deal of veggies come and go over the years, and we are still just as excited to grow through another year. Personally, I am excited to experience another season of organic farming because there is so much to learn. My favorite part of the growing season happens to be the very beginning. Greenhouse work is so interesting and requires great attention to detail in order to ensure success throughout the whole season. I am also excited to hang around the critters at the Food Farm. Organic farming really seems to bring out the best in our garter snakes, birds, bugs, and Chester.

These are some critters I was able to snap pictures of this past season. A brave garter snake who made its way into the chicken coop and a lovely Luna moth hanging on a hose.

I realize it is January and dreaming of spring and summer seems unfair. Especially when we still have literally tons of food in the root cellar. Rutabagas and parsnips have made their debut in your winter shares this month. They’ve been patiently waiting in the root cellar since the end of the growing season (they’re the last few vegetables we harvest every year). One fun (and slightly embarrassing) fact about myself is before working at the Food Farm, I had never tried either of these vegetables. It seems that even as a farm worker, there may still be crops I have yet to try for the first time. Nonetheless, they’re amazing vegetables and one of our amazing CSA members has provided us with the perfect recipes for them.

Hopefully your holiday season was full of amazing food, crafted from either newly discovered recipes or the traditional ones that hold a special place in your celebrations. Appreciating and considering where your food is grown makes it more fun to be a home chef. I hope that you all love having the produce we grow in your homes as much as I do.

Until next time,

Emily

In your shares this month

Chioggia Beets, Carrots, Onions, Parsnips, Red and Yellow Potatoes, Rutabagas, Winter Sweet and Delicata Squash

Oven Baked Rutabaga Fries

  • 2 lbs rutabaga, cut into 1-inch wedges
  • 2 tablespoons olive oil
  • 1/2 tsp salt
  • 1/2 tsp. garlic powder (optional, but encouraged)
  • 1/4 tsp. paprika (opt.)
  • 1/4 tsp. ground cumin (opt.) 
  • 1/4 tsp. ground cayenne pepper (opt.)
  • Preheat oven to 450F.  Grease a large rimmed baking sheet and set aside. 
  • In a large bowl, toss the rutabagas with oil until thoroughly coated. 
  • In a small bowl, combine the salt and spices. 
  • Sprinkle the spices over the rutabagas and toss to coat. Spread the rutabagas over the prepared sheet in a single layer and bake for 30-35 minutes until browned and crispy. 

Quick-Pickled Rutabagas (*pickling fluid from New York Times)

  • 1/4-1/2 lbs rutabaga
  • 1 cup water
  • 1/4 cup rice-wine vinegar
  • 1/4 cup apple cider vinegar
  • 5 tablespoons white sugar
  • 2 tsp salt (optional additions (to your taste): peppercorns, coriander seeds, chili pepper, star anise)
  • Bring water to a boil and pour into a bowl containing the vinegars, sugar, salt, and optional flavors.  Stir until the sugar is dissolved.
  • Scrub the rutabaga and slice thinly. 
  • Pour the vinegar mixture over the rutabaga and let them sit at room temp until the liquid is slightly cooled. 
  • Transfer to the refrigerator for at least one hour before eating.  Eat within the week! 

Parsnip Flan (Wall Street Journal)

  • 1/2 lb parsnips, peeled and finely chopped
  • 3/4 cup sugar
  • 2 tbsp water
  • 1/2 cup half-and-half
  • 2 large eggs
  • 1/2 tsp vanilla extract
  • 1/4 tsp salt
  • 8 ramekins (for baking the flan)
  • Preheat oven to 350 degrees. Bring a couple quarts of water to a boil.
  • Place parsnips in a medium saucepan and cover with 1/2″ water. Cover and bring to a boil. Cook parsnips until very tender, 5-6 minutes. Reserve 2 tbsp of cooking water, then drain parsnips. 
  • Heat 1/2 cup sugar and 2 tablespoons reserved cooking water in a 10″ skillet over high heat until the sugar liquifies. Continue cooking over high heat, swirling pan occasionally until sugar caramelizes to a dark amber. Immediately divide caramel among ramekins.
  • In a blender, puree parsnips with half and half, eggs, vanilla, salt and remaining 1/4 cup sugar until smooth. Pour mixture through a mesh sieve into a bowl and divide among ramekins.
  • Place ramekins in a roasting pan and carefully pour boiling water into the pan (avoid splashing!) until it reaches halfway up the ramekins.  Bake until the flans are set but slightly wobbly in the center (approx. 15-20 minutes). Transfer ramekins to frig and chill completely.  
  • To serve, run the tip of a knife around the interior edge of the ramekins and invert the flan with their caramel onto dessert plates.

December Winter CSA

One of the highlights of my life the last few months is food preservation. It looks me right in the face every time I step foot in our amazing root cellar at the farm. From seed to storage, there is nothing more satisfying than preserving the bounty of the season, especially when you can watch a crop throughout its entire lifetime. My shelves are full of some amazing local produce thanks both to my job at the farm and having friends in the farm community. I am still relatively new to food preserving. The volume needed for a highly self-sustaining lifestyle hasn’t been attainable quite yet, so it seems like less of a chore and more of an experiment. We all know there are much less time-strenuous ways of getting and keeping food but I’m enjoying honing the craft of putting up food for the winter.

When I’m sweating over a hot stove by myself I often thing about the times when people would participate in community canning parties. It seems like a big stretch to organize events like that today, but it seems like such a great thing and I love hearing stories about farm members getting together with friends and family to process food together! It’s so great to know exactly what you’re eating and where it comes from, and doing the work with others makes it an occasion rather than just a chore. Plus, the apple fruit roll-ups I made with local apples taste much better than Betty Crocker’s.

Preserve (ca. 1917-1919) by Carter Housh

After last week’s storm the fields are covered in snow, though it looks like we may lose it all this week. A good hard freeze gives our soil a nice reset each year and can kill invasive pests, so we’re hoping that we do get some extended winter weather soon, and we sure could use some moisture in the ground. Towards the end of this harvest season, we removed all of the plastic walls from one of the greenhouses to give the soil inside a much-needed snow treatment this winter. While the plastic stays up on most of the greenhouses every winter, we try to leave it off over winter when it needs to be replaced. This helps wash away mineral build ups from many seasons of irrigation, loosen the soil with a few good freeze-thaw cycles, and build up the subsoil water reserves. I have a feeling that one of the first tasks to happen on the farm this spring is reassembling the greenhouse. I hope we have some calm days this spring, because any breeze can get pretty exciting when you’re holding a 48×150 foot kite! If you see us hitchhiking back from Wisconsin in April you’ll know what happened.

From Food Farm to you, enjoy this holiday season!

Queue “It’s Beginning To Look A Lot Like Christmas” by Bing Crosby

For the farm crew, Emily


In your shares this month:

Beets – Green Cabbage – Orange and Purple Carrots – Garlic – Onions – French Fingerling and Yellow Potatoes – Sunshine and Delicata Squash


Beet, Apple, and Walnut Salad – The Book of Salads by Sonia Uvezian

  • 2 large, cooked beets – peeled and chopped
  • 2 tart apples – peeled, cored, and chopped
  • 6 stalks celery
  • 1/2 cup chopped walnuts
  • 1/4 cup olive oil
  • 2 Tbsp wine vinegar
  • 2 Tbsp orange juice
  • 1 small clove of garlic – crushed (optional)
  • salt and pepper to taste
  • Combine apples, beets, celery and walnuts in a bowl. 
  • Beat together the oil, vinegar, juice, salt, pepper, and garlic with a fork and whisk until well blended. 
  • Pour over salad.  Toss gently but thoroughly.  Taste and adjust the seasoning.

Creamy Garlic Dressing – Moosewood Cooks at Home

  • 3 garlic cloves – minced or pressed
  • 3/4 cup vegetable oil
  • 1/4 cup red wine vinegar
  • 1 tbsp chopped basil (or 1 tsp dried)
  • 1 tsp salt
  • 1 tbsp grated Parmesan
  • pepper to taste
  • 1/2 cup milk
  • Put garlic, oil, vinegar, basil, salt, Parmesan, and pepper into a blender or processor and whirl for a couple of seconds. 
  • With the blender still running, slowly add the milk, whirling until the dressing is thick and smooth. Covered and refrigerated, this will keep a week.

Roasted [Sunshine] Squash Soup – Simply Recipes

  • 3-4 lbs. sunshine squash, seeded (about 1 large squash)
    • This squash is in your share this month!
  • 2 1/2 tablespoons extra virgin olive oil, divided
  • Salt
  • 2 cups chopped or sliced onions
  • 2 ribs celery, sliced
  • 3 cloves garlic, chopped (about 2 tablespoons)
  • 2-inch piece of fresh ginger root, peeled and grated
  • 1/2 teaspoon ground cumin
  • 1 teaspoon ground coriander
  • 4 cups chicken or vegetable stock
  • 2 teaspoons salt
  • 1/4 teaspoon black pepper
  • Lime juice, for serving
  • Chopped fresh cilantro, for serving
  • Roast the squash: Preheat oven to 400°F. Use a heavy chef’s knife or cleaver (it helps if you have a rubber mallet as well) to cut the kabocha squash half into a few large pieces. (Kabocha squash is thick and meaty and can be a challenge to cut. Make sure the squash is stable on your cutting board before you start to cut it.) Scoop out the seeds (you can toast them like pumpkin seeds!) and stringy insides. Place the squash pieces on a foil or Silpat lined roasting pan.
  • Rub 1 tablespoon olive oil over all sides, and sprinkle with salt. Put the squash pieces skin side up on the pan. Roast for 45 minutes to an hour, until completely cooked through, soft, and caramelized at the edges. Remove from oven and let sit.
  • Sauté onions, celery, garlic, ginger, cumin, coriander: Heat the remaining 1 1/2 tablespoons of olive oil on medium-high heat in a large (4 to 6 quart) thick-bottomed pan. Add the onions and celery. Lower the heat to medium and cook until softened, 8 to 10 minutes.
  • Add the garlic, ginger, cumin, and coriander and cook 2 minutes more.
  • Add squash, stock, salt, pepper, then simmer: Once squash is cool enough to handle, remove and discard the skin. Place the roasted kabocha squash flesh into the pot with the onions and celery mixture. Add the stock, salt and pepper. Increase heat to high to bring the soup to a simmer, then lower the heat to low, partially cover and cook 8 to 10 minutes.
  • Purée the soup: Remove from heat. Use an immersion blender (or work in batches with a standing blender, only filling the blender bowl 1/3 of the way each time) to purée the soup.
  • Add more salt to taste. Sprinkle with lime juice and chopped cilantro to serve.

Summer CSA Week 18

That’s right farm sharers… It’s the final countdown (insert Europe guitarist). I think every one of us on the farm is shocked that the final CSA delivery is upon us. Not only because it’s still in the 70s during the day, but it also seems like only yesterday we were on the back of the transplanter planting the first of thousands of veggie starts. I don’t think we could have done it without that life-saving, and back-saving implement. Moreover, we could not have done it all without the support of our community and share members. It is all of you that keep the farm afloat and drive us to be the best farmers we can be. 18 weeks of shares have gone by in the blink of an eye yet we have so much to show for it. We have fed hundreds of people fresh, local, and organic veggies all while sustainably stewarding our farm.

This is not to say that with the end of the Summer CSA that comes the end of our work on the farm. In fact, we are just starting most of the large scale projects that will prepare us for our ’21-’22 Winter CSA, winter wholesale orders, and winter itself. On the farm hand side of things, this means clearing out the greenhouses, harvesting insane amounts of carrots, potatoes, beets, rutabagas, parsnips and cabbage, taking down trellises, and stowing the irrigation pipe that got our plants through this brutal summer. On the Janaki side of things, this means ensuring that fields are seeded with cover crops, compost is produced to feed our soil microbes, and operating the tractors so that us farm hands do not suffer at the expense of the insane amount of carrots I mentioned. Of course these aren’t the only things we will be doing over the next month, but you get the idea.

Just as we’re putting the farm to bed, we’re including a few sprigs of lavender in your share, long used as an aromatherapy sleep aide.

Here’s a list of things I have learned this season, even though nobody asked for it:

  • Do not waste time picking burs off of Chester. He will only come back around covered in more. He is also a professional skunk hunter and deer carcass finder.
  • Driving a very old tractor (we call it Stubby) is very fun and also terrifying at the same time.
  • Pigweed is a noxious plant that really makes you question whether or not being an organic farm is really worth it… (It is).
  • When a bee colony swarms they are actually super calm because they are not protecting their queen or hive anymore. I once walked through a swarm of thousands of bees to feed the chickens.
  • Raccoons sneak onto the farm for our tiny corn patch and nothing else.
  • Aside from the skunks that Chester brings around, the worst smell on the farm is hands down the smell of rotting daikon radish.
  • Do NOT harvest beets without gloves on unless you want to look like a murder suspect.
  • There is no such thing as a free meal.

Once again, we could not have done it without all of your support this season. We look forward to feeding you again in 2022. Until then, we will be here waiting and working the land to ensure you all receive high quality veggies next time around.

Take care,

Emily

“Agriculture is the noblest of all alchemy; for it turns earth, and even manure, into gold, conferring upon its cultivator the additional reward of health.” – Paul Chatfield

In your shares this week:

Beets – Carrots – Cilantro – Collar Greens – Lavender – Lettuce – Yellow Onions – Sweet Red Peppers – Hot Peppers – Potatoes – Rutabagas – Red Shallots – Delicata and Kabocha Winter Squash

A wonderful rainbow that made an appearance after we were rained on all day.
An absurdly large daikon radish that is destined for Spirit Creek Farm kimchi.

Red Flannel Hash (modified from NYT Cooking)

This recipe also works wonderfully with left-over roasted vegetables!

1.5 cups diced potatoes

1 cup diced squash

1/2 cup diced beets

1/2 cup diced carrots

1/2 cup diced peppers

1/4 cup diced onion

1/2 tsp each thyme and parsley

salt and pepper to taste


*Note:  Dice all the veggies into the similarly sized cubes (~1/2 inch) Heat oven to 425.  Place potatoes, squash, and beets on a rimmed baking sheet with 1 tablespoon of oil and bake for 20 minutes.  Add remaining veggies and herbs to the pan with the remaining olive oil and bake another 25 minutes.   
Fry the baked veggies in a frying pan with butter in a single layer to achieve crispness.  Top with a fried egg and serve with a side salad.


Strata (savory bread pudding)

1/2 lb french bread (stale or leftover works best), enough to make 4 cups of bread cubes

1 cup sliced mushrooms

1/2 cup diced peppers

1 cup diced or grated squash (~1/4″ cubes)

2 cups kale

1 clove garlic, minced

1.5 cups milk

1/2 cup grated hard cheese (swiss, gruyere, or cheddar)

1/4 cup grated Parmesan cheese

2 tbsp olive oil

1 tsp fresh rosemary (or 1/2tsp dried) 

1 tsp salt

4 large eggs


Preheat oven to 350 degrees. Soak the bread cubes in 3/4 c. of the milk. Oil or butter a 2 qt baking dish.  Heat a frying pan and add the kale.  Fry over medium heat until the leaves begin to soften and wilt.  Cover the pan and let the kale steam until cooked (3 minutes).  Remove from pan, press or squeeze out the excess liquid.  Chop coarsely and set aside.  Add 1 tbsp oil to the same frying pan and add the mushrooms and peppers.  Fry on medium heat until the mushrooms are cooked and the peppers have lost some of their moisture.  Add the minced garlic and the squash, and continue to fry for another minute.  Stir in the rosemary and kale.  Remove from heat, pour into a bowl with the cubed bread, the two cheeses, and toss together.  Arrange in a baking dish.
Beat eggs in a medium bowl and add the remaining milk and salt (and a few shakes of black pepper if you like it).  Pour over the bread and press the bread down into the custard mix.  Bake for 40-50 minutes until puffed up and brown and a knife poked into the strata comes out clean.
Note:  this can be assembled and left (covered) in the fridge for the night for a quick and easy morning bake, too!

Summer CSA Week 17

I hope everyone’s fall equinox was filled with fall festivities. Leaf watchers should be infiltrating the region en masse in the coming weeks. Luckily we don’t have to go very far at the Farm to see the beautiful colors of fall. For those who have been out to the Farm, you know what I mean. This is also the week where onion cleaning is in full swing which means that the falling leaves will become mostly indistinguishable from onion skins that are left to the ground.

Onions are one of our main storage crops for the winter. Last week we harvested several thousand pounds of storage crops. These include squash, potatoes, cabbage, and daikon radish. Speaking of… daikons will be making an appearance in your shares this week. The following recipes are heavily influenced by daikons as they are probably not used as often in people’s cooking routines.

This is a really nice time on the farm.  The weather is not too hot, and not yet cold. The weeds and bugs have slowed, and we are no longer planting vegetable starts or seeds into the field with the exception of cover crop seed. The frost seems to be keeping its distance and we received a 3/4″ of rain this week. All of our “free time” is pretty focused on harvesting storage crops.

Also, this week we will be sending out pumpkins! Farmer Janaki notes that although these are technically edible, the texture and flavor is not as good for eating. This variety is mainly used for carving. Let the fall festivities ensue.

Thanks for reading,

Emily

Terri hauling pumpkins while wearing her pumpkin colored overalls.

In your shares this week: Pole Beans – Carrots – Celery – Cilantro – Cucumbers – Greens Mix – Onions – Red Peppers – Hot Peppers – Fingerling Potatoes –  Daikon Radishes – Spinach – Delicata Squash – Tomatoes – Zucchini

Beans in the greenhouse.

This recipe is good for a quick addition to anything that might need the crunch of a pickle (salads, grilled items).  The original recipe also called for carrots. 


Daikon Radish Quick Pickle (Modified from The CSA Cookbook (Ly)


1/2 lb daikon cut into 2-inch matchsticks

1tsp salt

1/2 cup rice vinegar

1/2 cup water

2 tbsp sugar


Toss the daikon with the salt and let it sit in a colander in the sink for about 30 minutes.  Toss once or twice to remove as much liquid as possible.  Combine the vinegar, water, and sugar in a saucepan.  Cook over medium heat, stirring until the sugar is dissolved.  Let the brine cool to room temp.Rinse the daikon under cold water to remove the salt and pack into a container.  Cover the daikon matchsticks with the brine and let them stand for at least 4 hours at room temperature.  Pickles are best if refrigerated overnight.

Spicy Chinese Slaw (The Joy of Cooking)


Slice into 2-inch matchsticks- Daikon, cucumbers and cabbage (to equal 3 cups)

Place in bowl and toss with 4 tablespoons of salt.  Let stand to drain for 30-45 minutes. 

Rinse veggies with cool water to remove the salt.  Drain well and place into serving bowl. 

Stir in: 1 tsp minced garlic Red pepper flakes (to taste)

1 tablespoon sugar

1 tablespoon rice wine vinegar

1.5 tablespoons olive oil

1.5-2 tablespoons of sesame oil

salt to taste. Marinate for at least an hour.  

The 3rd recipe I chose should use some of the root veggies in this share…YUMMY!


Roasted Roots with Vinaigrette (modified from The Smitten Kitchen)


1 cup of cooked grains – quinoa, barley, couscous, farro (your choice!)

salt

3 small shallots or 1 small garlic clove

olive oil

3-4 cups mixed root vegetables (possibilities:  radishes, turnips, beets, carrots, potatoes, squash, cabbage, zucchini) – you can also include any non-root veggies from your shares.

2 tablespoons lemon juice


Preheat oven to 400 degrees F. Peel shallots (or garlic), break the shallot into clove-sized portions and wrap in aluminum foil with a few drops of olive oil. Place in oven. Coat baking sheet or roasting pan lightly with olive oil. Arrange the root veggies in one layer and drizzle with as much olive oil as you like to use (at least 2T). Sprinkle with lemon juice, sprinkle generously with salt and pepper to taste. Add roasting pan to oven. Roast veggies for 20 minutes, flip them over and roast for 10-20 more (until tender and slightly brown).  Remove both veggies and foil packet from oven.


Vinaigrette

2 tablespoons mild vinegar (sherry is good)

1 tablespoon balsamic vinegar

1/4 tsp salt

3 tbsp olive oil

pepper to taste


Remove the shallot or garlic from the foil packet and toss into blender with the vinegers and salt.  Drizzle in olive oil and sample the dressing.  Add salt and pepper to taste.  
To assemble:  spoon the grain onto a platter.  Arrange roasted root veggies over the grains and drizzle with the dressing.    

Summer CSA Week 16

Howdy food sharers,

This past week was the week of squash. To be honest, I’ll probably never see that much squash again in one place. On Wednesday we harvested around 8,000 pounds of Delicata alone. As much as it feels like it will never end when we are in the middle of harvesting, the end results are very satisfying to look at. 4 tons of Delicata sitting on drying racks is a sight for sore eyes (and arms). It is also very funny to be using old bakery racks as storage racks. They sure do get the job done though.

Delicata are not the only variety of squash we are growing this year. The others include: Winter Sweet, Acorn, Kabocha and Sunshine. To be honest I think I would name my pet after these squashes. Maybe not Delicata though… I sometimes think that squash is such an interesting crop so I decided to do a little research to spice up this newsletter. Here are some fun facts about squash:

  • The name “squash” comes from a Native American word “askutasquash” which means “eaten raw or uncooked” which is….ironic. Or at least I have always cooked my squash.
  • Squashes are some of the oldest crops. Some estimates are at 10,000 years old. 
  • The regions of Mexico and surrounding Central American countries are where squash is originally thought to come from. 
  • We grow both summer and winter squash here at Food Farm. Summer squashes are harvested when they’re immature and their skins are still soft. For example, zucchini is a well-known summer squash. Winter squashes are harvested when their skin is hard, making them suitable for long term storage.

Pretty soon your summer CSA will be over and your household may start to accumulate more and more squash. Pumpkins will be on their way to you soon. Jack-o-lanterns will be carved. Pies will be baked. Although this is the beginning of the end of our time being your summer farmers, we still have a LOT to get done on the farm before freeze-up. Best of all, the autumn equinox is on Wednesday. According to the MN DNR Fall Color Finder, between 10-25% of our trees in the area are turning color. Fall has quickly become my favorite time of the year since I started farming.

I’m keeping this newsletter short and sweet, just like our acorn squash.

Thanks for tuning in,

Emily 

In your shares this week: Arugula – Beans – Carrots – Cucumbers – Red Russian Kale – Leeks – Onions – Parsley – Peppers – Potatoes – Acorn and Sunshine Squash – Tomatoes – Zucchini

Chinese Chard with Almonds by TasteofHome

Ingredients

1 bunch chard (about 1 pound), chopped (the Red Russian Kale this week is tender enough to use in place of Chard)

1 tablespoon olive oil

1 large sweet red pepper, cut into strips

1 large tomato, diced

1 small red onion, diced

3 garlic cloves, minced

1 tablespoon minced fresh gingerroot

1 tablespoon hoisin sauce

3/4 teaspoon Chinese five-spice powder

3/4 teaspoon kosher salt

Dash crushed red pepper flakes

2 tablespoons lemon juice

1/2 cup sliced almonds, toasted

Directions

In a large saucepan over medium-high heat, bring 2 in. of water to a boil. Add chard; cook, covered, until crisp-tender, about 5 minutes. Drain; set aside.

In same saucepan, heat oil over medium-high heat. Add pepper, tomato and onion; saute until pepper is crisp-tender, 3-4 minutes. Add garlic; cook 1 minute more. Stir in next five ingredients; add cooked chard. Cook and stir until pepper is tender, 3-4 minutes ; add lemon juice. Top with almonds.

Kale and Leek Gratin by Food & Wine

3 pounds kale, de-stemmed

3 tablespoons extra-virgin olive oil 

5 medium leeks, white and tender green parts only, sliced 1/4 inch thick

Salt

3 garlic cloves, minced

6 tablespoons unsalted butter

2/3 cup all-purpose flour 

1 quart whole milk

1/2 cup shredded Gruyère cheese

1/2 cup freshly grated Parmigiano-Reggiano cheese 

1/4 teaspoon freshly grated nutmeg

Freshly ground pepper

Directions

In a large pot of boiling water, blanch the kale in batches until wilted, about 1 minute. Drain, squeeze dry and chop it.

Heat the oil in the pot. Add the leeks and a pinch of salt. Cover and cook over moderately low heat, stirring, until tender, 7 minutes. Uncover, add the garlic and cook, stirring, until fragrant, 2 minutes. Add the kale, season with salt and remove from the heat.

Preheat the oven to 425°. Butter a 10-by-15-inch baking dish. In a large saucepan, melt the butter. Stir in the flour over moderate heat to form a paste. Gradually whisk in one-third of the milk and cook, whisking, until the mixture starts to thicken. Repeat two more times with the remaining milk. Bring the sauce to a boil, whisking constantly. Reduce the heat to low and cook, whisking often, until thickened and no floury taste remains, 15 minutes. Whisk in the cheeses and the nutmeg; season with salt and pepper. Mix the sauce into the leeks and kale. Season with salt and pepper.

Transfer the mixture to the prepared baking dish. Bake in the upper third of the oven for about 25 minutes, until bubbling and golden brown on top. Let rest for at least 10 minutes before serving.

Summer CSA Week 15

It’s hard to believe that we are already on the 15th week of the CSA, it feels like the season just started last week!? Anyways, while we are excited to share with you the vegetables of the week, there are still a few that you may not see this week, or next. Crops like brussels sprouts take a long time to mature–they’re seeded in early June and usually aren’t ready until the last week of the CSA. Most crops, like the celery in your shares today, are a couple of weeks ahead of schedule, but the brussels are actually slow enough that they may not even mature in time. I’m excited to eat them even if we have to wait for the winter shares.

This past weekend we attended the Harvest Festival at Bayfront and enjoyed seeing many familiar and new faces at the booth. The crew worked all day Friday harvesting vegetables to ensure that festival-goers received the freshest produce possible. It was great to see everyone after a year off from the festival.

The theme of last week seemed to be our potatoes. We worked on getting out the rest of the first planting of potatoes which included whites, russets, and yellows. Potatoes rock our world in so many ways and are incredibly versatile. I thought it might be useful to include a guide as to what potatoes are good for different potato cooking techniques. Disclaimer: this guide is based on a quick Google search and really, you can do whatever you want to your potatoes.

Fingerlings: great for baking, roasting, and potato salads. Not as good for soups.

Russets: These are the long brown potatoes in the share today. These are good for baking, mashing, french fries, and chips.

Reds: Unlike Russets, red potatoes do not fluff up as much when cooked. This makes them good for soups and stews.

Yellow/Gold: Creamier than most and are great for mashing, roasting, and grilling.

White: Great for french fries and hashbrowns. Doesn’t necessarily need peeling due to thin skin.

That’s the reference guide I use when choosing potatoes, but I use the different varieties interchangeably for the most part. Next up, I felt compelled to include a recipe for a classic potato dish that I grew up eating at every family gathering and holiday, and I hope you did too.

Thanks for reading,

Emily

We were fortunate to receive a few random rain showers and a big rainbow last week.

In your shares this week:

Beans – Broccoli – Carrots – Celery – Cucumbers – Dill – Lettuce – Onions – Red Peppers – POTATOES – Acorn Squash – Tomatoes

Farmer Kathleen driving the crew back to the potato fields for harvesting.

Potatoes au Gratin by RecipeTinEats

  • 1 1/2 cups cream
  • 2 garlic cloves, minced
  • 2 tbsp unsalted butter,melted
  • 2 lb starchy potatoes, Russet
  • 1 tsp salt
  • 1/4 tsp pepper
  • 2 1/2 cups gruyere cheese (or mozzarella)
  • 2 tsp thyme leaves
  • Cream Mixture: Place butter, cream and garlic in a jug or jar. Mix until combined.
  • Preheat oven to 350°F.
  • Slice potatoes: Peel the potatoes and slice them 1/8″. Or use a slicer!
  • Layer 1: Spread 1/3 of the potatoes in a baking dish, then pour over 1/3 of the Cream Mixture, scatter with 1/3 of the salt, pepper and thyme. Sprinkle with 3/4 cups cheese.
  • Layers 2 & 3: Repeat for the 2nd and third layer, but do not finish with cheese on the top layer (will add later).
  • Cover & bake: Cover with lid or foil, and bake for 1 hr 15 min or until the potatoes in the middle are soft (use knife to test).
  • Top with cheese, bake again: Remove foil, top with cheese. Bake for a further 10 to 15 minutes until golden and bubbly. Stand 5 minutes before serving.

Cream of Celery Soup by AllRecipes

  • 3 quarts vegetable stock 
  • 1 head of celery, coarsely chopped
  • ½ pound carrots, julienned
  • ½ pound onions, chopped 
  • 1 cup all-purpose flour 
  • 1 tablespoon salt
  • 1 teaspoon ground white pepper
  • 3 quarts hot milk
  • 1 cup margarine
  • Step 1 Pour the vegetable stock into a large pot, and bring to a boil. Add the celery, carrots and onion to the pot.
  • Step 2 Whisk together the flour, salt, pepper, and milk; add to the pot along with the margarine.
  • Step 3 Boil for 10 minutes, then strain out the vegetables by pouring through a sieve, or if the vegetables are large enough, a colander may be used.

Summer CSA Week 14

This week was a big week for our dear friends the alliums. Alliums are a genus of plants that include onions, garlic, leeks, and shallots. Onions! Enough to make a grown man cry. To say that these crops are the very backbone of savory dishes in the Midwest is an understatement. Not only do they provide great flavor and texture to our food, they also make the air smell great when you harvest them for several hours. And what do you say to a small onion that has helped you? Thanks shallot. We also started to sort out seed garlic which involves picking out the most perfect heads of garlic to use for next years garlic crop. This process, over the course of years, helps us yield the best looking heads of garlic to give to our dear members and the community.

Soup season is just around the corner, unless you’re like me and believe soup shall not be limited to colder weather. Either way, I feel compelled to throw in a decent soup recipe in these newsletters each week. They’re great for many things but amazing for using up random veggies in your fridges. Great for budgets and your stomachs. This may very well be the beginning of canning season for your household, for which soup is a fantastic candidate. Our dear friend the leek has been patiently waiting it’s arrival in your shares. And you had better believe there’s a soup recipe in this newsletter whose sole intention is to use a decent amount of leeks. Personally, I think the leeks this year look way bigger than last years. This is probably due to the warmer temperatures we have been experiencing.

This weekend you’ll find the Food Farm crew at the Sustainable Farm Association’s annual Harvest Festival at Bayfront Park in Duluth. Have you been wishing to have just a few more heads of broccoli this year? Perhaps you’re wishing for some more tomatoes? Fear not, as we will likely have a wide variety of food available to you. My favorite thing about these festivals as a consumer is seeing the value added goods that people create. Every year there is something new to try and it’s even better knowing it’s local. The annual Harvest Festival is a fun and great way to connect producers directly to consumers. Aside from these newsletters, there are only a handful of ways in which we are able to directly connect with our share members and the general public. We hope to see all of you there! We’ll be there from 10am – 4pm.

Some exciting news from our newest farm hens, they’ve laid their first eggs! These relatively tiny eggs will not be included in the egg shares yet. However, they are a reminder that these chickens play a valuable role on the farm. They provide our members with food and our fields with fertility. Plus they’re cute and full of personality – what more could you ask for in your coworkers?!

If anyone has a soup recipe suggestion, please do not be shy. We must all prosper in the richness that is liquid food.

Your local soup enthusiast,

Emily

In your shares this week:

Broccoli – Carrots – Cilantro – Cucumbers – Garlic – Greens Mix – Leeks – Onions – Hot Pepper – Red Peppers – Potatoes – Tomatoes – Zucchini

Bumble bees are fond of our bean plants and their flowers. I call this photo: “Bumble Bean”

Potato Leek Soup from Tasty

  • 2 tablespoons butter
  • 3 large leeks, chopped
  • 3 cloves garlic, minced
  • 2 lbs potato, cubed
  • salt, to taste
  • pepper, to taste
  • 6 cups vegetable broth
  • 2 cups water
  • 2 sprigs fresh thyme
  • 1 bay leaf
  • ¼ cup fresh chives, chopped
  • hot sauce, to taste
  1. Melt butter on medium heat in a large pot. Add the chopped leeks and stir until coated with butter.
  2. Cover the pot and lower heat, cook for around 10 minutes until the leeks have softened.
  3. Increase to medium-high. Add garlic, potatoes, salt, and pepper. Cook for 1 minute, then add vegetable broth, water, thyme, and bay leaf. Bring to a boil.
  4. Lower heat and cover pot with a lid and simmer for 15 minutes, or until potatoes are tender and easily speared by a fork.
  5. Uncover and remove thyme and bay leaf.
  6. Use an immersion or countertop blender to blend the soup until smooth.
  7. Stir in chives and hot sauce (optional).
  8. Allow to cool 2 minutes and serve

Cucumber Avocado Salsa by To Simply Inspire

  • 1 large cucumber peeled, seeded and finely chopped
  • 1 avocado finely chopped
  • 1 medium tomato finely chopped and seeded
  • 1/4 cup red onion finely chopped
  • 2 – 3 tablespoon fresh cilantro finely chopped
  • 1 garlic clove minced

For the sauce:

  • 1/4 c reduced-fat sour cream
  • 1-1/2 tsp lemon juice
  • 1-1/2 tsp lime juice
  • 1/4 tsp ground cumin
  • 1/4 tsp salt
  1. In a medium bowl, combine the first six ingredients and gently toss
  2. In a separate bowl, combine the sour cream, lemon juice, lime juice, cumin and salt.
  3. Pour over cucumber mixture and gently toss to coat.
  4. Serve with tortilla chips.

Summer CSA Week 13

Every day was super eventful on the farm this past week. The crew adjusted the solar panels along the driveway to match the sun’s fall position in the sky. We are also gearing up for the fall harvesting that will be happening soon, especially for the storage crops. On Wednesday we harvested about 13 tons of carrots – all before lunch. It’s days like those that really make us realize the impact we have on the local food system. Also, not to scare anybody but there are at least 30 more tons (hopefully) that still need to be harvested before late October. And those are just the carrots. Our list of things to do seems like it should be getting smaller but let’s be honest – it’s definitely going to get bigger.

Early this week we said a heartfelt goodbye to Karin who has been the backbone of the farm crew for 7 seasons. She will be deeply missed, but we all wish her the best of luck with this transition in her life. In her honor we built a huge shrine with some parts we found laying around in the barn and it’s just outside the pack shed so she is never forgotten. It doubles as a second bucket-drying rack. Just kidding – that’d be weird. But truthfully, she deserves the recognition for being so cool.

As many of you probably experienced this week, the air quality was very poor from the wildfires burning north of us. As a farmer, I never realized how much I had been taking good air quality for granted. Luckily, wearing a mask helps a lot. There was some rain at the end of the week (yay!) that helped improve the air quality. As a bonus we got to finally experience some autumn-ish weather that the storms brought with them – cool breezes and chilly mornings. Rain also gives us all some excitement knowing that our veggies will be that much happier.

Our newer hens have been adjusting nicely to their new home in the last month. They live on the far side of the farm in a mobile coop that gets moved every few days. This ensures the field they are in is getting an equal distribution of fertilization from the chickens. Earlier this season Farmer Janaki taught us that the fields that have had chickens rotated around in them are significantly more fertile than their non-chicken bearing neighbors. This is just another way the Food Farm builds soil and improves soil quality. What that means for our share members is more nutrient dense veggies.

Thanks for reading my first newsletter, I am excited to carry on this task.

Emily

In your shares this week:

Cucumber – Zucchini – Potatoes – Carrots – Hot Peppers – Red and Green Peppers – Onion – Dill – Tomatoes – Greens Mix – Beans – Beets

Zucchini Lasagna from PBS

  • For the Tomato Sauce:
  • 1 – 28 oz can of crushed tomatoes (or about 4 pounds of fresh tomatoes)
  • 1 large garlic clove, minced
  • 1 Tbsp. fennel seed, crushed slightly to release the flavor
  • 1 tsp. ground oregano
  • 1/4 cup finely chopped basil
  • 1 tsp. cane sugar
  • 2 Tbsp. olive oil
  • For the Cheese Filling:
  • 1 pound of ricotta cheese (or cottage cheese)
  • 1 cup grated parmesan cheese
  • 1 egg
  • Salt and Pepper to taste
  • For the Vegetables:
  • 2 to 3 medium-sized zucchinis, no bigger than 4 inches diameter (or 4 to 5 small zucchinis)
  • 2 tsp. salt
  • 3 Tbsp olive oil
  • 1 pound of mushrooms, sliced
  • 1 bunch of swiss chard or spinach (about 4 cups, chopped)
  • 1 large onion, minced
  • 2 Tbsp. flour (can be gluten-free flour)
  • A dozen or so fresh basil leaves (optional)
  • 4 cups shredded mozzarella (about 1 pound)
  1. Slice the zucchinis lengthwise to between 1/8 to 1/4 inch thick. Use a mandolin if you have one, it will help you slice the zucchini faster and in perfect consistent slices. Otherwise, slicing with a knife is fine too. Place the slices on a clean towel and pat the zucchini very dry. Rub 1 Tbsp of olive oil onto an extra-large baking sheet (or 2 smaller ones) and place the zucchini slices in a single layer. Roast in a 375F oven for about 10 minutes. Allow to cool.
  2. If using fresh tomatoes, deseed the tomatoes (if you wish remove the skins). Bring the tomatoes to a boil and add the minced garlic, chopped basil, crushed fennel seeds, ground oregano, olive oil, sugar, and salt to taste. Simmer until thick and reduced. It’s important to use a thick lasagna sauce in this recipe because the lasagna can otherwise be on the soupy side without the pasta to soak up the extra liquid as it bakes.
  3. In a large skillet or wok, heat 2 Tbsp olive oil and sauté the onions for 3 to 4 minutes. Add the mushrooms and continue cooking. Once the mushrooms are soft, add the chopped swiss chard. When the chard is cooked, remove from heat and drain any juices (save these for great soup stock). Add 2 Tbsp flour to the mixture and mix well to incorporate.
  4. Oil a 9 x 13 inch lasagna dish and spread about one third of your sauce on the bottom. Add a layer of roasted zucchini to cover the tomato sauce. Add the ricotta and parmesan cheese mixture and spread evenly. Add another layer of zucchini slices. Add a second round of tomato sauce and spread evenly, followed by the vegetable mixture and half of the shredded mozzarella cheese. Add a last layer of zucchini slices followed by the third and last round of tomato sauce. Place the twelve basil leaves on top of the sauce and sprinkle the rest of the shredded mozzarella on top. Pro tip: place a baking tray on the rack beneath the lasagna pan to catch any bubbling juices from falling to the bottom of your oven. Bake for about 40 minutes at 350F until the cheese is melted.

Cucumber Tomato Salad from Spend With Pennies

  • 2 cucumbers (sliced)
  • 2 large tomatoes (diced)
  • 1/2 onion (sliced)
  • 1 tablespoon of dill
  • 2 tablespoons of olive oil
  • 1 tablespoon of red wine vinegar
  • salt and pepper to taste

Combine all ingredients in a boil and toss well.