Happy February! January always feels like the longest month of the year to me, and those VERY cold days we had didn’t help. Now that February is here, the farming anticipation is growing (pun intended), and we are extra busy.
On February 19th your farmers will be coming to town for the “The Rutabaga Giveaway,” which somehow has become an annual event for us! This is a great opportunity to not only meet other Food Farm members, but also to meet Janaki, Annie, and other farm crew folks. It’s also a great way for friends or neighbors who are interested in being part of the farm to meet us and have their questions answered. We’re holding it this year at the Whole Foods Co-op’s Denfeld location from 4-7 pm. Back in November when we harvested Rutabagas, we set aside the largest ones just for this event. Even if you don’t want to socialize, you might want to come down just to see how big they are!
Drum roll please for the other exciting thing about February…it’s the last month before we start seeds for next year! By the time you are reading this, we are only three weeks away from starting onion seeds and beginning the 2025 growing season. We are all excited thinking about warm, sunny days ahead, but we also aren’t quite ready to give up our slow days of drinking coffee in front of the fireplace.
This month is also conference season. Over the next few weeks, Janaki and some of the farm crew will be traveling to La Crosse and/or Madison for the opportunityto learn about new/different farming practices, meet other farmers, and reignite our excitement about farming before the season starts.
Now is the time to join in that excitement, because 2025 share sign ups are officially open! They tend to go fast, so sign up as soon as possible. You should have gotten an email letting you know sign ups are open, but if you didn’t, or you can’t find it, you can sign up by going to the Food Farm website.
Finally, we are still looking for a couple of seasonal crew members to join us on the farm this summer and fall. More info is available here if you know of someone looking for good work with good folks! Thanks!
In your share this month:
Yellow, Red, and Baby Russet* Potatoes – Red Cabbage – Beets – Orange and Purple Carrots – Parsnips – Red and Yellow Onions – Delicata Squash – Garlic
*The baby russets are perfect for hashbrowns! See our instructions in last year’s newsletter.
I made these Korean Lentils from Crumbs & Caramel for dinner a few nights ago, and can’t get over how delicious it was. It’s an easy meal that gets a lot of color on the plate, and offers room for creativity with the vegetables you use. This is a great way to use some cabbage, and I highly recommend adding some shredded carrot as well.
Potatoes are a delicious and inexpensive way to make soups and chowders more filling. If you’re a meat lover, or you want to make this soup extra filling, ground sausage is a great addition to this meal. The yellow potatoes in your box this month are begging to be used in this Roasted Poblano Corn Chowder by Whip & Wander, and I’m going to add a some parsnips to it as well.
Happy New Year! We hope you all had a wonderful holiday season, and are enjoying all the fresh snow.
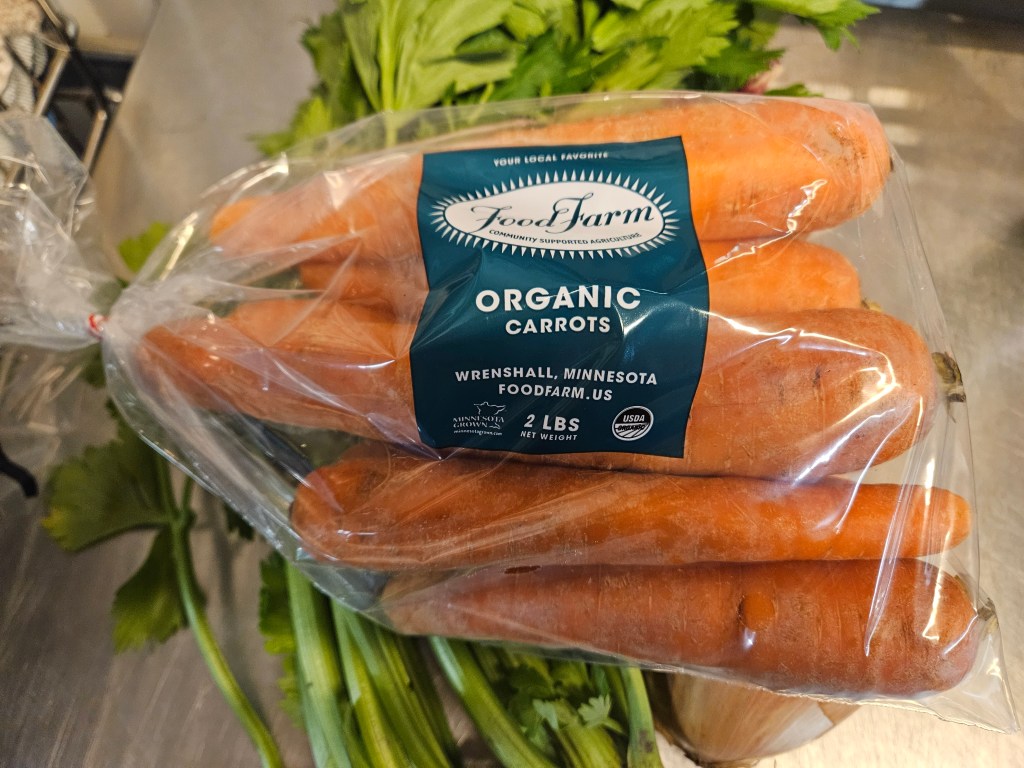
One of the big tasks over the holiday season at the farm is packing vegetables for our grocery store and restaurant partners. If you’ve recently visited one of the grocery stores in the area that stocks our produce, you may have noticed that our carrot bags have gotten an upgrade! We ran out of our old printed bags last spring and have been putting individual stickers on bags while we waited for the new batch of printed bags to arrive. The new bags are slightly wider to make them easier to pack, and we made the size of the label smaller so it’s easier to see the carrots, and we simplified the logo and color scheme to reduce printing costs. They also have ventilation holes throughout the bag so the carrots don’t get too wet inside. It was quite a process, with a lot of back and forth with printers, including a misprinted batch of 50,000 bags (yikes!), but the crew is excited to not have to do so much stickering.
Last month I mentioned we had started ordering seeds already. The next few months will be filled with more crop planning, research, and lots of learning. Last week, Janaki was talking with one of our seed reps to discuss a new variety of zucchini. A seed rep works for a supplier and their main goal is to sell seeds to farmers, but they also provide additional knowledge and support as well. Most large seed companies will also assign reps to only work in certain regions or states that way they can be extra knowledge about a farmer’s specific growing zone and conditions.
The variety of zucchini we have been growing for a while has been discontinued. This meant research to find a suitable replacement. Janaki mentioned to our Johnny’s Seed rep that we struggled with proper pollination last year. Our rep recommended a new variety that has better pollination rates especially early in the season when pollination rates are usually lowest. The rep then went one step further and also sent along information about how to enhance habitat for the specific pollinators that target zucchini.
We were worried that part of the poor pollination last year was due to the fact that all of the bees seemed to visit the melons we had planted in the same field, and skipped right over the zucchini. The information from our rep taught us that the honey bees visiting the melons are secondary pollinators of squash. The primary pollinators of Winter and Summer squash are squash bees, which are specifically attracted to squash. They live in tunnels at the base of the plants, they come out really early in the morning to collect pollen as soon as the flowers open, then they do the cutest thing of all, and take afternoon naps inside the flowers. The article gave us tons of info about the squash bees, how to protect them, and how to keep them coming back year after year. It is likely that the primary cause of poor pollination this season was the cool, wet start to the year, but hopefully the new seed variety and the information about squash bees, will improve our ability to cope with poor weather.
INGREDIENTS 4 medium carrots, diced 1 tbsp balsamic vinegar 1 tbsp olive oil 2 tbsp clear honey 4 pre-cooked beets, quartered 25g pumpkin seeds (optional) handful fresh herbs, such as parsley or basil to serve
1 : Heat the oven to 180c/gas 4.In a bowl, toss together the carrots, vinegar, honey and olive oil. Spread on a baking tray, then roast for 30 minutes. 2 : Remove 5 minutes before the end of cooking time, add the beetroot to the tray and return to the oven. Once cooked, remove form the oven and leave to cool a little, then toss with the pumpkin seeds and herbs.
Preheat the oven to 425°F and line a large baking sheet with parchment paper. Combine rutabaga fries with oil, paprika, garlic powder, salt and pepper on the prepared sheet pan, and toss until evenly coated. Arrange the rutabaga fries on the baking sheet in a single layer leaving space in between them. Bake for 30-35 minutes, flipping the rutabaga fries halfway through; until they are crisped on the outside and cooked through on the inside.
Now is the time of year when most people are flipping through store catalogs in hopes of finding the perfect gift to give their loved ones this holiday season. If any of you were curious, I’m a Queen Bee tomato seed packet. It’s a one size fits most so should be pretty easy to find. Figured I’d throw in some farming humor to lighten the holiday stress.
Here on the farm, we’re also flipping through catalogs, making our lists and checking them twice. This is the time of year when seed companies send out their catalogs.
If you’re thinking to yourself, “it is way too early to start thinking about seeds,” the farm crew would agree with you! The arrival of the seed catalogs is always creates a mix of emotions, from the dread we feel when a favorite variety is discontinued to the excitement of trying new and improved varieties, but mostly we’re not ready to start thinking about it yet with the harvest season only a few weeks in the rearview mirror. Onions and shallots, the first crops to be seeded, won’t be started for another 3 months, but farming never takes a break, so here we are thinking about what new varieties can provide better flavor, quicker maturity, better production, more disease resistance, or better drought tolerance. All of these qualities help us provide quality and consistency to members, and we’re grateful to the seed breeders who help us out, even though we’re not quite ready to turn our minds to spring.
Thankfully this isn’t our first rodeo. At this point, we have a pretty good idea of what vegetables, and more specifically which varieties, we will be growing next year. This makes it a lot easier for ordering types and quantities of seeds. Every year there are a few new (or new to us) varieties that we trial. Those take a little longer for us to order since we like to do more research on each of the varieties to see which one will be the best fit for what we need.
When we aren’t planning for next year, the farm crew is busy in the pack shed bagging and boxing vegetables for our retail orders, washing carrots, or finishing up various tasks to make sure the farm is ready for winter.
In your share this month:
Delicata and Kabocha squash – Green Cabbage – Chioggia Beets
Fingerling and Russet Potatoes – Red and Yellow Onions – Carrots – Garlic
Beet Salad
▢1 tablespoon (15 ml) fresh lemon juice
▢1 tablespoon (15 ml) white wine vinegar
▢2 teaspoons (10 ml) liquid honey or sugar
▢¼ teaspoon fine sea salt
▢2-3 tablespoons (30-45 ml) extra-virgin olive oil, or use pistachio oil for a special treat
▢1 pound (450 g) Chioggia beets, peeled
▢¼ cup (40 g) thinly sliced red onion
▢4 cups (170 g) mixed salad greens
▢¼ cup (60 g) fresh crumbled goat cheese
▢2 tablespoons chopped pistachios
Whisk the lemon juice, vinegar, honey (or sugar) and salt in a small bowl until honey is dissolved. Gradually pour in the oil and whisk to combine.
Shave the beets into ribbons with spiral slicer, or into thin discs with a mandoline or sharp knife.
Put the beets in a salad bowl with the onion and greens. Drizzle with enough dressing to coat, about 2 tablespoons, and toss together. Sprinkle the goat cheese and pistachios over the salad. Serve with additional dressing on the side.
Caramelized Squash
4pounds winter squash, such as acorn, butternut, honey nut, kabocha or red kuri
4medium shallots
¼cup extra-virgin olive oil
Salt and black pepper
¼cup unsalted butter
¾cup raw nuts, such as hazelnuts, pecans or walnuts, chopped
½cup maple syrup
½teaspoon ground cinnamon
Adjust oven rack to the lower-third position and heat to 425 degrees. Halve the squash lengthwise and use a spoon to scoop out the seeds and any stringy bits. Cut each half into 3- to 4-inch wedges. Halve the shallots lengthwise through the roots, leaving the skin on.
Toss together the squash, shallots and olive oil on a large rimmed baking sheet. Season with salt and pepper, toss once more and spread out the squash and shallots as much as possible. Roast until nicely browned and tender, 30 to 40 minutes total, flipping the squash and shallots after 15 to 20 minutes.
While the squash roasts, melt the butter in a small saucepan over medium. Add the nuts and cook, stirring occasionally, until the nuts have slightly darkened and smell very toasty, 3 to 5 minutes. Remove from heat and stir in the maple syrup and cinnamon. (The toasted nuts may be made up to 3 days in advance and stored in a sealed container in the fridge. Reheat in a small saucepan over medium-low before serving.)
Arrange the squash and shallots on a platter or large plate and spoon the toasted nuts and their syrup on top.
We love seeing our fields all tucked in with cover crops for the winter!
Welcome to all of our new members, and welcome back to our returning members. We’re so excited you have chosen to spend your Winter receiving the best veggies in town!
Boy oh boy has it been busy around the farm! I know I said that a lot this year, but this time I really mean it. November marks the busiest time of year here. Our Summer CSA season ended about a month ago, and since then, the farm crew has been hard at work. We said goodbye to all of the tomatoes, cucumbers, pole beans, and some herbs in the greenhouses. Rye got planted in their place to begin putting nutrients back into the soil to prepare it for next spring. We packed up and stored the last of the peppers and kale before we said a final goodbye to those plants as well. We got the 2025 garlic separated, planted, and covered with rye straw to keep it cozy through the winter. We moved onions and winter squash to their more temperature controlled, winter homes in the pack shed. Then we got to harvesting.
It has been all hands on deck, non-stop work, to get everything out of the field. Potatoes, cabbage, brussels sprouts, carrots, beets, and parsnips are all out of the field and crammed into the root cellar for storage. We emptied out the very last greenhouse with the harvest of lettuce and celery for the share boxes. The only things left in the field are rutabaga and daikon radishes. We need to make a little room in the root cellar first so we have space to put them. A wonderful and terrible problem to have. This time of year, our root cellars are filled floor to ceiling, wall to wall with pallet boxes of vegetables. It’s an amazing sight to see. It’s one of my favorite things to stand in the cooler and look around at all the boxes filled with vegetables that we lovingly (and reluctantly) seeded, planted, transplanted, weeded, thinned, hoed, watered, stressed over, and harvested. It’s a year’s-worth of hard work all packed and stacked into massive pallet boxes.
…and the crops all tucked into the cellar for storage!
The hard work doesn’t stop there. Once we get the last of the veggies out of the ground, we hope to take advantage of this nicer weather to get some various projects done around the farm, and clean up some last minute things before the snow starts piling up.
If I had to sum up this share box in two words it would be: Large and Lush. You’ll probably agree with this when you look inside. Thanks to all the rain this year, the carrots are HUGE! In early October, Janaki mowed off the top greenery of the plants in hopes the carrots would stop growing. The carrots didn’t seem to understand, and we harvested really large carrots. They’re still just as tasty as normal, but now, you don’t have to wash and cut as many for dinner. Win! Our friends over at Spirit Creek agreed to take the largest carrots, and a whole pallet box of super large beets as well. This means we can attempt to give you all normal-ish sized food. The weather was perfect for growing lettuce, so you all got one beautiful and lush head of lettuce. It is sturdy and tasty. If you’re not quite ready for cold and snow, this lettuce is the perfect time to make one last Summer salad. The only thing that isn’t large and lush is the celery. This got a slow start, so it’s smaller than the celery we normally send. The smaller size makes it more tender and less stringy. If you aren’t a fan of celery and don’t know what to do with it, did you know it’s a great treat for dogs? The fibers help to clean their teeth, it works to freshen their breath, and the high water content is hydrating. Around our house, we freeze the stalks so the dogs can’t chew through them as fast. Local produce can be fun and tasty for the whole family!
1 bunch of celery stalks (around 6-8 stalks) chopped into 3cm pieces
250g of chopped parsley
50g of chopped fresh mint or 2.5 tbsp of dried mint
130ml juice of lime
½ tsp of saffron dissolved in ¼ cup of boiling water
1 tsp salt
½ tsp freshly cracked black pepper
1 vegetable stock cube
Vegetable oil of your choice
INSTRUCTIONS
1. Heat 3 tbsp of vegetable olive oil in a pan over medium heat. Add the chopped mint and parsley and fry for around 10-15 minutes until herbs start getting dark and release their aroma. Add more oil if necessary. The darker the colour, the better the flavour will be.
2. In a separate pot, fry the sliced onion in 3 tbsp of vegetable oil. When translucent, add 1 tsp of turmeric. Then add the garlic and celery pieces and saute for another 5 minutes on medium heat.
3. Add in the butter beans and sauteed herbs and cook for about a minute further.
4. Add in 3 cups of boiling water, followed by the stock cube, lime juice, saffron water, salt, pepper, and cover and cook for at least 45 minutes-1 hour on a very low heat.
5. Make sure it is not completely dry, we want the juice! Add more salt to taste.
6. Serve hot with steamed basmati rice and vegan yoghurt!
Carrot Tahini Soup
Ingredients
2 large onions, thinly sliced
2-4 garlic cloves, minced
5-6 large carrots (about 3 lb. or 1200 g.), chopped
2 tbsp. olive oil
~ 7 cups water or vegetable broth
2/3 to 1 tsp. salt
1 tbsp. fresh or 1/2 tsp dried thyme
1/1 tbsp. Italian seasoning herbs
1 tbsp. smoked paprika
1/4 tsp. chipotle powder
1/4 cup (or a bit more) tahini + more for garnish
sesame seeds, lightly toasted, for serving(optional)
fresh thyme, for serving (optional)
Directions
In a large pot, heat the olive oil and sauté the onions with garlics, 5-7 min, until aromatic and translucent. Add the carrots and cook them for 5 minutes until start to lightly brown.
Add the water or broth to the pot along with the ginger juice, seasonings, and maple syrup (if using). Simmer at low-medium heat, covered and skimming the scum (if any appear) for about 12-15 minutes or until the carrots are soft.
At the end, stir in the tahini and off heat. Let it cool a bit until easy to handle. Using an immersion blender, process until smooth. If the soup is too thick to your liking, add a little of hot water or broth. Try and adjust the seasoning (or maybe even more tahini!) if necessary. When serving, drizzle with extra tahini and sprinkle with the sesame seeds, if desired. Enjoy!
Thanksgiving Slaw
Ingredients
For the dressing:
1/2 medium red onion
1/3 cup vegetable or olive oil
1/4 cup apple cider vinegar
2 tablespoons maple syrup
4 teaspoons Dijon mustard
1/2 teaspoon kosher salt
For the salad:
1.5 pounds shredded brussels sprouts
1 bunch fresh parsley
3/4 cup toasted, sliced almonds
3/4 cup dried cranberries
Kosher salt
Freshly ground black pepper
Instructions
Make the dressing:
Finely chop 1/2 medium red onion and add to a large bowl. Whisk in 1/3 cup vegetable oil, 1/4 cup apple cider vinegar, 2 tablespoons maple syrup, 4 teaspoons Dijon mustard, and 1/2 teaspoon kosher salt. Let sit for at least 10 minutes for the flavors to meld. Meanwhile, prepare the salad.
Make the salad:
Shred the brussels sprouts. Pick the leaves from 1 bunch fresh parsley and coarsely chop until you have 2/3 cup.
Add the shredded brussels sprouts, chopped fresh parsley leaves, 3/4 cup toasted, sliced almonds, and 3/4 cup dried cranberries to the dressing. Toss to combine. Taste and season with kosher salt and black pepper as needed.
Today marks the final Summer CSA delivery. We are sad to see this part of our season come to a close, but what a wonderful season it has been. This year has been filled with seeding, planting, harvesting, learning, laughing, and gratitude.
Our Farm crew shows up and works incredibly hard every day, but as the saying goes, many hands make light work. On Mondays and Thursdays we are grateful for our wonderful volunteers that help to lighten the load. This year we had quite the list of volunteers come out to help–if you braved the weather to come bag vegetables, harvest, weigh items, fill boxes, wash veggies, or cheer us on while we did those things, we appreciate you and your time more than words could express! Our CSA deliveries also wouldn’t be possible without our wonderful site hosts. Thank you to all of you who allowed us to use space at your home or business. This allows us to get local veggies onto the plates of more families by making pick up locations closer to their homes.
Today may end the CSA season, but it doesn’t end the farming season. These next 3 weeks are crunch time for us. We still have lots of veggies in the field that can handle a light frost ( and remember from last week, some of them even taste better), but too much frost can damage the crops. We also had a hard start to the growing season with how wet this spring was, so the longer we can let the plants grow, the better.
We will start the harvesting with things that shouldn’t get too cold such as potatoes and brussels sprouts. We will finish the harvest with our most cold hardy vegetables such as carrots and parsnips. By the end of October, all of the fields will be empty and everything that shows up on grocery store shelves, or in the Winter CSA boxes has been carefully stored over many months. Vegetables can last for a very long time if they are properly stored. We are grateful for our root cellar that will soon get packed from floor to ceiling with vegetables. This year was finally time to admit that we might be growing more vegetables than we have storage for. Janaki applied for, and got approved for a grant that will allow us to expand our cold storage area. By the end of the project, we will have increased our cold storage by over 50%, and give us a bit more space to wash and pack those veggies as well. If the mild weather continues, the plan is to get the footings in place before snow flies. The rest of the project will have to wait until Spring, so check back for more updates.
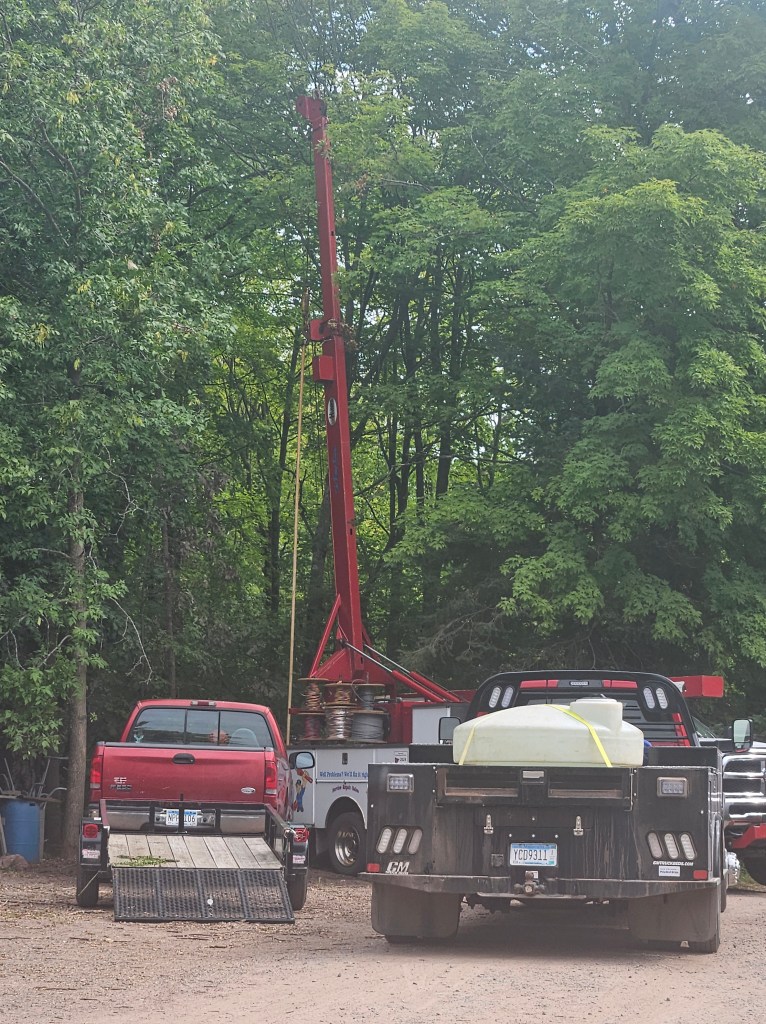
Another fun project we have in the works is adding another well. Up to this point, we’ve been using our household well to irrigate all of our greenhouses and tunnels, as well as a few of the smaller fields that don’t fit our larger irrigation equipment. This has required a careful dance to make sure everything gets watered and we still have pressure to wash and pack everything we need to. We hired a crew to come out a few weeks ago and dig the new well, and they’ll be coming back soon to install the pump and run new pipe to connect the buildings. We’re looking forward to having easy access and enough water pressure to provide water to the greenhouses, pack shed, and maybe even run a load of laundry at the same time.
Once November hits, we say goodbye to most of our summer crew. A couple people will stay on to fill retail orders, box Winter shares, wash vegetables (there isn’t always enough time to harvest and wash before the season ends) and do various tasks over the winter. The Summer crew will rejoin in late April or early May to start the cleaning process and take everything out of storage so we can do this all over again next year.
Before we end this last newsletter, we need to say a big thank you to all of you. Thank you for supporting us. Thank you for believing in us. Thank you for being here with us through the twists and turns. Farming isn’t easy. We give up a lot of control to mother nature, and hope things work out how we want them to…and sometimes they do! Having your support makes the challenges a little easier. Thank you for putting your trust in us, for supporting your local farmers, and for allowing us to wake up each day and do what we love. We hope to see you all again next year!
Soften the onion, carrot and garlic in the olive oil in a large pan over low heat for about 10 minutes. Add the lentils in stock to the pan bring to boil and skim off the foam that forms on the top simmer for 20 to 40 minutes until the lentils have disintegrated. Stir in the spices and lemon juice and season with salt and pepper. Simmer for five minutes more – if the soup needs thinning, add water and bring to boil again.
Winter Salad
For the Salad:
6 oz. shredded kale
1/2 small lemon, juiced
1 Tbsp. extra-virgin olive oil
6 oz. shredded vegetables, such as Brussels sprouts, cabbage, carrots
2 medium apples, cored and diced
1 1/2 c. candied pecans
4 oz. crumbled goat cheese
1 1/2 c. roasted winter squash
1/2 c. pomegranate arils
For the Dressing:
1/2 c. red wine vinegar
4 tsp. whole grain or dijon mustard
4 tsp. pure maple syrup
1 tsp. kosher salt
1/2 tsp. ground black pepper
1/2 c. extra-virgin olive oil
Directions
Place the shredded kale in a very large salad bowl. Add the lemon juice and oil. Use your hands to massage the lemon juice and oil into the greens, about a minute or so. The greens should wilt slightly and take on a deep green color.
Add the other shredded vegetables to the bowl as well as the chopped apple.
Make the dressing by combining all of the dressing ingredients in a mason jar. Shake vigorously for 30 seconds and then pour it over the salad. Toss well to combine.
Add the pecans, goat cheese, squash, and pomegranate arils on top. Serve.
The end of September marks garlic sorting time. This is when a few lucky crew members get to sort through each of the garlic bulbs to decide if they will be used as seed garlic, or if they will be sent to shares or sold. Last year we planted over 6,700 cloves of garlic. Every clove that you plant gets turned into a bulb that you harvest. That means over 6,700 bulbs of garlic were sorted one by one. We look at each bulb to see how many cloves it contains, the size of the cloves, and the overall appearance of the bulb. When looking for garlic that will be used as seed for this year, we look for bulbs that have 4,5, or 6 cloves in it. Any more or less and the bulb gets sent directly to the shares/sell pile. Once we’ve counted the cloves, we look at the size of each clove. We want the largest cloves that we can find. This is for 3 main reasons: 1) larger cloves have more energy in them to help the plant gets started. We don’t want the plants struggling and stressed from the very beginning. 2) larger cloves produce a stronger root system early in the growing season. This can improve their ability to access water and nutrients from the very beginning. 3) larger cloves are more resistant to frost. This allows them to better withstand our cold Minnesota winters, and it helps them recover more quickly if they do get a little too cold. For those reasons, anything with small cloves will get put in the shares/sell pile.
As we’re looking at the size of the cloves, it’s also important to make sure that we are choosing bulbs with similarly sized cloves. If they are all different sizes, they have the potential to grow and mature at different rates. Since we are growing such a large amount, making sure everything is growing and maturing at the same rate is very important.
The final inspection is the overall look of the bulb. We look for any signs of disease, internal mold, improper drying, and any other abnormalities. These all get pulled out and set aside for further inspection. planting bulbs with any of these “imperfections” could result in the cloves not germinating, or in them spreading disease to the soil and/or other garlic plants. We always prefer to be cautious and not chance it.
Once we have all our garlic separated into the two piles, we then do the math to figure out how many cloves we will need for planting. We figure out the length of the fields, how many beds we plan to plant, how far apart each clove will get planted, and possible increase or decrease in crop yield. I say we as if all of us are doing this math, but in actuality, Janaki does all of this math for us so only one person has to hurt their brain crunching all the numbers. Thanks to all of your interest in our garlic preserving shares this year, and the fact that we are planning to plant on a longer field than last year, we increased our seed number by 15%. This means at the end of October, the crew will hand plant over 7,700 cloves of garlic. Anything not deemed seed quality, got set aside to be sent as preserving shares or will be saved for winter share deliveries. In past years we’ve also sold a fair amount to restaurants and other local outlets, but this year that’s not possible because we’re saving extra seed.
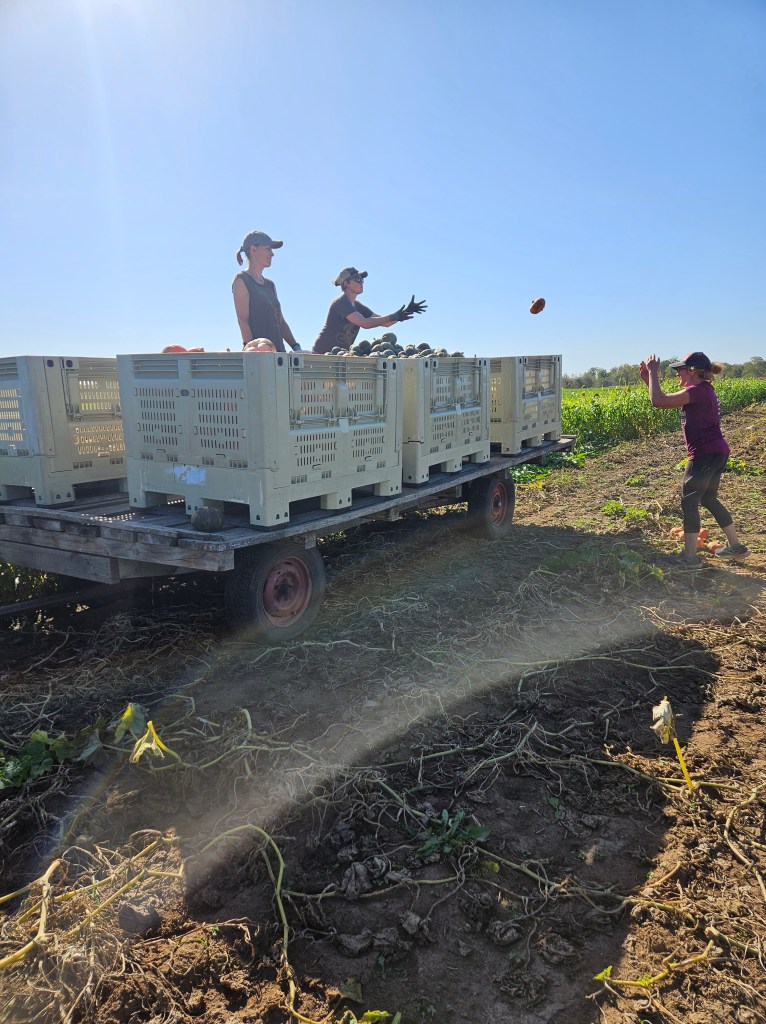
As the same time garlic sorting was happening, the rest of the crew was out getting all the winter squash from the fields. This meant clipping, throwing, stacking, loading, unloading, counting, and organizing thousands of squash. This is a long process because 1) it’s a lot of squash! 2) the Squash are split into different fields. One is on the main part of the farm, and the other is across the road. We had all the delicata, acorn, and some sunshine squash on the main part of the farm. The delicata made up the majority of this field since it’s the squash we will send with every winter share until we run out. This is also the popular seller to local businesses, and a favorite for most of the farm crew, so we plant quite a bit. Across the road was the rest of the sunshine, the kabocha, and all of the pumpkins.
It was a lot of work, but we got all the Squash and pumpkins out of the field by the end of the work day on Friday. Now we begin the curing process for most of the squash so they will stay fresh through the winter months. As for the pumpkins, those get to go home with all of you this week! As you’re carving your pumpkins, feel free to share these fun facts:
-the first vegetable to be carved into a Jack o’lantern was actually a turnip
– Pumpkins need honey bees to pollinate their flowers. The more honey bee visits a flower gets, the more perfect the pumpkin will be
– pumpkins are grown on every continent except Antarctica
In your share this week:
Hot Peppers – Red Peppers – Northeaster Pole Beans – Basil – Carrots – Celery
1 cup your favorite vinaigrette (mustard vinaigrette is delicious for this!)
3 cups fresh green beans (cut the Nor’easters on the diagonal)
1 head butter lettuce or spinach
3 ripe tomatoes, quartered
1 cap of canned tuna (optional)
3 hard boiled eggs, halved
1/2 cup Mediterranean style olives
Fresh herbs
Boil potatoes until just tender. Drain and rinse in cold water and slip off the skins. While still warm, cut into 1/8″ slices and gently toss with about 1/3 cup of the dressing. Just before serving, toss greens with vinaigrette and arrange on a platter. Arrange all the other ingredients in clusters around the platter, drizzling on the remaining vinaigrette. Dress the salad with the fresh herbs and serve.
NOTE: you can add any veggie to this salad– carrots, celery, and peppers add depth and color
Rutabaga Hash
22 ounces rutabaga, peeled and diced (about 1 large rutabaga)
6 ounces green cabbage, chopped (about half a head of green cabbage)
1 leek, cut into strips (white parts only, green stems removed)
3 tablespoons avocado oil (or any cooking oil or butter)
1 teaspoon salt
½ teaspoon black pepper
1 teaspoon Italian seasoning
8 ounces bacon, cut into pieces
basil for garnish
Preheat your oven to 425°F. Add avocado oil, followed by rutabaga, cabbage, leeks, and bacon to the cast iron skillet.
Season with salt, pepper and Italian seasoning. Mix until well combined.
Roast in the oven for 25 minutes, then take the veggies out, and mix around before returning to oven for another 20-30 minutes, because you want all the vegetables to get a little crisp on them.
Finally, garnish with basil if you want, then eat!
It feels like June was just a few days ago, and here we are in our 16th week of CSA shares! Maybe that’s because the weather the last few weeks have felt more like Summer than Fall. Sunday night’s chill was a nice reminder that it is indeed officially Fall, but we’re looking forward to another beautiful week to get things done.
For most people, this time of year means slowing down and getting cozy as the days shorten and the nights lengthen. For those of us lucky people in agriculture, we won’t be slowing down any time soon. The Fall equinox marks the start of the busiest time of year for us (and also the perfect time to sign up for a Winter Share)!
Over the next few weeks, we’ll say goodbye to our Summer crops such as melons, zucchini, and cucumbers. Those fields will soon go from green to brown, then back to green as we make our final harvests, till in the plants, and seed our cover crop. We will begin to say hello to more of our Fall and winter crops such as leeks, rutabaga, parsnips, and winter squash. This also means we will be spending lots of time cleaning and sanitizing storage space to put all of these crops for the winter.
With the colder nights, this time also begins to signal a flavor change in the crops. The colder weather causes some crops to convert a portion of their starches into sugars. The addition of sugar causes the freezing point of the water inside the plant to be lowered. This now means the plant can withstand colder temperatures before it’s ruined. The plants most known for this are carrots, kale, and beets. This is one of the reasons why we have a spring/Summer planting and a fall planting of these veggies. The early planting becomes available at a time when we are all excited (and possibly a little desperate) to add some color back into our food after the long winter. The early plantings add more of an earthy flavor to dishes, while the later planting adds a little bit more sweetness. Getting to enjoy the flavor changes in the vegetables is one of the many beautiful things about farming.
Another exciting change happening on the farm is that our smaller hens have started laying eggs! For those of you with an egg share, you may have already noticed this last week when one or two smaller eggs showed up in your share. These are thanks to our little ladies who are just starting to lay. We got these hens back in early May. They’ve spent the last 4 months growing and exploring different areas of the farm. They start out in a fully enclosed shed to keep them warm, and protected from the elements. After about a month, we move them to a mobile chicken coop that we place over one of our fields we aren’t currently using. This allows them to start getting used to the wind and change in temperature while still being fully protected from the rain. It also introduces them to insects and vegetation. It’s beneficial for the farm because they are producing free fertilizer for us which adds nutrients back into the field. Once the hens get bigger and start showing signs of being adventurous (aka once they start trying to escape), we move them to a fenced off area with a larger mobile coop. This allows them to roam around in a larger area during the day, but still have a sheltered place to protect them from the rain and sun. The mobile coop also houses their egg boxes, food and water. It also is fully enclosed with a lockable door for protection at night. The Farm has a surprisingly high amount of coyotes, wolves, raccoons, and foxes close by, so keeping the chickens locked up at night is a must!
1. Heat oven to 350 degrees. Grease 8″ square or 9″ round baking pan and line with parchment paper.
2. Make the streusel: in a small bowl, combine sugar, flour, spice and salt. Add the butter then pinch the butter into the four mixture with your fingertips until the mix forms pebble-size crumbs.
3. Make the cake: in a large bowl, whisk the sugar and eggs until pale and foamy, about 1 minute. Add the squash puree, melted butter, oil, pumpkin spice and salt. Whisk until combined and smooth. Whisk in the baking powder and baking soda then whisk in the flour.
4. Transfer the batter to the prepared pan, smooth the top and tap on the counter a few times to release any large air bubbles. Sprinkle the streusel evenly over the top.
5. Bake the cake until puffed and golden and a toothpick inserted into the center comes out clean (40-45 minutes). Set the cake in the pan on a rack to cool. After about 15 minutes remove the cake from the pan and set it on a rack to cool completely
Turkish- Style Braised Leeks
3 large leeks, cleaned well and trimmed, whites and tender green parts sliced into ¼-inch rounds
In a medium saucepan heat ¼ cup extra virgin olive oil over medium-high heat until shimmering. Add the leeks, carrots, and garlic and season with kosher salt, black pepper, and the spices. Toss around and cook for about 5 to 7 minutes, stirring regularly as needed until the leeks and carrots soften just a bit.
Add 2 cups of water, the rice, and lemon juice. Bring the water to a boil, then lower the heat and let simmer for 15 to 20 minutes or until the rice is fully cooked and the vegetables are fully tender.
Let the leeks and carrots cool down to room temperature, then stir in the fresh parsley, lemon zest, and another good drizzle of extra virgin olive oil.
Tomato-Green Bean Salad with Chickpeas, Feta and Dill
salt and pepper
3/4 lb green beans (cut diagonally into 1in pieces)
2 Tbsp lemon juice
1 Tbsp red wine vinegar
1 garlic clove (or less), minced finely
3 Tbsp olive oil
2 cups tomatoes cut into bite sized pieces
2 cups cooked chickpeas (1 can), drained
1/2 cup crumbled feta
2-3 Tbsp roughly chopped dill
pinch of dried oregano
1. bring medium saucepan of water to boil over high heat. Add 1 tsp salt then green beans. Cook until beans are tender-crisp (about 2 minutes). Transfer to large bowl of cold water. Drain in colander and blot dry.
2. Make dressing by combining lemon juice, vinegar, garlic, pinch of salt and some black pepper in a small bowl. Whisk in the olive oil.
3. In a large salad bowl, combine tomatoes, beans and chickpeas. Season to taste with salt and pepper. Add dressing and stir to coat. Add feta and toss once more. Let marinate for 10-15 minutes before serving.
4. Before serving, sprinkle generously with dill and oregano
Last week the crew was working hard to get more veggies out of the field. We have been slowly working to get onions out of the field and onto racks in covered areas to start drying for storage. We haven’t been in a rush to do this because last week and this week’s weather are the perfect chance for the onions to keep drying naturally in the sun. The warm, dry air helps to dry the onions and start creating the protective outer skin. Once we move the onions into sheltered areas, we point industrial fans on them 24/7 to ensure they dry properly. As a farm that always strives to be sustainable, using the sun and wind instead of all that electricity is huge for us.
Last week we also used the harvesters to dig up more potatoes and carrots. We got out red potatoes, russets, white potatoes, yellow potatoes, orange carrots, and the first of the purple carrots. This also marked an exciting time for the farm crew as it meant it was time to bring the forklift out of summer storage. We use our forklift in the root cellar to stack pallet boxes as a way to better conserve space, so we have enough room to fit all the veggies. In the Summer, we put the forklift in our shop to keep it away from the damaging humidity of the root cellar, and because veggies are being harvested only in the quantities we need, so nothing needs to be placed in the root cellar for extended storage. Now as we start to empty fields and get ready for fall harvest, the root cellar is filling up fast. Soon we will have pallet boxes of veggies stacked all the way to the ceiling.
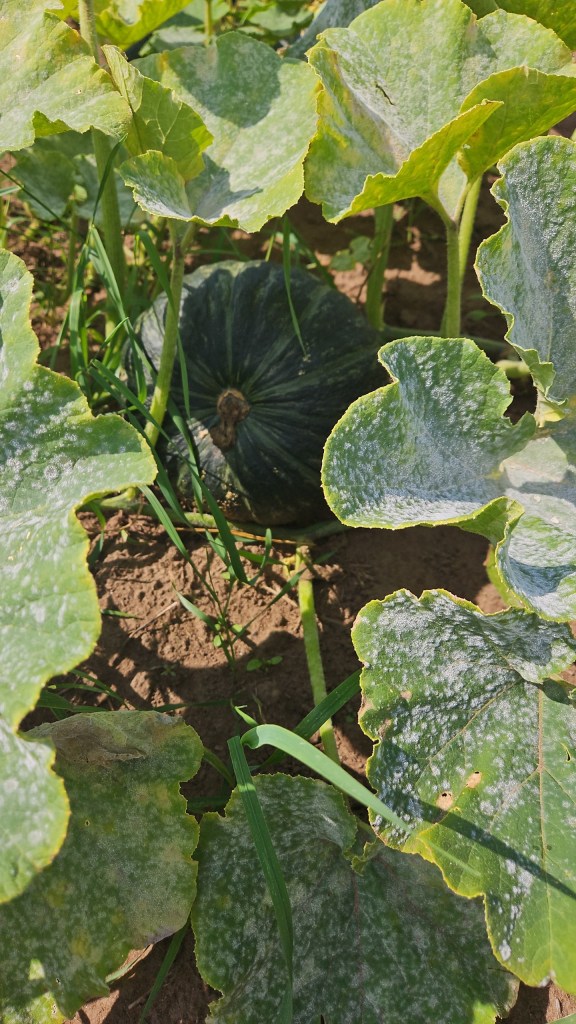
This week might still feel like Summer, but your box is starting to signal that Fall is coming. We are excited to introduce our Winter Squash! This crop was a little touch and go for a while. They didn’t appreciate the excess rainfall and cool early summer temperatures, but as things dried out the vines grew really large, and looking great. For a while, we were worried we might end up with 15 pound squashes. Our fears were soon squashed (there’s always time for food puns) as the vines developed powdery mildew. This is a common fungal disease that attacks many plants. It appears as small, white-ish gray spores on the leaves of the plant. It starts out very small, so small it is sometimes hard to spot at first, but once the plant is infected, it can spread like crazy. Soon the small spots take over the whole plant, and begin to spread to neighboring plants. We mostly find this on our Winter Squash and our zucchini. Once the plant is infected, there is no way to cure it, you can only slow down the spread…for a while. The powdery mildew on the winter squash ended up spreading and killing all the foliage in the last couple of weeks, but the squash themselves appear to be absolutely the perfect size!
Soon we will start the task of getting all the Squash out of the field. Once they are out, the majority of them need to cure first before they can be eaten. The curing process does two things for the squash 1) it hardens the outer skin which will allow it to last for multiple months in storage. 2) starches change to sugar and releases excess moisture which concentrates the flavor to make an even more delicious and sweet squash. Acorn squash is the earliest to mature of the varieties we grow, so it’s the first we send. In fact, if acorn squash is cured at high temperatures it can cause it to rot faster. This is why we are able to send this wonderful veggie to all of you now rather than making you wait for it.
It is a very fun veggie to experiment with. Many people like to stuff it since the shape of it naturally looks like a bowl. Other people roast it for salads, puree it as an easy, veggie packed pasta sauce, or grate it up to add to muffins or other baked goods. My favorite way to make acorn squash ( or any winter squash for that matter) is to turn it into gnocchi. I’ve added my favorite recipe below if you’re feeling adventurous and want to give it a try.
1/2 cup all purpose flour plus 1 tablespoon for the rolling and cutting gnocchi
1 tsp kosher salt
1/4 tsp ground black pepper
2 tablespoons prepared basil pesto
Roast Squash for Gnocchi
Pre-heat oven to 400 degrees. Line a baking sheet with foil. Cut acorn squash in half, on the vertical, and scoop out seeds. Drizzle olive oil onto the flesh side and season with salt and pepper. Place on baking sheet, flesh side down, and roast about 30-40 minutes, until squash is fork tender. Allow to cool at least 10 minutes before scooping out flesh into a bowl.
Preparing Gnocchi Dough
To prep the dough, bring a large pot of water to a low boil, season with salt like you would to cook pasta. In the bowl of roasted squash, stir together with flour until smooth. The dough should feel about as pliable as pizza dough, meaning it should still hold together but doesn’t feel dry. If the dough is too wet, add a little more flour (about a tablespoon at a time) until you get to that desired consistency. This will help in the rollout of dough.
Roll and cut dough: Working in batches, scoop up a loose handful of dough and roll out onto a lightly floured work surface. Roll the dough into the shape of a log, about 3/4 inch wide. Using a sharp knife, slice into 1 inch pieces and place on parchment. Repeat with the remaining chunks of dough until all gnocchi is cut.
Cooking Gnocchi
Working in two or three batches (depending on number of gnocchi), add gnocchi to the large pot of boiling water and allow to cook 2-3 minutes until the gnocchi floats to the top. Using a spider strainer (or slotted spoon), remove gnocchi and allow to drain on a baking sheet lined with paper towels. Repeat until all gnocchi are cooked.
Toss gnocchi together with a couple of tablespoons of basil pesto, using a little gnocchi water to thin out sauce as needed and grate a generous amount of parmigiano-reggiano. Enjoy immediately.
Apple and Beet Muffins
1 cup shredded cooked beets – about 2 small cooked beets
2 cups shredded apples – about 2 apples, do not need to peel
Can you all believe it, we only have 4 more weeks of our Summer CSA season!
The final weeks of the CSA season are busy, busy, busy! Mother Nature threw quite the curve ball for us on Friday night with her far too early, danger of frost. Usually we don’t have to start worrying about the dreaded F word until later in the month. We chose the mentality that if you don’t think about it, it won’t happen (it’s actually the only thing any of us thought about all week, but we had good intentions). Things worked out well for us. It did get really chilly on Friday night, but with the exception of a few melon vines the plants appear to have been mostly unaffected. We then had to pull out our warm-ish layers to get ready for our busy Saturday.
On Saturday, we were at Bayfront for Harvest Fest. It’s always a fun event to meet so many people in the community, chat with other local farmers, and show off some new things. If you stopped by our booth, you may have seen our mini carrots in their packaging. The bags arrived just in time for Harvest Fest, and will be hitting some grocery store shelves later this season, so be on the lookout for them. You’ll be getting this variety in your shares this week, but 2 pounds instead of the little bags for market.
In preparation for the remaining few weeks of the CSA season, Janaki starts taking inventory of all the vegetables we have sent to our members so far this season, and starts planning for when we will send the remaining vegetables. You all have gotten lots of delicious veggies so far, but there are still quite a few things you haven’t seen in your boxes yet. Spoiler Alert: we still have leeks, rutabaga, parsnips, pole beans, red cabbage, winter squash, and brussels sprouts. This week we have a new addition to the line up with Carmen peppers. These peppers look intimidating because their shape resembles that of a spicy pepper, but they are not spicy at all. They are like a sweet red bell pepper but we love the thick walls and robust flavor of the Carmens.
Along with planning what else will go in the boxes for the remaining weeks, Janaki also starts creating a plan for our big Fall harvest that happens at the end of October. A big part of this is pulling out the carrot and potato harvesters to fix anything that got broken/damaged last fall or over the winter in storage, and to dust off the machines and the crew’s sorting abilities that haven’t been used in a year. We used the carrot harvester on Wednesday to get most of the third planting of carrots out of the field, and we used the potato harvester on Thursday to get russets and red potatoes out of the field to bring to Harvest Fest. This means that for the last 13 weeks, every vegetable you’ve received in your box has been lovingly harvested by hand by our hard working farm crew.
It’s an exciting time when the veggies are large enough and mature enough to use the full sized harvesters. We weren’t able to use the potato harvester until now because the potatoes weren’t mature enough. Their skin was still too delicate for all of the rolling, shaking, and dropping that the potato harvester puts them through. The first two plantings of carrots were large enough and mature enough that we could have used the harvester. However, due to the disease, the carrots required a lot of sorting. This would have required the harvester to go slower so we would have time to sort more accurately. If we run the carrot harvester too slow, the harvester will skip over some carrots leaving them in the field. We actually enjoy hand-harvesting, but when we’re all geared up to go fast it gets pretty irritating in a hurry when things go wrong.
Aloo Gobi
Ingredients
2Tbsp. vegetable oil
1 red chili, diced
2 cloves garlic, minced
1Tbsp. minced ginger
1tsp. garam masala
1/2tsp. dried turmeric
1/4tsp. cayenne pepper
3 potatoes, peeled and chopped into 1″ pieces
1 medium head cauliflower, cut into florets
1c. low-sodium vegetable broth
Kosher salt
Freshly ground black pepper
Freshly chopped cilantro, for serving
Directions
Step 1:In a large skillet over medium-high heat, heat oil. Add chili, garlic, and ginger and cook until fragrant, 1 minute. Add garam masala, turmeric, and cayenne and cook until toasted, 1 minute more.
Step 2:Add potatoes, cauliflower, and vegetable broth and season with salt and pepper. Reduce heat and cook, covered, until potatoes and cauliflower are tender, 15 minutes. Garnish with cilantro to serve.
Melon and Cucumber Salad
Ingredients
1 cantaloupe, seeds removed and cubed
1 large cucumber , thinly sliced
1 large red bell pepper, thinly sliced
1/2 large red onion, thinly sliced
3 – 4 tablespoons apple cider vinegar (white wine vinegar ok too)
1 tablespoon olive oil, optional
1/2 teaspoon fresh cracked pepper, or to taste
good pinch of salt
fresh basil or mint, to garnish (optional)
Instructions
Cantaloupe: Slice your cantaloupe in half (doesn’t matter if you slice it horizontally or vertically). Scoop out the seeds with a large spoon and discard. Slice your cantaloupe halves into 5 or 6 slices. Using a sharp knife, cut from one end of the slice to the other as close as you can to the rind, slowly and carefully cutting the orange flesh away from the peel. Slice into bite size pieces.
Cucumber: Slice off each end and using a vegetable peeler remove the outer skin (leave skin on for extra nutritional value and fiber). Slice the cucumber into 1/8 – 1/4 inch slices.
Bell Pepper: Wash and core your bell pepper. Slice into 1/4 – 1/8 inch slices. Cut the slices in half.
Onion: Slice the onion in half lengthwise. Cut off both ends of one of the halves and remove the outer layer. Place the sliced onion, end cut down and slice into 1/8 – 1/4 inch slices. If onion slices seem too long for you, cut them in half.
Assemble salad: Place ingredients in a large bowl. Add apple cider vinegar, salt and pepper and mix well to coat. Cover and set in the refrigerator for an hour or so to chill and marinate, mix occasionally if you like
Last week I promised you all an official update on how the caterpillar tunnel experiment went. I know a few of you were heartbroken to learn that this was not in fact a fun tunnel that we let caterpillars run through all day, but instead it was an effort to save our sad looking tomatoes.
At the beginning of the season, before we put the caterpillar tunnel up, the field tomatoes looked very stressed. They had gotten their leaves pelted by so much rain and the soil was soaked. As we hustled to get the tunnel up before yet another 2″ rain, we worried that it might be too late for them to recover. I am happy to report that the exact opposite happened. We put the caterpillar tunnel over the tomatoes, and in just a few weeks, they looked like entirely different plants. The leaves went from a dry, shriveled, brown color to a soft, vibrant green color. The plants started producing more leaf sets, growing taller, and eventually putting on flowers and fruit. We think the protection from the elements really saved them because the rest of the field tomatoes developed early blight.
The fruit has been slow to ripen, but that could be because we pinched off the first one or two sets of flowers in an effort to convince the plant to focus on getting healthy rather than producing fruit. We have been able to harvest a few tomatoes, but most of the fruit on the plants is still green.
The most important factor in determining if this tunnel was a success came down to the taste. First, for background, we haven’t been satisfied with our greenhouse tomatoes for a few years so this year we tested out new fertility sources. Previously, our nitrogen source was coming from fish fertilizer, and our potassium source was mineral based. Nitrogen is important for the chlorophyll formation in plants. Chlorophyll is what makes plants green which allows them to absorb sunlight through photosynthesis. Without adequate nitrogen, plants won’t be “green” enough to absorb sunlight thus stunting their growth, and possibly preventing them from fully maturing. Potassium is important for plants because it aids in regulating the rate of photosynthesis, and it is associated with the movement of water and nutrients throughout the plant. Without adequate potassium, plants have reduced yield, stunted growth, and poor flavor.
Our previous fertilizer mixture worked okay (though applying fish fertilizer through drip tape is a smelly hassle), but we wanted to see if we could do better so we tried an amino acid based nitrogen. This is beneficial to the plants because amino acids are immediately available for the plants to absorb. The fish fertilizer delivered nitrogen in the form of proteins which can take a while to break down so they can be absorbed by the plants. We also switched to using a plant based potassium source instead of a mineral based source. Mineral based sources can often lead to a build up of minerals at the roots of the plant, preventing the plant from being able to absorb other nutrients. We also added calcium and micronutrients to round out the program.
Farmer Janaki thought this new fertilizer combination made the greenhouse tomatoes taste significantly better than in previous years. This meant the caterpillar tunnel tomatoes had to be really great in order to earn the top spot for best tomatoes on the farm this year. We had lots of people taste testing, and we all came to the same conclusion: for our Geronimo (large slicing tomatoes) we compared one from our regular greenhouse and one from our caterpillar tunnel, and the greenhouse won. They both had a similar texture, but the greenhouse tomato had more flavor. We also compared an Early Cascade (small canning tomato) from outside and one from the caterpillar tunnel. In this test the caterpillar tunnel won. Again, they had similar textures, but the appearance and flavor of the caterpillar tunnel tomatoes was better. Oddly, the caterpillar tunnel fruit ripened later than both the high tunnel and field tomatoes. We only did a small sample so far, and this is just one year, so we are excited to keep this in mind and see if we feel the same again next year. In farming, there are so many variables that it’s hard to run true experiments that inform results year-to-year, but we keep trying to zero in on better ways of growing healthy food!
Hot Peppers – Sweet Peppers – Potatoes – Melons– Lavender
Marcella Hazan’s Tomato Sauce
2 cups of tomatoes with juices
5 tablespoons of butter
One onion, peeled and cut in half
Salt
Combine tomatoes and juices, butter and the onion halves in a sauce pan with one or two pinches of salt.
Place over medium heat and bring to a simmer. Cook uncovered for 45 minutes occasionally stirring and breaking up chunks of tomatoes with the back of the spoon.
Discard the onion before pouring sauce on cooked pasta. This recipe creates enough sauce for 1 pound of pasta.
Marinated Vegetable Antipasto
Vegetable suggestions: Blanched and chilled broccoli, cauliflower, and carrots. Onion, celery, sweet peppers, zucchini
Marinade:
1/2 cup water
1-1/2 cups wine vinegar
1 cup olive oil
2 tbsp sugar
2 tsp fresh oregano, minced
1/2 cup pitted olives
Salt and pepper to taste
Prepare appx 8 cups vegetables by cutting into bite-size pieces. Bring marinade ingredients to a boil in a larger saucepan. Add approximately 2 quarts of cut up vegetables – cover and cook 3 to 4 minutes, stirring once. Uncover, cool and refrigerate for at least two hours. Drain before serving.