Summer CSA Week 11

I had a newsletter-sized case of writers block as I started putting recipes and photos in for this week. I asked my husband what I should say, and he said “get the vegetables, eat them up, num num num” -at which I laughed, probably harder than it deserved.
Num num num has become something I say a lot to my baby. It’s one of those idiosyncrasies I have that, apparently, is a little annoying to hear dozens of time at dinner for the other adult present. So strange.
So now it’s something of a running gag at our house.

It’s good to find things to laugh about. I have been trying to make space (i.e., turn off the news) in my life for more laughter. Watch a funny show, check. Pretend to eat my baby’s legs (he loves this!), check.

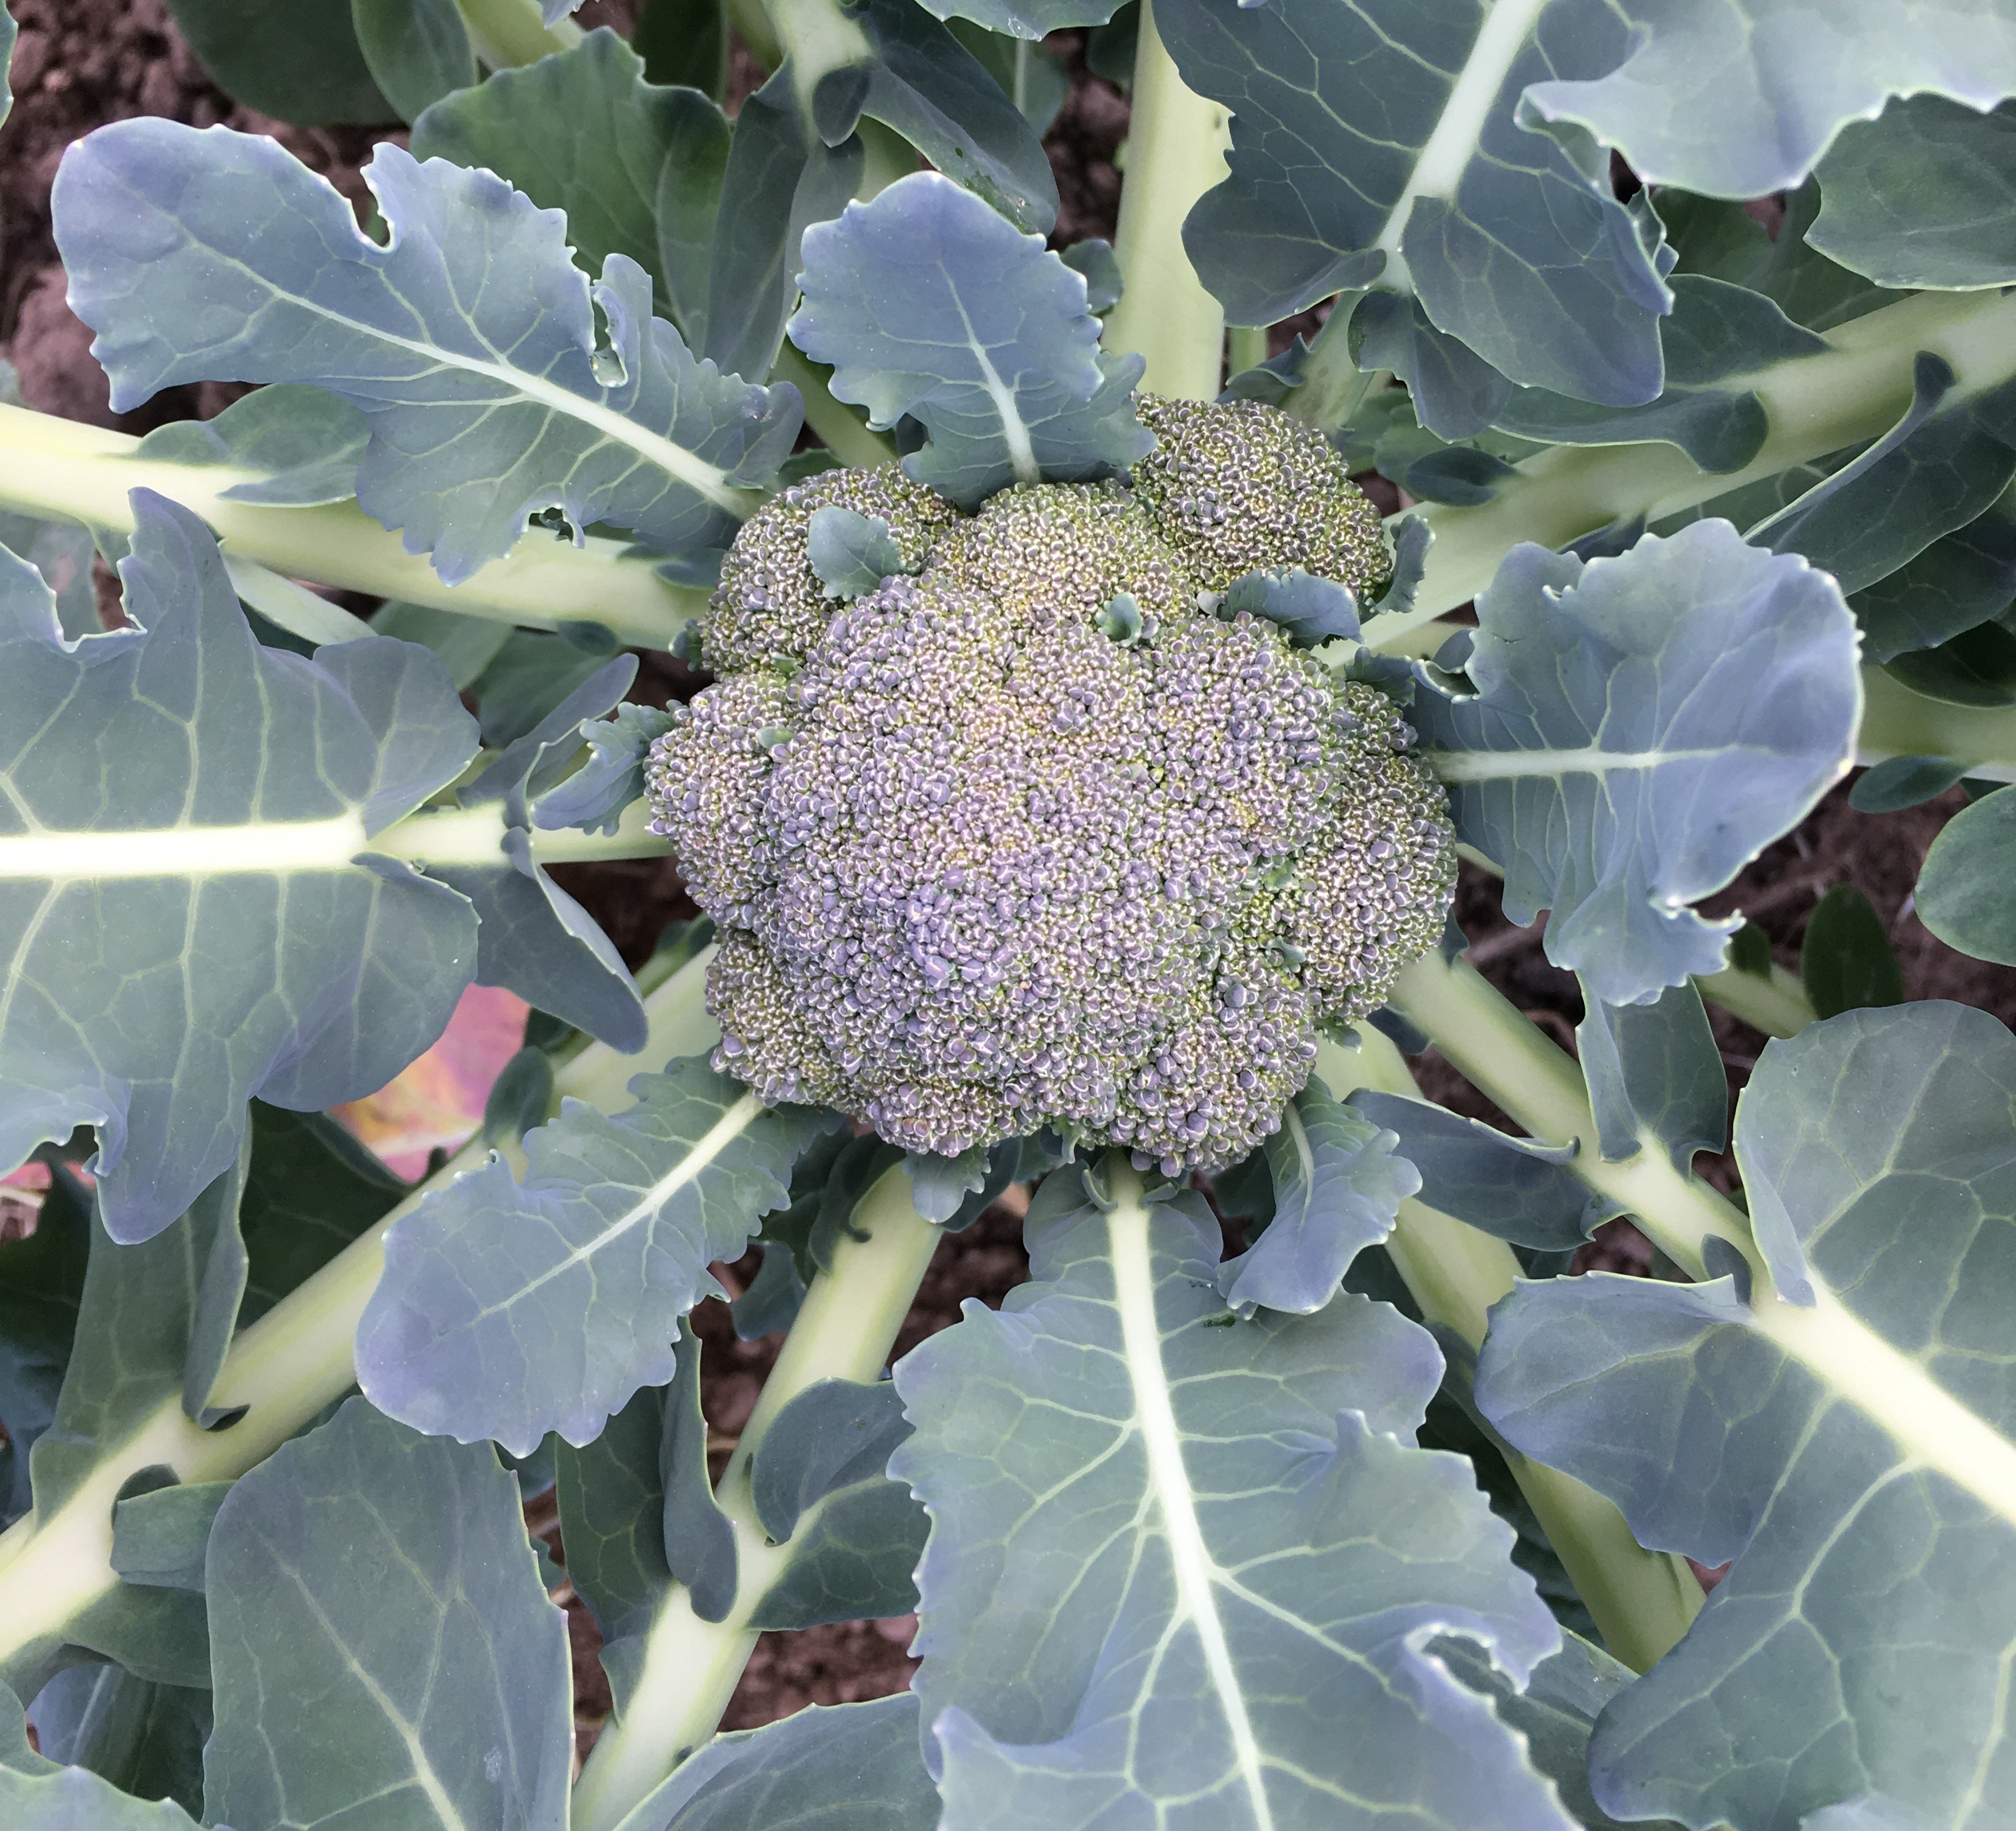
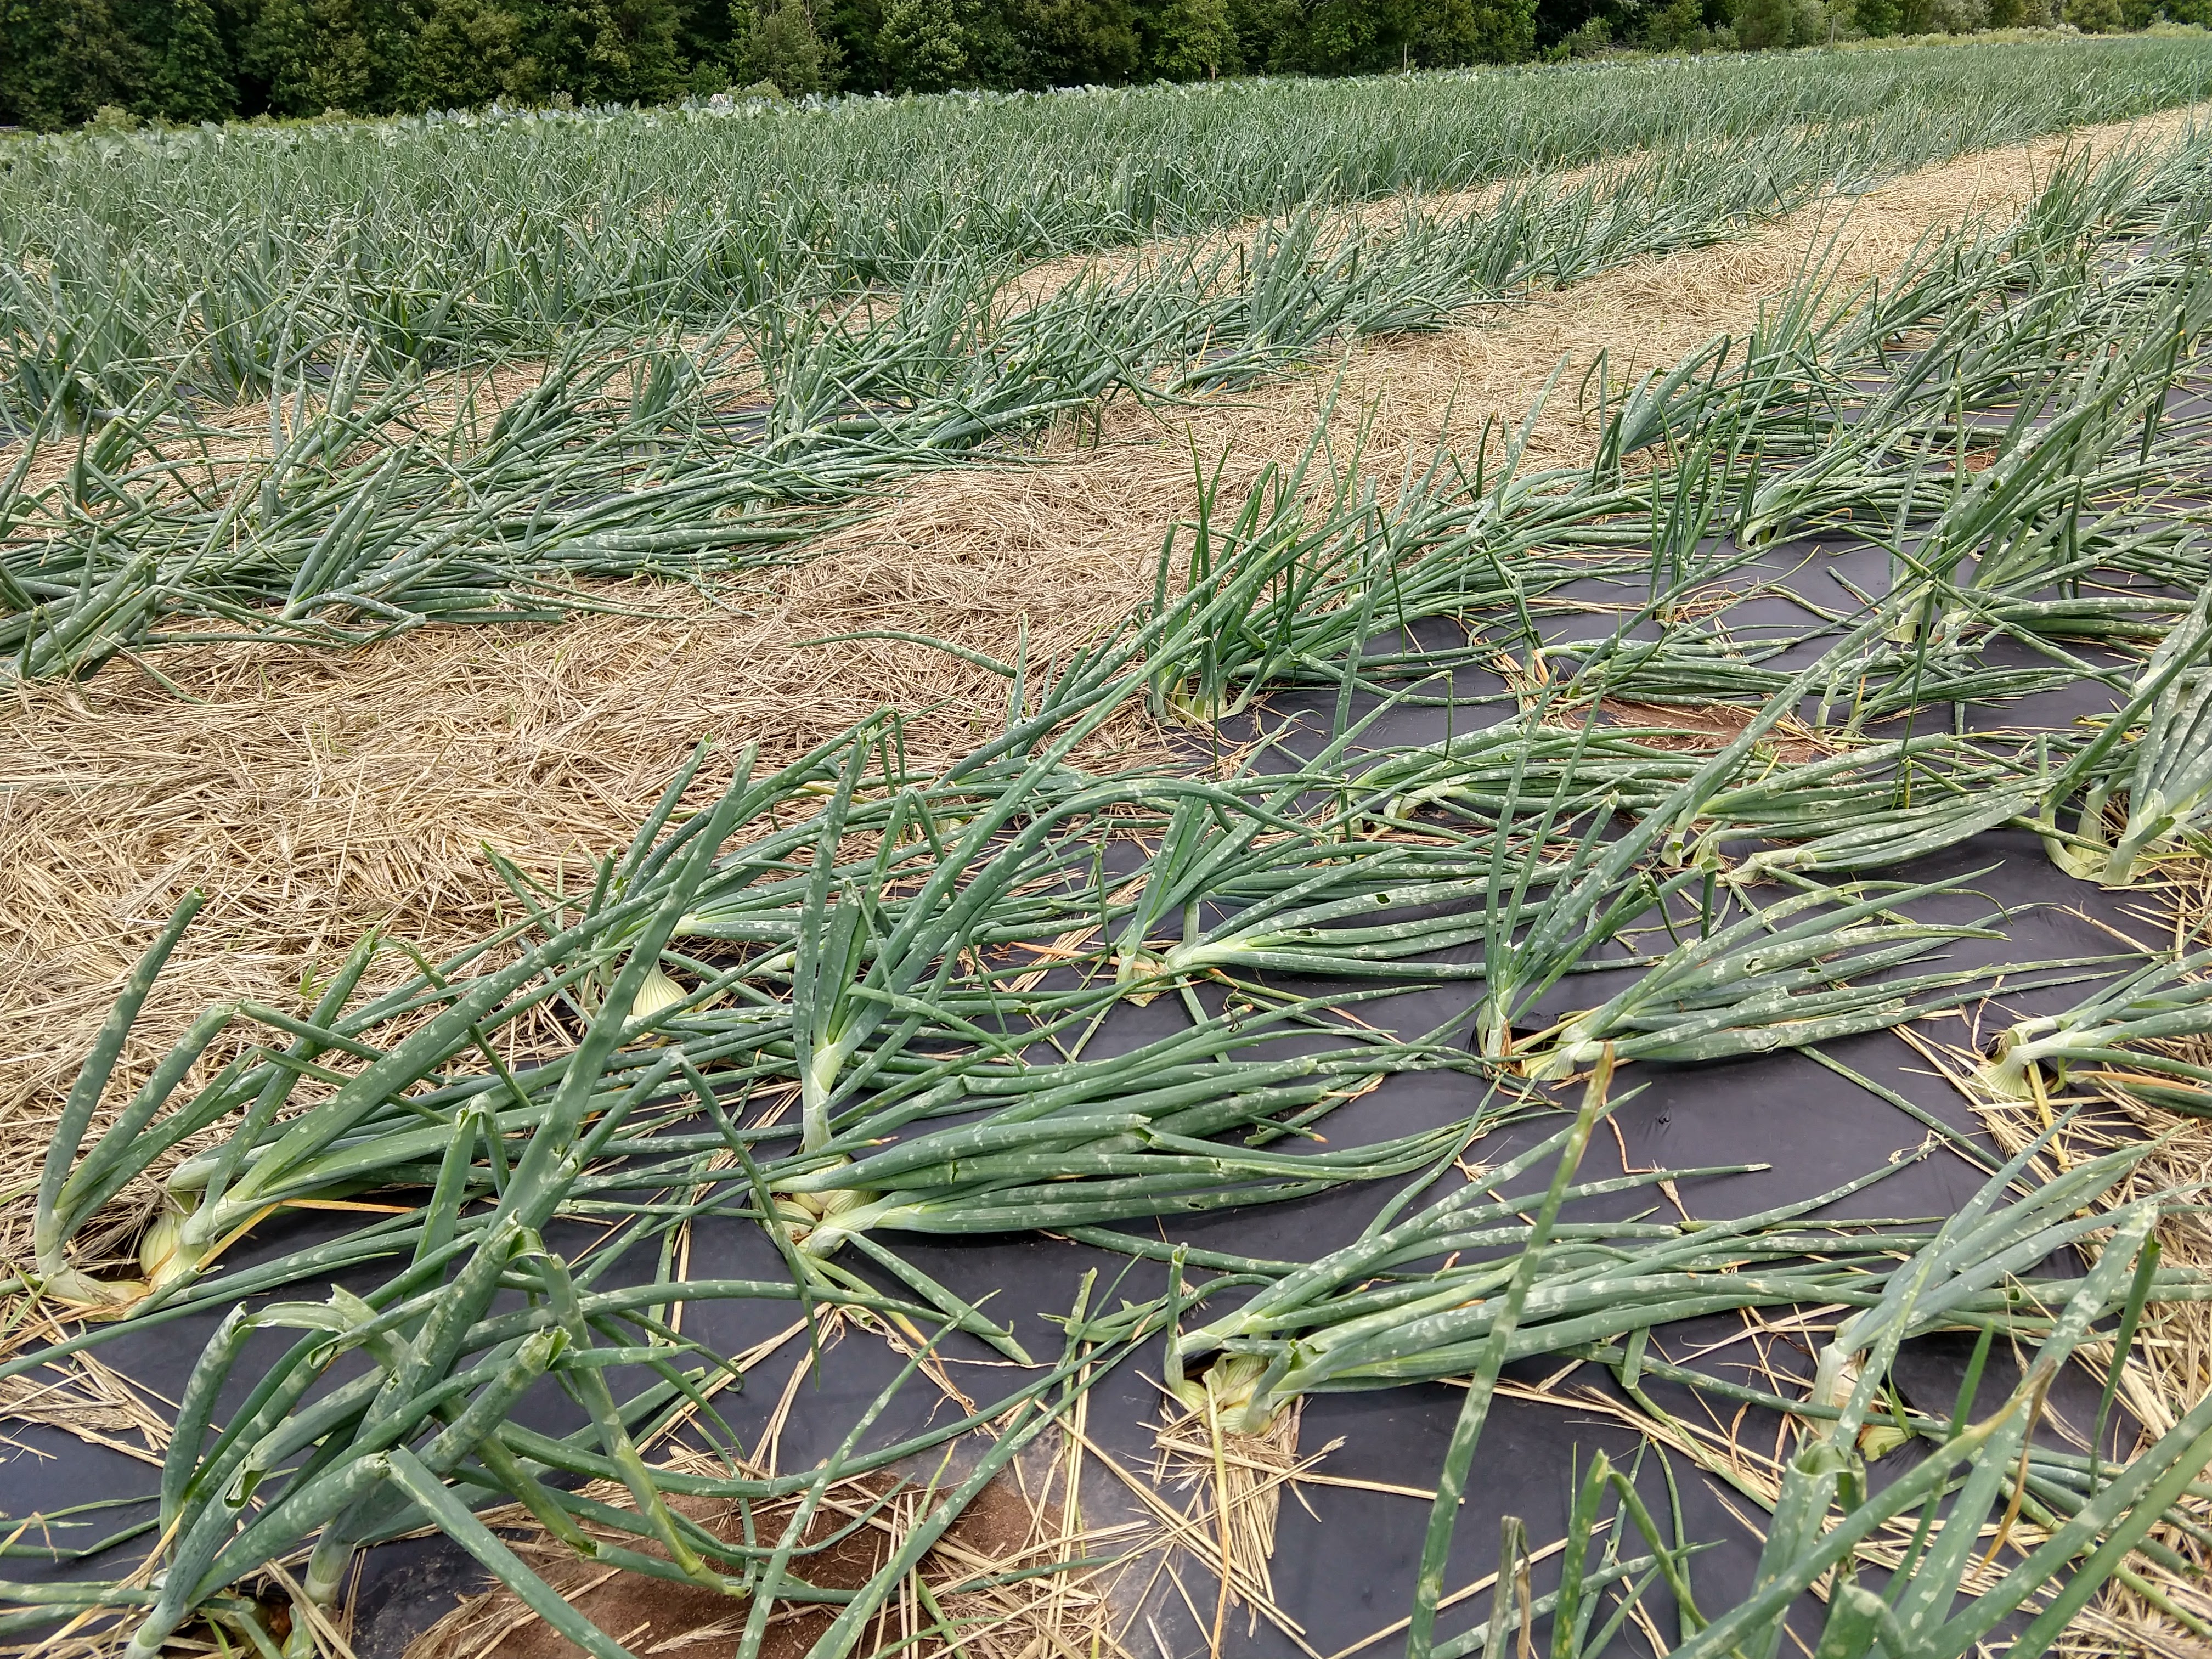
The season is ramping up on the farm this time of year. We will start harvesting almost non-stop very soon. We’ve started with getting in the garlic, and next the onions. Between CSA harvests, wholesale harvests and the constant cucumber, zucchini and broccoli harvest there isn’t much time left for other projects. Every year I don’t really know how we get all the stuff done. It’s a marvel.

I love this time of year on the farm though. I love the variety and bounty. I love the new potatoes! I love the go-go-go feel. It can also be a little much at times, which is why I’ve been glad over the years that often there are people on the crew who keep things fun, or have funny anecdotes about weekend activities. It’s nice to have people to share inside jokes with, or running gags. Especially in the particularly stressful year we all find ourselves in.

I hope that some laughter finds its way into your week, and that you num  num num every veggie with joy!

For the farm crew,

Karin

PS Dave has us pick just the tops of the basil, so it should be good to go for a small batch of pesto!

61887768080__50472868-5f5e-4842-bc18-2ce9d2cc2046


In your share this week:

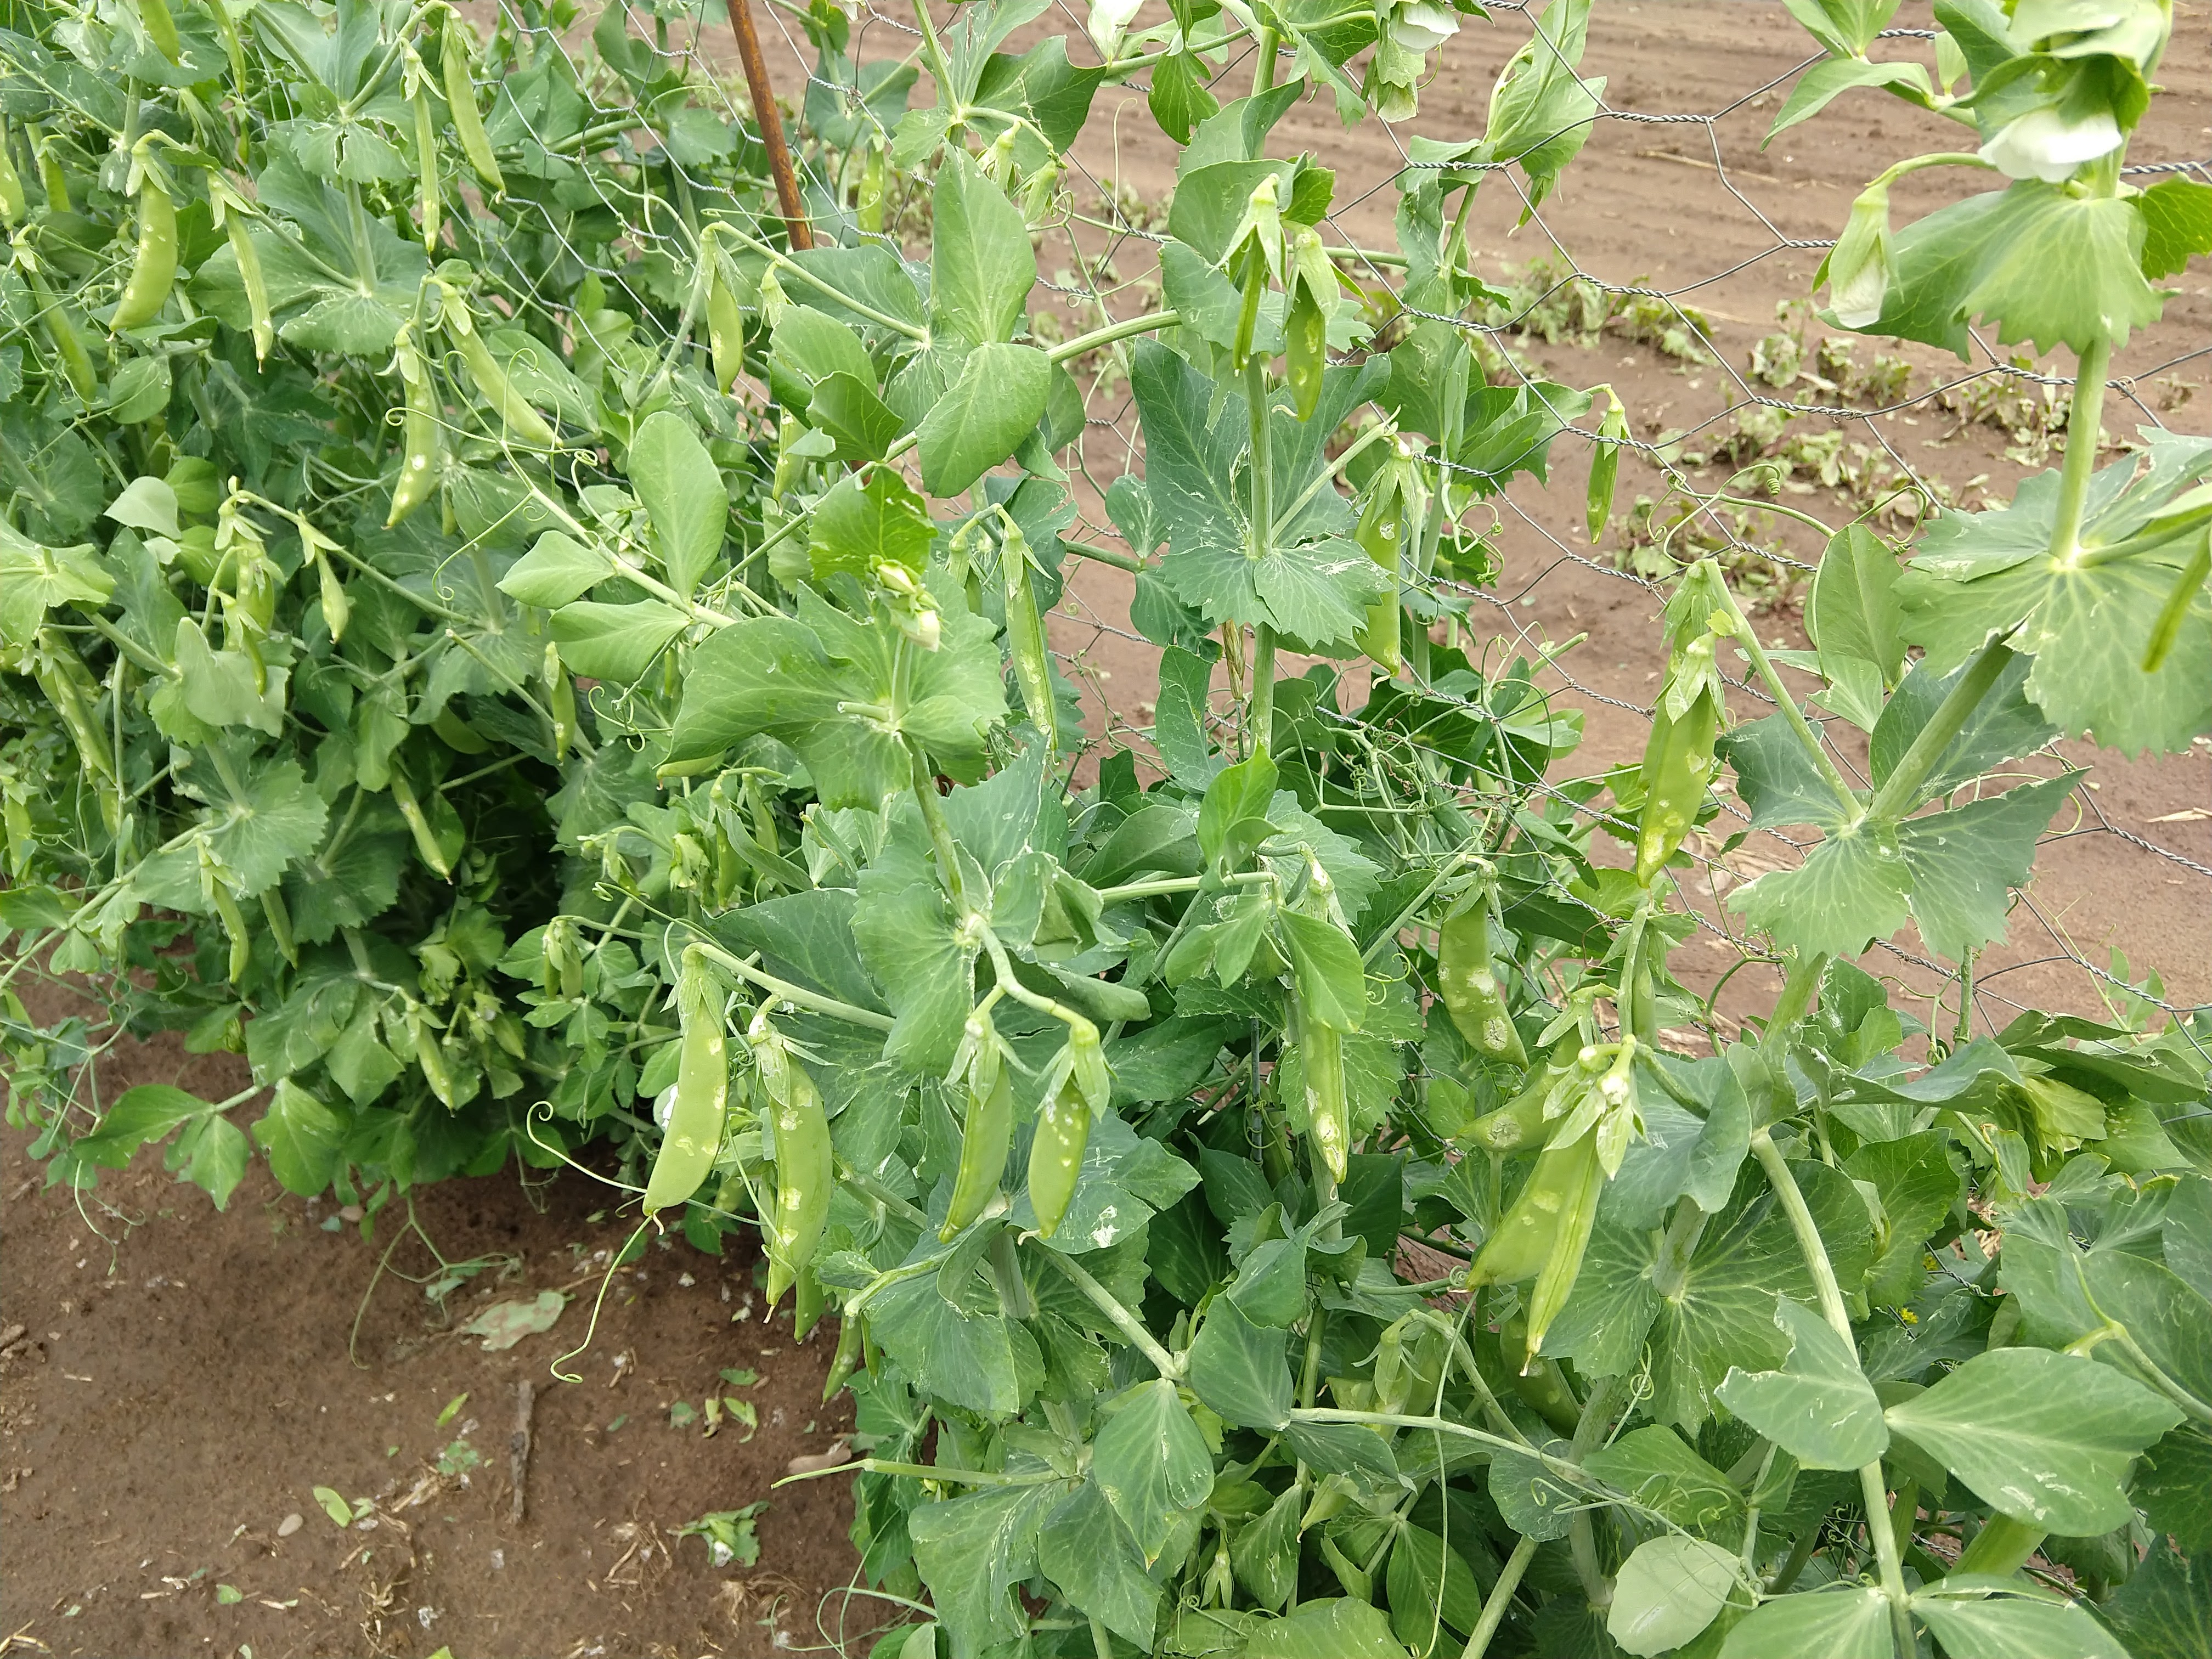
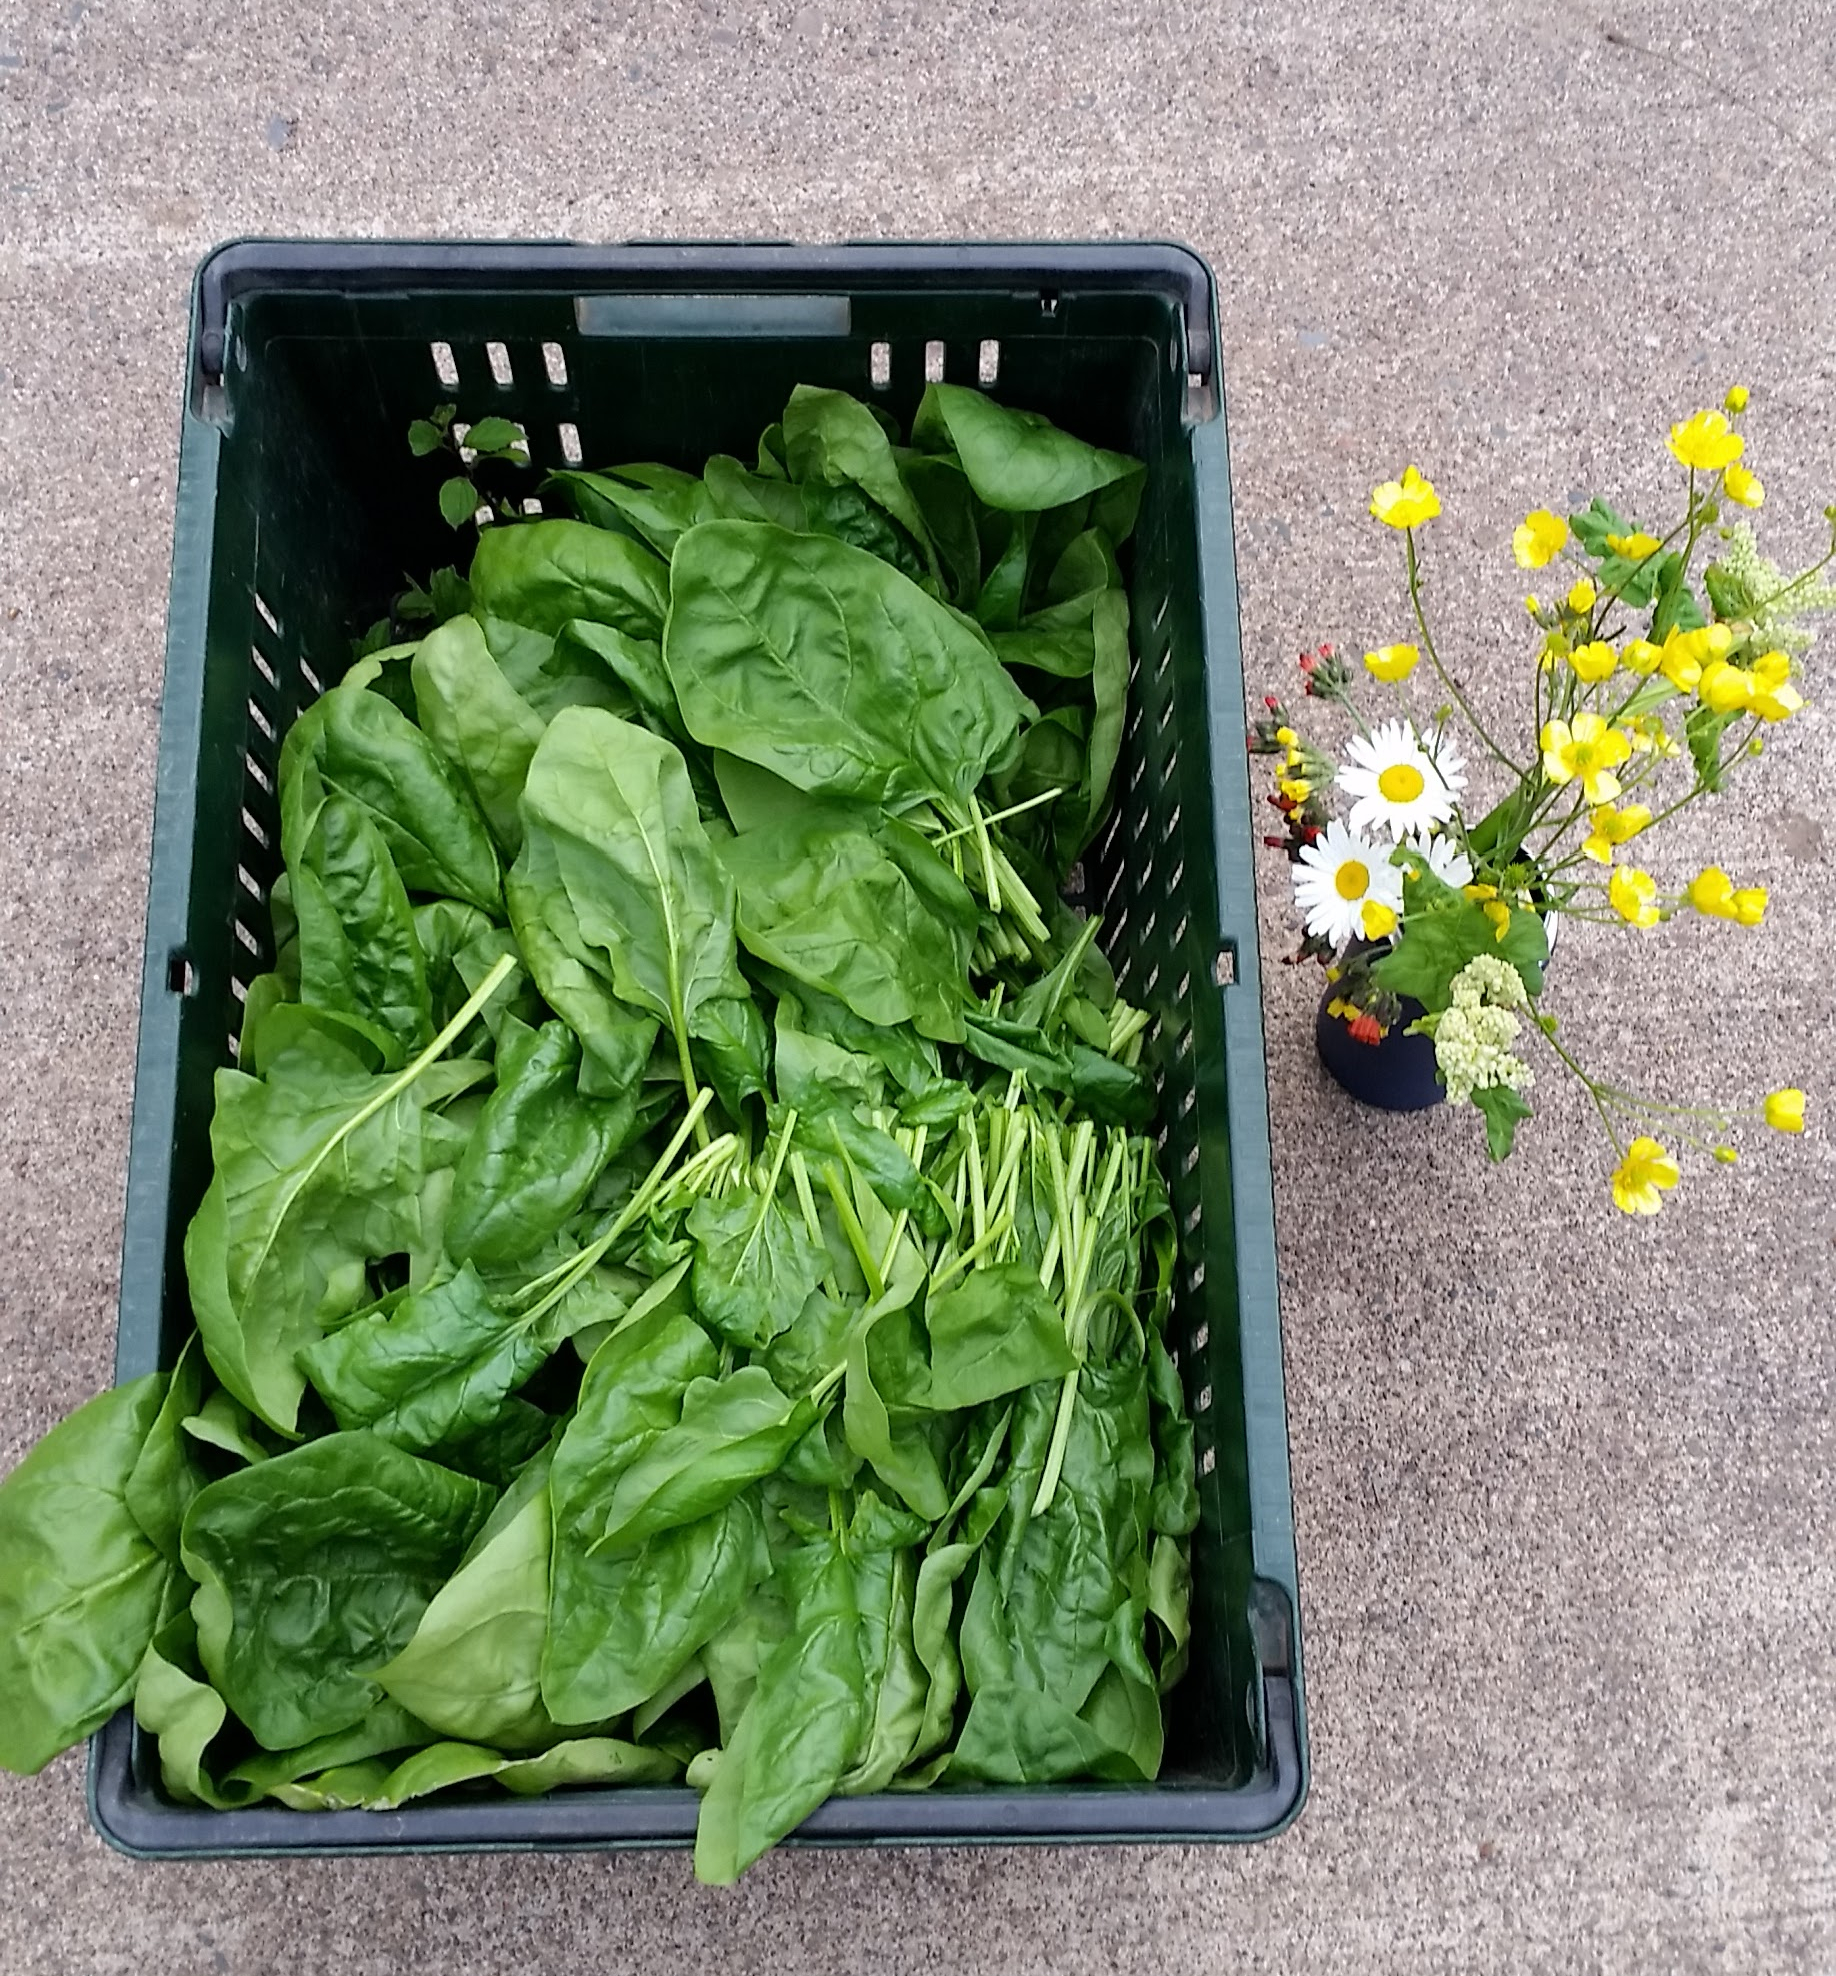
Basil – Green Beans – Carrots – Cilantro – Cucumbers – Garlic – Head Lettuce – Onions – Green Bell Peppers – Hot Wax Peppers – New Potatoes – Tomatoes – Zucchini


img_1169


Carrot and White Bean Burgers

From the Smitten Kitchen

  • Olive oil
  • 1/2 cup panko-style breadcrumbs
  • 3 shallots, or 1 small onion, diced
  • 1 tablespoon tomato paste
  • 1 1/2 teaspoons kosher salt
  • 1 cup packed grated carrot (from 2 medium carrots)
  • 1 1/2 tablespoons apple cider vinegar
  • Two 15-ounce cans cannellini or other white beans, drained and rinsed
  • 1 large egg, beaten
  • Freshly ground black pepper
  • Burger accompaniments, as you like

Heat 1 tablespoon olive oil in a large skillet over low heat. Add the panko and cook, stirring often, until lightly browned and crisp, 3 to 5 minutes. Transfer crumbs to a large bowl, then return the pan to the heat.Add 2 tablespoons olive oil to the skillet, followed by the shallot or onion. Cook until softened and lightly golden, 8 to 10 minutes. Stir in the tomato paste, salt, and carrots and stir frequently until the carrots are soft and a bit blistered, another 8 to 10 minutes. Add the vinegar, scraping up all the browned bits until the pan is dry. Remove from heat and add the bowl with the toasted panko. Add beans and use a wooden spoon or spatula to very coarsely mash the mixture until a bit pasty and the mixture coheres in places—there should still be plenty of beans intact. Add pepper, and more salt if needed, to aste. Stir in the egg. Shape into 6 patties (I used a 1/2 cup measure as a scoop) for the size burger you see here; 4 patties for really large burgers (to warn, I found this size a little unwieldy), or 8 to 10 for slider-size.

To cook the veggie burgers, heat a thin layer of olive oil in a wide skillet over medium heat and carefully cook until browned and slightly firm to the touch, 3 to 4 minutes per side. It may be necessary to cook in batches. Serve hot or at room temperature, with whatever you like on or with veggie burgers.


Charred Green Beans with Tahini Yogurt Sauce

From The Leek and the Carrot

2 pounds green beans
1/2 cup roughly chopped almonds
1 jalapeno, minced
2 garlic cloves, minced
3 tablespoons apple cider vinegar, divided
Pinch sugar
Kosher salt, divided
1/2 cup Greek yogurt
2 tablespoons tahini
2 tablespoons water
1 tablespoon vegetable oil
1/2 teaspoon freshly ground black pepper

  1. Bring a large pot of salted water to a boil on the stove. Once boiling, cook your green beans for 5 minutes then drain and rinse under cold water.
  2. While you wait for the water to boil, you can do a few other things. First toast almonds (either in the oven or on the stove). Then in a small bowl, combine 2 tablespoons vinegar with jalapeno, garlic, a pinch of sugar and a pinch of salt.
  3. In another small bowl, combine yogurt, tahini, water, remaining vinegar and 1/2 teaspoon Kosher salt. Whisk until smooth.
  4. Once your beans have been blanched and cooled, heat oil in a large skillet over medium high heat until it glistens. Toss the blanched green beans in there and sprinkle with 1/2 teaspoon Kosher salt and 1/4 teaspoon freshly ground black pepper. Cook over medium high heat, stirring every minute or two until most sides of the green beans are a little charred (about 10 minutes).
  5. Serve by spreading yogurt mixture over a shallow bowl and topping with green beans. Sprinkle with quick pickled jalapenos and almonds before enjoying. Season with flaky sea salt (or more Kosher salt) and more freshly ground pepper before serving.

Summer CSA Week 10

A couple of weeks ago we walked through some fields – with newly sprouted cover crop – to pull out some of the towering (compared to the baby cover crop!) pig weed and lambs quarter. Looking across the fields they looked much better after, though when we were in there we could see plenty more weeds that we may get to at some point. Maybe.

Soon Janaki will be doing trip after trip with the old dump truck full of manure from a local cattle farm. The manure gets turned and composted and turned again and composted some more (a few cycles of that over weeks) and then can get used on fields next year to add rich nutrition to the soil.

Next year, crops will be moved around to avoid being planted in the same places as this year. That way we can avoid disease, pests (hopefully), and the plants can go into fields that have had time, cover crop, and nutrition added back in. Our healthy soil and extra work to maintain it keeps our vegetables healthy, and the farm healthy for years to come.

Janaki has some of the rotating stuff down to a science (I mean spreadsheets), but much of it is still an art. He knows what fields may have low spots that will be wet in spring, and can’t be used for early crops. He knows which ones have heavier, and richer soil that might be good to go to plant into, and which ones might need some organic fertilizer added in. He has a rotation of cover crops that works well for us down to a science too. Bare fields can equal sad soil, and having crops that add organic matter, or elusive nitrogen naturally back into the soil is a must for organic agriculture.

It’s a cycle of wholeness. And it leads to some pretty good whole food.

I wish I could say that everything I eat or otherwise consume follows this same pattern, or puts back what it takes out from the planet. I can’t say that; though I hope to keep moving that direction.
More and more, it is so challenging to me when I think of what things cost on the shelf not always being reflective of how much they really cost from an environmental (yes, that includes humans too!) perspective.

The truth is the cost on the shelf for organic food, or organic clothing (or non-toxic baby mattresses as I’ve found out) is an insurmountable barrier for many people, both here and around the world. I don’t want to minimize that. It’s a real problem.

Conventional agriculture is also a problem. Perhaps many of you have our CSA share because you already know this and are bothered by mono-cropping, pesticide use, loss of top soil and the list of negativity goes on.

Might I add another to the list.

Ammonium nitrate.
The elusive nitrogen that all crops (corn needs a lot, for example) require. Ammonium nitrate is one of the fertilizers that gets used around the world, in staggering quantities, in the production of all kinds of non-organic crops.

And it’s a bomb.
I feel like I should say it “can be” a bomb. It’s very often used for agriculture, but it’s also also used in war. And, I’m sure many of you remember exactly where you were on April 19th, 1995.

And in Beirut… does it matter now what the original purpose of it’s manufacture or intended destination was? Does it matter that it *could have been* fertilizer if it becomes a bomb in the middle of a city anyway?

I was living and farming in Waco, Texas when a fertilizer plant 25 minutes north, in the town of West, exploded. At the time it happened, I was video chatting with friends at a cafe, and it was only after the call ended that I realized that I had been half-hearing sirens the entire time through my head phones. When I went inside to return my cup (and to see if anyone knew what was going on), the TVs were all on, and everyone was silent or on phones trying to call friends or family.
You’d be forgiven for not remembering, it was two days after the Boston Marathon bombing.

I had no idea that that plant was up there, and if I would have known I had no idea at the time what ammonium nitrate was. I am sure many (most?) people in Beirut or in the whole of Lebanon didn’t know that tons of the stuff was being, almost randomly, disastrously, stupidly stored at their port.

I think as humans we just can’t keep up with how dangerous our world is. How much danger we add to it. We won’t be able to control storms, or drought, or volcanoes (though our actions surly add to the devastation they cause). But what we can and do add in the way of poisons, bombs… it’s overwhelming.

I wish this could be a swords to plowshares kind of post… but the materials we’re talking about aren’t nearly as simple as hammering metal into a different shape. If only that was the task we were undertaking. Again, so what if it’s destined to be fertilizer if it blows up anyway?

By partaking in the food from your CSA share each week you’re taking steps (and power!) away from the machine that seems to roll along in our world and hurt so much in it’s path. You’re taking steps (and giving power!) to safer, cleaner alternatives. It’s hard to feel like we have much power in the face of such destruction, or in the face of such wide-spread unsustainability, but the power we do have we can wield. Even by wielding your fork.

For the farm crew,

Karin


img_1104


In your share this week: Green Beans, Broccoli, Carrots, Cucumbers, Dill, Lettuce Mix, Green Onions, Parsley, Green Peppers, New Potatoes, Tomatoes, Zucchini


Many of you long-time members will remember the porch at 427 N. 16th Avenue East. The Benson’s have been members since the beginning–before the beginning, actually. Their porch served as a pickup site from 1994 until this year because they were anticipating the sale of their home. It is officially on the market this week, and I promised a number of people that I would pass along the listing once it was up. Since I don’t remember who that was, I’m sending it along to everyone in the hopes that this special place might stay in the Food Farm family: https://s.paragonrels.com/goto/2_IPp


img_1107

It doesn’t hurt that weeds can be so beautiful.


Refrigerator Pickled Green Beans

Can double or triple.

  • 5 ounces green beans
  • 1 clove garlic
  • 1/2 teaspoon coriander seeds
  • 1 small dried chile
  • 1/8 teaspoon black peppercorns
  • 1 bay leaf
  • 1 cup cider vinegar
  • 1/2 cup white wine
  • 1 tablespoon sugar
  • 1 teaspoon fine sea salt

Steps to Make It

  1. Gather the ingredients.

  2. Before you trim the green beans, arrange them vertically in a 1-pint jar to see how many will fit. Pack them in as tightly as you can—once you add the hot liquid, they will shrink just a bit, so feel free to really cram them in.

  3. Remove the beans from the jar and trim them to fit, leaving at least 1/2 inch of head-space. Pack the trimmed beans back into the jar.

  4. Peel the garlic and cut it into quarters. Stuff the garlic pieces into the jar with the green beans.

  5. Add the coriander seeds, dried chile, peppercorns, and the bay leaf into the jar around the beans.

  6. Put the vinegar, wine, sugar, and salt in a small saucepan. Bring it to a boil over high heat and boil for 2 minutes (the sugar and salt should be completely dissolved).

  7. Pour the hot mixture over the beans. The liquid should completely cover all of the beans. Screw on the lid and let the jar sit until it’s cooled to room temperature.

  8. Once the jar is cool, refrigerate the bean pickles for at least 2 days or up to 6 months before eating.


Herby Potato and Green Bean Salad

From Taproot Magazine

1 1/2 lb potatoes, cubed
1 1/2 tsp salt
1/2 lb green beans
6-8 radishes
1/4 medium onion
1/2 cup loosely packed fresh dill
1/2 cup loosely packed fresh parsley
2 sprigs fresh tarragon
3-5 green onions (to taste)

Dressing:

1/2 tsp yellow mustard seeds
1/2 tsp brown mustard seeds
1/4 c olive oil
2 Tbsp grainy mustard
2 Tbsp red or white wine vinegar
2 Tbsp lemon juice
1 Tbsp honey’
3/4 tsp salt
1/2 tsp black pepper

Boil or steam potatoes. Boil or steam beans. If boiling, add plenty of salt to water. Chill beans after cooking in ice water. Salt after steaming/rinsing.

Fold the chopped herbs and radishes, beans, and potatoes once cooled.

Lightly toast mustard seeds on medium low heat in a pan, stirring to avoid burning. Crush seeds in mortar with a pestle. Shake all dressing ingredients together in a jar.

Gently mix dressing into salad, taste for salt. Serve a bit warm, or out of the fridge up to 4 days later.


Summer CSA Week 9

I was blathering on to my one-year-old over breakfast this morning, trying to describe the taste of the cucumber sticks he was eating. I seem to be driven by this need to cram as many adjectives into his first years as humanly possible. I think perhaps it will backfire someday, but I’m not sure how.

Anyway, the cucumber.
I was informing my son, that though I prefer most fruits (especially) and vegetables (generally) at room temperature, cucumbers are one I love right out of the fridge.
Cool, as they are generally thought of, they taste like the feeling of walking through the woods and noticing that there must be running water near by because of the coolness in the air. Maybe even such a small spring it’d be hard to pin-point, but the feeling in the air is still there.
He also got a short lesson in evaporation over breakfast, and I’m sure he understands it quite well now.

When my sister and I were kids, she was the reader. She always had her nose in a book, and read very, very fast. Like, the sixth Harry Potter book in a day kind of fast. But I’d watch her sometimes skipping whole pages at a time. She said it was “just” description, and she didn’t have the patience for that. I’m sure Tolkien was rolling in his grave.

I hope this week you can find ways to notice how things taste and feel and sound and smell and to be present in the here and now. Plenty of times (and reasonably) the here and now can be stressful, or boring. But even so, there can be a lot that’s worth pausing for and noticing.

We’d be lucky if you thought our veggies this week were some of those things!

For the farm crew,

Karin

img_1031


In your share this week:

Green Beans – Carrots – Cilantro – Cucumbers – Lettuce Mix – Green Onions – Green Peppers – Kale – Jalapeno Pepper – Tomatoes – Zucchini


Zucchini and Ricotta Galette

From The Smitten Kitchen

For the pastry:
1 1/4 cups all-purpose flour, chilled in the freezer for 30 minutes
1/4 teaspoon salt
8 tablespoons (1 stick) cold unsalted butter, cut into pieces and chill again
1/4 cup sour cream
2 teaspoons fresh lemon juice
1/4 cup ice water

Filling:
1 large or 2 small zucchinis, sliced into 1/4 inch thick rounds
1 tablespoon plus 1 teaspoon olive oil
1 medium garlic clove, minced (about 1 teaspoon)
1/2 cup ricotta cheese
1/2 cup (about 1 ounce) grated Parmesan cheese
1/4 cup (1 ounce) shredded mozzarella
1 tablespoon slivered basil leaves

Glaze:
1 egg yolk beaten with 1 teaspoon water

Make dough: Whisk together the flour and salt in a large bowl. Sprinkle bits of butter over dough and using a pastry blender, cut it in until the mixture resembles coarse meal, with the biggest pieces of butter the size of tiny peas. In a small bowl, whisk together the sour cream, lemon juice and water and add this to the butter-flour mixture. With your fingertips or a wooden spoon, mix in the liquid until large lumps form. Pat the lumps into a ball; do not overwork the dough. Cover with plastic wrap and refrigerate for 1 hour.

Make filling: Spread the zucchini out over several layers of paper towels. Sprinkle with 1/2 teaspoon salt and let drain for 30 minutes; gently blot the tops of the zucchini dry with paper towels before using. In a small bowl, whisk the olive oil and the garlic together; set aside. In a separate bowl, mix the ricotta, Parmesan, mozzarella, and 1 teaspoon of the garlicky olive oil together and season with salt and pepper to taste.

Prepare galette: Preheat oven to 400 degrees. On a floured work surface, roll the dough out into a 12-inch round. Transfer to an ungreased baking sheet (though if you line it with parchment paper, it will be easier to transfer it to a plate later). Spread the ricotta mixture evenly over the bottom of the galette dough, leaving a 2-inch border. Shingle the zucchini attractively on top of the ricotta in concentric circles, starting at the outside edge. Drizzle the remaining tablespoon of the garlic and olive oil mixture evenly over the zucchini. Fold the border over the filling, pleating the edge to make it fit. The center will be open. Brush crust with egg yolk glaze.

Bake the galette until the cheese is puffed, the zucchini is slightly wilted and the galette is golden brown, 30 to 40 minutes. Remove from the oven, sprinkle with basil, let stand for 5 minutes, then slide the galette onto a serving plate. Cut into wedges and serve hot, warm or at room temperature.


img_1045


Pico de Gallo

  • 1 cup finely chopped onion (about 1 small onion)
  • 1 medium jalapeño ribs and seeds removed, finely chopped
  • ¼ cup lime juice
  • ¾ teaspoon fine sea salt, more to taste
  • 1 ½ pounds ripe red tomatoes (about 8 small or 4 large), chopped
  • ½ cup finely chopped fresh cilantro (about 1 bunch)
  1. In a medium serving bowl, combine the chopped onion, jalapeño, lime juice and salt. Let it marinate for about 5 minutes while you chop the tomatoes and cilantro.
  2. Add the chopped tomatoes and cilantro to the bowl and stir to combine. Taste, and add more salt if the flavors don’t quite sing.
  3. For the best flavor, let the mixture marinate for 15 minutes or several hours in the refrigerator. Serve as a dip, or with a slotted spoon or large serving fork to avoid transferring too much watery tomato juice with your pico. Pico de gallo keeps well in the refrigerator, covered, for up to 4 days.

Summer CSA Week 8

We’ve gotten into a bit of a rhythm, our mid-summer rhythm, at the Food Farm the past few weeks. Broccoli harvest in the morning. Cucumbers and zucchini in the afternoon. Carrot weeding. Potato bug picking. Tomato trellising. Washing bins and buckets. Share harvest and packing. More carrot weeding. 

I have to say, carrot weeding may be my favorite summer farm job thus far. It’s definitely the most satisfying. When we see the carrots just popping up and the weeds breaking through alongside the carrots, we know it’s time to grab our close weeding knives and get to it! When the weeds are small, we scratch around the surface with our knives to cut what weeds are visible and disturb the soil enough to stop the not-yet-but-almost-germinated weeds. 

As we crawl up and down the field scratching the soil surface, we leave behind rows of soft green carrot tops uninhibited from growing up to be the most delicious carrots I’ve ever had! By weeding these carrots when they’re young, we give them all the space they need to soak up water and nutrients. No weeds hogging up their resources! 

One of the biggest challenges that I find this time of the season is remembering and taking the time to drink extra fluids! While last week’s cool weather brought some welcomed relief (I even wore a sweatshirt for half a day last week), the weather is quickly heating up again. Great veggie growing weather! Heat and water! However, it can be easy on the farm to get so caught up in what you’re doing that you forget about drinking water. I’m sure this is relatable for many people in the summer. 

So as the weather heats up this week, I hope that you stay hydrated and safe! 

For the farm crew,
Madison 

Baby chickens growing up! Day by day, week by week
Last planting of brassica seedlings ready to go
Honeybee friend tagging along for carrot weeding

In your share this week: 

Beets – Broccoli – Carrots – Cucumbers – Napa Cabbage – Onions – Peas – Green Bell Pepper – Hot Pepper – Tomatoes – Zucchini 

Classic Stir-Fry

Adapted from Jennifer Drummond

Ingredients

1 tbsp sesame oil

1 clove garlic, minced

½ cup onion, sliced small

2 cups sweet bell pepper, seeded, sliced in thin strips

1 poblano pepper, seeded, sliced in thin strips

2 cups zucchini, sliced in thin strips

2 cup brown rice, cooked

Handful of peas

A few thinly sliced carrots

Sauce (more ideas below):

21/2 tbsp soy sauce, low sodium

1 tsp. sesame oil

2 tsp chili paste

1 tsp dijon mustard

Instructions: 

  1. Cook rice according to direction.
  2. In a large fry pan; over medium-low heat, add 1 tablespoon of sesame oil. Heat oil for about 30 seconds, add garlic, and cook for 1 minute. Add onion and peppers, stirring occasionally and cook for about 4 minutes. Add zucchini, carrots, and snap peas and cook until slightly tender, but still firm, stirring occasionally. Turn off heat and stir in sauce.
  3. Divide rice between two bowls, and evenly divide vegetables. For a pinch of heat, I added sriracha sauce to the stirfry.

To make the sauce:

In a bowl, add soy sauce, sesame oil, chili paste and mustard; mix until combined.

Additional sauce ideas: peanut sauce, sunflower butter sauce (for nut allergy folks), or try the sauce included in this recipe! 


Beet and Corn Salad 

Adapted from The Food from Great Island

Ingredients

1 bunch of beets I had 3 medium sized beets

2 ears of corn kernels removed

1 cup of fresh peas if you have them

1 small red onion minced or a couple green onions minced

2 stalks celery minced

1 cup feta or goat cheese crumbles

olive oil, balsamic vinegar, salt, and pepper

Instructions

Trim the tops off the beets and put them in a pot of water just to cover.  Boil for 30-45 minutes until they’re just tender.  Check by sticking a sharp knife into the center of one.  Cool them while you prep the other vegetables. Instead of boiling the beets, you can pressure cook them if you have a pressure cooker or multi-use cooker like an InstaPot. Very easy!

Put the corn, celery and onion into a serving bowl. When the beets are cool enough to handle, trim off both ends and gently peel off the skin. Chop the beets into chunks and add to the bowl. 

Add salt, pepper, olive oil, and balsamic vinegar to taste!

The salad will keep, refrigerated, for up to a week.

Share your Food Farm meals with us by using the hashtag #FoodFarm and/or tag us on Instagram or Facebook! We’d love to see how you use your veggies.

Summer CSA Week 7

I have had a bad case of “make hay while the sun shines.” I haven’t put away anything from the farm yet, but maybe some of you have frozen some broccoli or this and that from your weekly shares. I confess, what I’ve been after this past week is raspberries, cherries, a hill full of Juneberries and beach time! So much to do, so little time!

Such is summer. Summers always seem so rushed and full in the north, because we all know winter comes so soon. Many years summers rush by and it seems there is little time for rest, or reading in a hammock. For farmers this is especially true. Perhaps insulated hammocks for winter would be nice for farmers…?

For all of us, this summer has such a different feel with weekends free from weddings, grad parties or family reunions. Bitter sweet- to have some free time to stay in-town, but for such a sad reason.

In the spirit of the shortness of summer, I will leave you there. My baby is anxious to be outside (he also wanted to include “AAAAAAS” to share with you all, which I told him didn’t fit with the rest of the newsletter, but that’s the mind of a one year old for you).

I hope you all enjoy the mid-summer offerings this week, and the lovely weather too.

For the farm crew,

Karin
img_9594


In your share this week:

Basil – Red Cabbage – Carrots – Cucumber – Kale – Snap Peas  – Tomatoes! Just a few now, but more to come…


img_9583

Kale Peanut Salad

from the Leek and the Carrot

1-1/4 cup roasted salted peanuts, divided
6 tablespoons vegetable oil
5 tablespoons apple cider vinegar
3 tablespoons brown sugar
1 teaspoon Kosher salt
1/2 teaspoon red pepper flakes
1 pound kale, ribs removed and very thinly sliced
1 cucumber, seeded and sliced
4 scallions, trimmed
3 radishes, thinly sliced

  1. In a food processor, combine 3/4 cup peanuts, oil, vinegar, brown sugar, salt and red pepper flakes. Process until smooth. Taste and adjust seasoning as desired.
  2. In a large bowl, combine kale with the dressing, using half at first, tasting and adding more as you like. I often use the full amount for a pound of kale but you may not want to.
  3. Top with scallion, radish and remaining 1/2 cup nuts. Serve right away or store for 2-3 days in your fridge. The kale can stand up to being dressed in advance.

Red Cabbage date and feta salad

From The Smitten Kitchen

1 to 1 1/4 pounds red cabbage (1 small head or half of a large one), sliced very thin
3 tablespoons olive oil

2 tablespoons lime or lemon juice (I use lime)
Salt and red pepper flakes (I used the mild Aleppo variety) to taste
About 1/2 cup pitted dates, coarsely chopped or sliced
4 ounces feta, crumbled into chunks
1 tablespoon chopped flat-leaf parsley
2 teaspoons well-toasted sesame seeds

Toss cabbage with olive oil and first tablespoons of lime juice, plus salt and pepper, coating leaves evenly. Taste and add more lime juice, salt and pepper to taste. I do this a few times, making sure I really get this base well seasoned because it will be hard to do it as well later.

Toss dressed cabbage gently with half of dates and feta. Sprinkle with remaining dates, then feta, then parsley and sesame seeds. Dig in.

Do ahead: The whole salad can sit assembled for at least an hour, if not longer in the fridge. Mine is going strong on the second day. You can also prepare the parts separately (feta, chopped dates, sliced cabbage) to assemble right before serving, if you’re planning ahead for Thanksgiving or a dinner party.

Summer CSA Week 6

It seems that somehow the weather has been colluding with current events – when it rains it pours. When it pours it also hails. If you haven’t yet read Janaki’s storm report from mid-week last week it’s worth reading through, just scroll down this page.

We take a lot of pride in the food we send in the shares each week. The plants get a lot of TLC around here between greenhouse time, or field weeding and hoeing time (not to mention the tractor time and watering time). Janaki and Dave are always considering this or that about the appearance of the leaves, or the way plants look when they sprout, or how to perfectly place pac choi in a box so it’s as unrumpled it can be. The care and precision for every aspect of a plant’s life is time consuming, and it rubs off on everyone who works on the farm.

Doing things to the best of our ability is all we can do, and there is so much that isn’t up to us.. It is disappointing, and a little nerve wracking to see plants we are counting on look like someone stepped all over them. We can still do our best to care for the plants and to harvest them tenderly, but nothing is going to change the pock marks in the peas, or the dead carrots or other crops now open to more pressure from pests or disease.

During this whole insane time we find ourselves in as a society, I have really struggled to pull myself back from the precipice of “everything-is-horrible-and-it-shouldn’t-be-and-if-only-people-had-done-the-work-in-the-beginning-or-at-least-tried-even-later-or-just-did-anything-at-all-even-small-things-this-wouldn’t-be-happening-and-if-I-get-mad-enough-at-strangers-in-the-grocery-store-will-that-fix-how-terrible-I-feel”. It’s a long name for a precipice. I should consider an acronym.

This year so far has been a lot of rubber meeting the road and wool being pulled from our eyes. It is a lot to digest, and it feels like it’ll digest us. It’s not easy to put one’s head down and keep doing right, and keep working for better when it seems like a hail storm is going to come along and undo whatever you’ve worked for. Or even trying again after a hailstorm of life- it’s hard to keep on when maybe the damage that’s been done won’t be out-weighed by the effort and vulnerability of our attempt for better.

In pulling myself back from the aforementioned precipice, I have to constantly remind myself that I am only in control of what I do and don’t do. I can not control most of what happens to me, or other people. I can not control what the weather does, or the climate, or the people in the grocery store.

On the farm, we’ll keep tending to the crops tenderly, even though (especially because) they’re in rough shape. We’ll harvest them well and pack them for you as gingerly as we can. That’s what we can do. We can keep on doing the right thing for the soil on the farm, year in year out and keep making choices that keep us as off the grid as possible.

Thanks for doing your part by using our vegetables, and for sharing in the ups and downs of farming and life with us. None of this would be happening without all of you choosing to eat our food for yourselves and your families.

For the farm crew,

Karin


img_0786


In your share this week:

Beets – Broccoli – Cauliflower – Carrots – Cucumbers – Head lettuce- Snap peas


img_0789

Straw all stacked -done and done!

Napa Cabbage Salad with Buttermilk Dressing

From The Smitten Kitchen

-I am including this recipe mostly for the dressing, because having a good dressing on hand can be a key part of getting veggies from your fridge and into your mouth! Also, did you know that Napa cabbage (should you have any left from last week) can be stored for quite a while, well wrapped in the fridge? Not maybe as long as hard cabbage, but for at least a month.

1/2 cup well-shaken buttermilk
2 tablespoons mayonnaise
2 tablespoons cider vinegar
2 tablespoons minced shallot
1 tablespoon sugar
3 tablespoons finely chopped chives (or green onions!)
1 pound Napa cabbage, cored and thinly sliced crosswise (4 cups)
6 radishes, diced
2 celery ribs, thinly sliced diagonally

Whisk together buttermilk, mayonnaise, vinegar, shallot, sugar, 1/2 teaspoon salt, and 1/4 teaspoon pepper in a large bowl until sugar has dissolved, then whisk in chives.

Toss cabbage, radishes, and celery with dressing.

Storm Report

Well, I slept like a baby last night–in other words, I woke up half a dozen times screaming. After weeks of rain missing the farm, we finally got a solid two inches. Unfortunately, it came in a very short period of time and was accompanied by high winds and hail. It’s been about 20 years since we’ve had a significant hail event so I suppose we should be thankful about that, but it’s still sad to see plants that have been cared for so meticulously looking beat up and bedraggled.

img_20200709_135401537

A beautiful crop of snap peas looking rather pockmarked.

img_20200709_135350419

The early beet crop looking shredded.

img_20200709_135930949_hdr

Sad onion field.

It remains to be seen how much of this damage will be permanent and which plants can grow out of it. Thankfully, no crop will be a total loss. I expect that early potatoes, beets, and those precious carrots will be delayed by a couple of weeks, and yield will be reduced. I think the snap peas that were not mature enough to be harvested today will turn brown or scab over as they age, but we have another planting that should come on soon. Whether the onions size up at all after that much damage is a big concern. We were just about to begin harvesting zucchini and those plants are also going to take awhile to look right.

Small seedlings of storage crops, such as fall beets and carrots, really took a beating and some percentage are actually broken off, but we’ll know better in a week if they can pick themselves back up and keep growing. We have an additional acre of fall carrots that were just seeded and soil compaction and crusting is a concern for emergence but I’m hopeful that they’ll be okay.

img_20200709_133856062

The other real concern is disease. Any time plants like the potatoes above are beaten up this way it gives disease an opportunity to bypass the plant’s natural defenses and cause serious harm. Many of these diseases are soil-borne, so driving that much dirt into the plant’s pores is a recipe for bad things to come.

On a brighter note, some things are looking great, like the fall cabbage crop. Broccoli, cabbage, and cauliflower in earlier plantings also appear to be okay, although the green cabbage definitely has some holes in it. Preserving share tomatoes and 2/3 of the winter squash are in a field that was protected by the wind so they fared much better than others. Another great thing is that the crew has really been on top of the weeding and field work, so we can afford to miss a few days in the field to give plants a chance to stand up and dry out.

Also, I am incredibly relieved to have a pause in what has been a grueling nighttime irrigation schedule. We really did need a good soaking rain, but could have done with a little less drama.

Thanks for your understanding and support, and we’re looking forward to more beautiful, bountiful boxes heading to your kitchen soon.

For the farm crew,

Janaki

img_20200709_141236747_hdrimg_20200708_152846066_hdr


Summer CSA Week 5

Most years I have felt that if you blink after the Fourth of July, you may miss summer. Fortunately we have more summer left than we’ve experienced so far. I’d like it to include more rain than it has so far. This week seems promising.

This year we have a great crew with a few new people who are figuring out the pace of work on the farm and where everything is and how to do farm tasks just so. Kelly, Madison and Nick are all new this year and started between early May and early June. Jane has returned after her first season last summer. It’s always nice to have repeat people who know the ropes. Lizzy comes out on CSA harvest days, Teri does all the deliveries and joins us on projects when not on the road or harvesting. Of course Dave is out planting, running things in the greenhouses, keeping knives sharp and a myriad of other tasks that need doing. A couple of long-term volunteers have been joining us on harvest days. Usually we throw open the gates for volunteers -but with COVID19 we’ve been keeping it to a minimum. (Now that I’m going to list them, it sounds like a lot – but believe me there used to be more that would work a day or two here and there) Joe, Ki, Rollie, Sandy and Betsy and of course Patricia who keeps us all organized. I think Janaki is still working on the Farm too. We see someone driving tractors around throughout the day and moving irrigation around constantly. There is a good chance it’s him doing all that work, but with the clouds of dust following the tractor it’s hard to see.

I’m so glad we have a good number of (and just plain good) people working on the farm. There is always a lot to do. It’s way more than just a few people could manage. My first season was 2014 and there were roughly 11 acres in vegetables with the other 11 in a cover crop. Now there are at least 15 acres in vegetables at the peak of the year. When I tell someone I work on a farm, and then they hear the size of it sometimes they seem to think it’s small. But with forty plus varieties of vegetables in fields + greenhouses there is a lot of work and every crop needs something different.

I hope you enjoy some of that variety in your share this week. I love this kind of a share box -you could just chop everything up into a big bowl and eat it! Likely, you’ll eat some of this and some of that and maybe keep some for later.
However you eat it -we hope you enjoy it. We enjoy growing it.

For the farm crew,

Karin


img_0696

Potato bug larvae -shortly before their demise.


In your share this week:

Broccoli – Carrots – Cucumber – Garlic Scapes – Greens Mix – Lettuce – Napa Cabbage – Green Onions – Snap Peas


20180709_144413


Garlic Scape Salt

From Gutsy By Nature

(After hearing that a member made some last week I thought it’d be a fun item to include!)

Ingredients
  • 12 fresh garlic scapes
  • ½ cup coarse sea salt
Instructions
  1. Preheat oven to 250° F.
  2. Roughly chop garlic scapes, then place in bowl of food processor along with sea salt and process until it becomes an even paste.
  3. Spread the paste in an even layer on a small baking sheet. Place in oven and allow to bake for 1 hour, stirring and re-spreading in an even layer every 15 minutes, until the paste is uniformly dried.
  4. Remove from oven and allow to cool enough to handle.
  5. Using your hands, crumble the dried salt and garlic scape mixture into fine pieces. If you find you have very hard and large clumps, you may wish to return this dried mixture to your food processor (making sure you have cleaned and dried it first) and pulverize it even further.
  6. Transfer the resulting garlic scape salt into jars for storage.

Carrot Ginger Dressing

  • 1 large carrot, peeled and roughly chopped
  • 1 small shallot, peeled and roughly chopped
  • 2 tablespoons roughly chopped fresh ginger
  • 2 tablespoons white miso
  • 2 tablespoons rice vinegar
  • 2 tablespoons toasted sesame seed oil
  • 1/4 cup grape seed or another neutral oil
  • 2 tablespoons water
    Whiz the carrots, shallot and ginger in a blender or food processor until finely chopped. Scrape down the sides, then add the miso, vinegar and sesame oil. While the machine running, slowly drizzle in the grape seed oil and the water.


Summer CSA Week 4

At the end of every CSA season we send out a survey to you our members to find out what you thought of your share boxes throughout the season. There are some general questions about how we did, how you felt about the season, and then line by line we ask if you thought you got too much, too little, or just the right amount of every item we send all season long. It’s a long list, as you can imagine.

We use all that information to try to see what, if anything we should change about what we send in the share boxes, and thus, what we should plant on the farm every spring. Over the years it seems like the farm has honed in pretty well to what works for many of you.

Every year though, there are always responses that lean more to the “too much!” side than “never enough!” (we sure don’t want anyone to feel like there’s not enough -except the snap peas – we can never grow enough of those!).

I seem to remember a couple of years back, many members feeling like they had received too many green onions. A few snipped on top of a baked potato won’t use up a bunch a week, but it seems like green onions are often thought of as a garnish in recipes as opposed to a component adding a lot of flavor. Throughout my week, I seem to always be chopping an onion up, even before I’ve fully decided what to make for dinner. I know whatever I make, it needs onion. You can do the same thing with green onions. Whatever recipe calls for onion using green onions would offer that same flavor punch so you can either substitute/or add green onions. Plus, if you’re cooking them down like in a stir-fry, soup or curry you can use a lot of them. It maybe doesn’t need to be said (but I’ll say it), that green onions won’t need to be cooked as long, and can’t be caramelized in the same way as onions can.

In other years I’ve recommended sharing food with friends or family as a way to use up a share if you’re struggling to finish it by the next week. Pot-lucks can be a great way to share and use up whatever you have laying around. This year the option of gathering around food is more complicated, and sharing more difficult. In spite of this, or because of this, I hope you are able to find creative ways to use, store and maybe even share the vegetables you get from our farm.

Feel free to reach out if you have pro-tips on using up a share, or if you have questions that you think others might like answered as well!

For the farm crew,

Karin


img_0614


In your share this week:

Broccoli – Cauliflower – Cucumbers – Garlic scapes – Head lettuce – Green onions – Pac choi – Radishes


Roasted Cauliflower Spread

From Food and Wine

-I’ve said it before that I’m not much of a recipe person, and my educated guess is that this recipe would be very flexible. You could add in some of the garlic scapes and green onions, and probably change up the spices and herbs and still end up with a tasty spread as long as your liquid to solid ratio stays about the same.

  • 1 head of cauliflower (2 pounds), halved crosswise and thinly sliced
  • 1/4 cup vegetable oil
  • 1 1/2 tablespoons minced fresh ginger
  • 1 1/2 teaspoons ground coriander
  • Kosher salt
  • 3 tablespoons tahini (sesame) paste
  • 3 tablespoons fresh lemon juice
  • 3 tablespoons chopped cilantro
  • Sesame seeds

Preheat the oven to 450°. In a large bowl, toss the cauliflower with the oil, ginger and coriander and season with salt. Spread the cauliflower on a rimmed baking sheet and roast for about 40 minutes, stirring once or twice, until tender and lightly browned in spots. Let cool slightly.

Transfer the cauliflower to a food processor. Add the tahini and lemon juice and pulse to a chunky puree; season with salt. Add the cilantro and pulse just until incorporated. Transfer the spread to a bowl and sprinkle with sesame seeds. Serve warm with pita bread or chips (or on toast!)


Garlic Scape Pesto

  • 10 Garlic scapes
  • 1/3 C Pine nuts or walnuts 
  • 1/3 C Parmesan, asiago or simply parmesan dice or shredded
  • 1/2 Lemon juiced
  • 1/8 tsp Fine Sea Salt or more to taste
  • A few grinds of Pepper
  • 1/3 C Olive oil

Trim the garlic scapes by cutting just below the bulb. Discard the bulb and set the remaining scape aside.
In a food processor, add the chopped scapes. Add the pine nuts, cheese, juice of the lemon and salt and pepper. Process by pulsing until the mixture begins to break down. Scrape the bowl down.
With the processor running, slowly add all the olive oil. Continue to process until all the ingredients are incorporated and broken down, about one minute. Taste for salt.
Store in a covered container or lidded jar in the fridge and enjoy within a week. Also, you can freeze the pesto in a jar or in an ice-cube tray. Once frozen, in the ice-cube tray, remove and place in a zip top bag in the freezer.
img_0617

Summer CSA Week 3

I love this time of year. The time of light. This year, with a little baby added into my evening and morning routines, I find myself wanting to loll in bed for a bit longer first thing than I used to. Even so, it is nice to wake up to brightness, and to have an evening of light.

Like my little one’s babyhood – I wish I could put some of summer in a bottle to take sips of later in the year.

On the farm we’ve been enjoying the lovely days -though we would rather it rained. When “nice” weather goes on and on, it becomes too much of a good thing–all of the recent rain showers have missed the farm so there has been no real moisture for two months. Janaki has been spending more time than he has (yes, there is a black-hole on the farm where time gets sucked up and obliterated) moving irrigation from one field to the next to keep up with the demands of new plants and sprouting seeds with very young (i.e., short and delicate) root systems. It’s like putting out acres of tiny fires. Oh gosh-what an image.

Not a small part of me feels like our country right now fits this description somehow: like things have gotten to hot and dry for too long, and too few people are running around trying to fix the problems. Maybe what we need is, metaphorically, a deep cleansing rain as a country to wash the dust off and wet our cracking mouths. Or maybe what we need is a salve of sorts. Something to heal. Or maybe we are in a time where we just need to let wounds see the light of day, and have time to air out and be seen before anything more can be done.

I don’t really know.

I do know that with how interconnected we all are (and boy, did we ever really realize how much until lately?), even “just” getting a share from a local farm is part of the healing work. Sustainable food is part of food fairness, just as climate justice is social justice, and healthy choices for an individual add up to being healthy choices for a community.

Thank you for being part of our farm and for participating in our work by gaining your daily sustenance from our food.

For the thirsty farm crew,

Karin

img_0549


In your share this week:

Beets – Greens mix – Lettuce – Green onions – Radishes – Spinach – Turnips


So many greens!

Does it feel like you are getting so many greens in your first shares this season? You are! That’s what the early shares are all about- and it feels good after a long season of fewer fresh salads!

It can feel like a lot to keep up with too. It doesn’t take more than a bag of sub-prime wilted greens in my fridge to make me feel discouraged about food choices I make during the week. Look no further than your freezer should you feel yourself drowning in greens. This week, beet tops, turnip tops and any spinach that feels like more than you’d use up this week can all be frozen.

Cut into 2″ square pieces, wash (per last week’s manifesto against gritty greens), blanch in a pot of boiling water for a minute and a half or so, dunk in an ice bath and then remove as much of the water as you can in a towel or by squeezing the greens. Freeze in a baggy or freezer paper for up to a year (but preferably less). Frozen greens work well for smoothies, adding to soups at the last minute or working into a meal of pasta or grains and legumes.

20180621_182715


Quick, spicy pickled radishes

From Cookie + Kate

Serving ideas- on top of or on the side of any thing you eat this week!

INGREDIENTS

  • 1 bunch radishes
  • ¾ cup white wine vinegar or apple cider vinegar
  • ¾ cup water
  • 3 tablespoons honey or maple syrup
  • 2 teaspoons salt
  • 1 teaspoon red pepper flakes (this yields very spicy pickles, so use ½ teaspoon for medium spicy pickles or none at all)
  • ½ teaspoon whole mustard seeds (optional)
  • Optional add-ins: garlic cloves, black peppercorns, fennel seeds, coriander seeds

  1. To prepare the radishes: Slice off the tops and bottoms of the radishes, then use a sharp chef’s knife or mandoline to slice the radishes into very thin rounds. Pack the rounds into a pint-sized canning jar. Top the rounds with red pepper flakes and mustard seeds.
  2. To prepare the brine: In a small saucepan, combine the vinegar, water, honey or maple syrup and salt. Bring the mixture to a boil, stirring occasionally, then pour the mixture over the radishes.
  3. Let the mixture cool to room temperature. You can serve the pickles immediately or cover and refrigerate for later consumption. The pickles will keep well in the refrigerator for several weeks, although they are in their most fresh and crisp state for about 5 days after pickling.