Summer CSA Week 10

We’re just over half way through the 2021 summer share! We hope you’ve been enjoying the ever more summery selection! Our item list on the white board hardly fits any more – time to write it smaller. The crew has more of a routine as the summer goes on as different people take on a different, regularly harvested crop like daily zucchini and cucumbers, and almost daily melons (for a while), peppers and broccoli (never ending!). The addition of increasingly more harvesting is butting up against some later-than normal season weeding as rains have helped both crops, and the little (and not so little) unwanted plants in our fields.

We will be getting into a more regular rhythm of harvesting large amounts of things at a time too, to have available for a week or two at a time. The first planting of carrots got harvested a week and a half ago, and we have a few bins of cabbage in the cooler waiting for wholesale orders and for CSA delivery. The garlic is out of the ground, a couple weeks ahead of usual, and is curing in the greenhouse for now. Soon we’ll trim those stalks and move the garlic to make way for onions. Bit by bit the harvest ramps up, and we can start ticking entire crops off the list.

How about all of you? Do you feel like you’re in a good rhythm of using your share, or are you stuck in a rut? Hopefully you won’t ever feel too stuck since the veggies change throughout the season, though I think my household is already ready to move on from zucchini fritters… Time to move on to my regularly occurring (but it’s been a while!) potato salad I guess!

August in Minnesota always feels so full and so fast with late summer camping trips, or weddings and planning for the fall and school season ahead. Even if school isn’t a part of your life any more, there seems to be a different pace to things come September. I hope you are all finding satisfying ways to spend these last summery weeks. Perhaps in a couple of weeks, on the 21st (3-5pm), you’ll find yourself out here at the Food Farm for our farm gathering, or up the road for the Free Range Film Festival (7pm)! What could be more summery than an afternoon drive out to Wrenshall?

For the busy crew,

Karin


In your share this week:
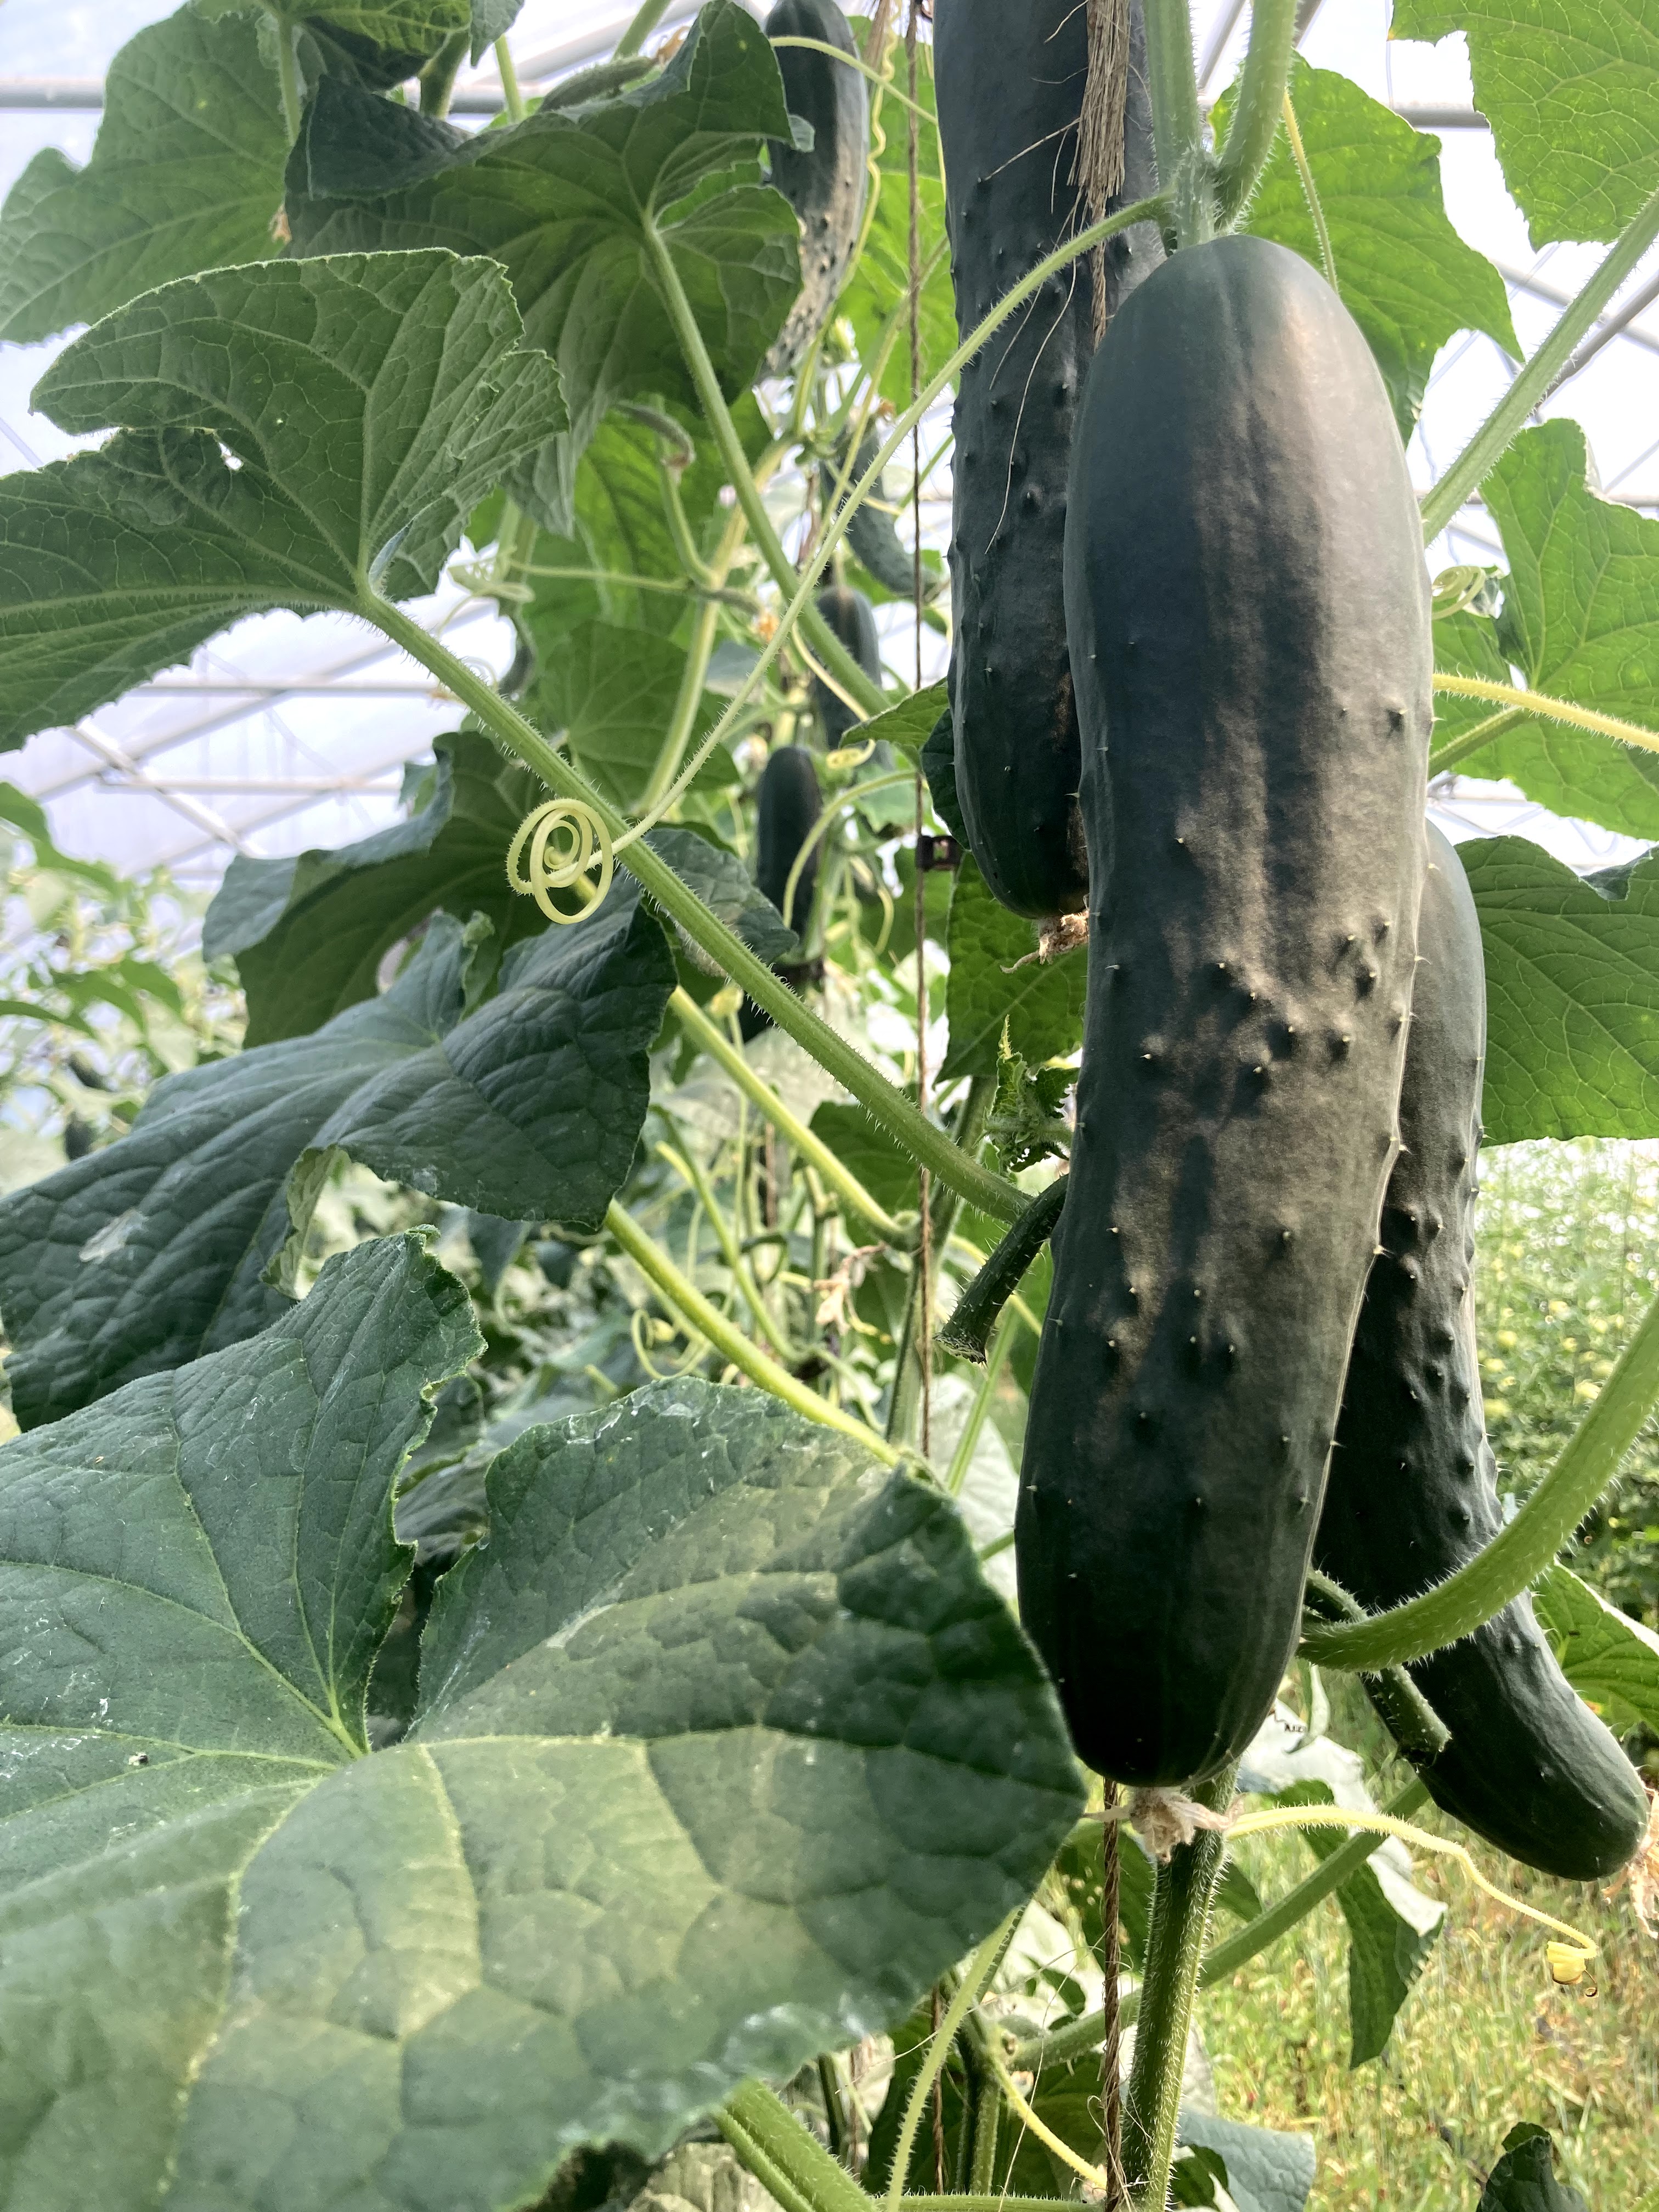
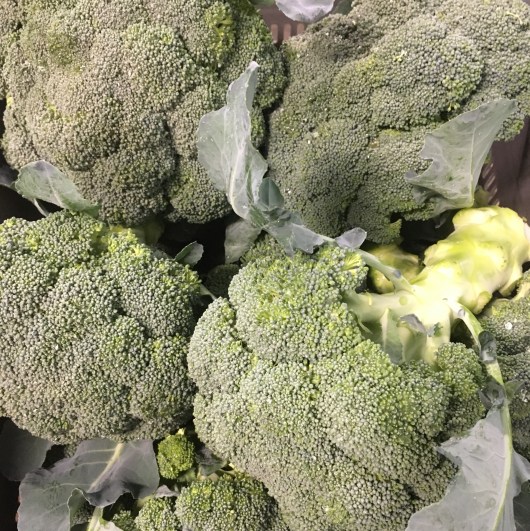
Green Beans – Broccoli – Carrots – Cucumber – Dill – Melons! – Sweet Onion – Green Onions – Sweet and Hot Peppers – Potatoes – Tomatoes – Zucchini


Cream of Broccoli Soup, By Farmer John

One large head of broccoli “the biggest you can find”, chopped
One large onion, the biggest you can find, chopped (not a sweet onion… sorry)
One large carrot, also the biggest you can find, chopped

2 Cloves Garlic
2 Tbsp, (but he uses 3) butter
2 Cups chicken or veggie broth
Salt to taste
1 Cup milk

Cook veggies in broth until quite soft, and then blend the living daylights out of it with an immersion blender. Add milk, stir and taste.
We talked about the option of freezing the soup – perhaps freeze it before blending, and adding the milk, so as to simplify the reheating. Then thaw, heat, blend and add milk when you’re ready to serve.

Ultimate Zucchini Bread

From The Smitten Kitchen

I have been making this like it’s going out of style… but it never will in my house! If you want a fun little description about how she got to this recipe from other less satisfying versions, look it up on her website – all her complaints about plain old zucchini bread were also my own- but I love this recipe! Disclaimer… it is basically eating cake for breakfast.

  • 2 cups (13 ounces or 370 grams) grated, packed zucchini, not wrung out, grated on the large holes of a box grater
  • 2 large eggs
  • 2/3 cup (160 ml) of a neutral oil (I use safflower), olive oil, or melted unsalted butter
  • 1/2 cup (95 grams) packed dark brown sugar
  • 1/2 cup (100 grams) granulated sugar
  • 1 teaspoon vanilla extract
  • 1 teaspoon fine sea or table salt
  • 1 1/4 teaspoons ground cinnamon
  • 1/8 teaspoon ground or freshly grated nutmeg
  • 3/4 teaspoon baking soda
  • 1/2 teaspoon baking powder
  • 2 cups (260 grams) all-purpose flour
  • 2 tablespoons (25 grams) raw or turbinado sugar

Heat oven to 350 degrees F. Lightly coat a 6-cup or 9×5-inch loaf pan with nonstick spray. Place grated zucchini in a large bowl and add oil, eggs, sugars, vanilla, and salt. Use a fork to mix until combined. Sprinkle cinnamon, nutmeg, baking soda, and baking powder over surface of batter and mix until combined — and then, for extra security that the ingredients are well-dispersed, give it 10 extra stirs. Add flour and mix until just combined. Pour into prepared loaf pan and smooth the top. Sprinkle with the raw or turbinado sugar — don’t skimp. Bake for 55 to 60 minutes, until a toothpick or tester inserted into the middle cake but also into the top of the cake, closer to the dome, comes out batter-free.

Let cool completely in the pan. Leave in pan, unwrapped, overnight or 24 hours, until removing (carefully, so not to ruin flaky lid) and serving in slices. Zucchini bread keeps for 4 to 5 days at room temperature. I wrap only the cut end of the cake in foil, and return it to the baking pan, leaving the top exposed so that it stays crunchy.

Summer CSA Week 7

It isn’t an easy summer to be a plant – or someone trying to grow plants. All the trees around town look tired and soft, like a sweaty brochure being used as a fan. Janaki is spending his time running irrigation around to keep vegetables alive in their turn, constant triage ensuring that every crop has what it needs. There are around 42 fields now, some quite large. Wow, I had never counted. No wonder I still get “lost” with the field numbers.

This image has an empty alt attribute; its file name is img_3230.jpg

There is something daunting about the weather this year. It’s not a good rain year. Last year wasn’t a good rain year, nor particularly snowy. Who can say if this is a trend, but who can say what a trend is other than unusual and more intense. It feels unsettling to know that the rest of my life will be marked by these changes. Perhaps some more “normal” feeling seasons or years will still happen- but I fear for more winters with little snow (what is the point of winter if there is no snow!?) and more growing seasons that are hot and dry. And what all will that change? In my life time will pine trees become more rare, will more invasive pests and plants make their way north, will all the ash trees die? Probably. Maybe I’ll find myself accepting change and growing a patch of lavender in my 70s. Or maybe I’ll move somewhere I can still ski.

Going down either an emotional or intellectual rabbit hole of climate worry will drive anyone insane after a while. Beyond my worry is grief, which is easier to be with than worry in the long term, but still not easy.

The other day I found myself thinking how hard it would be to plan and build for these changes we see. From air conditioning in schools to making changes to river banks – a lot could get done and some of it is a guessing game.

On the farm Janaki is continually making those guesses as well as he can in an attempt to mitigate risk and maintain some level of sanity in our work. We can’t make it rain, but he is in the market for a more sustainable and efficient irrigation system. And when (not if) the 5 inches of rain in a weekend fall, he has drain-tile now throughout the fields, to give the water somewhere to go instead of sitting and rotting carrots. We use refrigeration in the root cellar now, instead of solely relying on cold fall air to cool the old cellar for winter storage. Many changes in the past 8 seasons I have known the farm – and many of them just in time. We’re trying, folks. Thanks for coming with us on the journey.

For the farm crew,

Karin


In your share this week:
Broccoli – Carrots – Cucumbers – Lettuce – Green Onions – Peas – Tomatoes


Carrot and White Bean Burgers

From The Smitten Kitchen

  • Olive oil
  • 1/2 cup panko-style breadcrumbs
  • 3 shallots, or 1 small onion, diced
  • 1 tablespoon tomato paste
  • 1 1/2 teaspoons kosher salt
  • 1 cup packed grated carrot (from 2 medium carrots)
  • 1 1/2 tablespoons apple cider vinegar
  • Two 15-ounce cans cannellini or other white beans, drained and rinsed
  • 1 large egg, beaten
  • Freshly ground black pepper
  • Burger accompaniments, as you like

Heat 1 tablespoon olive oil in a large skillet over low heat. Add the panko and cook, stirring often, until lightly browned and crisp, 3 to 5 minutes. Transfer crumbs to a large bowl, then return the pan to the heat.

Add 2 tablespoons olive oil to the skillet, followed by the shallot or onion. Cook until softened and lightly golden, 8 to 10 minutes. Stir in the tomato paste, salt, and carrots and stir frequently until the carrots are soft and a bit blistered, another 8 to 10 minutes. Add the vinegar, scraping up all the browned bits until the pan is dry. Remove from heat and add the bowl with the toasted panko. Add beans and use a wooden spoon or spatula to very coarsely mash the mixture until a bit pasty and the mixture coheres in places—there should still be plenty of beans intact. Add pepper, and more salt if needed, to aste. Stir in the egg. Shape into 6 patties (I used a 1/2 cup measure as a scoop) for the size burger you see here; 4 patties for really large burgers (to warn, I found this size a little unwieldy), or 8 to 10 for slider-size.

To cook the veggie burgers, heat a thin layer of olive oil in a wide skillet over medium heat and carefully cook until browned and slightly firm to the touch, 3 to 4 minutes per side. It may be necessary to cook in batches. Serve hot or at room temperature, with whatever you like on or with veggie burgers.

Quinoa Broccoli Salad

From Cookie and Kate

Slaw

  • ¾ cup uncooked quinoa
  • 1 ½ cups water
  • ½ cup slivered or sliced almonds
  • 1 ½ pounds broccoli (about 2 large or 3 medium heads)
  • ⅓ cup chopped fresh basil

Honey-mustard dressing

  • ½ cup olive oil
  • 2 tablespoons lemon juice
  • 2 tablespoons smooth Dijon mustard
  • 1 tablespoon apple cider vinegar or more lemon juice
  • 1 tablespoon honey
  • 2 medium cloves garlic, pressed or minced
  • ½ teaspoon sea salt
  • Freshly ground pepper, to taste
  • Red pepper flakes, optional (for heat)
  1. To cook the quinoa: First, rinse the quinoa in a fine mesh colander under running water. In a medium-sized pot, combine the rinsed quinoa and 1 ½ cups water. Bring the mixture to a gentle boil over medium heat, then reduce the heat to medium-low and gently simmer the quinoa until it has absorbed all of the water. Remove the quinoa from heat, cover the pot and let it rest for 5 minutes. Uncover the pot and fluff the quinoa with a fork. Set it aside to cool.
  2. Meanwhile, toast the almonds: In a small skillet over medium heat, toast the almonds, stirring frequently, until they are fragrant and starting to turn golden on the edges, about 5 to 7 minutes. Transfer to a large serving bowl to cool.
  3. To prepare the broccoli slice the florets off the stems into manageable pieces. Feed the broccoli florets through your food processor using the slicing blade, then switch to the grating blade to shred the stems. Alternatively, you can shred the broccoli with a mandoline or by hand with a sharp knife.
  4. Combine all of the dressing ingredients in a liquid measuring cup and whisk until emulsified. The dressing should be pleasantly tangy and pack a punch. If it’s overwhelmingly acidic, add a little more honey to balance out the flavors. If it needs more kick, add a bit more mustard or lemon juice.
  5. Add the shredded broccoli slaw, cooked quinoa and chopped basil to your large serving bowl. Pour the dressing over the mixture and toss until well mixed. Let the slaw rest for about 20 minutes to let the flavors meld.

Summer CSA Week 2

I don’t think of myself as a superstitious person typically, but in the past couple weeks I have: left car windows open, left laundry on the line over night, left an open bag of potting soil on my deck (for days), not washed the car, left the garbage lid open, and left the deck chairs out instead of tipped up. This list isn’t just to show how lazy I am, it’s to show that I am TRYING to send a message (to whom it may concern) that we need rain! If I leave these things this way maybe they can be a sacrifice of sorts for rain. None of the passing showers that went through the area have hit the farm and we’ve had less than 1/4″ of rain in the last three scorching weeks, so I invite you all to participate in my efforts such as they are. Maybe the message will get through (and we’ll all have to take in that sopping laundry with joy).

These hot windy days are not only very drying, but also prevent us from irrigating during the day, so Janaki has been moving the irrigation around a lot at night (you know, in his spare time) to make sure all the plants get what they need, especially when so many are tiny seedlings without deep roots yet.

What can we say but say the so-annoying phrase “new normal”? Late spring used to bring rain fairly consistently, and in a soaking, spread out kind of way. And they sometimes still do. Sometimes there are still 45 and foggy days in the end of May- we had a few of those this year. Predictability and farming have never danced well together, but this new climate has scratched up the record we were trying to dance to. In the back of my head now I have a fear about dry-dry-dry and then a deluge of 5 inches of rain over night. It seems to be what happens.

On a sort of lame flip side – I think we’re staying on top of the weeds pretty well so far. Turns out they need water too (though somehow less…. how is that fair?) This past week saw the second and largest planting of potatoes in the ground, as well as the 5th and BY FAR largest planting of cabbage and some broccoli. Good luck out there little babies. We’re on your side!

We are happy to send a box that’s a little fluffier and fuller this week. It would have been a hot week to try to save the rhubarb and early spinach through -hopefully you found that harvest to be worth it! Each week -bit by bit there will be more variety in the boxes headed your way. As you get home with your share, especially on these warm days, a quick soak in a sink full of cold water can help prolong the life of many greens like pac choi and lettuce. They get cooled after we harvest them, but may warm up again at your pick up site. Cut-greens like this week’s greens mix could be put in the fridge with the bag open, but make sure to close the bag up again before night so they don’t dry out. If you use radish and turnip greens, good for you! They could also benefit from a cold soak, though I would really try to dry them well and then use them sooner than later.

Like greens, humans keep better with a good dunking now and then. If not that, maybe you can at least make time to dump some water on your head, or run your wrists under some cool water (trust me, it helps). And, if you do those things, maybe stand by a plant to share some of that water!

Enjoy the veggies!

For the farm crew,

Karin

Flying row cover!

Floating row cover!


In your share this week:
Greens Mix – Romaine Lettuce – Pac Choi – Radishes – Spinach – Turnips


Turnip and Kale Gratin
-From Bon Appetit

In the body of text about this recipe, it says that turnip greens can be used in place of the kale! Voila!

5 garlic cloves, thinly sliced
2 cups heavy cream
½ teaspoon dried thyme
2 tablespoons unsalted butter, divided
3 medium onions, thinly sliced
Kosher salt
3 bunches Tuscan kale, ribs and stems removed, leaves torn
4 medium turnips (about 1¾ pounds total), trimmed, peeled, cut into ½-inch pieces
3 large eggs, beaten to blend
4 ounces Fontina cheese, grated (about 1 cup)
1 ounce Parmesan, finely grated (about 1 cup)
8 ounces day-old white country-style bread, cut into ½-inch pieces
Freshly ground black pepper

Preparation

Step 1

Bring garlic, cream, and thyme to a bare simmer over medium heat. Reduce heat to low and let cream simmer 30 minutes. Let cool.

Step 2

Meanwhile, heat 1 Tbsp. butter in a large skillet over medium-low. Add onions, season with salt, and cook, stirring occasionally and adding a splash or two of water if onions begin to stick to pan, until caramelized and amber colored, 45–60 minutes. Transfer to a large bowl and let cool. Wipe out skillet.

Step 3

Heat remaining 1 Tbsp. butter in same skillet. Working in batches, add kale, tossing and letting it wilt slightly before adding more; season with salt. Cook until kale is wilted and tender, 5–8 minutes; transfer to bowl with onions.

Step 4

While kale is cooking, cook turnips in a large pot of boiling well-salted water until crisp-tender, about 2 minutes; drain. Transfer to a bowl of ice water and let cool. Drain; pat dry. Transfer to bowl with onions.

Step 5

Preheat oven to 375°. Whisk eggs, Fontina cheese, Parmesan, and cooled cream mixture in a large bowl to combine. Add onion mixture and bread; season with salt and pepper. Transfer to a 13×9″ baking dish and press down on mixture with your hands to form a tight, even layer. Bake gratin, uncovered, until well browned, 40–50 minutes. Let rest 10 minutes before serving.

Gratin can be assembled 12 hours ahead. Cover and chill.


Pac Choi and Shiitake Stir-fry
From The Spruce Eats

3 to 4 cloves garlic (minced)
1 cup shiitake mushrooms (sliced OR 1/2 cup sliced shiitake mushrooms and 1/2 cup sliced button mushrooms)
2 teaspoons canola oil or other high-heat oil
1 tablespoon soy sauce (or, use tamari)
1 pac choi
5 to 6 green onions (sliced)
1/4 cup vegetable broth
2 teaspoons fresh ginger (minced or grated)
2 teaspoons sesame oil
2 tablespoons sesame seeds (optional)

Saute the garlic and mushrooms in oil for 3 to 5 minutes then add in the soy sauce, the bok choy and scallions, and cook for a few more minutes. Reduce heat to medium-low and add vegetable broth and ginger. Simmer for another 3 to 5 minutes. Finally, stir in the sesame oil and the optional sesame seeds and remove from heat.

Eat as is or enjoy over rice or another grain!

February Winter Share

Now we have four Winter Shares done, and two to go! I hope that you all are well into the swing of using these storage-time staples each month. It can be nice to settle into patterns and familiar recipes. I’ve been through a few: hashbrowns, cubed and sautéed roots together with an egg on top, spicy coleslaw, miso soup, chocolate-chocolate chip cookies with peanut butter. Oh wait, that’s a different category.

If your go-to recipes are starting to feel more like a rut, and less like a comfort, I hope you can find some ways to add some pep and switch things up this month. Making a meal plan change can be as easy as trying a new condiment, or digging into the back of the spice cupboard and see what has fallen out of use for a while (not too long though… they do go bad [mom]). If you normally reach for lemon juice to brighten dishes, try a new vinegar, or some wine.

I know I’ve said before, that I have learned more about cooking from friends and roommates than I ever have from a cook-book or blog. From canning tomatoes to homemade pita bread to massaged kale to chopping food small enough- my friends didn’t even know the lessons they passed on just by sharing a kitchen.

The joy of cooking and preparing food together is something I miss. Sharing meals and passing dishes around a table to friends or family is going to be the first thing I do whenever those kinds of things can happen again. I am sure I will cry the first time.

With the sharing of food in groups missing, the connection between food and community might feel non-existent at times. Maybe if you split your share with another family you have an additional sense of connection as you sort through boxes together or drop food off. I am glad that at least, with the food you get from our farm, we are all still connected, and your support is a critical part of how we can do what we do. Indeed, of why we do what we do.

Even if you find yourself alone over a plate of uninspired-feeling (but delicious tasting) roasted delicata some time this month… you might not actually be as alone in that as you think.

For the farm crew,

Karin


In your share this month:
Beets – Purple and Orange Carrots – Green Cabbage – Delicata Squash – Onions – Parsnips* – Red and Baby Yellow Potatoes


*A note on our tiny little parsnips: this crop got 2020ed (is that be a verb now?), and the replanted ones didn’t have time to size up very well. I would recommend NOT peeling them, but scrubbing them well instead. The rusty, oxidized look on the outside shouldn’t affect the taste. They are just too small to peel. Here’s to next year’s planting going better.


Potato-Parsnip Latkes with Horseradish and Dill
From the Smitten Kitchen

Yield: About 18 2 1/2 to 3-inch latkes

Pancakes
1/2 pound (about 1 large) potato
1 tablespoon fresh lemon juice
1 pound parsnips (Farm note: you got 1 1/2 lbs in your share, and you could probably get away with using all of them in this)
1/4 cup all-purpose flour
1 teaspoon baking powder
2 large eggs, lightly beaten
2 tablespoons chopped fresh dill
1 teaspoon table salt
1/4 teaspoon freshly ground black pepper
Olive oil (or a mix of olive and vegetable or peanut oil) for frying

Sauce
1 cup sour cream
1 tablespoon lemon juice
1/2 teaspoon table salt
1 tablespoon freshly grated or prepared horseradish
1 tablespoon chopped dill

Preheat: Oven to 250 degrees. Line one large or two smaller baking sheets with foil and leave them in the oven until needed.

Prepare vegetables: grate them on the large holes of a box grater or (my preferred method) using the shredding blade of a food processor.

Transfer shredded vegetables to a lint-free dishtowel or square of cheesecloth, and wring out as much liquid as possible. Let stand for two minutes, then wring again. Wetness is the enemy of crisp, light latkes, so we want to get rid of as much as possible.

Make batter: Transfer wrung-out vegetables to a large bowl. Add lemon juice. In a tiny dish, stir together the flour, baking powder, salt, pepper and any herbs or additional seasonings and toss with vegetables, evenly coating the strands. In the same tiny dish, whisk your egg(s) and then stir this into the vegetable-flour mixture, evenly coating the strands.

Prepare pan: Heat a large, heavy skillet, preferably cast iron, over medium heat. Once skillet is hot, add 3 tablespoons oil and heat oil until shimmering. If you’re unsure, you can flick a droplet of water onto the oil; if it hisses and sputters, you’re good to go.

Cook: Using a fork or your fingertips (letting the eggy batter drain off a little is good), gather spoonful-sized mounds of battered vegetables and drop them onto the heated skillet. When golden underneath, 3 to 4 minutes later, flip pancakes. Cook on the other side until nicely bronzed underneath, another 2 to 3 minutes, and transfer to paper towels briefly to drain pancakes, before transferring them again to tray(s) in warm oven. If latkes cook too quickly or slowly on the stove, adjust the heat accordingly.

Add more oil if needed (you want to keep the pan at that 3 tablespoon level), being sure it is heated before adding more pancakes to the skillet. Repeat with remaining batter. I like to keep the latkes in the oven for at least 10 minutes to ensure they’ve cooked through before serving them. This gives you time to…

Make sauce: Mix sauce ingredients in a small dish. Adjust seasonings to taste.

Beet and Carrot salad with Currants
From the Leek and the Carrot

4 garlic cloves, minced
1/2 cup dried currants (or cranberries)
1/4 cup champagne vinegar
2 large (or 1 extra-large) beets, peeled
3-4 large carrots, peeled
2 apples
1/2 lemon, juiced
1 teaspoon Kosher salt
1/2 teaspoon freshly ground black pepper
1/4 teaspoon red pepper flakes
1/2 cup olive oil
1-2 cups chopped and toasted almonds

  1. In a small bowl, combine garlic, currants and vinegar. Let currants plump and garlic mellow in there for at least 20 minutes. It will likely take that long to get your veggies cut up anyhow.
  2. Cut the beets, carrots and apples into matchsticks and place in a large bowl. Squeeze with lemon and season with salt, pepper, and red pepper flakes. Toss to combine then add the garlic and currant mixture. Drizzle with olive oil and toss several more times to combine. Taste and adjust seasonings as desired.
  3. When ready to eat, serve with toasted almonds. If not eating all at once, keep toasted almonds to the side and add right before eating so they maintain their crunch.

December Winter Share

Greetings on this sunny winter day! Karin was off newsletter duty today, so you’re stuck with the last minute ramblings Truman and I came up with. Here are his thoughts:

I would like to wish all the farm kids a very happy, jolly, merry Christmas and that you all get what you’re looking for this holiday. I am looking forward to special food in my stocking, especially candy canes because we only get those at Christmastime. My favorite foods for dinner are mashed potatoes, broccoli, carrots, and beets. I like making and eating gingerbread cookies. I also like being in my pjs all day, especially my footy firetruck pajamas. I call them my matchies because Ellis has the same ones.

Even–or I suppose especially–in a turbulent year like this, I am just so humbled by my position in this world, so thankful to have family and friends nearby, so honored to have hundreds of families trusting this farm for their food supply. The older I get the more I realize how essential it is to have these networks of support in place to allow me the energy to in turn do my part in what I hope is an effort to make the world a little better. Our family is incredibly grateful to this place, the people, and the planet we call home.

For the farm crew,

Janaki

In your share today: Beets, Red Cabbage, Orange and Purple Carrots, Onions, Yellow and Russet Potatoes, Sunshine and Delicata Squash

Sorry, I didn’t have time to type in recipes today, so I’m just going to take a picture of two of my favorites–hopefully you can read the handwriting!. I was skeptical of the fresh beet/carrot salad at first, but it has become a staple in our house. And warm biscuits are hard to pass up any time of the year.

Summer CSA Week 16

The summer -turned fall- CSA has just two weeks more after this one, and it will probably go out with a climax of color, just like the summer does. We have winter squash in out of the field now, and are harvesting a variety of potatoes to go along with all the usual summer/end of summer produce you’ve been seeing lately. I hope that you have been finding fresh and creative ways to use the vegetables each week. I say this knowing that for me, I tend to get in a rut of cooking (sometimes tasty ruts, but still, how many zucchini fritters can one family eat?) and am now thankful for a change of weather to remind me of other go-to foods I love to make.

When I was growing up, my mom used to make big batch meals, some for dinner, some to freeze, and more often than not, some to bring to someone who needed it. My sister and I loved smelling whatever was cooking all day, and were primed and ready for chili, or spaghetti or roast for dinner by the time it rolled around. The worst was when she said it was something she was making a day or two ahead of time -pure torture for growing kids to wait to eat whatever smelled so good!

Back when the farm still had chickens for meat, one had been injured somehow a couple weeks before we were set to harvest them all. Figuring she might not make it that long, and knowing that either way she was suffering, Janaki said I could have (read: eat) her if I wanted to do that on my free time. So after work, I pulled together all the stuff I’d need to kill, clean and pluck the chicken and got to work. It isn’t really so very much work if you know what you’re doing, but what I did learn that evening was cleaning up from killing one chicken is just about as much work as cleaning up from 200. A little blood, a lot of blood, either way everything has to get totally clean. Only there’s just one dead chicken, verses food for dozens of families. So, I decided that day I’d set a minimum of 5 chickens next time.

In the before times (as they are called now) the crew used to eat lunches all together in Janaki and Annie’s house (ever more becoming Truman and Ellis’ house!). Some years we’d have a rotation down of who would go in a bit early to start lunch, other years we’d all cook together as fast as we could in an hour. Often I’d find myself in there with a pot of rice and a pile of vegetables and 25 minutes to put something together for 5, 6 sometimes 8 people. I could lie here because who’s going to check… but the truth is that the kitchen sometimes looked like a tornado had struck by the time I was finishing up. Many a time someone (Patricia) would come in and start working around me in the kitchen, scraping cut ends of onions off into the compost and washing salad spinners and colanders. But the end result was usually half way decent, fresh whole-food for a hungry farm crew and a kitchen that went back to sorts.

If only my kitchen at home had a person walking around behind me making things cleaner. Right now, it has a little person walking around pulling towels out of the drawer, putting measuring spoons between the fridge and the wall and holding onto the back of my pants. Basically, he’s no help. To boot, I’ve realized the same lesson applies from the chickens: cooking using whole food for 8 people – same mess as cooking for 3. Is this just me? So, the down side of that is obvious, it is: wow, what a mess. The plus side: it really isn’t so much more work to make twice, or three times as much and put some away for later. If you have to wash a cutting board, counter, knife and pots anyway, why not just chop a little more? If you’re roasting something, is another couple of baking sheets such a burden?

If anything, I write this as a pep talk to myself to just go nuts cooking. We can all go wild in these next few weeks of bounty, like squirrels running around frantically for acorns.

For the farm crew,

Karin

In your share this week:
Northeaster Green Beans – Carrots – Cilantro – Cucumbers – Greens Mix – Leeks – Onions – Red and Hot Peppers – Potatoes – Rutabagas – Acorn Squash -Tomatoes – Zucchini

Garbage Quiche

from The Leek and the Carrot

My two cents, and educated guess, is that quiche is usually very flexible, and as long as you don’t add something too watery (like tomatoes) without changing the amount of milk you add, you can put in just about anything you want as substitutions. Example, leeks instead of onions, or adding red pepper instead of mushrooms.

Makes 2 9-inch quiches
Serves 8 (hungry farmers)
Takes 1 hour, 20 minutes

2 partially baked pie crusts (see below) or 2 store-bought pie crusts
1/4 cup sunflower oil (or olive oil), divided
4 cups diced butternut squash
1 tablespoon Kosher salt, divided
1/2 teaspoon freshly ground black pepper, divided
1/2 teaspoon sage
1/2 teaspoon thyme
1/2 teaspoon red pepper flakes, divided
1 garlic bulb
2 medium yellow onions, thinly sliced
2 tablespoons butter, divided
1 teaspoon sugar
1/4 pound shittake mushrooms, loosely chopped
3 kale leaves, stalks removed and roughly chopped
1 cup finely shredded parmesan
6 eggs
2 cups half & half or whole milk

Preheat the oven to 425 degrees. Toss diced butternut squash with 2 tablespoons oil, 1 teaspoon salt, 1/4 teaspoon pepper, sage, thyme and 1/2 teaspoon red pepper flakes. Pour out onto a large baking sheet and roast for 30 minutes. Set aside once finished.
Cut the top off a garlic bulb. Drizzle with one tablespoon oil. Wrap in foil and add to the oven to roast until the squash is finished. Once cooked, remove from foil and squeeze cloves out of the peel. Gently chop and set aside.
Meanwhile, begin caramelizing onions. Combine last tablespoon oil and one tablespoon butter in a large heavy skillet over medium heat. Add onions, 1 teaspoon salt and remaining pepper. Reduce heat to medium low and cook for 15 minutes until well softened. Add sugar and continue cooking for 10 minutes until lightly browned and just caramelized. Remove from pan and set aside.
Wipe the large skillet out with a paper towel (if necessary) and add remaining tablespoon of butter. Melt over medium low heat. Add mushrooms along with remaining teaspoon Kosher salt. Saute for 5 minutes. Add kale and remaining 1/4 teaspoon red pepper flakes. Cook for an additional 5 minutes until just wilted.
Reduce oven temperature to 375 and prepare your quiche! Add half of the cooked butternut squash, chopped softened garlic, caramelized onions and sauted mushrooms and greens to each partially cooked pie crust. Sprinkle 1/2 cup parmesan cheese over each quiche.
In a large bowl, combine 6 eggs and cream or milk. Whisk until smooth. Pour mixture over each quiche so that all veggies are covered. Bake quiche for 35 minutes or until center is set. Enjoy warm today, tomorrow or all throughout the week!

Pie crust:
2-1/2 cups flour
1 tablespoon sugar
1 teaspoon Kosher salt
2 sticks butter, cut into pieces and very cold
1/2 cup cold water

I love to make pie crust in my food processor. I think it is the simplest thing on Earth. If you don’t have a food processor, follow this recipe; same techniques but no food processor necessary.
Before I even begin making the crust, I cut the butter into pieces and stick it in a bowl in the freezer. Then I fill a one- or two-cup measuring cup with 1/2 cup cold water and stick that in the freezer too. The trick with pie dough is to work quickly so that the butter stays cold and in small uneven pieces. This is what creates a flaky crust. Chilling these ingredients right before you start helps with this.
Combine flour, sugar and salt in the food processor and pulse a few times until well combined. Add all the butter at once and pulse a few times until broken up but not at all incorporated. What you are looking for is pea-sized pieces of butter sprinkled throughout. Uniform size is not important. Add half the cold water to the mixture, turn on the food processor and slowly pour in the rest of the water. Continue running the food processor until the dough comes together into one mass (it will not be a ball, but will be smooth and even).
Remove dough from food processor using a rubber spatula and wrap with plastic wrap. Chill in the fridge for at least an hour.
When ready to use, turn half the pie dough out onto a well-floured counter. Dust the top with flour and roll out until about 12 inches in diameter. Press into a 10-inch pie pan, line with foil and add pie weights (or dried beans). Bake at 425 degrees (with the butternut squash works well!) for 10 minutes.

Carrot Salad with Tahini, Crisped Chickpeas and Salted Pistachios

From the Smitten Kitchen

Chickpeas
1 3/4 cups cooked chickpeas, or 1 15-ounce can, drained and patted dry on paper towels
1 tablespoon olive oil
1/2 teaspoon coarse sea salt
1/4 teaspoon ground cumin

Salad
1 pound carrots, peeled and coarsely grated
1/4 cup coarsely chopped parsley
1/4 cup shelled, salted pistachios, coarsely chopped

Dressing
1 medium garlic clove, minced
1/4 cup lemon juice
3 tablespoons well-stirred tahini
2 tablespoons water, plus more if needed
2 tablespoons olive oil
Salt and red pepper flakes to taste

Roast chickpeas: Heat oven to 425 degrees F. Toss chickpeas with one tablespoon olive oil, salt and cumin until they’re all coated. Spread them on a baking sheet or pan and roast them in the oven until they’re browned and crisp. This can take anywhere from 15 to 20 minutes, depending on the size and firmness of your chickpeas. Toss them occasionally to make sure they’re toasting evenly. Set aside until needed.

Make dressing: Whisk all ingredients together until smooth, adding more water if needed to thin the dressing slightly. Taste and adjust seasoning; don’t worry if it tastes a little sharp on the lemon, it will marry perfectly with the sweet grated carrots.

Assemble salad: Place grated carrots in large bowl and toss with parsley. Mix in 2/3 of the dressing, adding more if desired. Add more salt and pepper if needed. Sprinkle with a large handful of chickpeas (you’ll have extra and if you’re like us, won’t regret it) and pistachios and dig in.

Do ahead: Salad keeps well in the fridge for two days, however, I’d add the chickpeas and pistachios right before serving, so they don’t get soft.

Potatoes make great toys… if they are used promptly afterwards for breakfast!

Summer CSA Week 12

When I first started farming, in Texas (in August…) I didn’t know what kale was. I thought sorghum sudangrass was corn. I had never heard of okra and didn’t know when to pick a cabbage.
Most of us all lived on the farm, and volunteers and interns all did the bulk of the work and farm chores in the morning, followed by lunch together. Afternoons were a time for informal classes for anyone on the farm or more chores and farm or office work for interns and devoted volunteers.

There were usually anywhere from 15 to 30 (but usually 20 something) mouths to feed at the group lunch time, and lunch prep was done on a rotating basis. I had never cooked for that many people before, and never been so “limited” by the ingredients at my disposal. We had our pick of anything the farm produced, other than meat. From the store, we had dried beans, other legumes, rice and quinoa (another new one me!). Oils, vinegars, spices. No cheese. No meat. Very few quick cans of anything, no convenience food. The quickest thing we had was eggs and toast. But if you did anything with store-bought bread for lunch, we’d run out quick and have none for breakfasts.

My first meals consisted of large, deep baking pans filled with onions, tomatoes, eggplant, peppers and so, so much yellow summer squash. I’d season the veggies, bake them, and serve them over whatever grains or legumes I made up. Anyone on lunch duty was given the whole morning work time to make up enough food, and I quickly learned to chop fast out of necessity. I chopped whatever veggies were around, and while I did, I planned what I’d make with them.

Looking back I feel like I learned more about cooking by doing, and from watching and eating what other people prepared, in a few short months than I had up to that point. Sorry mom.
I guess most of what stood out was the newness of eating in-season so thoroughly. Obviously I didn’t keep the same menu through the year, as summer produce faded to winter greens and squashes and roots. The variety of dishes from all the same simple ingredients we were able to enjoy was amazing to me. If left to my own devices, I’d probably just make pizza, miso soup and hash-browns until I died. But because of cooking alongside other people I learned about so many tips, tricks, and ways to use vegetables and grains that made them interesting, new feeling and delicious: homemade dressings! massaged greens! more salt!

The best thing about food is sharing it with other people; either by prepping together, or by eating together. It’s hard now to see the next time I’d possibly cook for so many people again. We don’t even cook together on the farm these days, we just bring lunch and talk together about what we make at home. At least that’s something.

I hope you’re finding ways to stay inspired about cooking (or roasting, grilling, baking, frying…) throughout the season, even if you aren’t maybe sharing as many meals this summer as you might otherwise. Pass on what’s keeping you interested in using our in-season veggies! Maybe someone scrolling by will be inspired.

My tip: just start chopping veggies until inspiration hits.
And, especially when it comes to other people passing through the kitchen, a timely saute of onions and garlic in a pan always makes people hopeful for a delicious meal, even if you don’t know what it is yet!

For the farm crew,

Karin

img_1209


In your share this week:

Green Beans – Carrots – Cauliflower – Cucumbers – Greens Mix – Kale – Green Onions – Onions – Sweet Red Peppers – New Potatoes – Tomatoes – Zucchini


img_1237


Kale Pesto

From Taproot Magazine

2-4 garlic cloves (or, maybe 1 Food Farm garlic clove!)
1/4 to 1/2 cup unsalted nuts such as sunflower seeds, walnuts or pine nuts
1/4 to 1 cup grated or chopped cheese such as Parmesan, Asiago or Romano
2 to 4 cups destemmed and roughly chopped kale
1/4 to 1 cup olive oil
Salt to taste (don’t forget the cheese adds a lot!)
Ground black pepper

Pulse garlic in food processor until well chopped. Add nuts and pulse until just chopped. Add cheese and blend until it is the consistency you want your pesto to be. Transfer to bowl and set aside.
In processor (no need to clean in between steps) combine kale, oil and salt and pepper and pulse until the kale is well chopped.
Add nut + cheese mixture back into food processor, and pulse briefly just to mix together. Add more oil, or salt, or pepper as needed. Use, store within 2 weeks or freeze.


Zucchini Bread

From the Smitten Kitchen

The best zucchini bread I have ever had, and I can’t get enough of it!

  • 2 cups grated, packed zucchini, not wrung out, grated on the large holes of a box grater
  • 2 large eggs
  • 2/3 cup of a neutral oil (I use safflower), olive oil, or melted unsalted butter
  • 1/2 cup packed dark brown sugar
  • 1/2 cup granulated sugar
  • 1 teaspoon vanilla extract
  • 1 teaspoon fine sea or table salt
  • 1 1/4 teaspoons ground cinnamon
  • 1/8 teaspoon ground or freshly grated nutmeg
  • 3/4 teaspoon baking soda
  • 1/2 teaspoon baking powder
  • 2 cups all-purpose flour
  • 2 tablespoons raw or turbinado sugar

Heat oven to 350 degrees F. Lightly coat a 6-cup or 9×5-inch loaf pan with nonstick spray. Place grated zucchini in a large bowl and add oil, eggs, sugars, vanilla, and salt. Use a fork to mix until combined. Sprinkle cinnamon, nutmeg, baking soda, and baking powder over surface of batter and mix until combined — and then, for extra security that the ingredients are well-dispersed, give it 10 extra stirs. Add flour and mix until just combined. Pour into prepared loaf pan and smooth the top. Sprinkle with the raw or turbinado sugar — don’t skimp. Bake for 55 to 60 minutes, until a toothpick or tester inserted into the middle cake but also into the top of the cake, closer to the dome, comes out batter-free.Let cool completely in the pan. Leave in pan, unwrapped, overnight or 24 hours, until removing (carefully, so not to ruin flaky lid) and serving in slices. Zucchini bread keeps for 4 to 5 days at room temperature. I wrap only the cut end of the cake in foil, and return it to the baking pan, leaving the top exposed so that it stays crunchy.

img_1216

Summer CSA Week 11

I had a newsletter-sized case of writers block as I started putting recipes and photos in for this week. I asked my husband what I should say, and he said “get the vegetables, eat them up, num num num” -at which I laughed, probably harder than it deserved.
Num num num has become something I say a lot to my baby. It’s one of those idiosyncrasies I have that, apparently, is a little annoying to hear dozens of time at dinner for the other adult present. So strange.
So now it’s something of a running gag at our house.

It’s good to find things to laugh about. I have been trying to make space (i.e., turn off the news) in my life for more laughter. Watch a funny show, check. Pretend to eat my baby’s legs (he loves this!), check.

The season is ramping up on the farm this time of year. We will start harvesting almost non-stop very soon. We’ve started with getting in the garlic, and next the onions. Between CSA harvests, wholesale harvests and the constant cucumber, zucchini and broccoli harvest there isn’t much time left for other projects. Every year I don’t really know how we get all the stuff done. It’s a marvel.

I love this time of year on the farm though. I love the variety and bounty. I love the new potatoes! I love the go-go-go feel. It can also be a little much at times, which is why I’ve been glad over the years that often there are people on the crew who keep things fun, or have funny anecdotes about weekend activities. It’s nice to have people to share inside jokes with, or running gags. Especially in the particularly stressful year we all find ourselves in.

I hope that some laughter finds its way into your week, and that you num  num num every veggie with joy!

For the farm crew,

Karin

PS Dave has us pick just the tops of the basil, so it should be good to go for a small batch of pesto!

61887768080__50472868-5f5e-4842-bc18-2ce9d2cc2046


In your share this week:

Basil – Green Beans – Carrots – Cilantro – Cucumbers – Garlic – Head Lettuce – Onions – Green Bell Peppers – Hot Wax Peppers – New Potatoes – Tomatoes – Zucchini


img_1169


Carrot and White Bean Burgers

From the Smitten Kitchen

  • Olive oil
  • 1/2 cup panko-style breadcrumbs
  • 3 shallots, or 1 small onion, diced
  • 1 tablespoon tomato paste
  • 1 1/2 teaspoons kosher salt
  • 1 cup packed grated carrot (from 2 medium carrots)
  • 1 1/2 tablespoons apple cider vinegar
  • Two 15-ounce cans cannellini or other white beans, drained and rinsed
  • 1 large egg, beaten
  • Freshly ground black pepper
  • Burger accompaniments, as you like

Heat 1 tablespoon olive oil in a large skillet over low heat. Add the panko and cook, stirring often, until lightly browned and crisp, 3 to 5 minutes. Transfer crumbs to a large bowl, then return the pan to the heat.Add 2 tablespoons olive oil to the skillet, followed by the shallot or onion. Cook until softened and lightly golden, 8 to 10 minutes. Stir in the tomato paste, salt, and carrots and stir frequently until the carrots are soft and a bit blistered, another 8 to 10 minutes. Add the vinegar, scraping up all the browned bits until the pan is dry. Remove from heat and add the bowl with the toasted panko. Add beans and use a wooden spoon or spatula to very coarsely mash the mixture until a bit pasty and the mixture coheres in places—there should still be plenty of beans intact. Add pepper, and more salt if needed, to aste. Stir in the egg. Shape into 6 patties (I used a 1/2 cup measure as a scoop) for the size burger you see here; 4 patties for really large burgers (to warn, I found this size a little unwieldy), or 8 to 10 for slider-size.

To cook the veggie burgers, heat a thin layer of olive oil in a wide skillet over medium heat and carefully cook until browned and slightly firm to the touch, 3 to 4 minutes per side. It may be necessary to cook in batches. Serve hot or at room temperature, with whatever you like on or with veggie burgers.


Charred Green Beans with Tahini Yogurt Sauce

From The Leek and the Carrot

2 pounds green beans
1/2 cup roughly chopped almonds
1 jalapeno, minced
2 garlic cloves, minced
3 tablespoons apple cider vinegar, divided
Pinch sugar
Kosher salt, divided
1/2 cup Greek yogurt
2 tablespoons tahini
2 tablespoons water
1 tablespoon vegetable oil
1/2 teaspoon freshly ground black pepper

  1. Bring a large pot of salted water to a boil on the stove. Once boiling, cook your green beans for 5 minutes then drain and rinse under cold water.
  2. While you wait for the water to boil, you can do a few other things. First toast almonds (either in the oven or on the stove). Then in a small bowl, combine 2 tablespoons vinegar with jalapeno, garlic, a pinch of sugar and a pinch of salt.
  3. In another small bowl, combine yogurt, tahini, water, remaining vinegar and 1/2 teaspoon Kosher salt. Whisk until smooth.
  4. Once your beans have been blanched and cooled, heat oil in a large skillet over medium high heat until it glistens. Toss the blanched green beans in there and sprinkle with 1/2 teaspoon Kosher salt and 1/4 teaspoon freshly ground black pepper. Cook over medium high heat, stirring every minute or two until most sides of the green beans are a little charred (about 10 minutes).
  5. Serve by spreading yogurt mixture over a shallow bowl and topping with green beans. Sprinkle with quick pickled jalapenos and almonds before enjoying. Season with flaky sea salt (or more Kosher salt) and more freshly ground pepper before serving.

Summer CSA Week 9

I was blathering on to my one-year-old over breakfast this morning, trying to describe the taste of the cucumber sticks he was eating. I seem to be driven by this need to cram as many adjectives into his first years as humanly possible. I think perhaps it will backfire someday, but I’m not sure how.

Anyway, the cucumber.
I was informing my son, that though I prefer most fruits (especially) and vegetables (generally) at room temperature, cucumbers are one I love right out of the fridge.
Cool, as they are generally thought of, they taste like the feeling of walking through the woods and noticing that there must be running water near by because of the coolness in the air. Maybe even such a small spring it’d be hard to pin-point, but the feeling in the air is still there.
He also got a short lesson in evaporation over breakfast, and I’m sure he understands it quite well now.

When my sister and I were kids, she was the reader. She always had her nose in a book, and read very, very fast. Like, the sixth Harry Potter book in a day kind of fast. But I’d watch her sometimes skipping whole pages at a time. She said it was “just” description, and she didn’t have the patience for that. I’m sure Tolkien was rolling in his grave.

I hope this week you can find ways to notice how things taste and feel and sound and smell and to be present in the here and now. Plenty of times (and reasonably) the here and now can be stressful, or boring. But even so, there can be a lot that’s worth pausing for and noticing.

We’d be lucky if you thought our veggies this week were some of those things!

For the farm crew,

Karin

img_1031


In your share this week:

Green Beans – Carrots – Cilantro – Cucumbers – Lettuce Mix – Green Onions – Green Peppers – Kale – Jalapeno Pepper – Tomatoes – Zucchini


Zucchini and Ricotta Galette

From The Smitten Kitchen

For the pastry:
1 1/4 cups all-purpose flour, chilled in the freezer for 30 minutes
1/4 teaspoon salt
8 tablespoons (1 stick) cold unsalted butter, cut into pieces and chill again
1/4 cup sour cream
2 teaspoons fresh lemon juice
1/4 cup ice water

Filling:
1 large or 2 small zucchinis, sliced into 1/4 inch thick rounds
1 tablespoon plus 1 teaspoon olive oil
1 medium garlic clove, minced (about 1 teaspoon)
1/2 cup ricotta cheese
1/2 cup (about 1 ounce) grated Parmesan cheese
1/4 cup (1 ounce) shredded mozzarella
1 tablespoon slivered basil leaves

Glaze:
1 egg yolk beaten with 1 teaspoon water

Make dough: Whisk together the flour and salt in a large bowl. Sprinkle bits of butter over dough and using a pastry blender, cut it in until the mixture resembles coarse meal, with the biggest pieces of butter the size of tiny peas. In a small bowl, whisk together the sour cream, lemon juice and water and add this to the butter-flour mixture. With your fingertips or a wooden spoon, mix in the liquid until large lumps form. Pat the lumps into a ball; do not overwork the dough. Cover with plastic wrap and refrigerate for 1 hour.

Make filling: Spread the zucchini out over several layers of paper towels. Sprinkle with 1/2 teaspoon salt and let drain for 30 minutes; gently blot the tops of the zucchini dry with paper towels before using. In a small bowl, whisk the olive oil and the garlic together; set aside. In a separate bowl, mix the ricotta, Parmesan, mozzarella, and 1 teaspoon of the garlicky olive oil together and season with salt and pepper to taste.

Prepare galette: Preheat oven to 400 degrees. On a floured work surface, roll the dough out into a 12-inch round. Transfer to an ungreased baking sheet (though if you line it with parchment paper, it will be easier to transfer it to a plate later). Spread the ricotta mixture evenly over the bottom of the galette dough, leaving a 2-inch border. Shingle the zucchini attractively on top of the ricotta in concentric circles, starting at the outside edge. Drizzle the remaining tablespoon of the garlic and olive oil mixture evenly over the zucchini. Fold the border over the filling, pleating the edge to make it fit. The center will be open. Brush crust with egg yolk glaze.

Bake the galette until the cheese is puffed, the zucchini is slightly wilted and the galette is golden brown, 30 to 40 minutes. Remove from the oven, sprinkle with basil, let stand for 5 minutes, then slide the galette onto a serving plate. Cut into wedges and serve hot, warm or at room temperature.


img_1045


Pico de Gallo

  • 1 cup finely chopped onion (about 1 small onion)
  • 1 medium jalapeño ribs and seeds removed, finely chopped
  • ¼ cup lime juice
  • ¾ teaspoon fine sea salt, more to taste
  • 1 ½ pounds ripe red tomatoes (about 8 small or 4 large), chopped
  • ½ cup finely chopped fresh cilantro (about 1 bunch)
  1. In a medium serving bowl, combine the chopped onion, jalapeño, lime juice and salt. Let it marinate for about 5 minutes while you chop the tomatoes and cilantro.
  2. Add the chopped tomatoes and cilantro to the bowl and stir to combine. Taste, and add more salt if the flavors don’t quite sing.
  3. For the best flavor, let the mixture marinate for 15 minutes or several hours in the refrigerator. Serve as a dip, or with a slotted spoon or large serving fork to avoid transferring too much watery tomato juice with your pico. Pico de gallo keeps well in the refrigerator, covered, for up to 4 days.

April Winter Share

Welcome to

In the few years I’ve been writing the Food Farm newsletter, this spring one has usually been especially fun to write. I like noting the melting snow, the running streams, the singing birds, new greens. Now though, I am just focused on willing the weather to hurry up and get warm so I can sit outside and talk with my family without shivering. So that we all can. 

The uncertainty of life is being exemplified right now, loud and clear. Intellectually, of course, I know that life is uncertain. Death and taxes and all that. But the magnitude of this cross-(insert all boundaries here) crisis and its still-unclear, unseeable conclusion has shaken me.

My feelings have been yo-yo-ing a lot this past month. I’ve been angry (my personal go to), sad, restful, indignant, needy, munchy, introspective, the opposite of introspective, blessed feeling, stressed feeling and most of the other ones except confident.

My thoughts, similarly, go round and round: I wonder about the lasting impact economically, socially. I think I should stop listening to MPR. I think I should never stop listening to MPR. I wonder if this will change the way my generation is treating the planet. I wonder if my generation can change.

In my own discombobulation, it’s hard to feel like I have much to offer you in a newsletter.

I can only say we are connected. We’re so wonderfully connected.

Of course we know that on some level day to day, but now the necessity of our separation makes it so…real, but unreachable. We’ve been together in stores, and on sidewalks and at funerals and concerts and on the beach and on airplanes and in meetings. I’ve driven past you with my windows down, I’ve handed you a shopping list you dropped. I’ve bent down to check on your kid who fell of her bike. I’ve breathed in the air you’ve breathed out. I’ve touched the food you’ve eaten from the farm for years, at planting, weeding, and harvest, and I’ll do it again this summer.

It feels amazing to be back on the farm after weeks of cocooning with my little family. Replacing those mixed-up thoughts and feelings with good, solid work that is for a purpose. Thinking of all of you, most of whom I’ve never met, gaining sustenance from what I’m doing helps get out of my head and chill out. The separation we’re participating in is abnormal, temporary, and a reminder of the power in human closeness, from necessary care to those everyday moments.

There’s no telling exactly what the coming weeks and months will bring. Some of us will get sick. Perhaps a lot of us. All of us will miss friends and family and walking down a sidewalk without side-stepping each other.

I wish you all well in this time.

For the masked farm crew,

Karin


In your share this month:

Beets – Carrots – Onions – Parsnips – Fingerling, Russet, and Baby Yellow Potatoes – Rutabaga – Spinach, Greens Mix and Thyme!


I’m trying to include recipes that are either flexible, or use a lot of staples that I hope you all have!

Carrot Cake Bread 

Ingredients

1/2 cup canola oil 

1/2 cup light brown sugar

1/3 cup granulated sugar

2 large eggs 

1/3 cup unsweetened apple sauce

1 teaspoon vanilla extract 

1 1/2 cups all purpose flour 

½  tsp cinnamon

½ tsp nutmeg

½ tsp ginger

1 teaspoon baking powder 

1/2 teaspoon baking soda 

1/2 teaspoon salt (scant)

2 cups finely grated carrots 

1/4 cup raisins (optional soaked in brandy or rum)

1/4 cup finely chopped walnuts (optional)

Directions

  1. Preheat the oven to 350°F.
  2. Spray a 9×5-inch loaf pan with nonstick cooking spray. Set aside.
  3. Place the canola oil, brown sugar, granulated sugar, eggs, applesauce and vanilla extract in a large mixing bowl. Whisk vigorously until smooth and combined.
  4. Add the flour, pumpkin pie spice, baking powder, baking soda and salt to the bowl. Continue whisking until the mixture is just combined. Do not over-mix.
  5. Fold in the grated carrots, raisins and walnuts and then pour the batter into the loaf pan.
  6. Bake the bread for 55-65 minutes on the middle rack until a toothpick inserted in the center comes out clean.
  7. Check to see that bread is done. Remove from oven or add time as needed.
  8. Allow the bread to rest in the pan for 10 minutes and then release the bread from the pan onto a cooling rack. Allow to cool for at least 1 hour before slicing and serving.

Vegetable Pancakes +sauce

I have found this recipe to be very flexible. You could use parsnips, beets or rutabaga easily, just keep the ratio of veggies to flour and egg about the same and shred everything finely.

Pancakes
1/2 small head cabbage, very thinly sliced (1 pound or 5 to 6 cups shreds) which will be easiest on a mandoline if you have one
4 medium carrots, peeled into ribbons with a vegetable peeler
1 onion, thinly sliced
1 teaspoon kosher salt
1/2 cup all-purpose flour
6 large eggs, lightly beaten
Canola, safflower or peanut oil for frying

Tangy Sauce
1/4 cup ketchup
1 1/2 tablespoons Worcestershire sauce (note: this is not vegetarian)
1/4 teaspoon dijon mustard
1 tablespoon rice cooking wine or sake
1 teaspoon soy sauce
1 tablespoon honey (use 2 if you like a sweeter sauce)
1/8 teaspoon ground ginger

Make the pancakes: Toss cabbage, carrot, onions and salt together in a large bowl. Toss mixture with flour so it coats all of the vegetables. Stir in the eggs. Heat a large heavy skillet on medium-high heat. Coat the bottom with oil and heat that too.

To make a large pancake, add 1/4 of the vegetable mixture to the skillet, pressing it out into a 1/2- to 3/4-inch pancake. Gently press the pancake down flat. Cook until the edges beging to brown, about 3 minutes. 30 seconds to 1 minute later, flip the pancake with a large spatula. (If this is terrifying, you can first slide the pancake onto a plate, and, using potholders, reverse it back into the hot skillet.) Cook on the other side until the edges brown, and then again up to a minute more (you can peek to make sure the color is right underneath).

To make small pancakes, you can use tongs but I seriously find using my fingers and grabbing little piles, letting a little batter drip back into the bowl, and depositing them in piles on the skillet easier, to form 3 to 4 pancakes. Press down gently with a spatula to they flatten slightly, but no need to spread them much. Cook for 3 minutes, or until the edges brown. Flip the pancakes and cook them again until brown underneath.

Regardless of pancake size, you can keep them warm on a tray in the oven at 200 to 250 degrees until needed.

If desired, make okonomiyaki sauce: Combine all sauce ingredients in a small saucepan and let simmer for 3 to 5 minutes, until smooth and thick.

Serve pancakes with sauce and any of the other fixings listed above, from Japanese mayo to scallions and toasted sesame seeds.

Do ahead: Extra pancakes will keep in the fridge for a couple days, or can be spread on a tray in the freezer until frozen, then combined in a freezer bag to be stored until needed. Reheat on a baking sheet in a hot oven until crisp again.