January Winter Share

Happy New Year! We hope you all had a wonderful holiday season, and are enjoying all the fresh snow.

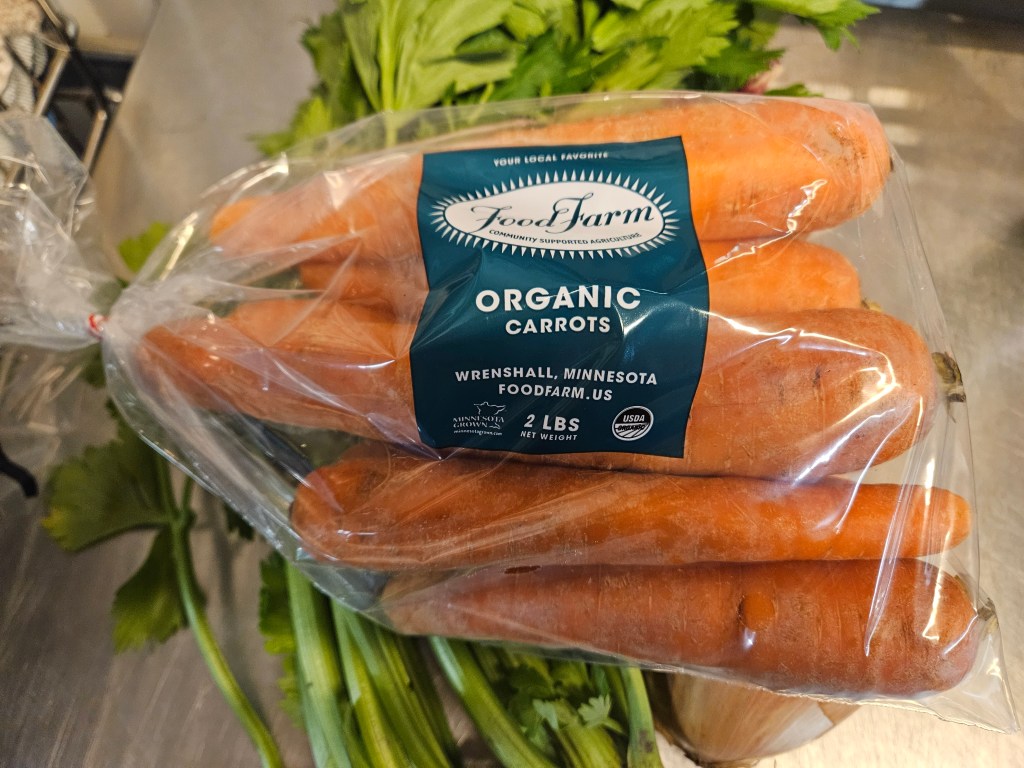
One of the big tasks over the holiday season at the farm is packing vegetables for our grocery store and restaurant partners. If you’ve recently visited one of the grocery stores in the area that stocks our produce, you may have noticed that our carrot bags have gotten an upgrade! We ran out of our old printed bags last spring and have been putting individual stickers on bags while we waited for the new batch of printed bags to arrive. The new bags are slightly wider to make them easier to pack, and we made the size of the label smaller so it’s easier to see the carrots, and we simplified the logo and color scheme to reduce printing costs. They also have ventilation holes throughout the bag so the carrots don’t get too wet inside. It was quite a process, with a lot of back and forth with printers, including a misprinted batch of 50,000 bags (yikes!), but the crew is excited to not have to do so much stickering.

Last month I mentioned we had started ordering seeds already. The next few months will be filled with more crop planning, research, and lots of learning. Last week, Janaki was talking with one of our seed reps to discuss a new variety of zucchini. A seed rep works for a supplier and their main goal is to sell seeds to farmers, but they also provide additional knowledge and support as well. Most large seed companies will also assign reps to only work in certain regions or states that way they can be extra knowledge about a farmer’s specific growing zone and conditions.

The variety of zucchini we have been growing for a while has been discontinued. This meant research to find a suitable replacement. Janaki mentioned to our Johnny’s Seed rep that we struggled with proper pollination last year. Our rep recommended a new variety that has better pollination rates especially early in the season when pollination rates are usually lowest. The rep then went one step further and also sent along information about how to enhance habitat for the specific pollinators that target zucchini.

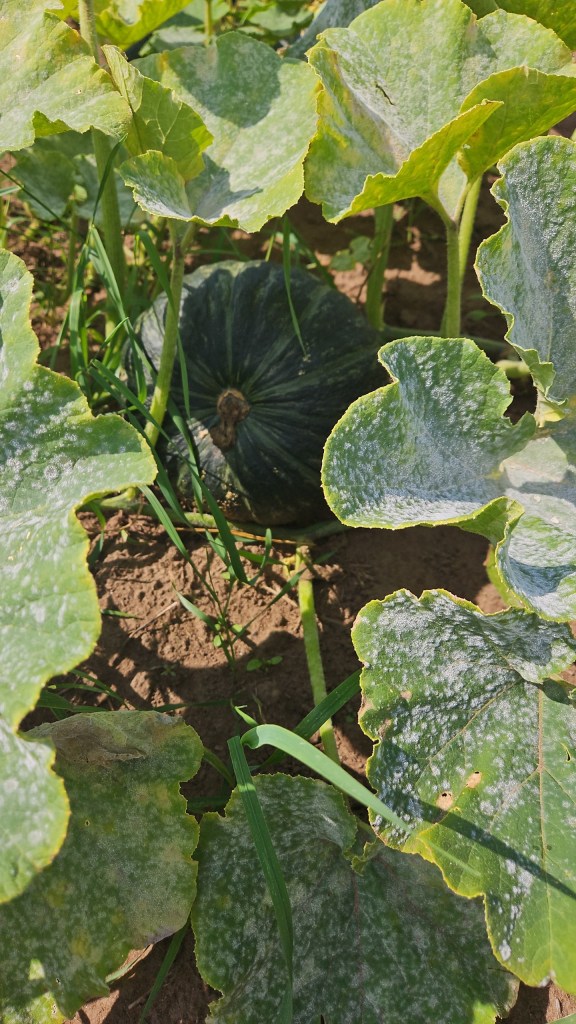
We were worried that part of the poor pollination last year was due to the fact that all of the bees seemed to visit the melons we had planted in the same field, and skipped right over the zucchini. The information from our rep taught us that the honey bees visiting the melons are secondary pollinators of squash. The primary pollinators of Winter and Summer squash are squash bees, which are specifically attracted to squash. They live in tunnels at the base of the plants, they come out really early in the morning to collect pollen as soon as the flowers open, then they do the cutest thing of all, and take afternoon naps inside the flowers. The article gave us tons of info about the squash bees, how to protect them, and how to keep them coming back year after year. It is likely that the primary cause of poor pollination this season was the cool, wet start to the year, but hopefully the new seed variety and the information about squash bees, will improve our ability to cope with poor weather.

In your share this month:

Delicata Squash – Winter Sweet Squash – Rutabaga – Beets – Onions – Parsnips – Orange Carrots – Purple Carrots – Red Potatoes – Russet Potatoes

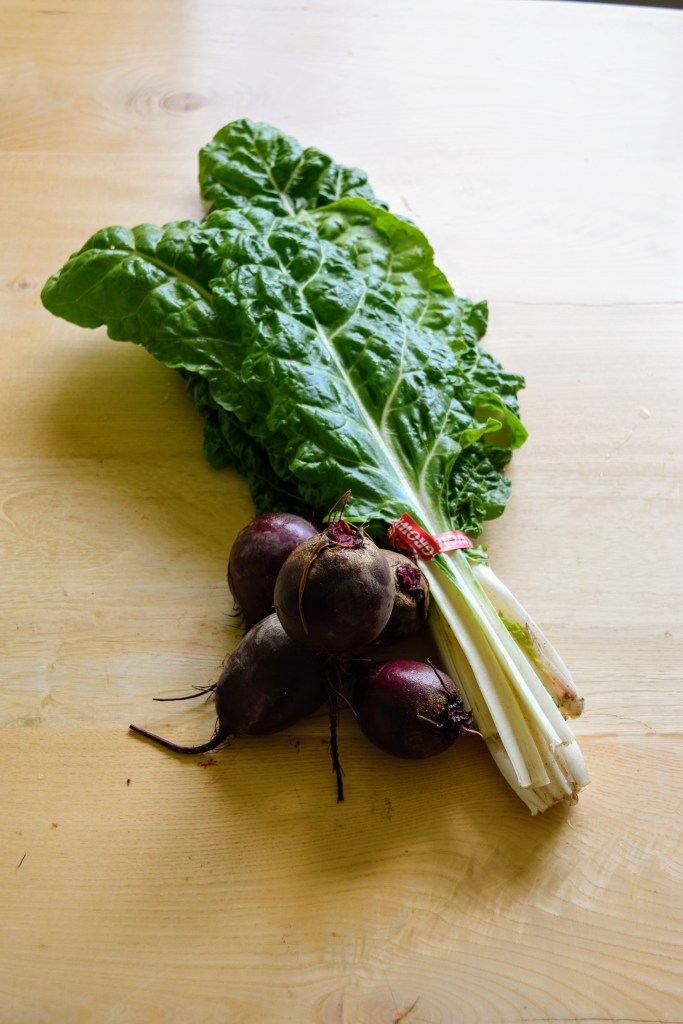
Honey Roasted Beets and Carrots

INGREDIENTS
4 medium carrots, diced
1 tbsp balsamic vinegar                                                                                                                    1 tbsp olive oil
2 tbsp clear honey
4 pre-cooked beets, quartered
25g pumpkin seeds (optional)
handful fresh herbs, such as parsley or basil to serve

1 : Heat the oven to 180c/gas 4.In a bowl, toss together the carrots, vinegar, honey and olive oil. Spread on a baking tray, then roast for 30 minutes.
2 : Remove 5 minutes before the end of cooking time, add the beetroot to the tray and return to the oven. Once cooked, remove form the oven and leave to cool a little, then toss with the pumpkin seeds and herbs.

Rutabaga Fries

Preheat the oven to 425°F and line a large baking sheet with parchment paper. Combine rutabaga fries with oil, paprika, garlic powder, salt and pepper on the prepared sheet pan, and toss until evenly coated. Arrange the rutabaga fries on the baking sheet in a single layer leaving space in between them. Bake for 30-35 minutes, flipping the rutabaga fries halfway through; until they are crisped on the outside and cooked through on the inside.

For the farm crew,

Jennifer

December Winter Share

Now is the time of year when most people are flipping through store catalogs in hopes of finding the perfect gift to give their loved ones this holiday season. If any of you were curious, I’m a Queen Bee tomato seed packet. It’s a one size fits most so should be pretty easy to find. Figured I’d throw in some farming humor to lighten the holiday stress.

Here on the farm, we’re also flipping through catalogs, making our lists and checking them twice. This is the time of year when seed companies send out their catalogs.

If you’re thinking to yourself, “it is way too early to start thinking about seeds,” the farm crew would agree with you! The arrival of the seed catalogs is always creates a mix of emotions, from the dread we feel when a favorite variety is discontinued to the excitement of trying new and improved varieties, but mostly we’re not ready to start thinking about it yet with the harvest season only a few weeks in the rearview mirror. Onions and shallots, the first crops to be seeded, won’t be started for another 3 months, but farming never takes a break, so here we are thinking about what new varieties can provide better flavor, quicker maturity, better production, more disease resistance, or better drought tolerance. All of these qualities help us provide quality and consistency to members, and we’re grateful to the seed breeders who help us out, even though we’re not quite ready to turn our minds to spring. 

Thankfully this isn’t our first rodeo. At this point, we have a pretty good idea of what vegetables, and more specifically which varieties, we will be growing next year. This makes it a lot easier for ordering types and quantities of seeds. Every year there are a few new (or new to us) varieties that we trial. Those take a little longer for us to order since we like to do more research on each of the varieties to see which one will be the best fit for what we need.

When we aren’t planning for next year, the farm crew is busy in the pack shed bagging and boxing vegetables for our retail orders, washing carrots, or finishing up various tasks to make sure the farm is ready for winter.

In your share this month:

Delicata and Kabocha squash – Green Cabbage – Chioggia Beets

Fingerling and Russet Potatoes – Red and Yellow Onions – Carrots – Garlic

Beet Salad

▢1 tablespoon (15 ml) fresh lemon juice

▢1 tablespoon (15 ml) white wine vinegar

▢2 teaspoons (10 ml) liquid honey or sugar

▢¼ teaspoon fine sea salt

▢2-3 tablespoons (30-45 ml) extra-virgin olive oil, or use pistachio oil for a special treat

▢1 pound (450 g) Chioggia beets, peeled

▢¼ cup (40 g) thinly sliced red onion

▢4 cups (170 g) mixed salad greens

▢¼ cup (60 g) fresh crumbled goat cheese

▢2 tablespoons chopped pistachios

  • Whisk the lemon juice, vinegar, honey (or sugar) and salt in a small bowl until honey is dissolved. Gradually pour in the oil and whisk to combine.
  • Shave the beets into ribbons with spiral slicer, or into thin discs with a mandoline or sharp knife.
  • Put the beets in a salad bowl with the onion and greens. Drizzle with enough dressing to coat, about 2 tablespoons, and toss together. Sprinkle the goat cheese and pistachios over the salad. Serve with additional dressing on the side.

Caramelized Squash

  • 4pounds winter squash, such as acorn, butternut, honey nut, kabocha or red kuri
  • 4medium shallots
  • ¼cup extra-virgin olive oil
  • Salt and black pepper
  • ¼cup unsalted butter
  • ¾cup raw nuts, such as hazelnuts, pecans or walnuts, chopped
  • ½cup maple syrup
  • ½teaspoon ground cinnamon
  1. Adjust oven rack to the lower-third position and heat to 425 degrees. Halve the squash lengthwise and use a spoon to scoop out the seeds and any stringy bits. Cut each half into 3- to 4-inch wedges. Halve the shallots lengthwise through the roots, leaving the skin on.
  2. Toss together the squash, shallots and olive oil on a large rimmed baking sheet. Season with salt and pepper, toss once more and spread out the squash and shallots as much as possible. Roast until nicely browned and tender, 30 to 40 minutes total, flipping the squash and shallots after 15 to 20 minutes.
  3. While the squash roasts, melt the butter in a small saucepan over medium. Add the nuts and cook, stirring occasionally, until the nuts have slightly darkened and smell very toasty, 3 to 5 minutes. Remove from heat and stir in the maple syrup and cinnamon. (The toasted nuts may be made up to 3 days in advance and stored in a sealed container in the fridge. Reheat in a small saucepan over medium-low before serving.)
  4. Arrange the squash and shallots on a platter or large plate and spoon the toasted nuts and their syrup on top.

For the farm crew,

Jennifer

Summer CSA Week 15

Last week the crew was working hard to get more veggies out of the field. We have been slowly working to get onions out of the field and onto racks in covered areas to start drying for storage. We haven’t been in a rush to do this because last week and this week’s weather are the perfect chance for the onions to keep drying naturally in the sun. The warm, dry air helps to dry the onions and start creating the protective outer skin. Once we move the onions into sheltered areas, we point industrial fans on them 24/7 to ensure they dry properly. As a farm that always strives to be sustainable, using the sun and wind instead of all that electricity is huge for us.

Last week we also used the harvesters to dig up more potatoes and carrots. We got out red potatoes, russets, white potatoes, yellow potatoes, orange carrots, and the first of the purple carrots. This also marked an exciting time for the farm crew as it meant it was time to bring the forklift out of summer storage. We use our forklift in the root cellar to stack pallet boxes as a way to better conserve space, so we have enough room to fit all the veggies. In the Summer, we put the forklift in our shop to keep it away from the damaging humidity of the root cellar, and because veggies are being harvested only in the quantities we need, so nothing needs to be placed in the root cellar for extended storage. Now as we start to empty fields and get ready for fall harvest, the root cellar is filling up fast. Soon we will have pallet boxes of veggies stacked all the way to the ceiling.  

This week might still feel like Summer, but your box is starting to signal that Fall is coming. We are excited to introduce our Winter Squash! This crop was a little touch and go for a while. They didn’t appreciate the excess rainfall and cool early summer temperatures, but as things dried out the vines grew really large, and looking great. For a while, we were worried we might end up with 15 pound squashes. Our fears were soon squashed (there’s always time for food puns) as the vines developed powdery mildew. This is a common fungal disease that attacks many plants.  It appears as small, white-ish gray spores on the leaves of the plant. It starts out very small, so small it is sometimes hard to spot at first, but once the plant is infected, it can spread like crazy. Soon the small spots take over the whole plant, and begin to spread to neighboring plants. We mostly find this on our Winter Squash and our zucchini. Once the plant is infected, there is no way to cure it, you can only slow down the spread…for a while. The powdery mildew on the winter squash ended up spreading and killing all the foliage in the last couple of weeks, but the squash themselves appear to be absolutely the perfect size! 

Soon we will start the task of getting all the Squash out of the field. Once they are out, the majority of them need to cure first before they can be eaten. The curing process does two things for the squash 1) it hardens the outer skin which will allow it to last for multiple months in storage. 2) starches change to sugar and releases excess moisture which concentrates the flavor to make an even more delicious and sweet squash. Acorn squash is the earliest to mature of the varieties we grow, so it’s the first we send. In fact, if acorn squash is cured at high temperatures it can cause it to rot faster. This is why we are able to send this wonderful veggie to all of you now rather than making you wait for it. 

It is a very fun veggie to experiment with. Many people like to stuff it since the shape of it naturally looks like a bowl. Other people roast it for salads, puree it as an easy, veggie packed pasta sauce, or grate it up to add to muffins or other baked goods. My favorite way to make acorn squash ( or any winter squash for that matter) is to turn it into gnocchi. I’ve added my favorite recipe below if you’re feeling adventurous and want to give it a try.

In your share this week:

Northeaster Pole Beans – Basil – Beets – Broccoli – Red Cabbage – Carrots – Cucumber – Garlic – LettuceMelon – Onion – Hot Pepper – Sweet Pepper – Yellow Potatoes – Tomatoes – Zucchini

Acorn Squash Gnocchi with Basil Pesto

  • 1 medium sized acorn squash just shy of 1 lb.
  • 2 tablespoons olive oil
  • 1/2 cup all purpose flour plus 1 tablespoon for the rolling and cutting gnocchi
  • 1 tsp kosher salt
  • 1/4 tsp ground black pepper
  • 2 tablespoons prepared basil pesto 

Roast Squash for Gnocchi

  • Pre-heat oven to 400 degrees. Line a baking sheet with foil. Cut acorn squash in half, on the vertical, and scoop out seeds. Drizzle olive oil onto the flesh side and season with salt and pepper. Place on baking sheet, flesh side down, and roast about 30-40 minutes, until squash is fork tender. Allow to cool at least 10 minutes before scooping out flesh into a bowl.

Preparing Gnocchi Dough

  • To prep the dough, bring a large pot of water to a low boil, season with salt like you would to cook pasta. In the bowl of roasted squash, stir together with flour until smooth. The dough should feel about as pliable as pizza dough, meaning it should still hold together but doesn’t feel dry. If the dough is too wet, add a little more flour (about a tablespoon at a time) until you get to that desired consistency. This will help in the rollout of dough.
  • Roll and cut dough: Working in batches, scoop up a loose handful of dough and roll out onto a lightly floured work surface. Roll the dough into the shape of a log, about 3/4 inch wide. Using a sharp knife, slice into 1 inch pieces and place on parchment. Repeat with the remaining chunks of dough until all gnocchi is cut.

Cooking Gnocchi

  • Working in two or three batches (depending on number of gnocchi), add gnocchi to the large pot of boiling water and allow to cook 2-3 minutes until the gnocchi floats to the top. Using a spider strainer (or slotted spoon), remove gnocchi and allow to drain on a baking sheet lined with paper towels. Repeat until all gnocchi are cooked.
  • Toss gnocchi together with a couple of tablespoons of basil pesto, using a little gnocchi water to thin out sauce as needed and grate a generous amount of parmigiano-reggiano. Enjoy immediately.

Apple and Beet Muffins

Instructions

  • First, cook the beets
  • Preheat the oven to 350℉. Line a muffin pan (if not using a silicone one) and set aside.
  • Using a hand or box grater, shred the cooked beets and apples.
  • In a large mixing bowl, whisk together the unsweetened applesauce, beaten eggs, olive oil, maple syrup, and vanilla extract.
  • In a measuring cup or separate bowl, combine the whole wheat flour, baking powder, baking soda, cinnamon, and salt.
  • Add the dry to ingredients to the bowl with the wet ones. Stir to combine.
  • Fold the shredded beets and apples into the batter. Mix until evenly distributed.
  • Spoon the batter into the prepared muffin pan, filling each cavity about ¾ of the way.
  • Bake for 23 to 25 minutes until a toothpick inserted in the center of a muffin comes out clean.
  • Let the muffins cool for a few minutes, then enjoy!

For the farm crew,

Jennifer

Summer CSA Week 11

We hope you’re ready! This Saturday, August 24th is our wonderful Coffee On The Farm event. We will have coffee, hay rides, dog pets, and farm tours from 10am-12pm. This is a great event for all, so bring your friends, family, neighbors, or make it a solo outing. We hope to see all of your smiling faces.

Last week was focused on emptying out some more rows and fields, and dusting off all the washing equipment that hasn’t been used since January when we washed the last of the 2023 carrots. 

We spent a muddy and rainy afternoon pulling the rest of the Spring/Summer beets out of the field. Seems that every time we do a big harvest of beets, it’s muddy and wet. Thank goodness for outside hoses so we can set up the “human car wash” and hose ourselves off before moving onto the next activity. We had been harvesting beets as needed which allowed the smaller beets to keep getting bigger, and it allowed us to send you the delicious tops along with the beets. It was time to pull the rest of the beets because even the small ones had sized up nicely. Restaurants like Duluth Grill and Ursa Minor will be very excited to receive such big beets that take less time and are easier to process than a handful of smaller beets. On days when we do big beet harvests, we take all the tops off while we are in the field. The tops will get tilled into the soil to add back organic matter to make the field even better the next time we use it. The beets get put into buckets and loaded on a trailer to be brought down to the packing shed. Outside the packing shed, we have our washing station set up. The buckets get dumped into our brush washer where a series of sprayer nozzles and brushes clean all the dirt off of the beets. They pop out the other side where we sort out any odd beets, and give them a final spray to get off any remaining dirt. Once the beets are all approved, they ride the roller table, which is a series of rollers that push the beets along. Eventually they drop into a pallet box where they will stay until they get packed up for CSA or retail orders. We filled one pallet box with the remaining spring/Summer beets which is estimated to be around 1,000 pounds of beets.

We spent a few days last week across the road, starting to get the first two plantings of outdoor carrots out of the ground. Normally at this time in the year, we would just be removing the first outdoor planting, but disease has hit these carrots pretty hard, so it’s best to get them out sooner rather than later in an attempt to save some of the crop. Our carrots have gotten a disease known as Aster Yellows. A bug called a Leaf Hopper carries this disease. The Leaf Hopper gets the disease when it feeds on an infected plant, then spreads the disease when it starts feeding on a healthy plant. Once a plant is infected, there is no cure, so the only option is to remove the crops or plants before the disease gets worse. We knew the carrots had this because 1) when you touch the carrot tops, hundreds of Leaf Hoppers jump and fly around. 2) from afar, you can tell because it causes the carrot tops to turn a yellow color, and some even get purple and red tops. The really infected carrots will start getting “hairy” this is where they begin to grow extra roots out of the carrot. Once the carrots get hairy, they will also take on a bitter taste. 

The first planting required lots of hand sorting to find the healthy carrots. We left quite a few carrots in the field, but we were still able to harvest and keep around 1500 pounds of carrots. That’s a lot of carrots, but a far cry from the 6,000 pounds that we should have harvested. The second planting looks a bit healthier, but is still pretty young, so get ready to receive some “baby” carrots in your shares. 

The annoying thing about Aster Yellows and Leaf hoppers is that they are not exclusive to carrots. Leaf Hoppers can infect a long list of plants including house plants, flowers, and other vegetables. We struggled earlier with asters yellow on some lettuce in a few of our greenhouses. The insects cause the leaves to turn a yellowish green color, and it tastes bitter. We had to do the same thing as with the carrots where we harvested and kept what we could, and the infected lettuce went to our chickens as an unexpected treat. Thankfully, lettuce grows really quickly, so we got a new planting seeded right away, and our chickens were very happy.

We’ve also found other diseases in our broccoli, outdoor tomatoes, the first planting of potatoes (not the big planting thank goodness), zucchini, and cucumbers. The good thing is, most of these diseases are “normal” for us, so we’ve done a lot of research on ways to slow down the spread such as harvesting infected plants last, and using different harvesting tools for healthy plants vs. infected plants. Janaki has also done a lot of research to see if any organic materials can be used in slowing disease. The downside is, just like Aster Yellows, there is no cure for these diseases. Eventually the plants will get too stressed and weak, causing them to begin either producing funny looking and strange tasting vegetables, or the plants will stop producing entirely. 

I know this wasn’t as upbeat of a newsletter as normal, but farming isn’t always happiness and sunshine. Farming is all about how you manage and move forward. We’ve never given up when things get hard. We reach out to new resources and experts, we pour an extra cup of coffee, say a few colorful words, and get back to it. This time of year can be hard looking at all the veggies that didn’t make it, but it sure makes us appreciate the veggies that did make it. We hope that this week when you get your box, you take a moment to look at all the beautiful vegetables and know that each one of them was grown with love, sweat, and maybe some dog fur.

In your share this week:

Cabbage – Green Beans – Carrots – Celery – Cilantro – Cucumbers – Dill

Green Onions – Green Peppers – New Potatoes – Tomatoes – Zucchini

Mixed Salad

Note:  ingredients are chopped or cut into very small pieces in order to absorb the dressing and each each others’ flavors better. 

2 tomatoes

2 small cucumbers

6 olives

large raw carrot, peeled

raw beet

1-2 avocados, peeled and pitted

2 potatoes (boiled)

1 large, mild onion

1 pepper

2 hard-boiled eggs

Chop all the ingredients and cut them into a very small dice. Mix them together in a bowl.  Dress with the following tahini cream dressing and mix well. 

Tahini Cream

1 to 3 cloves of garlic (to taste)

1/2 cup of lemon juice

1/2 cup of tahini

1/2 teaspoon ground cumin

6 tablespoons chopped parsley

Crushed the garlic with the salt. Mix it with a little lemon juice in a large bowl add the tahini and mix well then add the remaining lemon juice and enough cold water to achieve a thick smooth cream while beating vigorously season salt and cumin.  Add more lemon juice, garlic or salt (all to taste) until the flavor is strong and tart. 

This dressing may be used for many salads

For the farm crew,

Jennifer

Summer CSA Week 5

As July begins, there seems to be a strange energy in the air. It’s technically the middle of Summer which means it’s almost the middle of the growing season. It’s this happy, yet sad, yet stressful time of year. It’s the time of year on the farm when most of the planting is complete, but a lot of vegetables aren’t quite ready to be harvested. It creates a sort of limbo stage.

As farmers, we try to stay in the moment (then again aren’t we all) to ensure we complete all the necessary tasks so the vegetables stay happy and healthy. This week that meant the farm crew was out mulching the rest of the outdoor tomatoes, doing some pruning of the peppers, more bug hunting, and lots and lots of weeding. Falling behind on any of these tasks can lead to unhealthy or stressed out plants that won’t produce how we expect them to. That would mean less veggies in your box each week, which would be a disaster!

However, in order to be a successful farmer, one must also be thinking of the future. Farmer Janaki spent a lot of time this week checking on the storage planting of potatoes that went in a few weeks ago, to ensure the seed pieces didn’t get entirely drowned out in all the rain. He’s also been checking in on the storage cabbage to make sure they are growing on track for fall harvest. There’s also been an uptick in conversations during our morning staff meetings about when final plantings of vegetables are scheduled to go in the ground. Every vegetable gets seeded, planted, and harvested at very specific times to ensure the predicted outcome is achieved. Straying too far from any of these dates could have big consequences if we aren’t careful.

This can make July an overwhelming time on the farm, but it’s also one of my favorite. As the crew walks along the fields moving from one weeding project to the next, you can’t help but notice all the flowers and tiny vegetables popping up all over. The baby broccoli peeking through the foliage. The beautiful white flowers that will soon turn into tasty peas. The Napa cabbage that is just days away from being ready to harvest. The big green tomatoes that, if I stare at them long enough, I can convince myself they might have the slightest tint of yellow to them.

I always think of July as nature’s way of reminding us to slow down and find happiness in the little things. Of course we will keep checking our calendars and racing around to get everything done before the end of the work day, but we might occasionally take the long way to our next weeding project as a way to bask in the beauty of almost-full fields, and to congratulate ourselves on all the hard work we’ve done to get to this point. I encourage all of you to take an extra moment this week to really take in the beauty and flavor of all the vegetables inside your box.

As I mentioned, good farmers are always thinking about the future, and we are going to ask all of you to do the same. We are giving you a heads up that we will be hosting our Coffee On The Farm event the morning of Saturday, August 24th. It’s a time for you to drink coffee, tour the farm, and meet other members. We will send out more information and additional reminders as the event gets closer.

This week in your share:

Kale – Cucumbers – Beets – Lettuce – Pac Choi – Parsley Green Onions – Garlic Scapes

Cucumber and Yogurt Salad (modified from A Book of Middle Eastern Cooking by Claudia Roden)

One large, cucumber, peeled and diced

Salt

3 to 4 garlic scapes, minced

2 cups plain yogurt

Pepper to taste

1 tablespoon dried, crushed mint or 3 tablespoons finally chopped fresh mint

Sprinkle diced cucumber with salt, and leave in a colander to drain for 30 minutes.  Mix the yogurt, garlic scapes, and mint in a large bowl. Season with salt and pepper.  Drain the cucumbers and add them to the yogurt dressing. Mix well and serve.

Moroccan Beet Salad

Half a pound of beets

Juice of half a lemon

One clove of garlic, minced finely

Half to 1 teaspoon ground cumin

2 tablespoons olive oil

Salt and pepper to taste

1/4 cup of parsley, chopped

Place water in a saucepan and bring to a boil.  Cut the beets in half and add them to the boiling water -cook until tender when pierced with a fork (approximately 30 minutes). Cool, peel and cut into bite-size pieces.   Place in a serving bowl.

Whisk lemon juice, garlic, and cumin in a small bowl.  Add salt and pepper to taste.  Gradually add the olive oil while whisking.  Pour over the beets and stir to mix.  Let beets marinade for a few hours.  Sprinkle parsley on top on beets before serving.

For the farm crew,

Jennifer

December Winter Share

Happy December! We hope everyone is finding time to be with the ones who matter most, whether it’s those in our everyday lives or those we reconnect with during this time of year. The holiday season offers the perfect opportunity to embrace the bounty of winter CSA vegetables!

Despite the calendar signaling December, the absence of snow and the uncharacteristic warmth persist, creating a season that has felt more like an extended November than the traditional winter landscape we anticipate. There has even been talk in the root cellar about the possibility of using spray-on snow around the windows to help re-create that quintessential winter charm. This idea may give the crew a good laugh, but it won’t do much for the fields…

Indeed, aside from being beautiful, snow brings a handful of advantages to farm fields:

Insulation: Acting as a natural blanket, snow shields the soil and crops from extreme cold, maintaining more stable temperatures. This prevents frost from penetrating too deeply and safeguards the roots of plants.
Moisture Source: As snow melts, it provides a slow and steady release of moisture into the soil, replenishing water levels essential for the growth of crops, especially in the drier winter months.
Nutrient Retention: Snow can capture and retain nutrients, gradually releasing them into the soil as it melts. This nutrient-rich water aids in enriching the soil for future planting seasons.
Erosion Prevention: Snow cover can mitigate soil erosion by shielding the surface from wind and water runoff, preserving the topsoil and preventing nutrient loss.
Microbial Protection: Snow cover can offer a protective environment for beneficial soil microbes and organisms, supporting a healthier soil ecosystem.


In Your Share This Month:

Beets – Green Cabbage – Orange & Purple Carrots – Garlic – Red & Yellow Onions

French Fingerling & Russet Potatoes – Kabocha & Delicata Squash


Roasted Winter Squash with Vanilla Butter (by Kay Chun from Food&Wine.com)

Yield: 6-8 Servings

4 tablespoons unsalted butter, at room temperature
1/2 vanilla bean, seeds scraped
4 pounds mixed squash (such as kabocha, Delicata and Red Kuri)—scrubbed, seeded and sliced 1/2 inch thick
3 sage sprigs, plus 24 small sage leaves
Kosher salt
Pepper
1/4 cup extra-virgin olive oil

  1. Preheat the oven to 425°. In a small saucepan, combine the butter and vanilla bean and seeds and cook over moderately low heat, stirring occasionally, until the butter is deeply browned and has a nutty aroma, about 5 minutes. Discard the vanilla bean.
  2. On a baking sheet, drizzle the squash and sage sprigs with the vanilla browned butter, season with salt and pepper and toss to coat. Roast for about 25 minutes, turning once, until the squash is golden in spots and tender. Arrange on a serving platter. Discard the sage sprigs.
  3. In a small saucepan, heat the olive oil. In batches, fry the sage leaves over moderate heat, stirring, until crisp, about 2 minutes. Using a slotted spoon, transfer the sage to a paper towel-lined plate to drain. Scatter the fried sage over the squash and serve.

Moroccan Grated Carrot & Beet Salad (by Elise Bauer from SimplyRecipes.com)

This recipe comes to us upon recommendation from one of our Ely members. She said her son used dried cherries instead of raisins, and added pistachios as well!

Yield: 4 Servings

2 cups grated carrots (from about 3 carrots)
1 cup grated fresh beets (from about 1 medium-sized peeled beet)
1/2 cup golden raisins
1/2 teaspoon paprika (sweet, not hot)
1/4 teaspoon ground cumin
1/4 teaspoon cinnamon
Small pinch salt
Small pinch cayenne
2 tablespoons lemon juice
2 teaspoons honey
2 tablespoons sliced fresh mint leaves

  1. Rinse the grated beets, combine with carrots and raisins:
    Place the grated carrots in a medium sized serving bowl.
    Place the grated beets into a sieve and briefly rinse with cold water. This will rinse away a little of the excess beet juice that may otherwise color the whole salad beet red. Pat dry with a paper towel.
    Then add to the bowl with the carrots. Add the raisins. Stir to gently combine.
  2. Make the dressing:
    In a small bowl, whisk together the paprika, cumin, cinnamon, salt, and cayenne. Then add the lemon juice and honey and whisk until smooth.
  3. Dress the carrots and beets, let sit for an hour:
    Drizzle over the the carrots and beets, then gently fold until the carrots and beets are lightly coated. Let sit for an hour before serving, either chilled or at room temperature, for the dressing to seep into the carrots and beets.
  4. Stir in sliced mint before serving:
    Right before serving, stir in a couple tablespoons of sliced fresh mint leaves. Garnish with fresh mint.

For the farm crew,
Charlie

November Winter Share

The first winter CSA delivery is upon us! For our new members: Welcome to our veggie community and thank you for choosing local and organic 🙂 For our season to season members: Thank you for your continued support and welcome back! It’s been a little over a month since our last summer share box was delivered. We hope the short break in your Food Farm veggie action has not been too much to bear. Despite a pause in share deliveries, the farm crew has done anything but pause…

Next year’s garlic crop all tucked in for the winter

It has been a mad dash to get us set up for winter! A short three weeks ago we were digging the last of our storage potatoes from the ground (a remarkable feat in its own regard), thinking to ourselves “How in the heck are we gonna get 35 tons of carrots, four tons of beets, a couple tons of parsnips and a few thousand pounds of rutabagas from the rapidly cooling earth before it freezes in four days?”

Well… we did things a little differently this year, that’s how.

Usually, during peak harvest time, we operate with two crews. One crew harvesting and another washing. This year, because of the hard freeze during the last week of October, we used all hands on deck (along with some volunteers from Fond du Lac Community College) to harvest everything as quickly as we could. Just in the nick of time, we packed the veggies in pallet boxes and stacked them to the ceiling of our root cellar with dirt still clinging to their skin. We then began November by pulling it all back out, one pallet box at a time, to gently roll or tumble through our washing assembly. We took the occasional break to knock ice free from the spray nozzles and it was a chilly process indeed, but Dave brought lots of extra winter gear and by the end the veggies were shining in vibrant shades of orange, purple & parsnip. It also helped that Janaki kept us fed and happy with hot cocoa, cookies & pizza during our lunch breaks. The morale boost was at times needed.

All in all, it was a year filled with joys and challenges, but we got through it and at the end of the day, that’s farming!


In your share this month:

Beets – Brussels Sprouts – Carrots – Celery – Onions

Red & Yellow Potatoes Delicata & Sunshine Winter Squash – Tatsoi


Thriving under the shelter of Catherine’s hoop houses, the celery reached rather impressive height this fall. We had to cut the stalks in half just to fit them in the share box. Because of this, we went ahead and left the leaves on – something we don’t often do in the summer shares. The leaves present a concentrated flavor that is more robust than the stalks. They can be used in a variety of dishes, including soups, stocks, salads, and as a garnish. Or maybe you would like to include them in your stuffing this holiday season… Included below is a recipe for just that!


Classic Thanksgiving Stuffing (by Anna from crunchycreamysweet.com)

Yield: 6 servings

1 fresh French bread or 10 cups dried cubed bread
1 ½ sticks unsalted butter, divided
1 ½ cup chopped celery
½ cup celery leaves, chopped
1 large yellow onion, chopped
1 tablespoon chopped fresh sage
1 tablespoon fresh thyme
1 tablespoon chopped fresh rosemary
1 teaspoon salt
½ teaspoon black pepper
1 ½ cups broth chicken, turkey or vegetable

  1. If you are using fresh French bread: slice it into ½″ slices, then each slice into ½″ cubes. Place bread cubes on a baking sheet (most likely you will need at least two sheets), in a single layer, then let it air-dry in room temperature overnight OR preheat oven to 250° F and bake bread for 30 to 35 minutes, shaking the pans every 15 minutes. If using already dried bread, place 10 cups in a large bowl.
  2. Preheat oven to 350° F. Butter a 13″x9″ baking dish or 3 quart baking dish. Set aside.
  3. In a skillet, melt 1 stick (½ cup) of butter. Add chopped onion and celery. Saute until veggies are soft.
  4. Add veggies to bread.
  5. Add herbs, celery leaves, salt and pepper. Stir in.
  6. Add broth and stir in gently. Place in buttered dish.
  7. Melt remaining butter and pour over the stuffing.
  8. Cover the dish with aluminum foil.
  9. Bake in preheated oven for 30 to 35 minutes. You can uncover it for the last 5 minutes to toast up the top pieces, if desired.
  10. Let cool for 10 minutes, then serve.

P.S. – For the best texture, bake the stuffing the same day you will serve it. You can prep everything the day before: dry the bread and sauté veggies. The next day just assemble everything and bake!


Bacon & Brussels Sprout Salad (from pinchofyum.com)

Yield: 8-10 servings

Dressing:
1 lemon
1 orange
1-2 tablespoons of apple cider, maple syrup or honey (something for sweetness)
1 shallot, minced
1/2 cup olive oil
1/2 teaspoon salt & pepper to taste

Salad:
4 dozen brussels sprouts
1 cup almonds
6 slices of cooked bacon, crumbled or chopped
1 cup grated parmesan cheese

  1. Combine the lemon juice, orange juice, apple cider, and shallots in a small bowl. Add the olive oil in a steady stream and whisk for a minute or two, until it becomes creamy-looking.
  2. Slice the brussels sprouts with a mandoline, taking care of your fingers! and slicing them as thin as possible. This works best when you hold the stem, slice from the top, and stop with a little bit left at the bottom, discarding the remaining bottom stem part since it’s not very leafy anyway. The thinner the shreds, the better the salad! Toss the shreds and loosen them with your fingers to they separate and fluff a little bit.
  3. Pulse the almonds in a food processor until finely chopped.
  4. Toss the brussels sprouts, almonds, bacon, cheese, and dressing together. Serve immediately or within a few hours of tossing.

This next recipe is rather simple, but I haven’t been able to get enough of it in the last couple weeks. I like it as a side, just as the recipe below says, but I also think it would make a great salad if combined with a bed of greens & dressing of your choice.

Delicata, Beets & Goat Cheese w/ Papitas

Yield: 2 servings

1 delicata squash
2 beets
olive oil
salt & pepper to taste

2 tablespoons toasted & salted pepitas
1-2oz. goat cheese

  1. Preheat the Oven: Preheat your oven to 400°F (200°C).
  2. Prepare the Squash: Wash the delicata squash and cut it in half lengthwise. Scoop out the seeds using a spoon. Then, slice the squash into half-moon shapes about 1/2-inch thick. Leave the skin on as it becomes tender when roasted.
  3. Prepare the Beets: Wash the beets thoroughly to remove any dirt. If the beets are large, you can peel them, but small to medium-sized beets can be roasted with the skin on for easy preparation. Cut the beets into even-sized pieces to ensure uniform cooking. You can either slice them into rounds or cube them, depending on your preference.
  4. Arrange on a Baking Sheet: Lay the squash slices in a single layer on one baking sheet & the beet cubes on another. Make sure not to overcrowd to ensure even roasting. Drizzle with olive oil and season with a generous dusting of salt and pepper.
  5. Roast in the Oven: Roast the delicata squash in the preheated oven for approximately 20-25 minutes, or until the edges are golden brown and the squash is tender. You can flip the slices halfway through the cooking time for even browning. Roast the beets for about 30-40 minutes, or until they are fork-tender. Larger pieces may require more time.
  6. Serve and Enjoy: Once the vegetables have cooled, serve with goat cheese & pepitas!

For the farm crew,

Charlie

Summer CSA Week 5, 2023

Dear Food Farm Community,

As we delve into the heart of the growing season, we find ourselves knee-deep in the world of weeding. Weeding, although often deemed an arduous task, is an essential part of maintaining the health and vitality of our crops. The crew has been diligently working through the fields, carefully tending to each bed, ensuring that our plants have the space, nutrients, and sunlight they need to thrive.

Soon we’ll begin to notice that the daylight hours are gradually decreasing, but the harvest time seamlessly extends, stretching out longer and longer. More variety means more running around for the crew and volunteers. This morning we were doing just that; shuttling harvest totes to and fro to deliver a well rounded box of vegetables.


In your share this week:

Green-top Beets – Broccoli – Green-top Carrots

Cucumber – Garlic Scapes – Kale – Green Onions – Zucchini


Beet Greens & Kale Sautéed with Garlic Scapes

~ 2 servings

  • 1 tablespoon olive oil
  • 1 slice bacon, cut into small pieces (optional, use a little more oil if omitting)
  • 2 garlic scapes, finely chopped
  • 2 green onions, white and pale green portion, finely chopped
  • 6 leaves beet greens, stems cut into 2-inch pieces
  • 2 leaves kale, ribs and stems removed, chopped
  • salt and pepper to taste
  1. Heat olive oil in a large skillet over low heat. Cook bacon until it begins to brown and crisp, about 2 minutes. Add garlic scapes and green onion, cook and stir until golden brown, 3-5 minutes.
  2. Stir beet stems and kale into skillet. Cover and cook until kale wilts, about 3 minutes. Add beet greens. Cover and cook until bright green and wilted, 1 to 2 minutes.
  3. Season with salt and pepper.

Sautéed Zucchini & Carrots

  • 1 medium zucchini, thinly sliced
  • 2 medium carrots, thinly sliced
  • 1 tablespoon olive oil
  • 1 tablespoon ghee (optional)
  • 1 teaspoon dried thyme
  • salt and pepper to taste
  1. Heat a large skillet over medium-high heat. Add the oil and butter.
  2. Once the better is melted, add the zucchini and carrots. Sprinkle with thyme, salt and pepper, toss to coat.
  3. Sauté vegetables until lightly browned and tender, stirring occasionally so they do not burn.

I know I already included a pickled turnip recipe in the week 2 newsletter, but if you are like me, you may have a few extra rolling around in your fridge still. Here is a recipe that includes beets along with our old friend. If you happen to be out of turnips, just use more beets!

Pink Pickles, from Cotter Crunch

8 servings

  • 12–14 ounces purified water
  • Optional: 1 teaspoon sugar
  • 2 ½ Tablespoon Kosher salt
  • 1 bay leaf
  • ½ cup white vinegar (for quick pickling)
  • 1 small red beet, peeled and sliced
  • 2 turnips (about 1 pound), peeled and sliced
  • 1 clove garlic, chopped
  1. Add beet, turnips and garlic to a heatproof jar or container. Set aside.
  2. In a medium saucepan, bring salt, sugar, bay leaf, and 12 ounces of purified water to a boil, stirring occasionally to dissolve salt and sugar. Turn off heat and let mixture cool down for 5 minutes, then stir in vinegar.
  3. Pour pickling liquid over the contents in the jar, and ensure that the turnip and beet slices are submerged completely in the brining liquid. Let it cool, then close the jar and place it in a dark area for 5 to 7 days.
  4. For best flavor, refrigerate before serving.
  5. Store in a covered jar or container in the refrigerator for up to one month.

For the farm crew,

Charlie

Summer CSA Week 6, 2022

Cucumbers ripening in the greenhouse

It’s hot and the CSA boxes are bursting! New in the box this week is Swiss chard and napa cabbage. We hope you’re staying hydrated and wearing plenty of sunblock and enjoying the heat!


In your share this week:

Swiss Chard – Napa Cabbage – Lettuce – Cucumbers – Green Onions – Broccoli – Carrots with Tops – Beets – Parsley – Garlic Scapes


Vegan Borscht

Serves 4

Ingredients

2 medium beets

3 small carrots (~1 1/4 medium carrots)

2 medium red-skinned potatoes

2/3 medium onion diced (approximately 2/3 cups, try substitution with the green onions in your box!)

2 stalks celery, diced

1 tablespoon and 1 teaspoon extra virgin olive oil

5 cups vegetable stock

1 1/4 cups shredded red cabbage

1 1/4 cups chopped beet greens or chard

1 tablespoon and 1 teaspoon chopped fresh dill

1 tablespoon and 1 teaspoon white vinegar

1 tablespoon and 1 teaspoon fine sea salt or to taste

freshly ground black pepper or to taste

1/4 cup sour cream vegan or regular (optional)

Instructions

  1. Begin by prepping your vegetables. Peel the beets. Scrub the carrots and potatoes. Dice everything up. It’s best if the beets are a slightly smaller dice than the rest as they take a little longer to cook (you could also shred them in a food processor).
  2. Heat the olive oil in a large pot over medium heat. Add the diced onion and celery and sauté for 5 minutes or until slightly softened. Add the diced carrots and cook for an additional minute or two.
  3. Tumble in the beets and the potatoes. Pour in the vegetable stock and bring to a boil. Reduce heat and simmer until root vegetables are al dente.
  4. Tip in the cabbage and beet greens. Bring soup back up to a boil, then reduce heat and simmer for 10-12 minutes. Vegetables should be tender.
  5. Sprinkle in the dill and the vinegar. Season the borscht to taste with salt and pepper.
  6. Ladle borscht into bowls and serve with a dollop of vegan or regular sour cream.

Notes

Cool completely before refrigerating the leftovers in airtight containers. Borscht will keep for up to five days in the fridge and up to six months in the freezer.

Based off a recipe from Simple Bites.


Beets and Chard

Did you know beets and chard are actually the same plant, Beta vulgaris? If you’ve grown both in your home garden, you may have noticed the similarities between the seeds and the leaves. The difference is that Swiss chard has been bred to favor leaf production, while beets have been bred to favor sweet fleshy roots.

The vegetables we eat didn’t just appear in the wild one day. Desirable traits have been “selected” for thousands of years to develop the tasty crops we enjoy today. Seeds are saved from plants that show the genetic variations we enjoy (more leaves versus fleshier roots) and then crossed through pollination with other plants with desirable traits so the offspring are better and better for human production and consumption. Please note, this is different from genetically modified which is done in a laboratory versus going through the generations of plants crossing for desirable traits already present in the species.

Rows of chard in the field

Resources for Veg Care and Use!

Remember to use the Vegetable Guide! Click the link below to see a pdf that describes most of the Food Farms crops and how to best care for the produce:

For the farm crew,

Starr

March Winter CSA

Hello beloved farm members,

This is the time of the year when our farm seasons begin to overlap. We are still packing up the last of our veggies from this past growing season and sending them to our wholesale customers and your CSA shares. In addition, the crew also started planting onions and greens for this upcoming season. Onions are the first to be seeded into flats, and one of the first be transplanted into the fields each year. This year we planted over 40,000 onion seeds! Greens mix is relatively quick, but it’s always touch and go whether they’ll be ready in time for the April Winter Shares, so bring on the sun! It’s exciting every year to get the new season rolling while we’re still sending out produce from last year.

This growing season we will have some new faces here on the farm as well as some seasoned veterans. Personally, I am excited to meet new crew members and learn their life stories and what brought them to work at the Food Farm. Everyone’s story is different but our goals are all relatively the same: getting our hands dirty and growing good organic veggies for our community. I feel like I learn new things almost every day at the farm, so I am also looking forward to that this year too.

A few weeks ago we had the pleasure of being interviewed by Fox21 to let our community know how things are going for us at the farm. Check our the interview (and my cinematic debut) by clicking this link here: https://www.fox21online.com/2022/02/28/food-farm-ready-for-2022-farming-season/?fbclid=IwAR1iteB7ZoSbY1O-82BXkTwMGjuKBPEG1ULnkIjY1QuBdD9-I94tPLq4k5A

We hope you’ll have a chance to get outside and enjoy the warmer weather this week!

For the farm crew, Emily

In your shares this month you will find:

Red Cabbage, Rutabaga, Beets, Red Potatoes, Fingerling Potatoes, Onions, Parsnips, and Orange and Purple Carrots.

May be an image of 1 person and outdoors

Beet and Fennel Salad with Citrus 

  • 2 lbs beets
  • 3 oranges (assortment looks pretty:  navel, cara cara, mandarins, blood oranges)
  • Fennel (one bulb), very thinly sliced
  • 1 shallot, very thinly sliced (or red onion)
  • 1/2 cup olive oil
  • 2 tbsp vinegar (white wine or champagne best, white is OK)
  • 1/2-1 tsp sugar or honey
  • Heat oven to 400 degrees.  Trim and wash the beets and wrap them in foil.  Put them in the oven and roast for 45-60 minutes, until tender.  Let cool.
  • Slice the peels and pith off the citrus.  Thinly slice (1/4″ or less) or section the oranges over a bowl to catch the juices.  
  • Slice or dice the beets and layer them on a platter.  Place the thinly sliced fennel, orange sections, and shallots on top of the beets.  
  • Make the vinaigrette by combining the vinegar, olive oil, sugar, salt and pepper (to taste) in a bowl.  Whisk until emulsified and pour over the salad. 
  • This salad is also very good with the addition of sliced avocado, but the leftovers are less attractive.  🙂

Carrot-Parsnip Soup (New York Times)

  • 2 tbsp olive oil
  • 2 1/2 cups chopped yellow onion
  • 3 cups coarsely chopped parsnip (about 1 lb)
  • 3 cups water
  • 2 1/2 cups coarsely chopped carrot (about 1 lb)
  • 2 cans (28oz total) vegetable broth
  • 1/4 tsp salt
  • 1 tbsp chives (garnish)
  • Heat the olive oil in a Dutch oven over medium heat.  Add the onion and cook 10 minutes or until tender, stirring occasionally.  Add chopped parsnip, water, carrot and broth:  bring to a boil.  Reduce heat and simmer 50 minutes or until vegetables are tender.  Remove from heat and let stand 5 minutes.  
  • Place 1/2 of parsnip mixture in a blender: process until smooth.  Pour pureed carrot mixture into a large bowl.  Repeat procedure with remaining veggies.  Stir in salt and pepper. 
  • Sprinkle chives on top of soup before serving.