Summer CSA Week 10, 2022

The crew preparing to harvest carrots with THE HARVESTER.

Last week was a big week for the Food Farm crew: we harvested our long awaited garlic! You’ll find more pictures and descriptions of that process below. We also brought out the carrot harvester, which is efficient but requires many hands to run smoothly. Boxes are filled with high summer bounty. New this week you’ll find green peppers and GARLIC! The garlic in the box this week is “green” or not yet cured. It should be left out on the counter with good ventilation so it does not mildew.

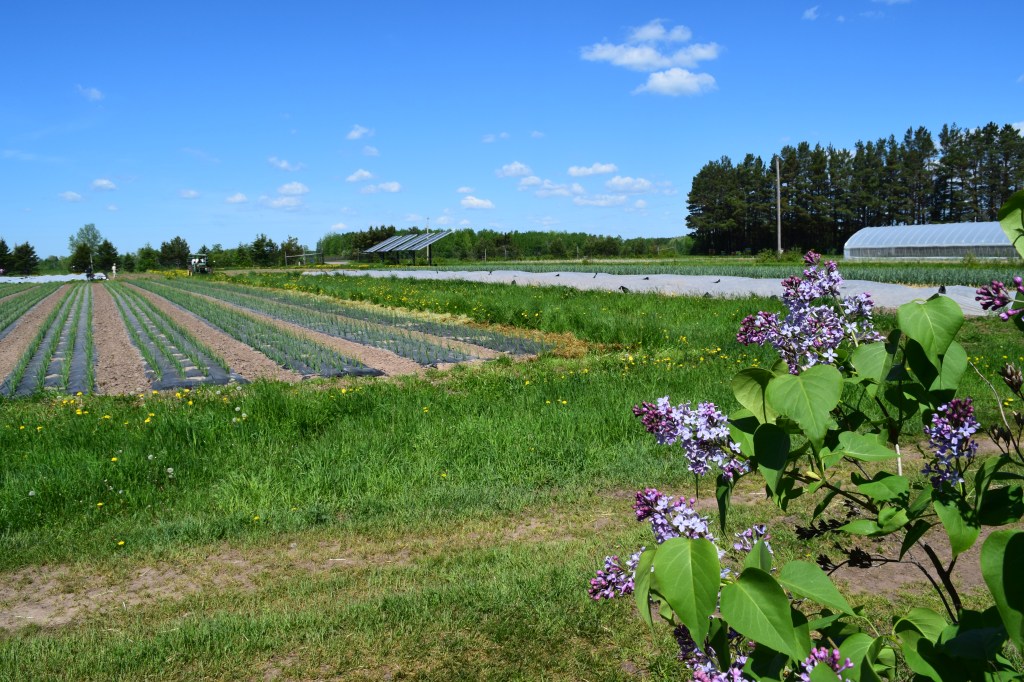
Would you like to come see the farm at peak season? You’re in luck! We are hosting a farm tour and pizza dinner on Saturday, August 27th! Come by the farm at 2612 County Road 1, Wrenshall from 4:00pm to 6:00. We’ll be serving pizza hot from our wood fired oven and giving farm tours. Free for all to attend, we’d love to see you!


In your share this week:

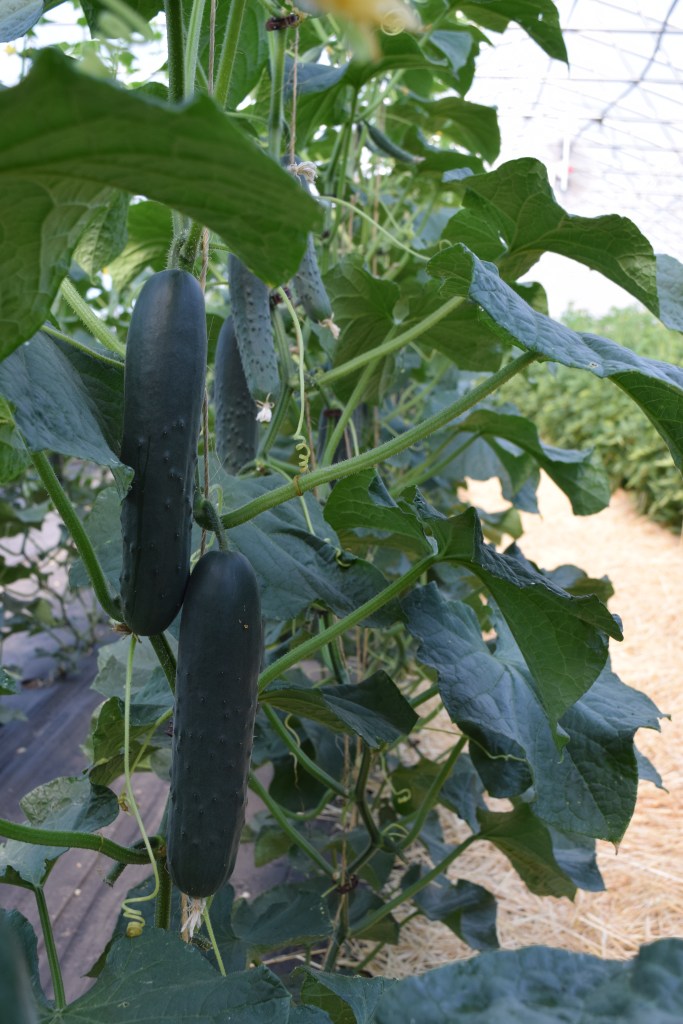
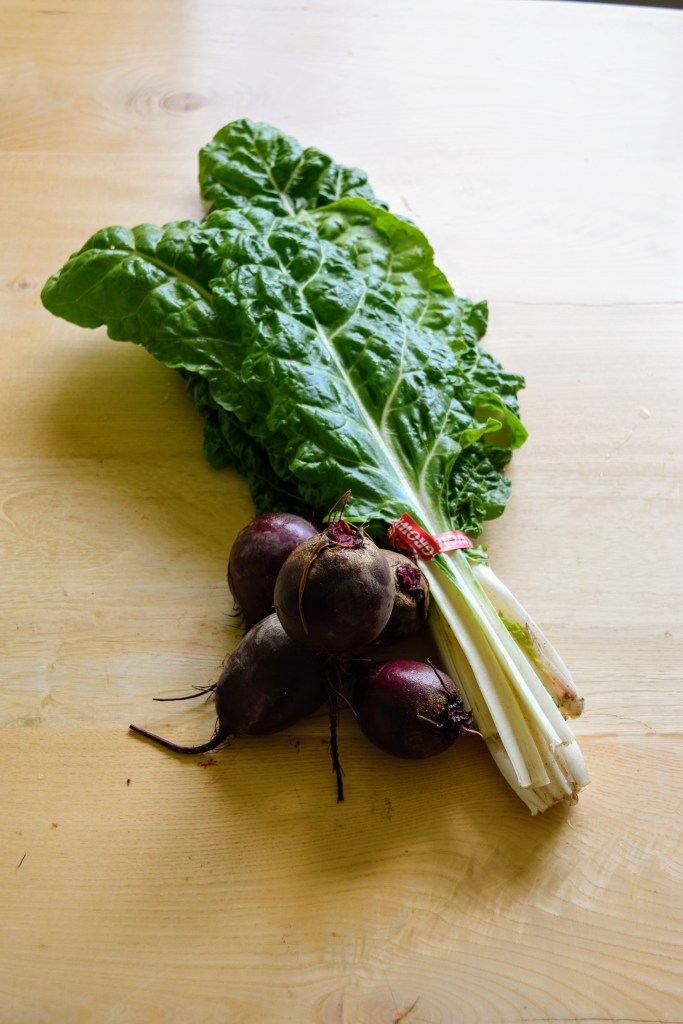
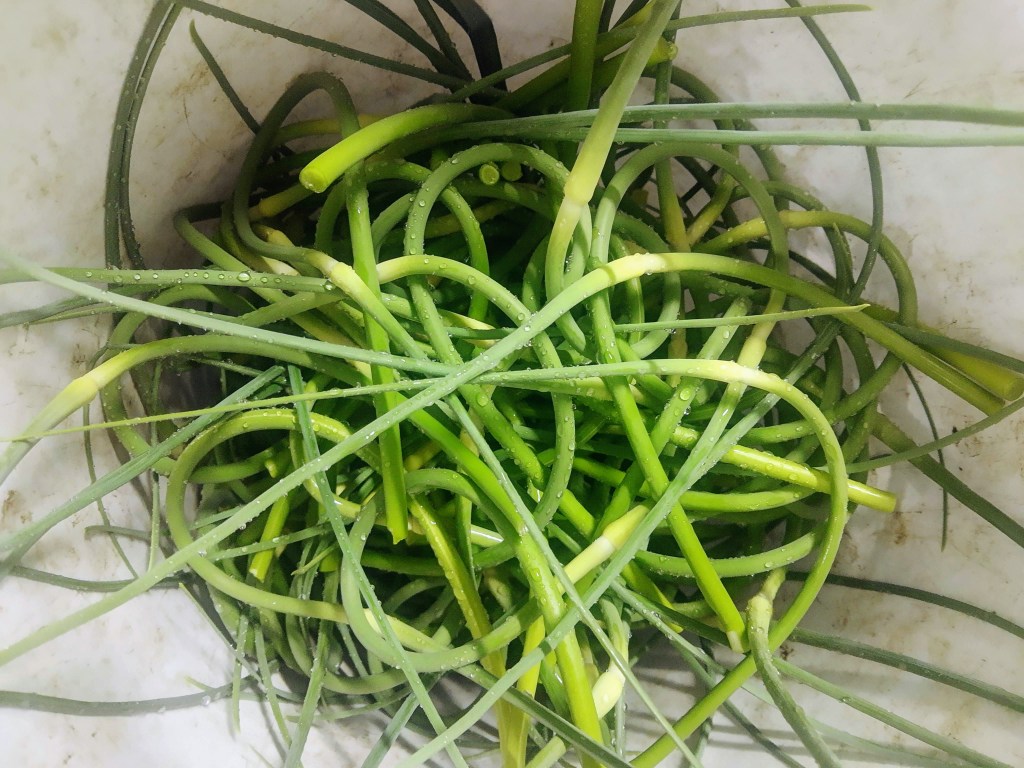
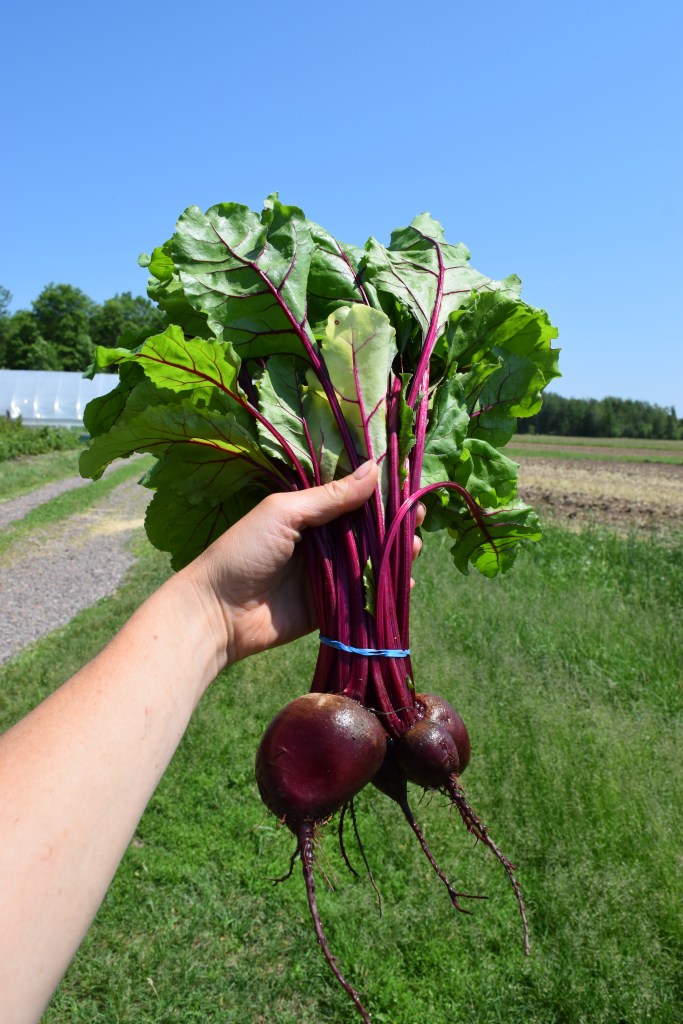
Basil – Beets – Cabbage – Carrots – Cucumber – Dill – Green Garlic – Green Pepper – Green Onion – New Potatoes – Parsley – Tomato – Zucchini


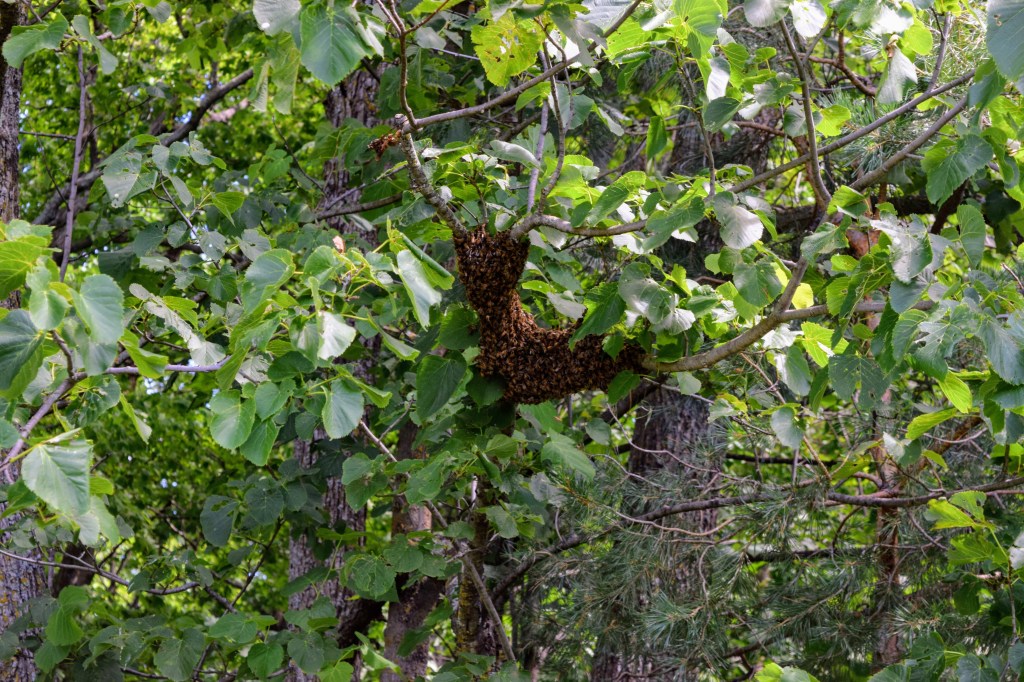
What am I looking at?

This is a swarm of honey bees seen near the farm hives recently. When a hive gets large enough it splits into two distinct colonies. During this process, part of the hive leaves as a swarm to find a new home. These swarms are often very docile because they are not guarding honey or a queen, but always be careful around bees, especially if there there is a chance you could be allergic.


Cucumber and Tomato Salad

From Claudia Roden’s Mediterranean

Ingredients

  • Cucumber (peeled, seeded and cut into pieces)
  • 2 large tomatoes, seeded and cut into pieces
  • green onion
  • 3 Tbsp olive oil
  • juice of 1/2 lemon
  • salt and black pepper to taste
  • small handful of fresh herbs (parsley, oregano, dill, cilantro) chopped

Instructions

  1. Put cucumbers, tomatoes, and onions into a bowl. In another bowl, whisk together the olive oil and lemon juice and season with salt and pepper to make a dressing. Just before serving, pour the dressing over the salad and mix well. Sprinkle with the herbs and add feta if you like.

Basic Pesto

We have garlic AND basil in the box this week. The only option is to make pesto 😉

Ingredients

  • 2 cups fresh basil leaves (no stems)
  • 2 tablespoons pine nuts or walnuts
  • 2 large cloves garlic
  • ½ cup extra-virgin olive oil
  • ½ cup freshly grated parmesan cheese

Instructions

  1. Combine basil leaves, pine nuts or walnuts and garlic in a food processor and process until very finely minced.
  2. With the machine running slowly dribble in the oil and process until the mixture is smooth.
  3. Add the cheese and process very briefly, just long enough to combine. Store in refrigerator or freezer.

From NYT Cooking


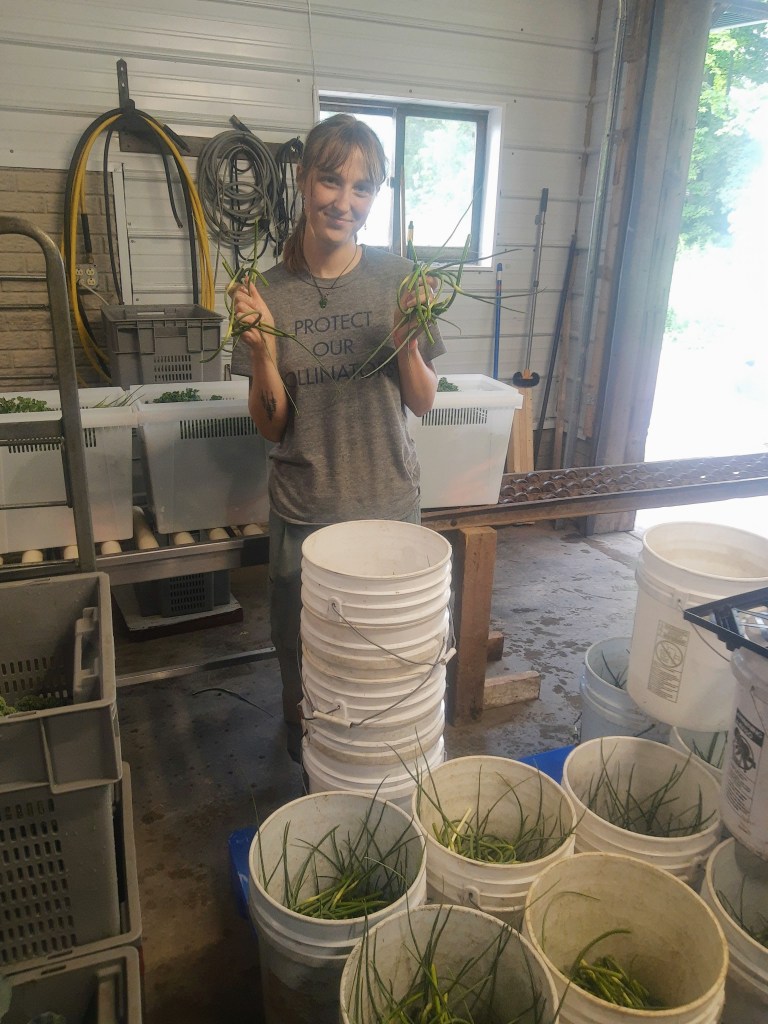
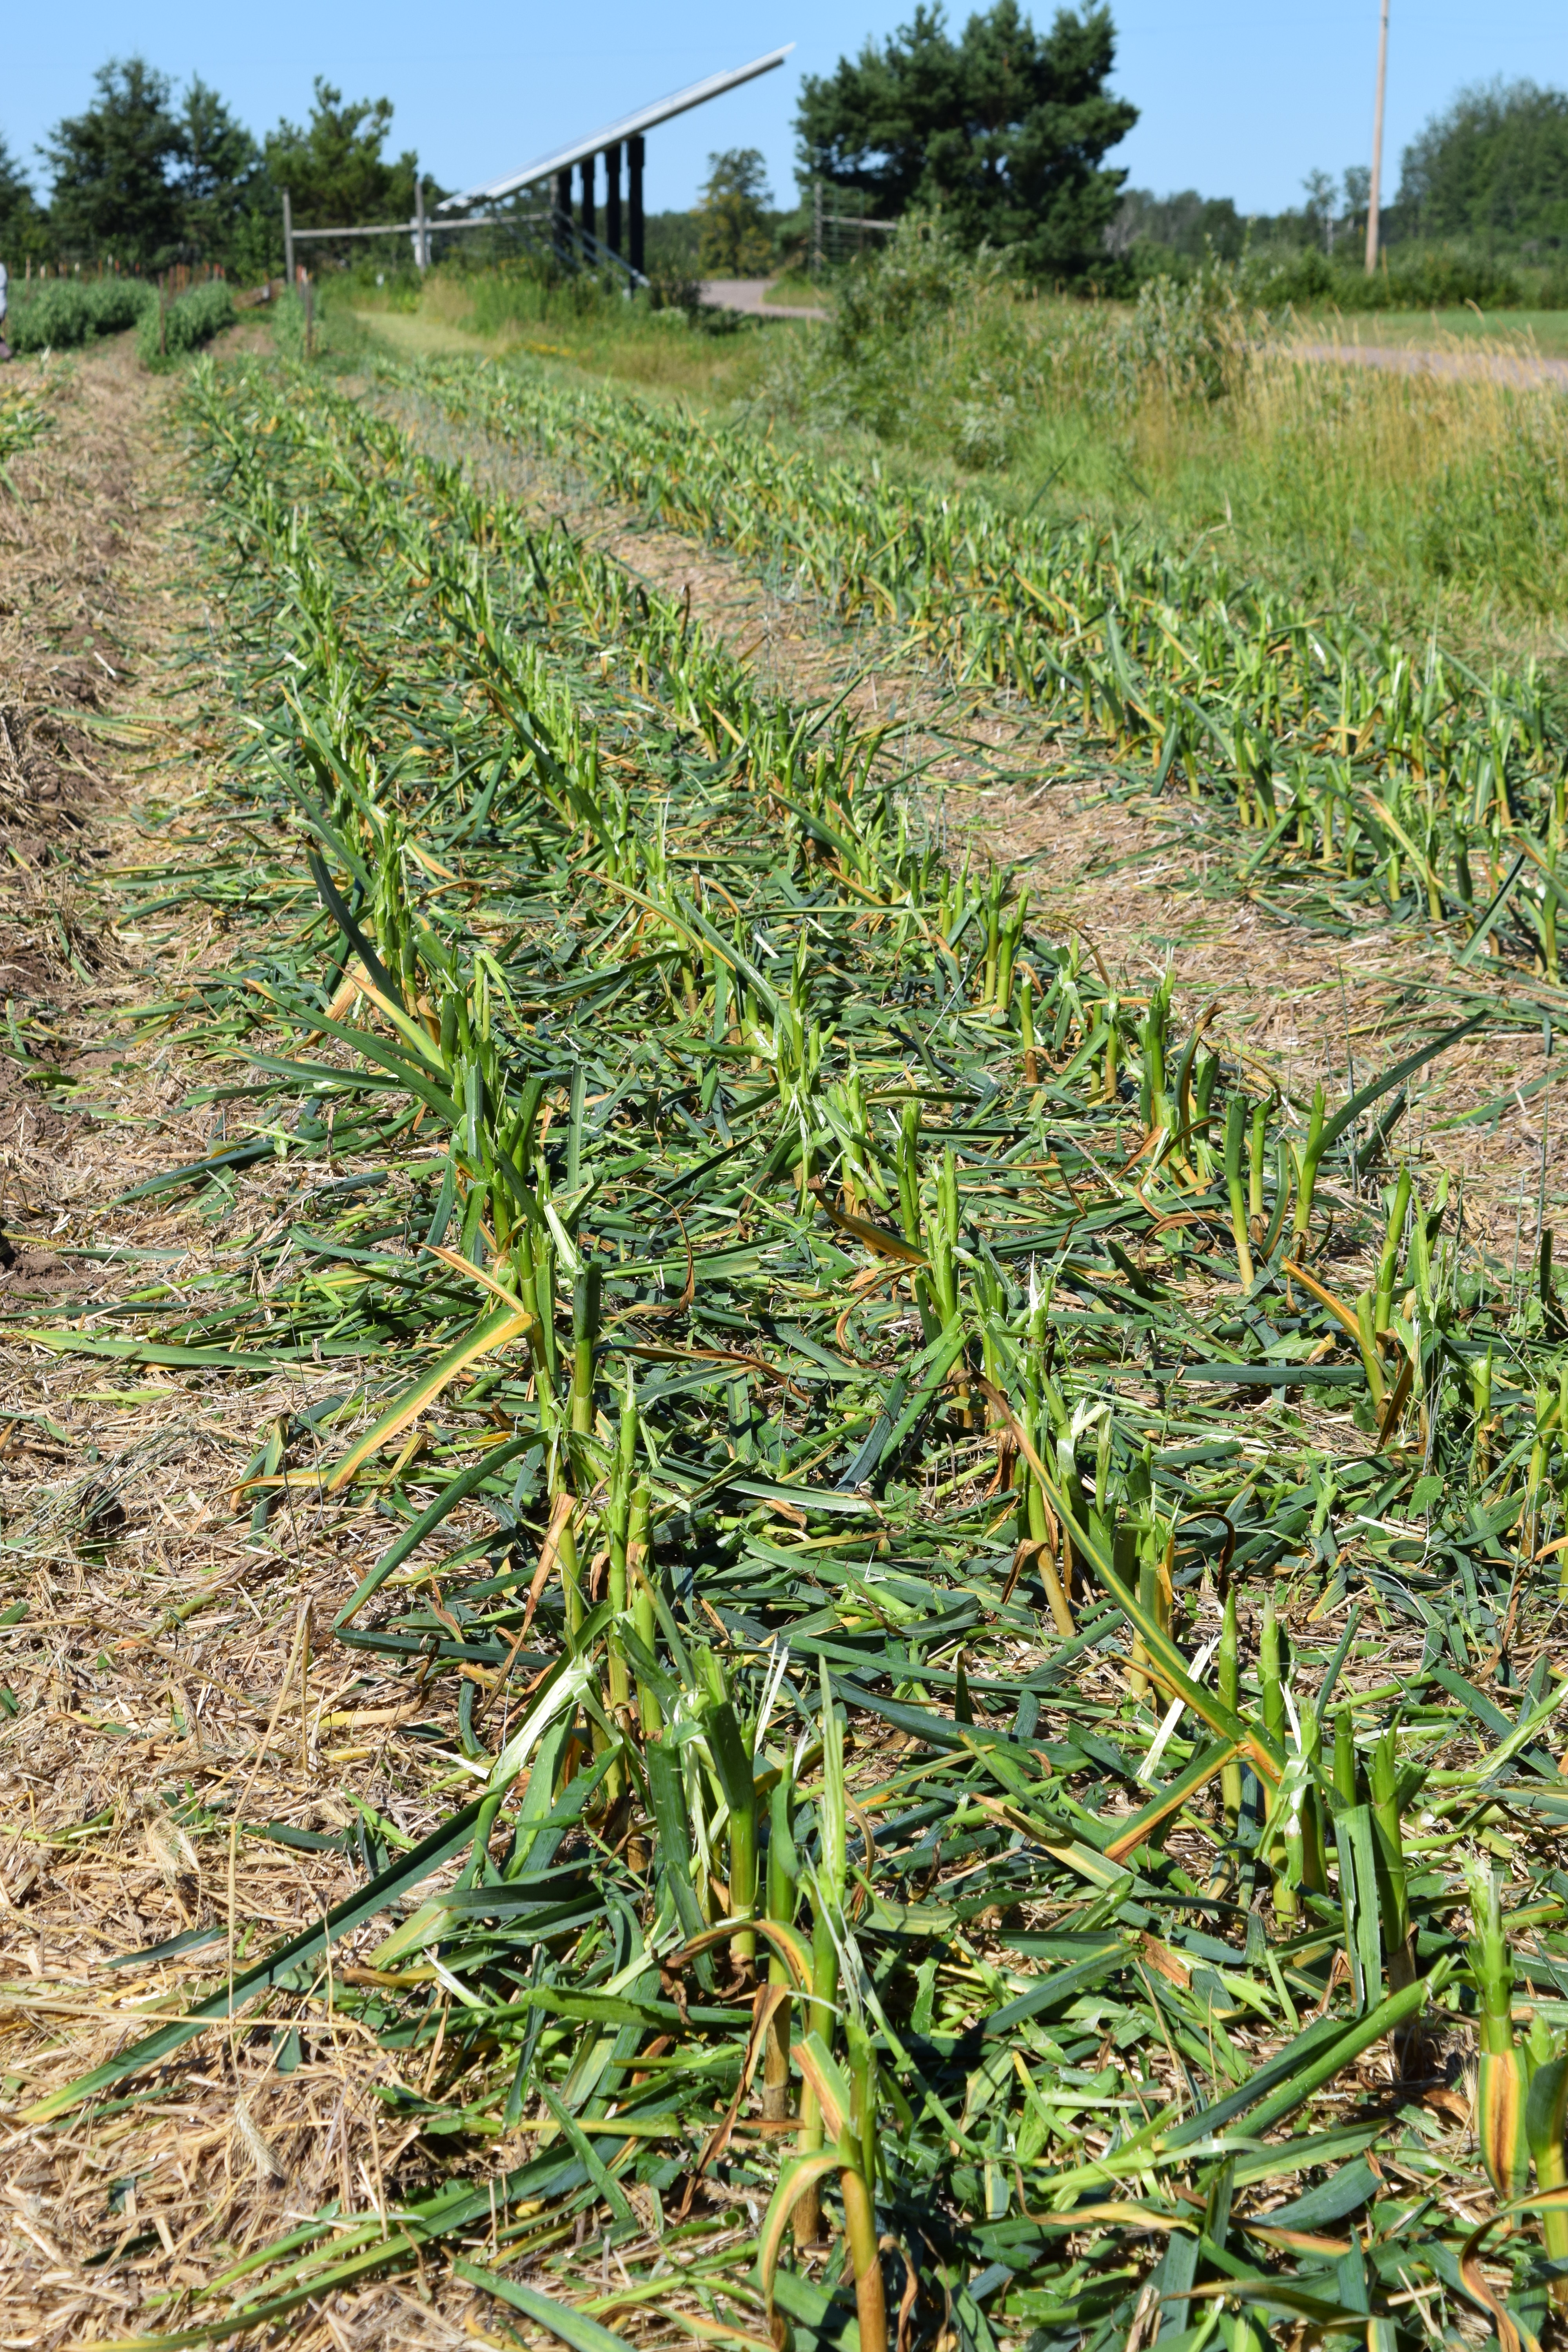
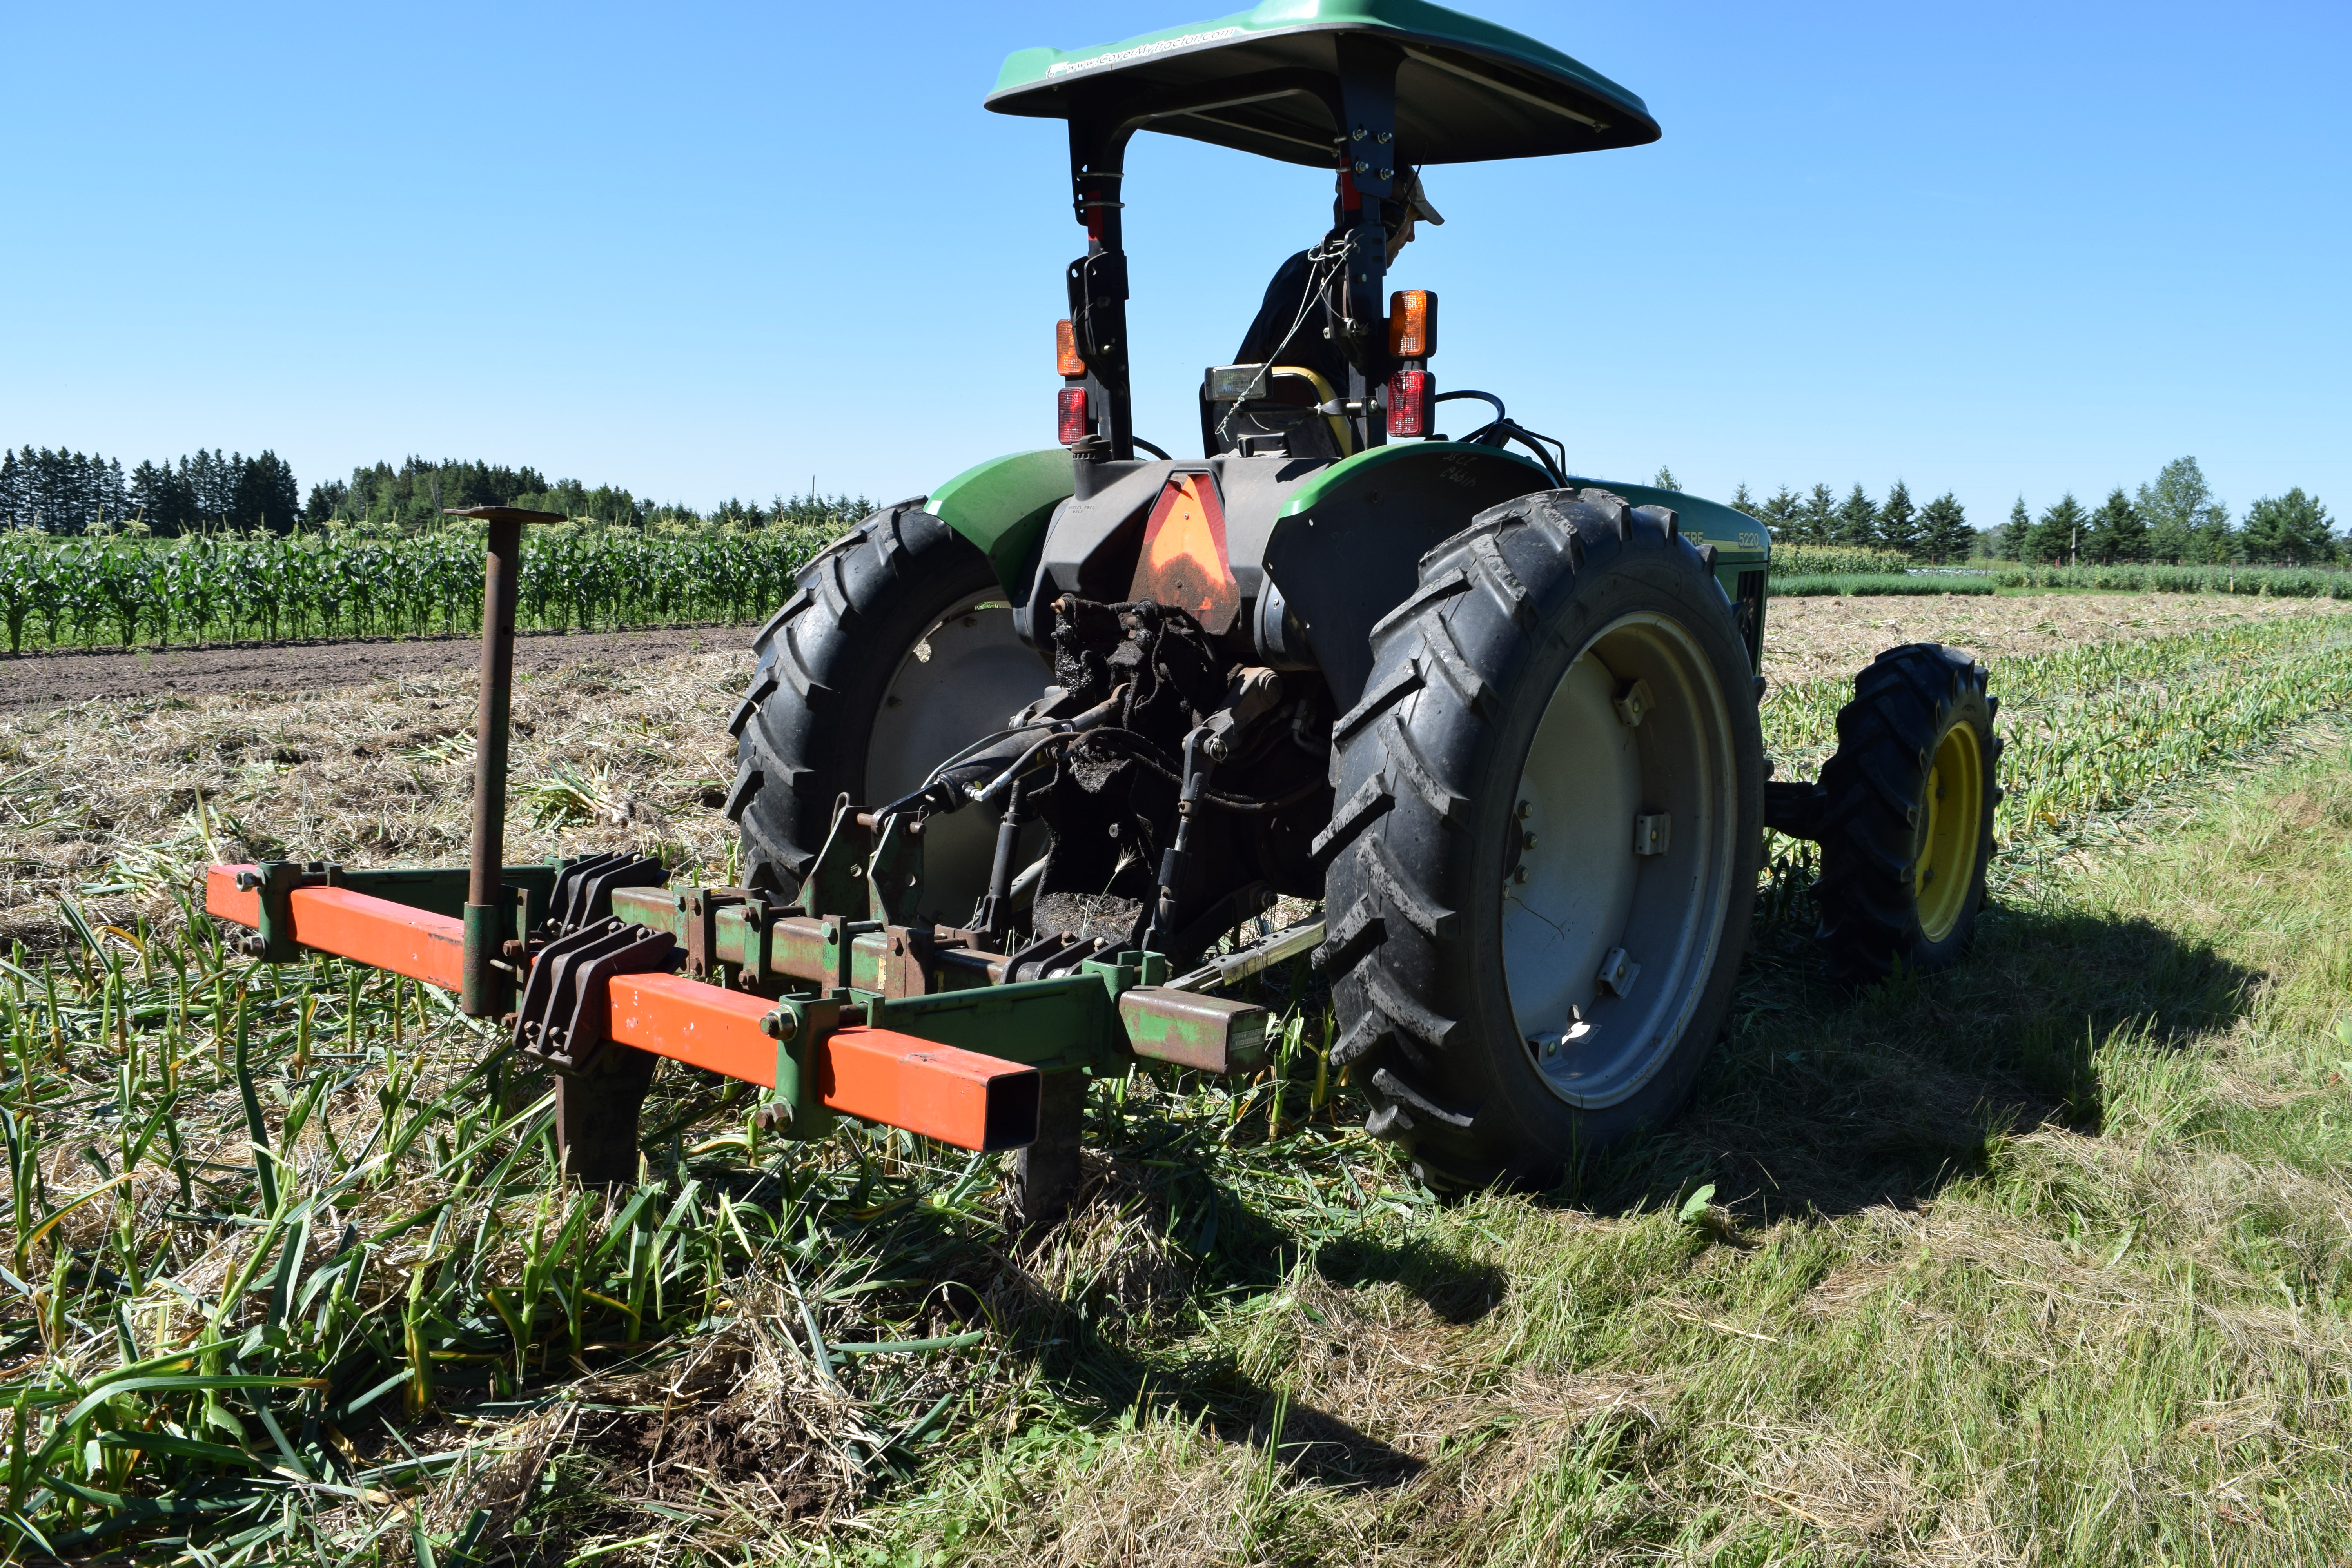
What is Harvesting Garlic Like?

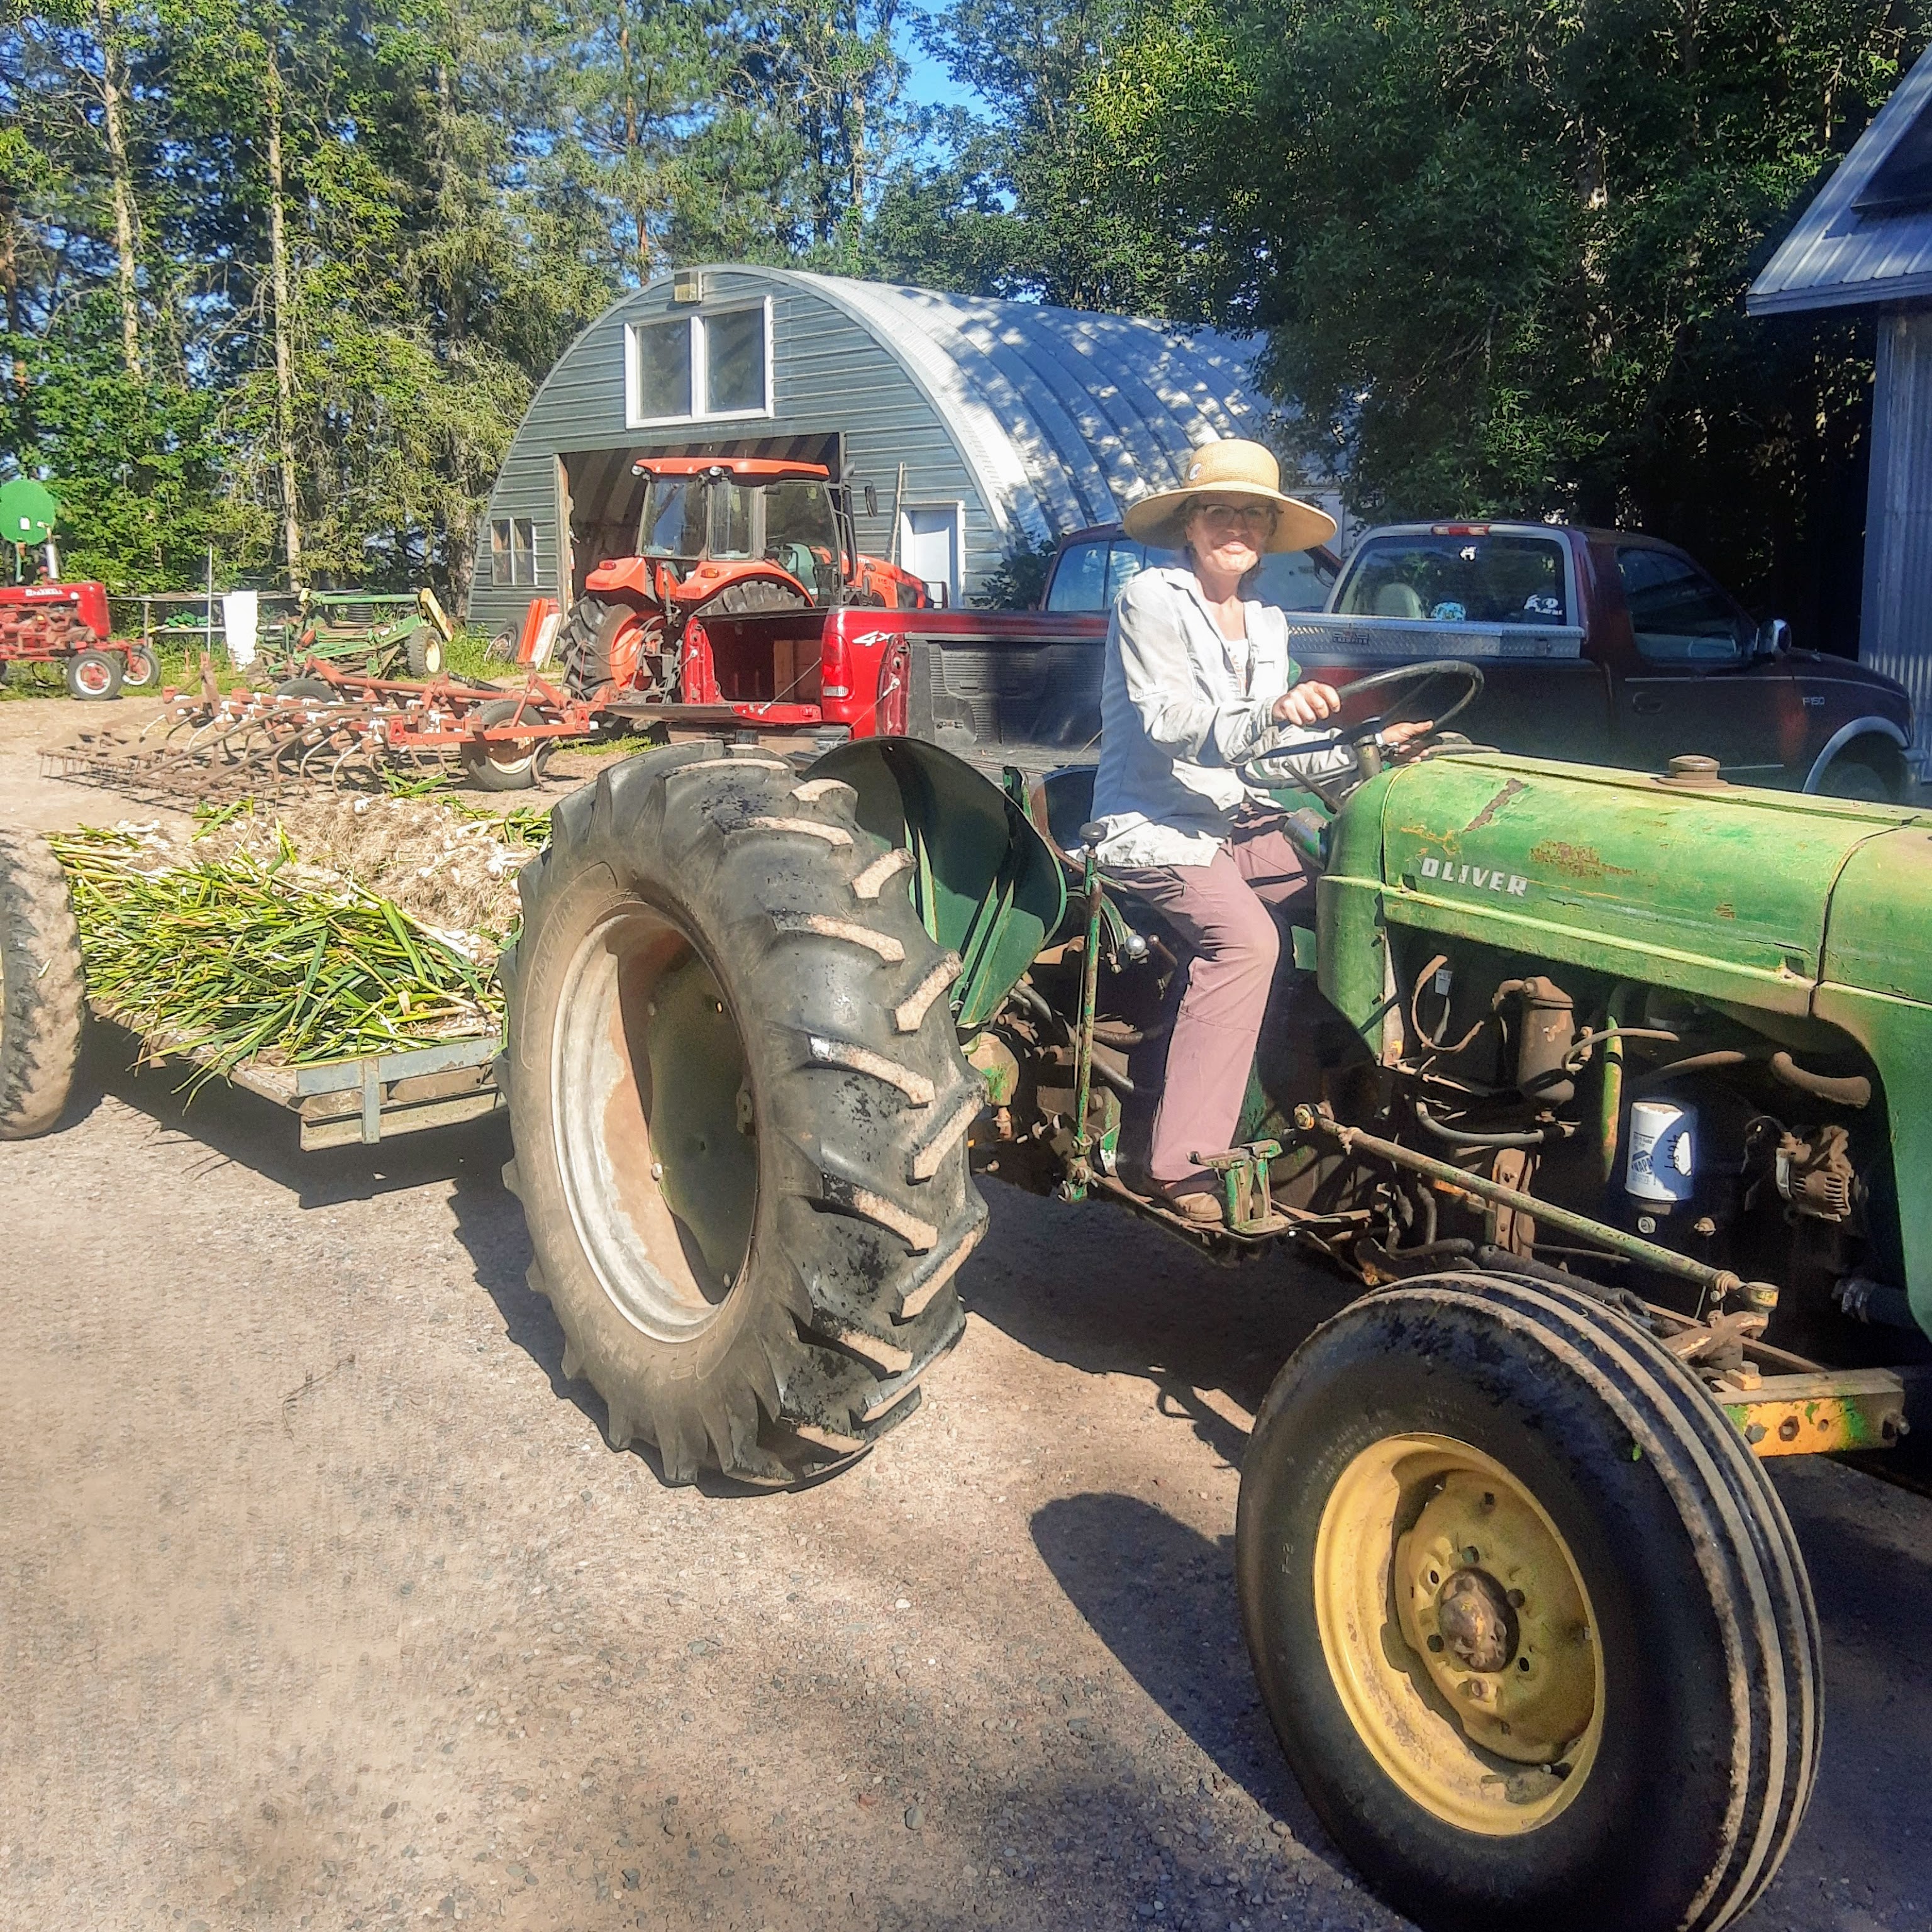
Step one: Janaki uses the tractor to mow and subsoil the garlic. The subsoiler has big hooks that dig down between the garlic rows, loosening the soil and lifting up bulbs.

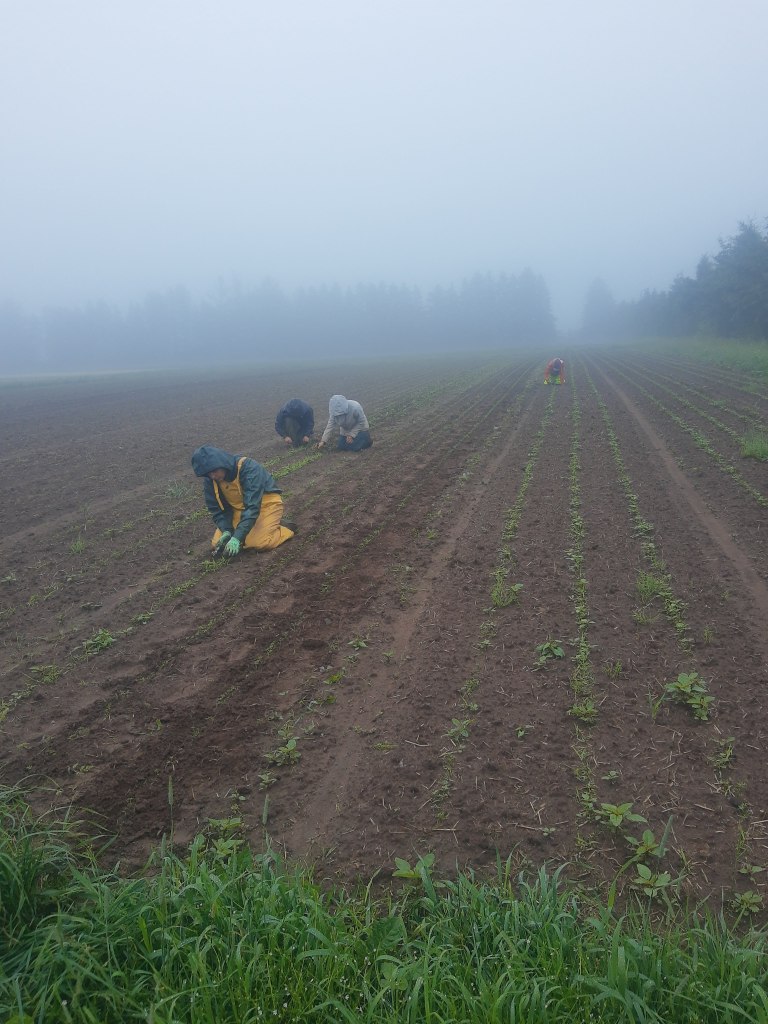
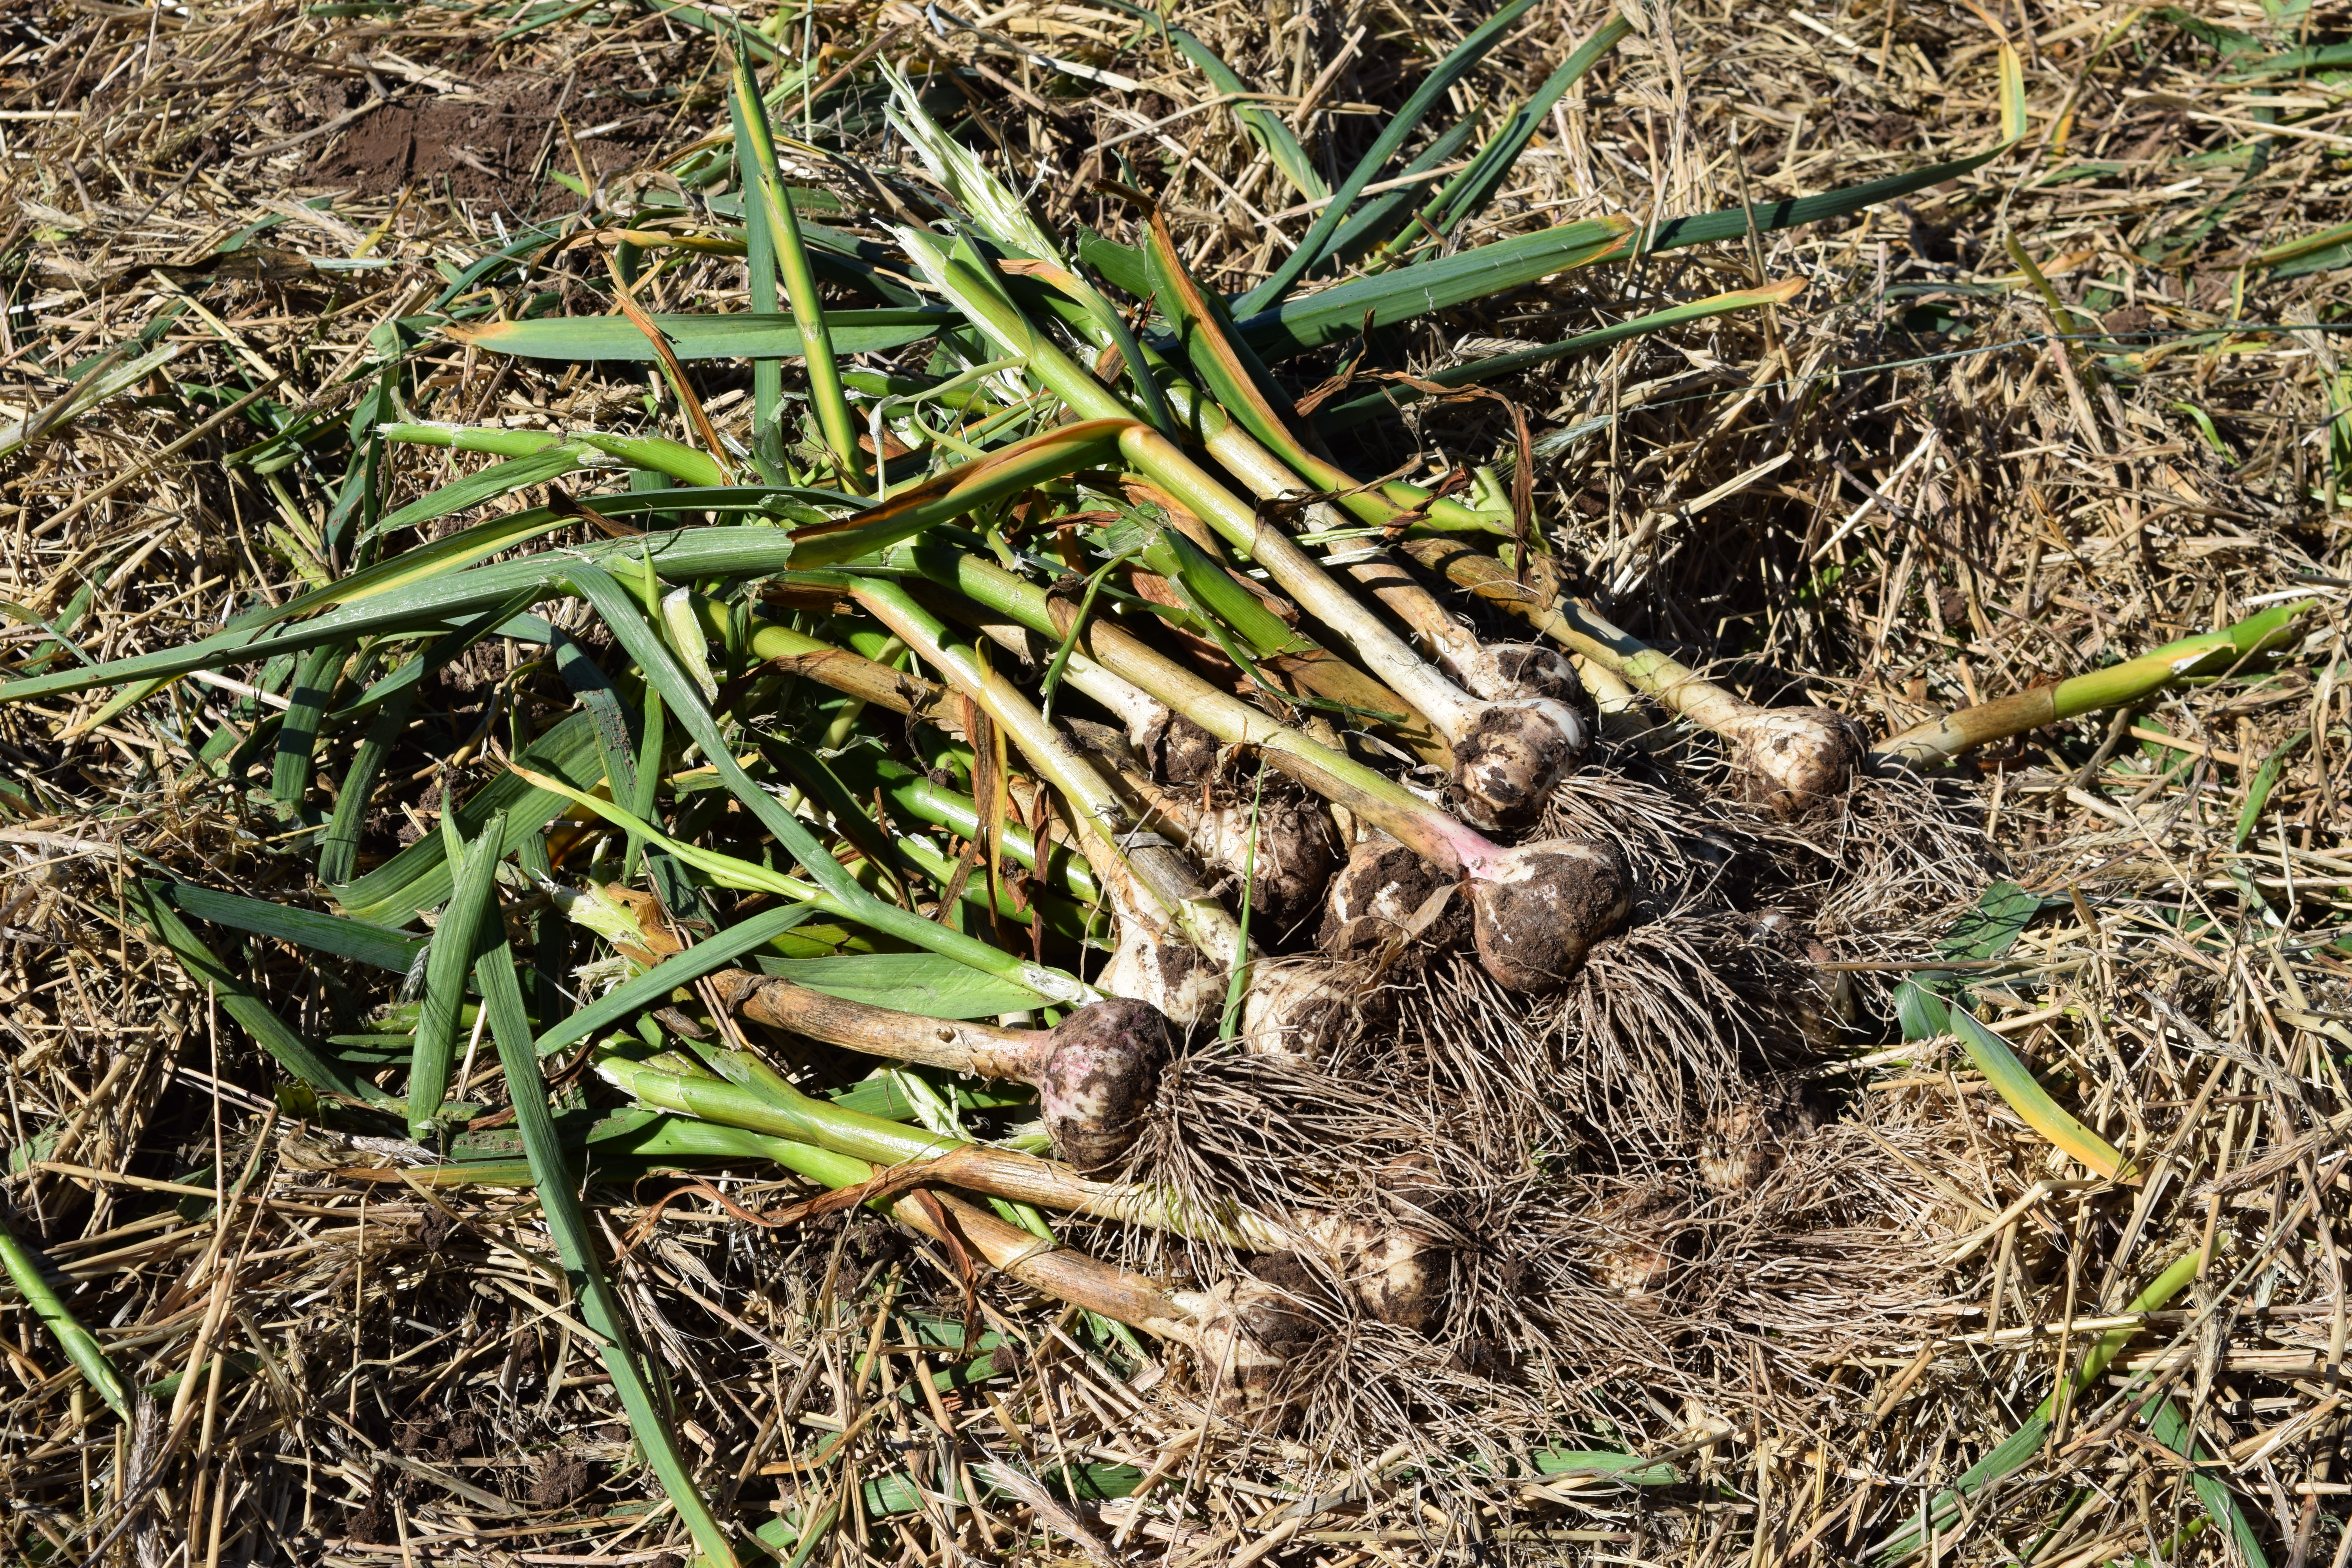
Step two: Bring in the farm crew! We pull the garlic and stack it up in piles. These piles are then loaded on a trailer and brought to the wash station.

Step three: Scrub-a-dub. The garlic is washed, removing any dirt that’s still on the bulbs.

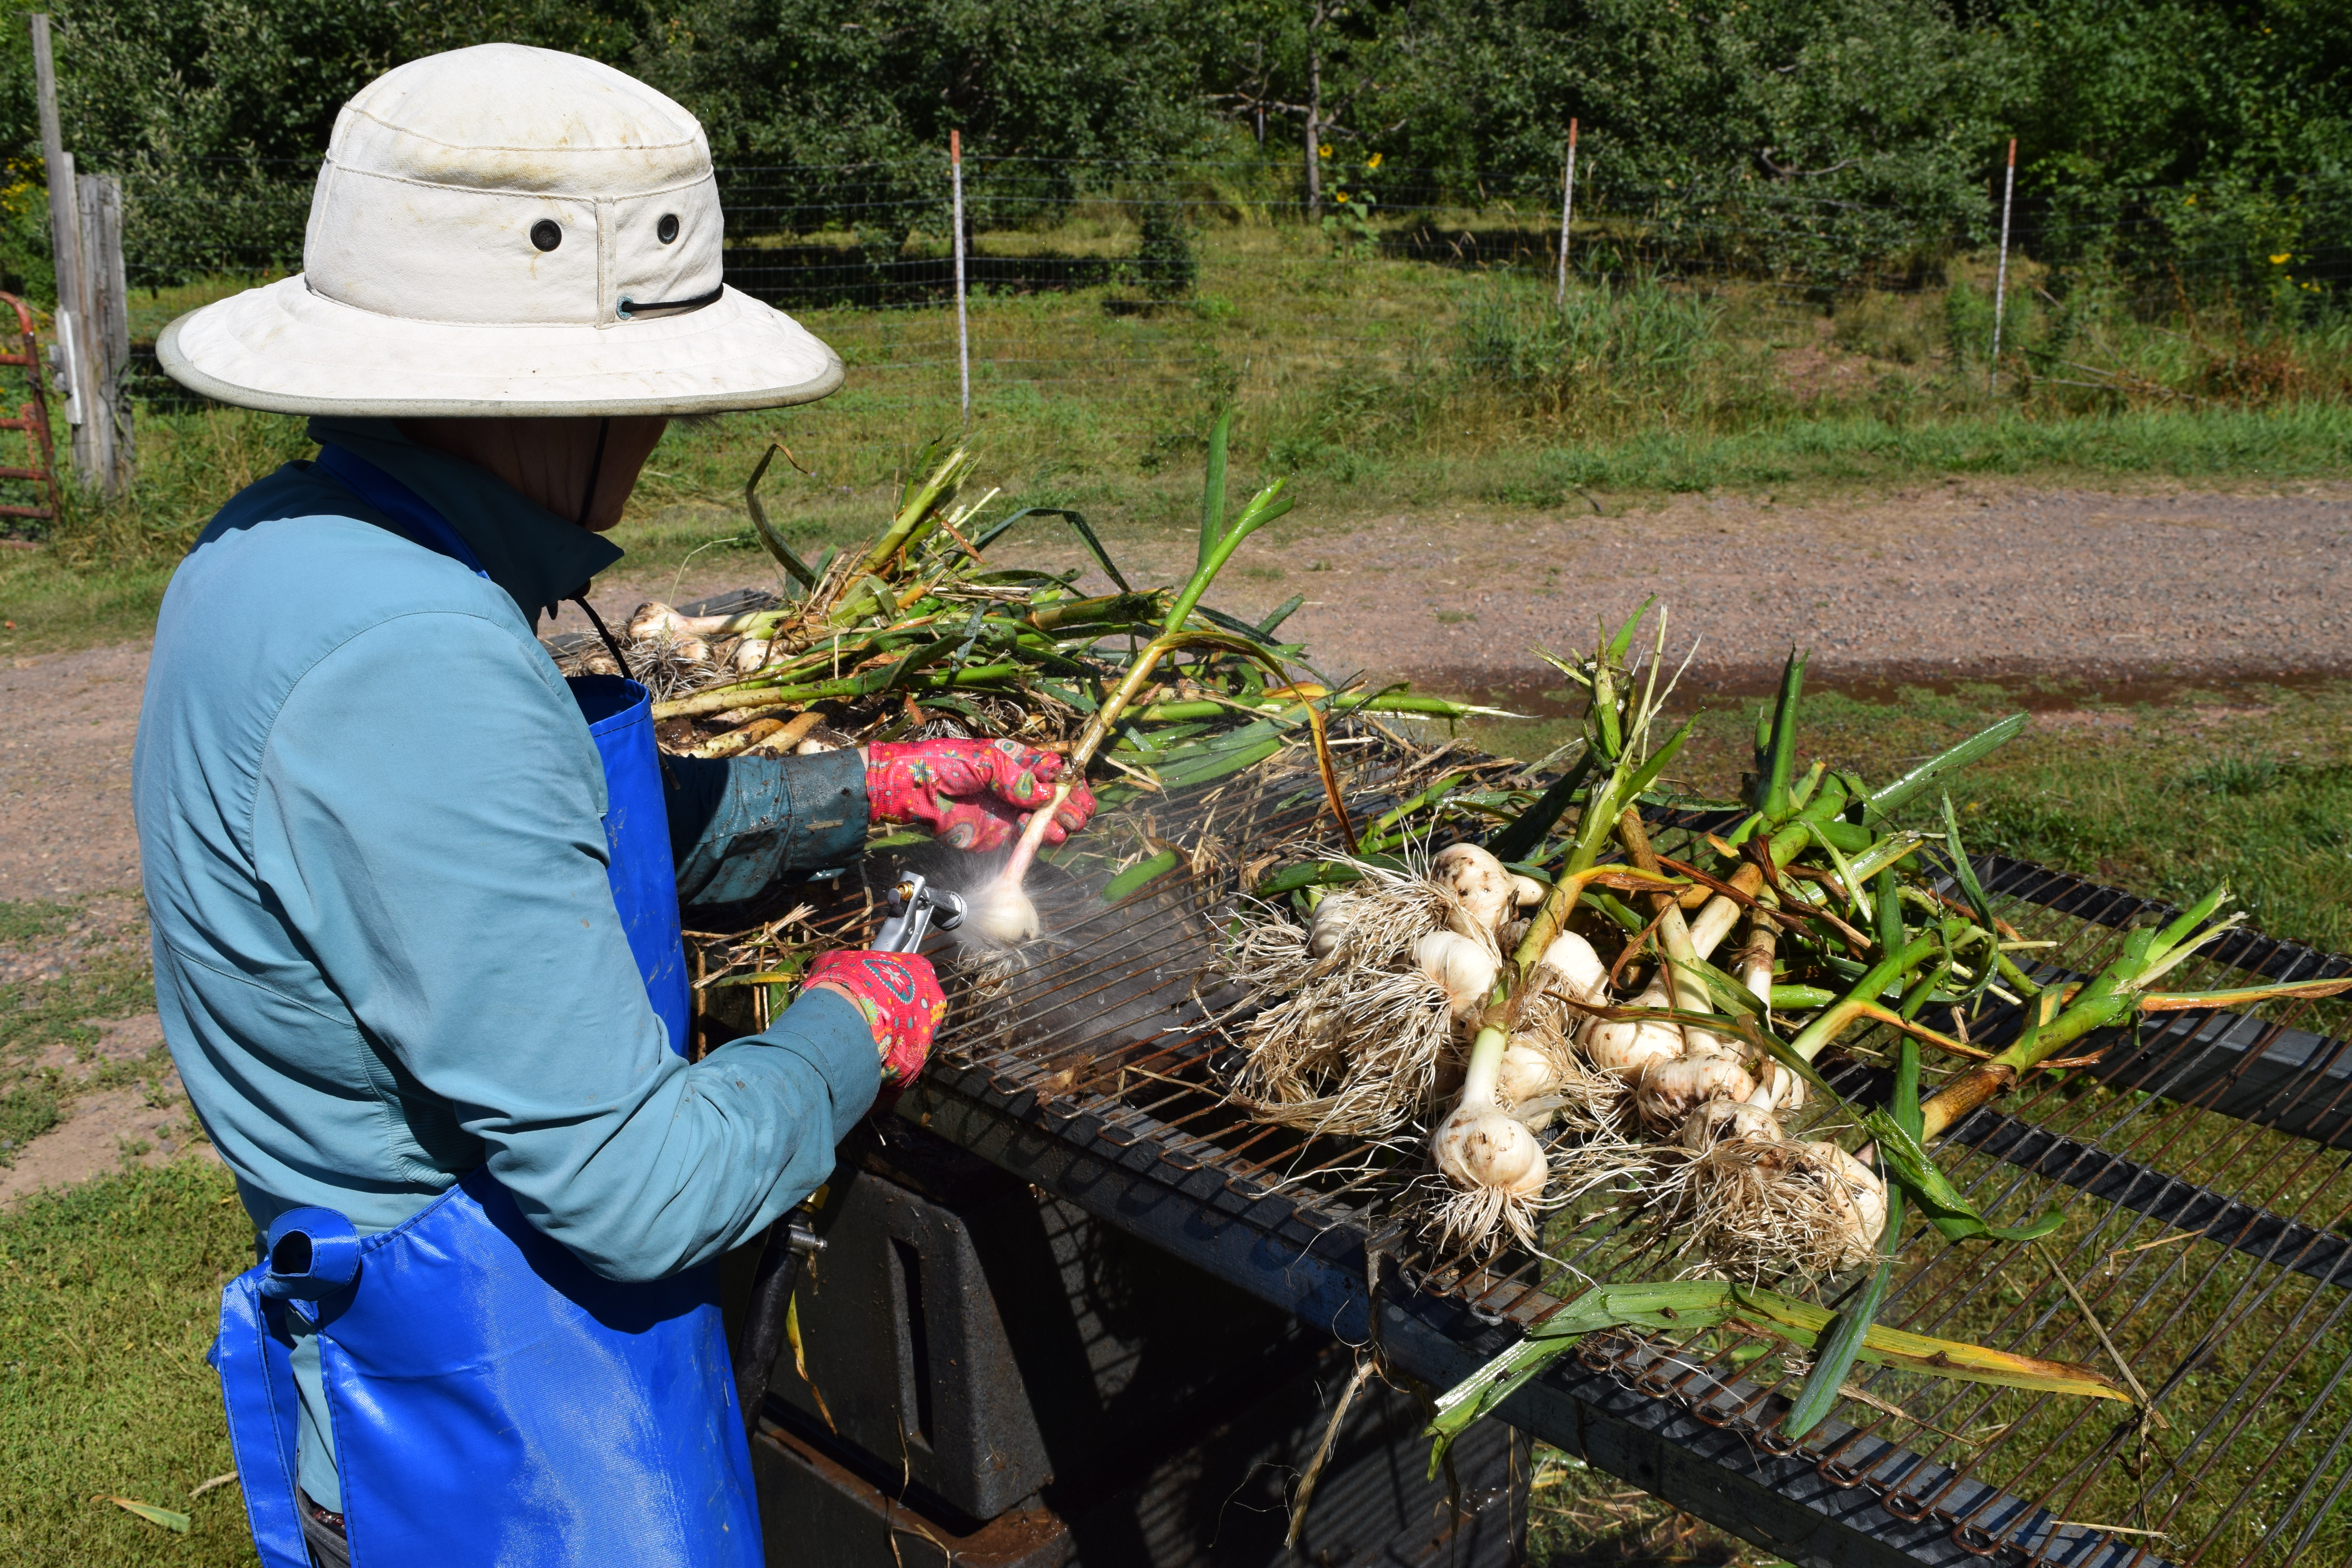
Step four: Stack and cure. In order for garlic to last into the winter it must “cure” or partially dry for a few weeks.

Garlic takes at least three weeks to cure. Then, if stored properly, garlic should last through the next spring!


For the farm crew,

Starr

Summer CSA Week 6, 2022

Cucumbers ripening in the greenhouse

It’s hot and the CSA boxes are bursting! New in the box this week is Swiss chard and napa cabbage. We hope you’re staying hydrated and wearing plenty of sunblock and enjoying the heat!


In your share this week:

Swiss Chard – Napa Cabbage – Lettuce – Cucumbers – Green Onions – Broccoli – Carrots with Tops – Beets – Parsley – Garlic Scapes


Vegan Borscht

Serves 4

Ingredients

2 medium beets

3 small carrots (~1 1/4 medium carrots)

2 medium red-skinned potatoes

2/3 medium onion diced (approximately 2/3 cups, try substitution with the green onions in your box!)

2 stalks celery, diced

1 tablespoon and 1 teaspoon extra virgin olive oil

5 cups vegetable stock

1 1/4 cups shredded red cabbage

1 1/4 cups chopped beet greens or chard

1 tablespoon and 1 teaspoon chopped fresh dill

1 tablespoon and 1 teaspoon white vinegar

1 tablespoon and 1 teaspoon fine sea salt or to taste

freshly ground black pepper or to taste

1/4 cup sour cream vegan or regular (optional)

Instructions

  1. Begin by prepping your vegetables. Peel the beets. Scrub the carrots and potatoes. Dice everything up. It’s best if the beets are a slightly smaller dice than the rest as they take a little longer to cook (you could also shred them in a food processor).
  2. Heat the olive oil in a large pot over medium heat. Add the diced onion and celery and sautĂŠ for 5 minutes or until slightly softened. Add the diced carrots and cook for an additional minute or two.
  3. Tumble in the beets and the potatoes. Pour in the vegetable stock and bring to a boil. Reduce heat and simmer until root vegetables are al dente.
  4. Tip in the cabbage and beet greens. Bring soup back up to a boil, then reduce heat and simmer for 10-12 minutes. Vegetables should be tender.
  5. Sprinkle in the dill and the vinegar. Season the borscht to taste with salt and pepper.
  6. Ladle borscht into bowls and serve with a dollop of vegan or regular sour cream.

Notes

Cool completely before refrigerating the leftovers in airtight containers. Borscht will keep for up to five days in the fridge and up to six months in the freezer.

Based off a recipe from Simple Bites.


Beets and Chard

Did you know beets and chard are actually the same plant, Beta vulgaris? If you’ve grown both in your home garden, you may have noticed the similarities between the seeds and the leaves. The difference is that Swiss chard has been bred to favor leaf production, while beets have been bred to favor sweet fleshy roots.

The vegetables we eat didn’t just appear in the wild one day. Desirable traits have been “selected” for thousands of years to develop the tasty crops we enjoy today. Seeds are saved from plants that show the genetic variations we enjoy (more leaves versus fleshier roots) and then crossed through pollination with other plants with desirable traits so the offspring are better and better for human production and consumption. Please note, this is different from genetically modified which is done in a laboratory versus going through the generations of plants crossing for desirable traits already present in the species.

Rows of chard in the field

Resources for Veg Care and Use!

Remember to use the Vegetable Guide! Click the link below to see a pdf that describes most of the Food Farms crops and how to best care for the produce:

For the farm crew,

Starr

Summer CSA Week 5, 2022

We love fresh produce any time of the year, but early summer is particularly special. There’s something magical about the first time in a season we’re able to share a vegetable. We have several firsts this week: cauliflower, kale, cucumber, AND garlic scapes. We’re watching our harvests diversify and we love it!

Pictured to the right: the crew weeding carrots in a wet fog on the 4th of July.

We’ve had some more storms and wet weather this past week, but fortunately nothing severe, and the moisture levels aren’t excessive. A word of advice to home gardeners: stay out of your gardens as much as possible in wet weather. Stepping in wet mud will cause compaction and be detrimental to your soil’s health. Plant diseases spread more readily in wet weather and your hands and tools could make that worse. On the Farm, have to keep working, even when it’s rainy, but we’re very selective about the tasks we do and how we harvest. Keep dry!


In your share this week:

Broccoli – Cauliflower – Lettuce – Green Onions – Carrots with Tops – Kale – Garlic Scapes – Cucumber


Forager’s Soup

Serves 6-8

Ingredients

4 tablespoons butter (use olive oil for a vegan alternative)

1 cup diced onion

1 medium potato, peeled and diced

salt and freshly ground black pepper

2 cups chicken or vegetable stock or hot water

1 1/2 cups whole milk (optional)

1/4 cup heavy cream (optional)

~4 cups (8 oz) mixed chopped spring greens, include scapes, kale, green onions, carrot tops, and/or broccoli (use whatever is on hand!)

3 tablespoons olive oil (to cook meat)

3 oz chorizo or bacon, finely diced (optional)

Preparation

  1. Melt butter in a large pot over medium-high heat. Once the butter foams add onion and potato and stir to coat butter. Add salt and pepper. Turn down heat and sweat the onions and potato on with a tight fitting lid for 10 minutes. Vegetables should not brown.
  2. Heat the stock (or water) in a saucepan until simmering. Add hot liquid to potatoes and onions and simmer 5-10 minutes more until vegetables are completely cooked. Add greens and simmer uncovered for 2-3 minutes more. (Don’t over cook the greens!)
  3. Blend with a blender or hand blender. Puree until smooth. Salt and pepper to taste. Stir or blend in milk and cream.
  4. If adding meat, heat olive oil in a small skillet. Add chorizo or bacon and cook until fat is rendered and meat is crisp, 5-10 minutes. Remove and drain on paper towels. Reserve the oil for a garnish or other cooking projects.
  5. Serve soup hot with the above meat and a few drops of the cooking oil to garnish.

This soup can be made a day in advance and kept in the refrigerator! Just gently reheat on the stove top, uncovered. To make this recipe vegetarian, use vegetable broth and skip step 4. To make vegan, also exclude the milk and cream, or substitute with vegan milk option.

*The above recipe is adapted from “Forgotten Skills of Cooking” by Darina Allen and has revisions from volunteer Deb Rausch to better suit our boxes this week. *(Source of recipe previously listed incorrectly.)


garlic scapes ready to go into share boxes

What are garlic scapes?

Scapes are the curly stems produced by hardneck varieties of garlic. We prune off these scapes so the garlic plant puts more energy into producing the garlic heads we all enjoy. If left on the plant these scapes would produce bulbils, which are like seeds that produce a clone of the parent plant.

Lucky for us, scapes are super tasty and get us through the early summer before the garlic crop is ready! Scapes are have a hot garlic flavor when eaten fresh and are a great garlic replacement in pesto. When cooked, the flavor mellows out. Try grilling garlic scapes or adding them to soups.


Still looking for recipes?

Use the Tag Cloud below to find archived recipes from past years. Just click an ingredient below and you’ll be taken to a list of all posted newsletters with a recipe that includes that vegetable. The larger the text below, the more posts there are including that vegetable.

Arugula Basil Beet Bell Pepper Broccoli Brussels Sprouts Cabbage Carrot Carrot Leaf Cauliflower Celery Chard Chives Cilantro Cucumber Delicata Squash Dill Dressing/Sauce Egg Garlic Garlic Scape Green Bean Green Onion Kale Leek Mint Napa Cabbage Onion Parsley Parsnip Pepper Potato Radish Red Onion Red Potato Rutabaga Scallion Shallot Spinach Thyme Tomato Turnip Winter Squash Yellow Onion Zucchini

The farm crew admiring dramatic cloud formations on 7/11 just before being pelted with rain.

For the farm crew,

Starr

Summer CSA Week 3, 2022

Ellis with turnips

Welcome to summer! June 21st was the Summer Solstice, the longest day and shortest night of the year. We received 15 hours 52 minutes on the farm!


In your share this week:

Green Top Beets – Lettuce – Green Onions – Pac Choi – Radishes – Spinach – Salad Turnips


A note on this week’s spinach: our previous batches of spinach have come from our greenhouses which means they have been protected from the elements. This week’s spinach is from the field, so you may find it a little dusty from splash back from the rain and wind. We don’t wash the spinach on farm, because we find it lasts longer if we don’t get it wet before we get it to you. When you’re ready to use your spinach give it a wash, and either wash and dry the bag or transfer it to a clean bag. See how to wash greens in the video we posted last week!


Beets with greens ready to go out in a CSA share!

The beet beat: did you now every part of the beet is edible? Beets tend to mature at varying rates, so you’ll probably find a range of sizes in your bunch this week. One thing they all have in common is delicious greens! Beet greens can be prepared any way you’d prepare kale. The most common way to prepare beet greens is in a sautĂŠ. Coat a pan with olive oil and cook your greens until they are wilted and tender (5 to 8 minutes). Add minced garlic, salt and pepper, or try experiencing with any of your favorite seasonings and aromatics.


You will find lots of salad turnips in your share this week! These turnips are best eaten fresh, but can be cooked (see a recipe below). These turnips are similar to radishes, but without the spiciness. You’ll find the turnips delightfully crunchy and juicy. Throw them in a big salad or eat them straight as a snack.

Here is a turnip poem written by a nine-year-old Henry Wadsworth Longfellow. It sounds like Longfellow only had access to old storage turnips. This poem might be a little more joyful if it was a fresh salad turnip they were eating, but we still love any literary ode to veggies.

Mr. Finney’s Turnip

By Henry Wadsworth Longfellow

Mr. Finney had a turnip,
And it grew, and it grew,
And it grew behind the barn,
And the turnip did no harm.

And it grew, and it grew,
Till it could grow no taller;
Then Mr. Finney took it up
And put it in the cellar.

There it lay, there it lay,
Till it began to rot ;
When his daughter Susie washed it
And put it in the pot.

Then she boiled it and boiled it,
As long as she was able;
Then his daughter Susie took it
And put it on the table.

Mr. Finney and his wife
Both sat down to sup;
And they ate, and they ate,
Until they ate the turnip up.

Lebanese Pink Pickled Turnips

Ingredients

1 pound turnips, peeled, quartered, and sliced 1/4 inch thick

1 small beet, peeled and quartered

1 clove garlic thinly sliced

1/2 cup vinegar

2 tablespoons kosher salt

1 teaspoon sugar

1 1/2 cups water

Preparation

  1. Put turnips, beet and garlic into a wide mouth heatproof 1 quart jar.
  2. In a small saucepan, bring vinegar, salt, sugar and water to a boil. When salt and sugar are completely dissolved, pour brine over vegetables to fill the jar. Leave to cool.
  3. When completely cool, cover jar and chill for 1 week.

Caramelized Hakurei Turnips

“Hakurei” turnips are another name for salad turnips, originally developed in Japan.

Ingredients

4 servings

2 tablespoons olive oil, plus more for greasing the baking sheet

2 bunches hakurei turnips, greens removed, washed but not peeled

1 teaspoon kosher salt

Freshly ground black pepper

Preparation

  1. Preheat oven to 425 degrees F. Grease baking sheet lightly with olive oil.
  2. Slice the turnips about 1/4 inch thick. You can do this with the slicing disk of a food processor, an adjustable mandoline, or by hand with a knife.
  3. Combine turnips with 2 tablespoons of olive oil and salt in a large bowl. Toss and coat turnips.
  4. Pile turnips on prepared baking sheet, spreading them as close as possible to a single layer.
  5. Roast the turnips until they are crisp and golden around the edges, 15-20 minutes. Shuffle turnips and roast 5 minutes more. Remove from oven and top with freshly ground black pepper.

Basic Vinaigrette

Spring and early summer is the season of greens! It is easy to make your own salad dressing at home. I like to put all my vinaigrette ingredients in a jar, and shake to combine. That way any dressing I don’t use, I can leave in the fridge for a future salad! Add any seasonings and herbs you prefer for different flavors.

Ingredients

Âź cup extra virgin olive oil
2 tablespoon balsamic vinegar
1 tablespoon whole grain dijon mustard
1 ½ teaspoon maple syrup (or agave)
1 teaspoon fine grain kosher salt
½ teaspoon ground black pepper

Preparation

  1. Combine!

Greenhouse after harvesting beets and scallions for Monday’s shares. Lots more tasty produce to come!

For the farm crew,

Starr

Summer CSA Week 2, 2022

Super star Food Farm member, Lynne, shows us how to unbox your veggie box and keep the produce fresh for your consumption!

Week 2 of the CSA! Our crew is back in the CSA rhythm and excited to bring you more delicious produce. Thanks to some super star volunteers we have an educational video for you about how to take care of the producing coming in your shares. Experienced CSA members and newbies alike will benefit from watching the video above!

Things are moving fast here at the farm, the hustle intensifies in hot weather as both crops and weeds develop quickly and need attention. On a related note: that’s why there are three heads of lettuce in your share this week!


In your share this week:

Broccoli – Head Lettuce – Oregano – Pac Choi – Potatoes – Radishes – Spinach


This share includes the last of the 2021 potatoes. This is very late to store potatoes, so please keep them in the refrigerator and use them quickly. If your potatoes sprout you can still break off the sprouts and use the potato as usual. You’ll have potatoes in your box again in August when our first crop of “new” potatoes is ready.


Greek Potatoes

Ingredients

6 servings

6 medium potatoes, cubed (3 pounds)

1/2 cup fresh lemon juice (~2 1/2 lemons)

1/3 cup vegetable oil

1 tablespoon olive oil

2 teaspoons salt

1/2 teaspoon black pepper

11/2 tablespoon fresh oregano

2 garlic gloves, minced

3 cups hot water

chopped fresh parsley

Preparation

  1. Preheat oven to 475 degrees.
  2. Toss together potatoes, lemon juice, salt, pepper, oregano and garlic in a deep flat pan about 8 x 12 inches. Add water to the pan.
  3. Bake for 1 1/2 hours at 475. Stir every 20 minutes adding more if needed to prevent sticking. Be careful not to burn in the last 30 minutes of cooking. During the final 15 to 20 minutes, allow water to evaporate.
  4. Garnish with fresh parsley and serve.

You can also try recipes from past newsletters like:

Pac Choi and Shiitake Stir-fry

Quick, spicy pickled radishes


The Free Range Film Festival is THIS WEEK. This is your opportunity to come out to Wrenshall and watch independent films in a beautiful historic barn. Friday and Saturday at 7pm. There will also be music by Darin Bergsven and the Denfeld Honors Quartet and a food truck on site. We’d love to see you there!

909 County Road 4, Wrenshall MN

June 24 & 25, 7:00pm

While there is officially no charge for admission, the organizers do ask audience members for a $10 donation to help pay for barn maintenance.

For the farm crew,

Starr

Summer CSA Week 1, 2022

Planting broccoli

Welcome to the 2022 summer CSA season! Thank you for being part of our community. You enable us to do what we love! After a cool slow start up, it’s starting to look like summer. The dry weather of the last two weeks have been great for getting field work done and the farm is finally looking lush and green. The farm crew has been hard at work weeding and planting, and we’re excited to begin harvesting as well!


In your share this week:

Dill – Greens Mix – Head Lettuce – Potatoes – Rhubarb – Spinach


Potatoes in June? Yes! This is a first for us–we had such a good crop last fall that we were able to save some for the first two shares. This is very late in their storage life, however, so please keep them in the refrigerator or they will sprout quite quickly. Sprouts aren’t bad though, so just break them off and use the potato as usual.

A note on the greens mix: our greens mix includes a special blend of kale, mustard and other members of the brassica plant family. This year we have seen an increase in flea beetle activity, which leaves little holes in the leaves of these plants. This is totally harmless; in fact, in French markets people seek out greens with these holes because it demonstrates the produce was grown organically without harmful pesticides! This can however increase the product’s spiciness. The greens mix makes excellent fresh eating in salads, but if you find this batch too spicy for you, a quick cook will mellow out the flavor. Try adding the greens mix to soup or lightly sautĂŠing the greens with olive oil, a dash of salt and any other preferred spices.

Lilacs overlooking the fields

I love the German variation on potato salad. With its olive oil and vinegar base, it is much lighter and brighter than the Midwestern mayonnaise based recipes. This brightness allows the herbs to really shine in this dish. When parsley comes into season, you can also try substituting the dill for bacon and parsley. Enjoy!

German Potato Salad with Dill (From Bon AppĂŠtit)

Ingredients

6 Servings

2 pounds small potatoes, halved and scrubbed

Âź cup olive oil

½ onion, chopped

Kosher salt and freshly ground black pepper

Âź cup apple cider vinegar

4 scallions, sliced

2 tablespoons fresh dill, chopped

1teaspoon caraway seeds, toasted

Preparation

Step 1: Cover potatoes with cold salted water, bring to a boil, and cook until tender; drain and transfer to a large bowl.

Step 2: Meanwhile, heat oil in a medium skillet over medium-high heat. Add onion; season with salt and pepper. Cook, stirring often, until soft, about 5 minutes.

Step 3: Remove from heat and mix in vinegar. Add to potatoes along with scallions, dill, and caraway seeds and toss, crushing potatoes slightly; season with salt and pepper.

You can also try recipes from past newsletters like:

Dilly Veggie Dip

Spinach and Quinoa Patties

Rhubarb Vanilla Compote


Finding Archived Recipes

You can now search previously posted Food Farm recipes using the “Tag Cloud” below. If you click an ingredient below it will take you to a list of the newsletters that include a recipe using that ingredient. Larger text means there are many recipes using that ingredient while smaller text means fewer recipes have been tagged so far.

Arugula Basil Beet Bell Pepper Broccoli Brussels Sprouts Cabbage Carrot Carrot Leaf Cauliflower Celery Chard Chives Cilantro Cucumber Delicata Squash Dill Dressing/Sauce Egg Garlic Garlic Scape Green Bean Green Onion Kale Leek Mint Napa Cabbage Onion Parsley Parsnip Pepper Potato Radish Red Onion Red Potato Rutabaga Scallion Shallot Spinach Thyme Tomato Turnip Winter Squash Yellow Onion Zucchini

We hope this will help you explore new and old recipes and take advantage of the produce in your share!

Chester, the Great Pyrenees and Food Farm guardian

For the farm crew,

Starr

Summer CSA Week 15

There is no denying: fall is in the air. Mornings and evenings are cool, and dark. The first few red and yellow leaves are turning with the cold nights, and the ones that have fallen already have that spicy-autumn smell. I love that smell. I love fall arriving, and picking up a caramel apple, making soups again (after a too-hot for soup summer!) and maybe having a back-yard fire to two.

I also have some trepidation about this fall. As far as the farm goes, we have seen a lot of rain towards the end of the season many years in a row, and it leads to some nail biting when thinking of getting into the fields to harvest our main storage crops. We’re hoping for a drier fall this year, but it’s quite dry right now so we wouldn’t mind a little rain.
We are also hoping for a full and healthy crew. It is hard to not look ahead, as if through a fog, and worry about what will happen when, inevitably, people start coming down with colds or worse and are waiting for COVID tests back.

Looking ahead to fall is difficult this year, because of all the uncertainty. The cold will bring more distance between friends and family, and many of the things we look forward to about this time are not happening (like Friday football and Harvest Fest). I am resolute to find fun where I can, and to sit around with friends outside while I still can, too.

I hope your week, and first bit of fall, start off well as you are replenished with fresh veggies. Maybe you will turn them all into a healthy, hearty soup to warm you and yours up.

For the farm crew,

Karin

In your share this week:

Green Beans – Broccoli – Carrots – Chard – Cucumbers – Dill – Onions – Red Peppers – Russet Potatoes – Daikon Radish – Tomatoes – Zucchini


Vegan Zucchini Fritters from The Crowded Kitchen

For the Lemon Cashew Cream:

  • 1 cup cashews, soaked for at least 1 hour and up to 4 (the longer the better)
  • 3 garlic cloves
  • 2 lemons, zested
  • ½ tsp salt
  • 2 tsp white miso paste
  • You may need Âź cup cashew soaking water or more, to blend

For the Zucchini Fritters:

  • 4 cups grated zucchini
  • 3 tbsp scallions, finely chopped
  • 2 tbsp basil, finely chopped
  • 1 1/2 tbsp flax meal + 3 tbsp water
  • 1/4 cup gluten free all purpose flour
  • 1/4 cup plain gluten free regular or panko style bread crumbs
  • 2 tbsp nutritional yeast
  • 1 1/2 tsp salt plus 1/2 tsp more to season mixture
  • 1/2 tsp garlic powder
  • 1/4-1/2 tsp ground pepper
  • 1 tbsp of olive oil for cooking

For the Lemon Cashew Cream:

  1. Drain the cashews, reserving soaking water in case you need it to blend the sauce. 
  2. Combine the cashes, garlic, all the lemon zest, juice from one lemon, salt, and miso in a blender. Blend until smooth, adding cashew soaking water one tablespoon at a time if necessary to achieve a creamy sauce.  

To make the fritters:

  1. Grate zucchini. Place in a mesh colander inside a bowl and toss well with 1 1/2 tsp of salt. Let sit for about 35 minutes. Be sure to toss and squeeze the moisture out of the zucchini 3-4 times while it is sitting. (The zucchini will release a lot of moisture!) After 35 minutes, transfer zucchini to a clean dish towel and squeeze out as much remaining moisture as possible.
  2. While the zucchini is sitting, mix together the flour, bread crumbs, nutritional yeast, 1/2 tsp of salt, garlic powder, and 1/4 tsp of pepper.
  3. Add flax meal to a bowl with water, stir and let sit for 20 minutes. Stir once or twice.
  4. Add zucchini to a bowl with scallions and basil. Mix well, then add in all of the dry ingredients. Add flax + water mixture and mix well. Let mixture sit at room temp for 20-30 minutes so the flax egg has some time to bind the mixture together. Taste and adjust salt and pepper if desired.  
  5. Heat a large nonstick fry pan over medium heat. Add 1 tbsp of oil. Use a 1/4 cup measuring cup so patties are the same size. Form into a ball in your hand and press flat, about 1/4-1/2 inch thick. Cook for 4- 5 minutes on each side over medium heat, until golden brown and crispy.

Gluten-Free Pan Pizza from King Arthur Flour

Crust

  • 1 3/4 cups all purpose gluten free flour
  • 2 tablespoons nonfat dry milk
  • 1/2 teaspoon baking powder
  • 1 teaspoon salt
  • 1 teaspoon xanthan gum
  • 2 teaspoons sugar
  • 1 cup lukewarm water
  • 2 tablespoons olive oil + 1 1/2 tablespoons olive oil, for the pan
  • 1 3/4 teaspoons instant yeast

Topping

  • 6 ounces mozzarella, grated (about 1 1/4 cups, loosely packed)*
  • 1/3 to 1/2 cup tomato sauce or pizza sauce, homemade or store-bought
  • freshly grated hard cheese and fresh herbs for sprinkling on top after baking, optional*
  • Veggies from the Food Farm!!

Instructions

  1. To make the crust: Place the dry ingredients (except the yeast) into the bowl of a stand mixer or large mixing bowl. Mix until thoroughly blended.
  2. Place the warm water, 2 tablespoons olive oil, yeast, and a scant 1 cup of the dry mixture into a small bowl. Stir to combine; a few lumps are OK. Set aside for 30 minutes or so, until the mixture is bubbly and smells yeasty.
  3. Add this mixture to the remaining dry ingredients and beat on medium-high speed for 4 minutes using a stand mixer or electric hand mixer. The mixture will be thick and sticky, but not elastic; it won’t feel like regular yeast dough. Note: You must use an electric mixer to make this dough; mixing by hand doesn’t do a thorough enough job.
  4. Cover the bowl and let the dough rest for 30 minutes or so.
  5. Pour the remaining 1 1/2 tablespoons olive oil into a cast-iron skillet that’s 10” to 11” diameter across the top, and about 9” across the bottom. Tilt the pan to coat the bottom with the oil. This heavy, dark pan will give you superb crust; but if you don’t have a cast-iron pan, use a 10” round cake pan, a 9” square pan, or other oven-safe, similar-sized, heavy-bottomed skillet.
  6. Scrape the dough from the bowl into the pan. Starting at the center of the dough and working outward toward the edges, use your wet fingers to press the dough to fill the bottom of the pan.
  7. Let the dough rest, uncovered, for 30 minutes.
  8. While the dough is resting, place one rack at the bottom of the oven and one toward the top (about 4″ to 5″ from the top heating element). Preheat the oven to 375°F.
  9. When you’re ready to bake the pizza, scatter about three-quarters of the mozzarella (a scant 1 cup) evenly over the crust. Cover the entire crust right to the edge, so the cheese will become deep golden brown and crispy as the pizza bakes. Dollop small spoonfuls of the sauce over the cheese (putting the cheese on first will prevent the top of the crust from getting soggy under the sauce) then sprinkle on the remaining mozzarella.
  10. Bake the pizza on the bottom rack of the oven for 20 to 22 minutes, until the cheese is bubbling and the bottom and edges of the crust are golden brown (use a spatula to check the bottom). If the bottom is brown but the top still seems pale, transfer the pizza to the top rack and bake for 3 to 5 minutes longer. On the other hand, if the top seems fine but the bottom’s not browned to your liking, leave the pizza on the bottom rack for another 2 to 4 minutes. Home ovens can vary a lot, so use the visual cues and your own preferences to gauge when you’ve achieved the perfect bake. You’ll notice the pizza has shrunk away from the sides of the pan, and perhaps deflated a bit; that’s OK.
  11. Remove the pizza from the oven and place the pan on a cooling rack. Carefully run a spatula between the edge of the pizza and side of the pan to prevent the cheese from sticking as it cools. If desired, sprinkle freshly grated hard cheese and fresh herbs over the hot pizza. Let the pizza cool briefly, and as soon as you feel comfortable doing so transfer it from the pan to a cooling rack or cutting surface. Serve pizza hot or warm.
  12. Store any leftovers, well wrapped, in the refrigerator for a day or so; freeze for longer storage.