December Winter Share

Now is the time of year when most people are flipping through store catalogs in hopes of finding the perfect gift to give their loved ones this holiday season. If any of you were curious, I’m a Queen Bee tomato seed packet. It’s a one size fits most so should be pretty easy to find. Figured I’d throw in some farming humor to lighten the holiday stress.

Here on the farm, we’re also flipping through catalogs, making our lists and checking them twice. This is the time of year when seed companies send out their catalogs.

If you’re thinking to yourself, “it is way too early to start thinking about seeds,” the farm crew would agree with you! The arrival of the seed catalogs is always creates a mix of emotions, from the dread we feel when a favorite variety is discontinued to the excitement of trying new and improved varieties, but mostly we’re not ready to start thinking about it yet with the harvest season only a few weeks in the rearview mirror. Onions and shallots, the first crops to be seeded, won’t be started for another 3 months, but farming never takes a break, so here we are thinking about what new varieties can provide better flavor, quicker maturity, better production, more disease resistance, or better drought tolerance. All of these qualities help us provide quality and consistency to members, and we’re grateful to the seed breeders who help us out, even though we’re not quite ready to turn our minds to spring. 

Thankfully this isn’t our first rodeo. At this point, we have a pretty good idea of what vegetables, and more specifically which varieties, we will be growing next year. This makes it a lot easier for ordering types and quantities of seeds. Every year there are a few new (or new to us) varieties that we trial. Those take a little longer for us to order since we like to do more research on each of the varieties to see which one will be the best fit for what we need.

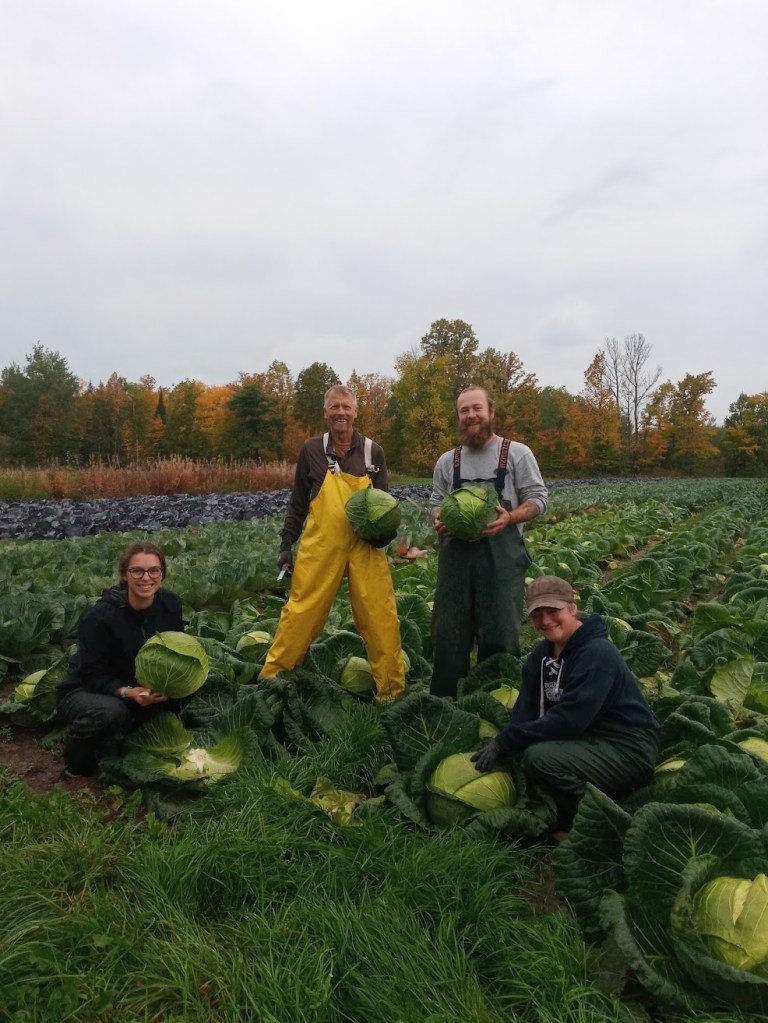
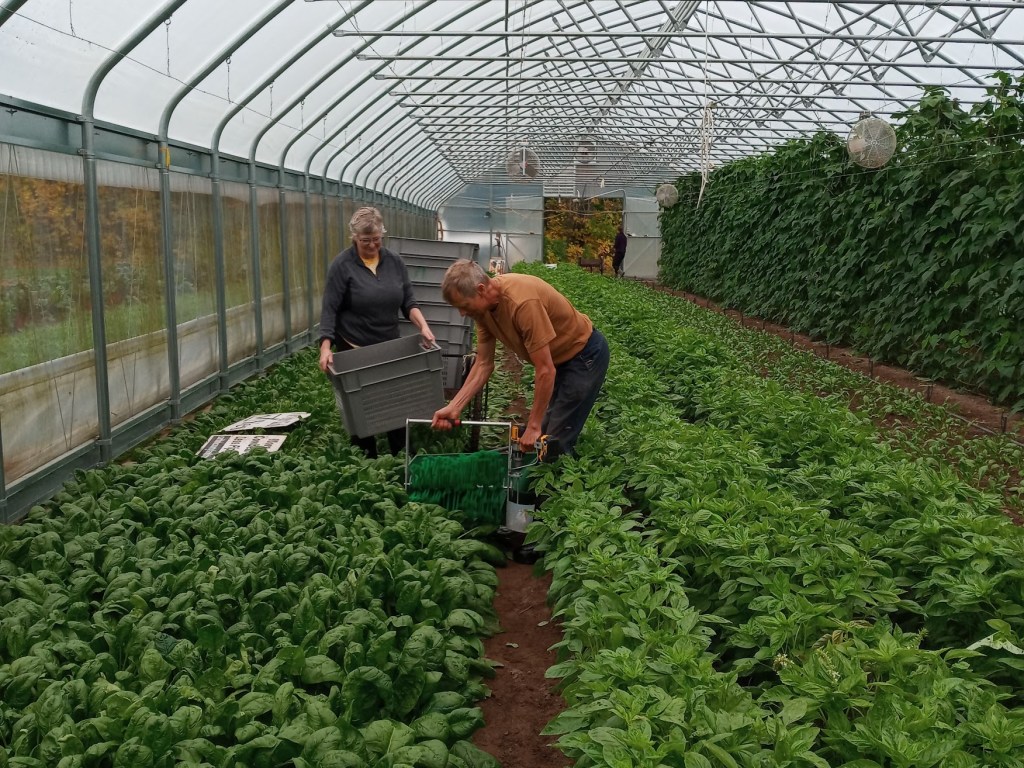
When we aren’t planning for next year, the farm crew is busy in the pack shed bagging and boxing vegetables for our retail orders, washing carrots, or finishing up various tasks to make sure the farm is ready for winter.

In your share this month:

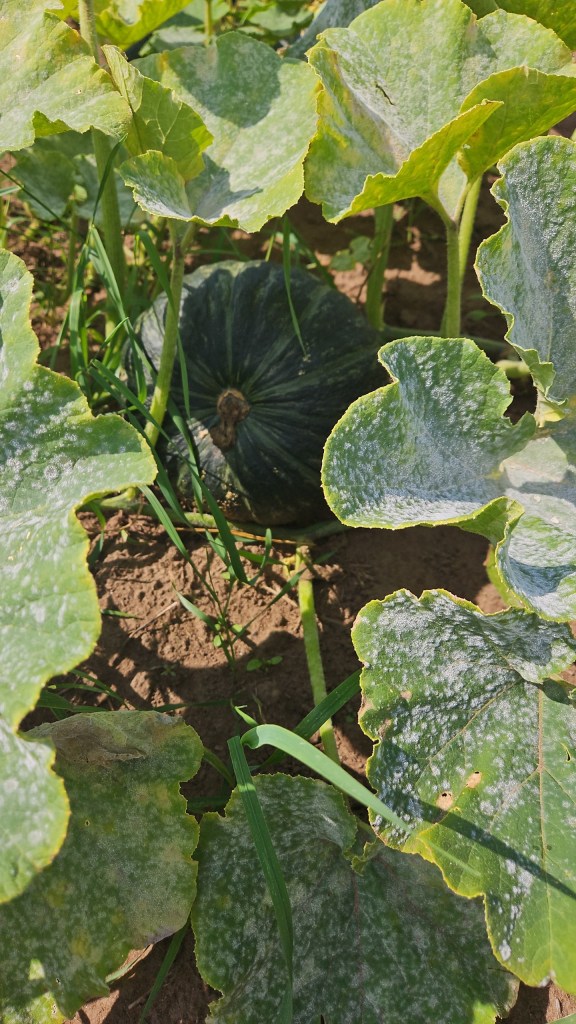
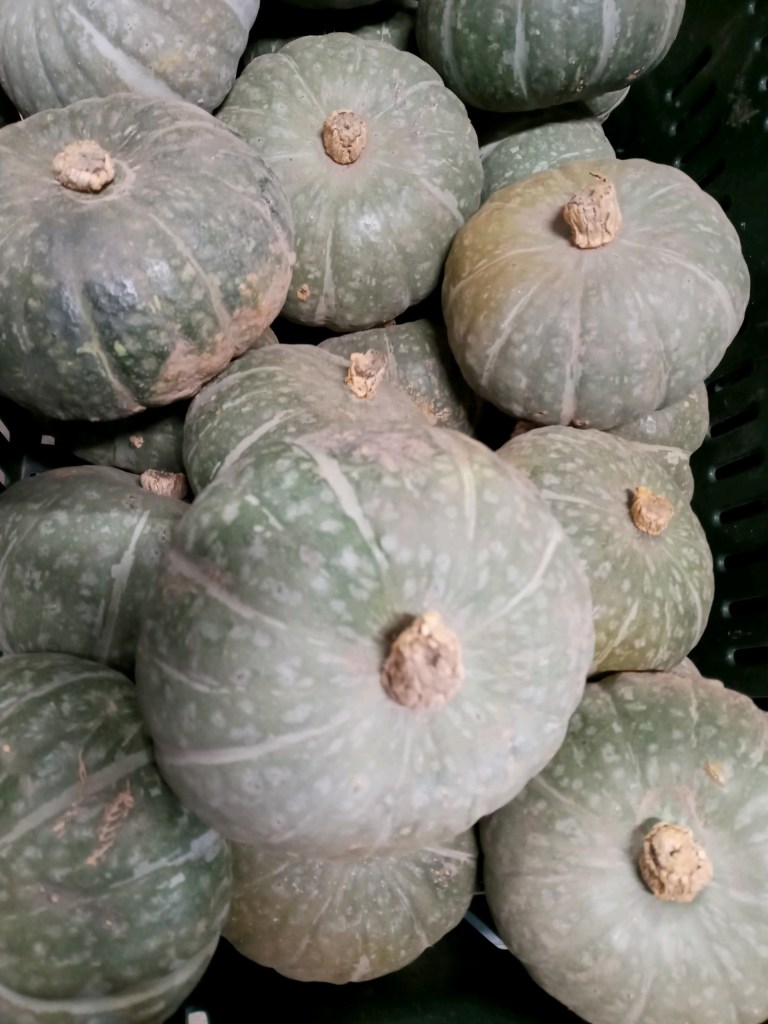
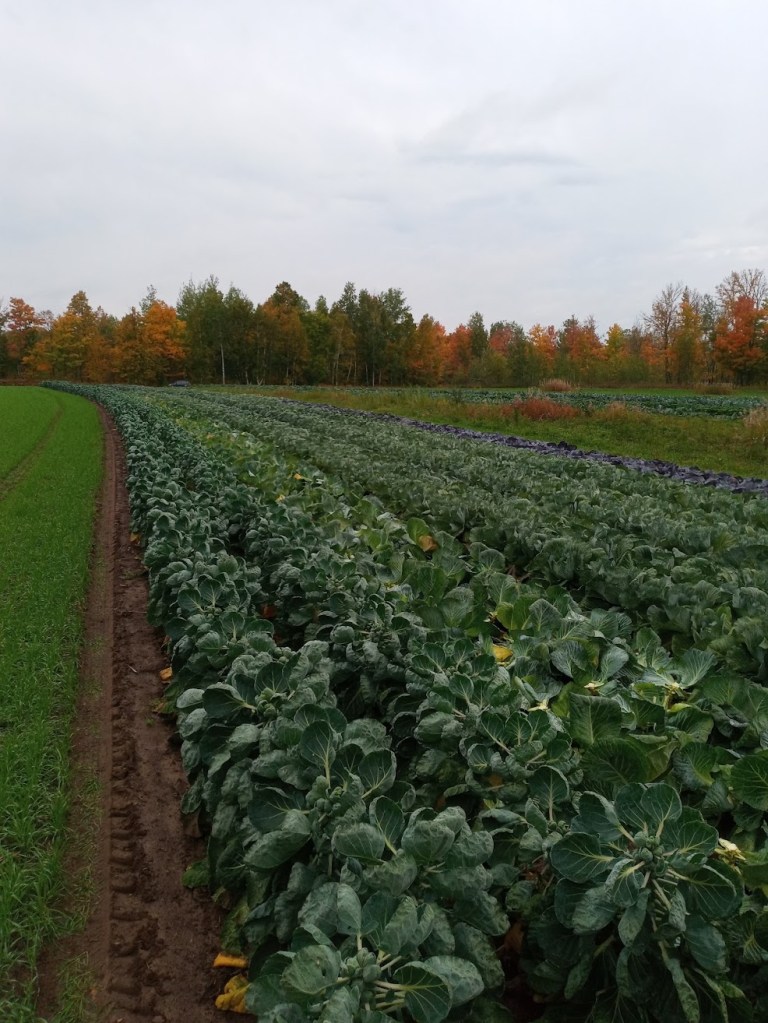
Delicata and Kabocha squash – Green Cabbage – Chioggia Beets

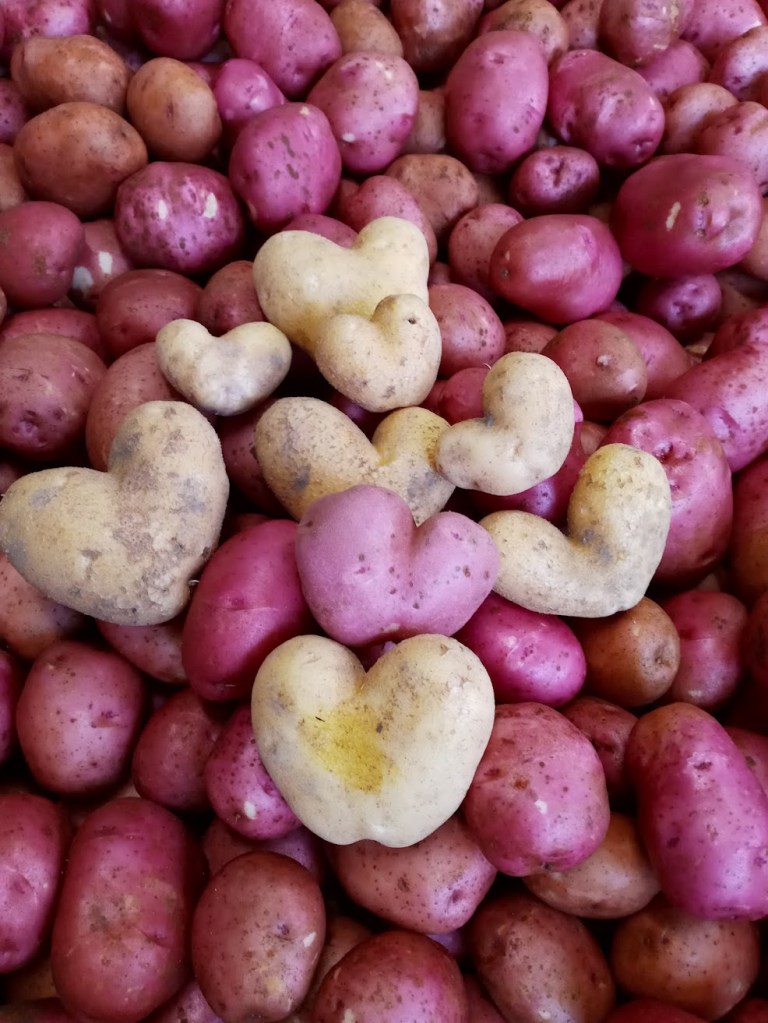
Fingerling and Russet Potatoes – Red and Yellow Onions – Carrots – Garlic

Beet Salad

▢1 tablespoon (15 ml) fresh lemon juice

▢1 tablespoon (15 ml) white wine vinegar

▢2 teaspoons (10 ml) liquid honey or sugar

▢¼ teaspoon fine sea salt

▢2-3 tablespoons (30-45 ml) extra-virgin olive oil, or use pistachio oil for a special treat

▢1 pound (450 g) Chioggia beets, peeled

▢¼ cup (40 g) thinly sliced red onion

▢4 cups (170 g) mixed salad greens

▢¼ cup (60 g) fresh crumbled goat cheese

▢2 tablespoons chopped pistachios

  • Whisk the lemon juice, vinegar, honey (or sugar) and salt in a small bowl until honey is dissolved. Gradually pour in the oil and whisk to combine.
  • Shave the beets into ribbons with spiral slicer, or into thin discs with a mandoline or sharp knife.
  • Put the beets in a salad bowl with the onion and greens. Drizzle with enough dressing to coat, about 2 tablespoons, and toss together. Sprinkle the goat cheese and pistachios over the salad. Serve with additional dressing on the side.

Caramelized Squash

  • 4pounds winter squash, such as acorn, butternut, honey nut, kabocha or red kuri
  • 4medium shallots
  • ¼cup extra-virgin olive oil
  • Salt and black pepper
  • ¼cup unsalted butter
  • ¾cup raw nuts, such as hazelnuts, pecans or walnuts, chopped
  • ½cup maple syrup
  • ½teaspoon ground cinnamon
  1. Adjust oven rack to the lower-third position and heat to 425 degrees. Halve the squash lengthwise and use a spoon to scoop out the seeds and any stringy bits. Cut each half into 3- to 4-inch wedges. Halve the shallots lengthwise through the roots, leaving the skin on.
  2. Toss together the squash, shallots and olive oil on a large rimmed baking sheet. Season with salt and pepper, toss once more and spread out the squash and shallots as much as possible. Roast until nicely browned and tender, 30 to 40 minutes total, flipping the squash and shallots after 15 to 20 minutes.
  3. While the squash roasts, melt the butter in a small saucepan over medium. Add the nuts and cook, stirring occasionally, until the nuts have slightly darkened and smell very toasty, 3 to 5 minutes. Remove from heat and stir in the maple syrup and cinnamon. (The toasted nuts may be made up to 3 days in advance and stored in a sealed container in the fridge. Reheat in a small saucepan over medium-low before serving.)
  4. Arrange the squash and shallots on a platter or large plate and spoon the toasted nuts and their syrup on top.

For the farm crew,

Jennifer

Summer CSA Week 16

It feels like June was just a few days ago, and here we are in our 16th week of CSA shares! Maybe that’s because the weather the last few weeks have felt more like Summer than Fall. Sunday night’s chill was a nice reminder that it is indeed officially Fall, but we’re looking forward to another beautiful week to get things done.

For most people, this time of year means slowing down and getting cozy as the days shorten and the nights lengthen. For those of us lucky people in agriculture, we won’t be slowing down any time soon. The Fall equinox marks the start of the busiest time of year for us (and also the perfect time to sign up for a Winter Share)!

Over the next few weeks, we’ll say goodbye to our Summer crops such as melons, zucchini, and cucumbers. Those fields will soon go from green to brown, then back to green as we make our final harvests, till in the plants, and seed our cover crop. We will begin to say hello to more of our Fall and winter crops such as leeks, rutabaga, parsnips, and winter squash. This also means we will be spending lots of time cleaning and sanitizing storage space to put all of these crops for the winter. 

With the colder nights, this time also begins to signal a flavor change in the crops. The colder weather causes some crops to convert a portion of their starches into sugars. The addition of sugar causes the freezing point of the water inside the plant to be lowered. This now means the plant can withstand colder temperatures before it’s ruined. The plants most known for this are carrots, kale, and beets. This is one of the reasons why we have a spring/Summer planting and a fall planting of these veggies. The early planting becomes available at a time when we are all excited (and possibly a little desperate) to add some color back into our food after the long winter. The early plantings add more of an earthy flavor to dishes, while the later planting adds a little bit more sweetness. Getting to enjoy the flavor changes in the vegetables is one of the many beautiful things about farming.

Another exciting change happening on the farm is that our smaller hens have started laying eggs! For those of you with an egg share, you may have already noticed this last week when one or two smaller eggs showed up in your share. These are thanks to our little ladies who are just starting to lay. We got these hens back in early May. They’ve spent the last 4 months growing and exploring different areas of the farm. They start out in a fully enclosed shed to keep them warm, and protected from the elements. After about a month, we move them to a mobile chicken coop that we place over one of our fields we aren’t currently using. This allows them to start getting used to the wind and change in temperature while still being fully protected from the rain. It also introduces them to insects and vegetation. It’s beneficial for the farm because they are producing free fertilizer for us which adds nutrients back into the field. Once the hens get bigger and start showing signs of being adventurous (aka once they start trying to escape), we move them to a fenced off area with a larger mobile coop. This allows them to roam around in a larger area during the day, but still have a sheltered place to protect them from the rain and sun. The mobile coop also houses their egg boxes, food and water. It also is fully enclosed with a lockable door for protection at night. The Farm has a surprisingly high amount of coyotes, wolves, raccoons, and foxes close by, so keeping the chickens locked up at night is a must! 

In your shares this week:

Carrots – Cucumber – Northeaster Pole Beans – Leeks – Lettuce – Melons – Onions – Parsley – Red Peppers – Russet Potatoes – Winter Squash – Tomatoes – Zucchini

Winter Squash Crumb Cake

Streusel:

1/2 packed cup of light brown sugar

1/2 c flour

1 tsp pumpkin spice blend

1/4 cup unsalted butter cut into cubes

Cake:

1 cup light brown sugar

2 large eggs

2 cups pureed squash

1/4 unsalted butter, melted

1/4 cup neutral oil

1 Tbsp pumpkin spice blend

1/2 tsp salt

1 tsp baking powder

1/2 tsp baking soda

1 1/2 cups flour

1.  Heat oven to 350 degrees.  Grease 8″ square or 9″ round baking pan and line with parchment paper.

2.  Make the streusel:  in a small bowl, combine sugar, flour, spice and salt.  Add the butter then pinch the butter into the four mixture with your fingertips until the mix forms pebble-size crumbs.

3.  Make the cake:  in a large bowl, whisk the sugar and eggs until pale and foamy, about 1 minute.  Add the squash puree, melted butter, oil, pumpkin spice and salt.  Whisk until combined and smooth.  Whisk in the baking powder and baking soda then whisk in the flour. 

4.  Transfer the batter to the prepared pan, smooth the top and tap on the counter a few times to release any large air bubbles.  Sprinkle the streusel evenly over the top.

5.  Bake the cake until puffed and golden and a toothpick inserted into the center comes out clean (40-45 minutes).  Set the cake in the pan on a rack to cool.  After about 15 minutes remove the cake from the pan and set it on a rack to cool completely

Turkish- Style Braised Leeks

  • 3 large leeks, cleaned well and trimmed, whites and tender green parts sliced into ¼-inch rounds
  • 2 to 3 carrots, peeled and cut into ¼-inch rounds
  • 3 large garlic cloves, minced
  • Kosher salt and black pepper
  • 1 teaspoon cumin
  • 1 teaspoon Aleppo pepper
  • 2 tablespoons rice, I used Arborio rice, rinsed
  • Juice and zest of 1 large lemon
  • ½ cup chopped fresh parsley
  • Olive oil
  • In a medium saucepan heat ¼ cup extra virgin olive oil over medium-high heat until shimmering. Add the leeks, carrots, and garlic and season with kosher salt, black pepper, and the spices. Toss around and cook for about 5 to 7 minutes, stirring regularly as needed until the leeks and carrots soften just a bit.
  • Add 2 cups of water, the rice, and lemon juice. Bring the water to a boil, then lower the heat and let simmer for 15 to 20 minutes or until the rice is fully cooked and the vegetables are fully tender.
  • Let the leeks and carrots cool down to room temperature, then stir in the fresh parsley, lemon zest, and another good drizzle of extra virgin olive oil.

Tomato-Green Bean Salad with Chickpeas, Feta and Dill

salt and pepper

3/4 lb green beans (cut diagonally into 1in pieces)

2 Tbsp lemon juice

1 Tbsp red wine vinegar

1 garlic clove (or less), minced finely

3 Tbsp olive oil

2 cups tomatoes cut into bite sized pieces

2 cups cooked chickpeas (1 can), drained

1/2 cup crumbled feta

2-3 Tbsp roughly chopped dill

pinch of dried oregano

1.  bring medium saucepan of water to boil over high heat.  Add 1 tsp salt then green beans.  Cook until beans are tender-crisp (about 2 minutes).  Transfer to large bowl of cold water.  Drain in colander and blot dry.

2. Make dressing by combining lemon juice, vinegar, garlic, pinch of salt and some black pepper in a small bowl.  Whisk in the olive oil.

3.  In a large salad bowl, combine tomatoes, beans and chickpeas.  Season to taste with salt and pepper.  Add dressing and stir to coat.  Add feta and toss once more.  Let marinate for 10-15 minutes before serving.

4.  Before serving, sprinkle generously with dill and oregano

For the farm crew, 

Jennifer

Summer CSA Week 15

Last week the crew was working hard to get more veggies out of the field. We have been slowly working to get onions out of the field and onto racks in covered areas to start drying for storage. We haven’t been in a rush to do this because last week and this week’s weather are the perfect chance for the onions to keep drying naturally in the sun. The warm, dry air helps to dry the onions and start creating the protective outer skin. Once we move the onions into sheltered areas, we point industrial fans on them 24/7 to ensure they dry properly. As a farm that always strives to be sustainable, using the sun and wind instead of all that electricity is huge for us.

Last week we also used the harvesters to dig up more potatoes and carrots. We got out red potatoes, russets, white potatoes, yellow potatoes, orange carrots, and the first of the purple carrots. This also marked an exciting time for the farm crew as it meant it was time to bring the forklift out of summer storage. We use our forklift in the root cellar to stack pallet boxes as a way to better conserve space, so we have enough room to fit all the veggies. In the Summer, we put the forklift in our shop to keep it away from the damaging humidity of the root cellar, and because veggies are being harvested only in the quantities we need, so nothing needs to be placed in the root cellar for extended storage. Now as we start to empty fields and get ready for fall harvest, the root cellar is filling up fast. Soon we will have pallet boxes of veggies stacked all the way to the ceiling.  

This week might still feel like Summer, but your box is starting to signal that Fall is coming. We are excited to introduce our Winter Squash! This crop was a little touch and go for a while. They didn’t appreciate the excess rainfall and cool early summer temperatures, but as things dried out the vines grew really large, and looking great. For a while, we were worried we might end up with 15 pound squashes. Our fears were soon squashed (there’s always time for food puns) as the vines developed powdery mildew. This is a common fungal disease that attacks many plants.  It appears as small, white-ish gray spores on the leaves of the plant. It starts out very small, so small it is sometimes hard to spot at first, but once the plant is infected, it can spread like crazy. Soon the small spots take over the whole plant, and begin to spread to neighboring plants. We mostly find this on our Winter Squash and our zucchini. Once the plant is infected, there is no way to cure it, you can only slow down the spread…for a while. The powdery mildew on the winter squash ended up spreading and killing all the foliage in the last couple of weeks, but the squash themselves appear to be absolutely the perfect size! 

Soon we will start the task of getting all the Squash out of the field. Once they are out, the majority of them need to cure first before they can be eaten. The curing process does two things for the squash 1) it hardens the outer skin which will allow it to last for multiple months in storage. 2) starches change to sugar and releases excess moisture which concentrates the flavor to make an even more delicious and sweet squash. Acorn squash is the earliest to mature of the varieties we grow, so it’s the first we send. In fact, if acorn squash is cured at high temperatures it can cause it to rot faster. This is why we are able to send this wonderful veggie to all of you now rather than making you wait for it. 

It is a very fun veggie to experiment with. Many people like to stuff it since the shape of it naturally looks like a bowl. Other people roast it for salads, puree it as an easy, veggie packed pasta sauce, or grate it up to add to muffins or other baked goods. My favorite way to make acorn squash ( or any winter squash for that matter) is to turn it into gnocchi. I’ve added my favorite recipe below if you’re feeling adventurous and want to give it a try.

In your share this week:

Northeaster Pole Beans – Basil – Beets – Broccoli – Red Cabbage – Carrots – Cucumber – Garlic – LettuceMelon – Onion – Hot Pepper – Sweet Pepper – Yellow Potatoes – Tomatoes – Zucchini

Acorn Squash Gnocchi with Basil Pesto

  • 1 medium sized acorn squash just shy of 1 lb.
  • 2 tablespoons olive oil
  • 1/2 cup all purpose flour plus 1 tablespoon for the rolling and cutting gnocchi
  • 1 tsp kosher salt
  • 1/4 tsp ground black pepper
  • 2 tablespoons prepared basil pesto 

Roast Squash for Gnocchi

  • Pre-heat oven to 400 degrees. Line a baking sheet with foil. Cut acorn squash in half, on the vertical, and scoop out seeds. Drizzle olive oil onto the flesh side and season with salt and pepper. Place on baking sheet, flesh side down, and roast about 30-40 minutes, until squash is fork tender. Allow to cool at least 10 minutes before scooping out flesh into a bowl.

Preparing Gnocchi Dough

  • To prep the dough, bring a large pot of water to a low boil, season with salt like you would to cook pasta. In the bowl of roasted squash, stir together with flour until smooth. The dough should feel about as pliable as pizza dough, meaning it should still hold together but doesn’t feel dry. If the dough is too wet, add a little more flour (about a tablespoon at a time) until you get to that desired consistency. This will help in the rollout of dough.
  • Roll and cut dough: Working in batches, scoop up a loose handful of dough and roll out onto a lightly floured work surface. Roll the dough into the shape of a log, about 3/4 inch wide. Using a sharp knife, slice into 1 inch pieces and place on parchment. Repeat with the remaining chunks of dough until all gnocchi is cut.

Cooking Gnocchi

  • Working in two or three batches (depending on number of gnocchi), add gnocchi to the large pot of boiling water and allow to cook 2-3 minutes until the gnocchi floats to the top. Using a spider strainer (or slotted spoon), remove gnocchi and allow to drain on a baking sheet lined with paper towels. Repeat until all gnocchi are cooked.
  • Toss gnocchi together with a couple of tablespoons of basil pesto, using a little gnocchi water to thin out sauce as needed and grate a generous amount of parmigiano-reggiano. Enjoy immediately.

Apple and Beet Muffins

Instructions

  • First, cook the beets
  • Preheat the oven to 350℉. Line a muffin pan (if not using a silicone one) and set aside.
  • Using a hand or box grater, shred the cooked beets and apples.
  • In a large mixing bowl, whisk together the unsweetened applesauce, beaten eggs, olive oil, maple syrup, and vanilla extract.
  • In a measuring cup or separate bowl, combine the whole wheat flour, baking powder, baking soda, cinnamon, and salt.
  • Add the dry to ingredients to the bowl with the wet ones. Stir to combine.
  • Fold the shredded beets and apples into the batter. Mix until evenly distributed.
  • Spoon the batter into the prepared muffin pan, filling each cavity about ¾ of the way.
  • Bake for 23 to 25 minutes until a toothpick inserted in the center of a muffin comes out clean.
  • Let the muffins cool for a few minutes, then enjoy!

For the farm crew,

Jennifer

December Winter Share

Happy December! We hope everyone is finding time to be with the ones who matter most, whether it’s those in our everyday lives or those we reconnect with during this time of year. The holiday season offers the perfect opportunity to embrace the bounty of winter CSA vegetables!

Despite the calendar signaling December, the absence of snow and the uncharacteristic warmth persist, creating a season that has felt more like an extended November than the traditional winter landscape we anticipate. There has even been talk in the root cellar about the possibility of using spray-on snow around the windows to help re-create that quintessential winter charm. This idea may give the crew a good laugh, but it won’t do much for the fields…

Indeed, aside from being beautiful, snow brings a handful of advantages to farm fields:

Insulation: Acting as a natural blanket, snow shields the soil and crops from extreme cold, maintaining more stable temperatures. This prevents frost from penetrating too deeply and safeguards the roots of plants.
Moisture Source: As snow melts, it provides a slow and steady release of moisture into the soil, replenishing water levels essential for the growth of crops, especially in the drier winter months.
Nutrient Retention: Snow can capture and retain nutrients, gradually releasing them into the soil as it melts. This nutrient-rich water aids in enriching the soil for future planting seasons.
Erosion Prevention: Snow cover can mitigate soil erosion by shielding the surface from wind and water runoff, preserving the topsoil and preventing nutrient loss.
Microbial Protection: Snow cover can offer a protective environment for beneficial soil microbes and organisms, supporting a healthier soil ecosystem.


In Your Share This Month:

Beets – Green Cabbage – Orange & Purple Carrots – Garlic – Red & Yellow Onions

French Fingerling & Russet Potatoes – Kabocha & Delicata Squash


Roasted Winter Squash with Vanilla Butter (by Kay Chun from Food&Wine.com)

Yield: 6-8 Servings

4 tablespoons unsalted butter, at room temperature
1/2 vanilla bean, seeds scraped
4 pounds mixed squash (such as kabocha, Delicata and Red Kuri)—scrubbed, seeded and sliced 1/2 inch thick
3 sage sprigs, plus 24 small sage leaves
Kosher salt
Pepper
1/4 cup extra-virgin olive oil

  1. Preheat the oven to 425°. In a small saucepan, combine the butter and vanilla bean and seeds and cook over moderately low heat, stirring occasionally, until the butter is deeply browned and has a nutty aroma, about 5 minutes. Discard the vanilla bean.
  2. On a baking sheet, drizzle the squash and sage sprigs with the vanilla browned butter, season with salt and pepper and toss to coat. Roast for about 25 minutes, turning once, until the squash is golden in spots and tender. Arrange on a serving platter. Discard the sage sprigs.
  3. In a small saucepan, heat the olive oil. In batches, fry the sage leaves over moderate heat, stirring, until crisp, about 2 minutes. Using a slotted spoon, transfer the sage to a paper towel-lined plate to drain. Scatter the fried sage over the squash and serve.

Moroccan Grated Carrot & Beet Salad (by Elise Bauer from SimplyRecipes.com)

This recipe comes to us upon recommendation from one of our Ely members. She said her son used dried cherries instead of raisins, and added pistachios as well!

Yield: 4 Servings

2 cups grated carrots (from about 3 carrots)
1 cup grated fresh beets (from about 1 medium-sized peeled beet)
1/2 cup golden raisins
1/2 teaspoon paprika (sweet, not hot)
1/4 teaspoon ground cumin
1/4 teaspoon cinnamon
Small pinch salt
Small pinch cayenne
2 tablespoons lemon juice
2 teaspoons honey
2 tablespoons sliced fresh mint leaves

  1. Rinse the grated beets, combine with carrots and raisins:
    Place the grated carrots in a medium sized serving bowl.
    Place the grated beets into a sieve and briefly rinse with cold water. This will rinse away a little of the excess beet juice that may otherwise color the whole salad beet red. Pat dry with a paper towel.
    Then add to the bowl with the carrots. Add the raisins. Stir to gently combine.
  2. Make the dressing:
    In a small bowl, whisk together the paprika, cumin, cinnamon, salt, and cayenne. Then add the lemon juice and honey and whisk until smooth.
  3. Dress the carrots and beets, let sit for an hour:
    Drizzle over the the carrots and beets, then gently fold until the carrots and beets are lightly coated. Let sit for an hour before serving, either chilled or at room temperature, for the dressing to seep into the carrots and beets.
  4. Stir in sliced mint before serving:
    Right before serving, stir in a couple tablespoons of sliced fresh mint leaves. Garnish with fresh mint.

For the farm crew,
Charlie

November Winter Share

The first winter CSA delivery is upon us! For our new members: Welcome to our veggie community and thank you for choosing local and organic 🙂 For our season to season members: Thank you for your continued support and welcome back! It’s been a little over a month since our last summer share box was delivered. We hope the short break in your Food Farm veggie action has not been too much to bear. Despite a pause in share deliveries, the farm crew has done anything but pause…

Next year’s garlic crop all tucked in for the winter

It has been a mad dash to get us set up for winter! A short three weeks ago we were digging the last of our storage potatoes from the ground (a remarkable feat in its own regard), thinking to ourselves “How in the heck are we gonna get 35 tons of carrots, four tons of beets, a couple tons of parsnips and a few thousand pounds of rutabagas from the rapidly cooling earth before it freezes in four days?”

Well… we did things a little differently this year, that’s how.

Usually, during peak harvest time, we operate with two crews. One crew harvesting and another washing. This year, because of the hard freeze during the last week of October, we used all hands on deck (along with some volunteers from Fond du Lac Community College) to harvest everything as quickly as we could. Just in the nick of time, we packed the veggies in pallet boxes and stacked them to the ceiling of our root cellar with dirt still clinging to their skin. We then began November by pulling it all back out, one pallet box at a time, to gently roll or tumble through our washing assembly. We took the occasional break to knock ice free from the spray nozzles and it was a chilly process indeed, but Dave brought lots of extra winter gear and by the end the veggies were shining in vibrant shades of orange, purple & parsnip. It also helped that Janaki kept us fed and happy with hot cocoa, cookies & pizza during our lunch breaks. The morale boost was at times needed.

All in all, it was a year filled with joys and challenges, but we got through it and at the end of the day, that’s farming!


In your share this month:

Beets – Brussels Sprouts – Carrots – Celery – Onions

Red & Yellow Potatoes Delicata & Sunshine Winter Squash – Tatsoi


Thriving under the shelter of Catherine’s hoop houses, the celery reached rather impressive height this fall. We had to cut the stalks in half just to fit them in the share box. Because of this, we went ahead and left the leaves on – something we don’t often do in the summer shares. The leaves present a concentrated flavor that is more robust than the stalks. They can be used in a variety of dishes, including soups, stocks, salads, and as a garnish. Or maybe you would like to include them in your stuffing this holiday season… Included below is a recipe for just that!


Classic Thanksgiving Stuffing (by Anna from crunchycreamysweet.com)

Yield: 6 servings

1 fresh French bread or 10 cups dried cubed bread
1 ½ sticks unsalted butter, divided
1 ½ cup chopped celery
½ cup celery leaves, chopped
1 large yellow onion, chopped
1 tablespoon chopped fresh sage
1 tablespoon fresh thyme
1 tablespoon chopped fresh rosemary
1 teaspoon salt
½ teaspoon black pepper
1 ½ cups broth chicken, turkey or vegetable

  1. If you are using fresh French bread: slice it into ½″ slices, then each slice into ½″ cubes. Place bread cubes on a baking sheet (most likely you will need at least two sheets), in a single layer, then let it air-dry in room temperature overnight OR preheat oven to 250° F and bake bread for 30 to 35 minutes, shaking the pans every 15 minutes. If using already dried bread, place 10 cups in a large bowl.
  2. Preheat oven to 350° F. Butter a 13″x9″ baking dish or 3 quart baking dish. Set aside.
  3. In a skillet, melt 1 stick (½ cup) of butter. Add chopped onion and celery. Saute until veggies are soft.
  4. Add veggies to bread.
  5. Add herbs, celery leaves, salt and pepper. Stir in.
  6. Add broth and stir in gently. Place in buttered dish.
  7. Melt remaining butter and pour over the stuffing.
  8. Cover the dish with aluminum foil.
  9. Bake in preheated oven for 30 to 35 minutes. You can uncover it for the last 5 minutes to toast up the top pieces, if desired.
  10. Let cool for 10 minutes, then serve.

P.S. – For the best texture, bake the stuffing the same day you will serve it. You can prep everything the day before: dry the bread and sauté veggies. The next day just assemble everything and bake!


Bacon & Brussels Sprout Salad (from pinchofyum.com)

Yield: 8-10 servings

Dressing:
1 lemon
1 orange
1-2 tablespoons of apple cider, maple syrup or honey (something for sweetness)
1 shallot, minced
1/2 cup olive oil
1/2 teaspoon salt & pepper to taste

Salad:
4 dozen brussels sprouts
1 cup almonds
6 slices of cooked bacon, crumbled or chopped
1 cup grated parmesan cheese

  1. Combine the lemon juice, orange juice, apple cider, and shallots in a small bowl. Add the olive oil in a steady stream and whisk for a minute or two, until it becomes creamy-looking.
  2. Slice the brussels sprouts with a mandoline, taking care of your fingers! and slicing them as thin as possible. This works best when you hold the stem, slice from the top, and stop with a little bit left at the bottom, discarding the remaining bottom stem part since it’s not very leafy anyway. The thinner the shreds, the better the salad! Toss the shreds and loosen them with your fingers to they separate and fluff a little bit.
  3. Pulse the almonds in a food processor until finely chopped.
  4. Toss the brussels sprouts, almonds, bacon, cheese, and dressing together. Serve immediately or within a few hours of tossing.

This next recipe is rather simple, but I haven’t been able to get enough of it in the last couple weeks. I like it as a side, just as the recipe below says, but I also think it would make a great salad if combined with a bed of greens & dressing of your choice.

Delicata, Beets & Goat Cheese w/ Papitas

Yield: 2 servings

1 delicata squash
2 beets
olive oil
salt & pepper to taste

2 tablespoons toasted & salted pepitas
1-2oz. goat cheese

  1. Preheat the Oven: Preheat your oven to 400°F (200°C).
  2. Prepare the Squash: Wash the delicata squash and cut it in half lengthwise. Scoop out the seeds using a spoon. Then, slice the squash into half-moon shapes about 1/2-inch thick. Leave the skin on as it becomes tender when roasted.
  3. Prepare the Beets: Wash the beets thoroughly to remove any dirt. If the beets are large, you can peel them, but small to medium-sized beets can be roasted with the skin on for easy preparation. Cut the beets into even-sized pieces to ensure uniform cooking. You can either slice them into rounds or cube them, depending on your preference.
  4. Arrange on a Baking Sheet: Lay the squash slices in a single layer on one baking sheet & the beet cubes on another. Make sure not to overcrowd to ensure even roasting. Drizzle with olive oil and season with a generous dusting of salt and pepper.
  5. Roast in the Oven: Roast the delicata squash in the preheated oven for approximately 20-25 minutes, or until the edges are golden brown and the squash is tender. You can flip the slices halfway through the cooking time for even browning. Roast the beets for about 30-40 minutes, or until they are fork-tender. Larger pieces may require more time.
  6. Serve and Enjoy: Once the vegetables have cooled, serve with goat cheese & pepitas!

For the farm crew,

Charlie

Summer CSA Week 18, 2023

This is the last Summer Share of the season! Please remember to bring any empty boxes back to your pickup site by next Thursday, the 19th. Winter Shares begin on November 13th.

As the chill of autumn sets in, we find ourselves on the threshold of our last CSA distribution of the summer season. As with most endings, it’s a bittersweet feeling.

The CSA boxes are one of our most straightforward connections to the community. The weekly bounties we harvest, wash, package, and deliver give us an opportunity to share the farm with all of you – something we miss during the longer stretches of the winter.

This time of year also signals the ramping up of end-of-season chores! There’s lots to do on the farm to get ready for winter. A big part of our business is caring for and delivering storage crops throughout the non-growing months. The short break between summer and winter CSA gives us just enough time to pull the cabbage, beets, potatoes, daikon radish, rutabaga, parsnips, & carrots from the fields before they freeze!

A big thanks is also in order to all of the volunteers who helped us in countless ways throughout the season. With so much work still to go, I don’t want to start reflecting too early, but I think it is safe to say “Thank you so so much Patricia, Sandy, Betsy, Rollie, Deb, Diane, Pat & any other names I may be forgetting while typing this.” Your work is really appreciated!


In your share this week:

Beets – Brussel Sprouts – Green Cabbage – Carrots – Garlic – Lacinato Kale – Onions

Parsley – Red Peppers – Potatoes – Rutabaga – Winter Squash


Now you’ve had some winter squash in your share this year, but this week will be your first time seeing green kabocha. You can think of it as a cross between a pumpkin and sweet potato. Its flesh has a sweet, earthy flavor that is denser and drier than the other varieties you’ve tasted this year. This makes it an excellent candidate for soups, stews & curries. It is quite dry right now, but should gain moisture as it cures over the next couple of weeks.

Also joining the lineup are tender brussel sprouts, small but mighty in flavor, and rutabagas!

Usually I am a strong endorser of leaving the skin on vegetables when eating. I do this in part for flavor, in part for valuable nutrients and fiber, but mostly out of laziness. Peeling can feel like an unnecessary chore… the worst kind. This year’s rutabaga is not quite as nice and smooth as usual, due in part to stress from our hot dry summer, and may benefit from being peeled.


Roasted Kabocha Squash Soup, from Simply Recipes

Yield: 4-6 Servings

1/2 large kabocha squash, seeded (about 3 to 4 pounds for the 1/2 squash)
2 1/2 tablespoons extra virgin olive oil, divided
Salt
2 cups chopped or sliced onions
2 ribs celery, sliced
3 cloves garlic (about 1 tablespoon)
1 (2-inch) piece fresh ginger, peeled and grated
1/2 teaspoon ground cumin
1 teaspoon ground coriander
4 cups chicken stock
2 teaspoons kosher salt
1/4 teaspoon black pepper
Lime juice, for serving
Chopped fresh cilantro, optional for serving

  1. Set the oven to 400°F.
  2. Roast The Squash: Use a heavy chef’s knife or cleaver (it helps if you have a rubber mallet as well) to cut the kabocha squash half into a few large pieces. (Kabocha squash is thick and meaty and can be a challenge to cut. So take care! Make sure the squash is stable on your cutting board before you start to cut it. You can create a flat side by shaving off a bit of the outside in one spot.)

    Scoop out the seeds (you can toast them like pumpkin seeds!) and stringy insides. Place the squash pieces on a foil, baking parchment, or Silpat-lined roasting pan. Rub 1 tablespoon olive oil over all sides, and sprinkle with salt.

    Put the squash pieces skin side up on the pan. Roast for 45 to 60 minutes until completely cooked through. The pieces should be soft and caramelized at the edges. Remove from oven and let sit.
  3. Sauté the onions, celery, garlic, ginger, and spices: While the squash is cooling, heat the remaining 1 1/2 tablespoons of olive oil on medium-high heat in a large (4- to 6-quart) thick-bottomed pan. Add the onions and celery. Lower the heat to medium and cook until softened, 8 to 10 minutes.

    Add the garlic, ginger, cumin, and coriander and cook 2 minutes more.
  4. Add the squash, stock, salt, and pepper, then simmer: Once the squash is cool enough to handle, remove and discard the skin. Place the roasted kabocha squash flesh into the pot with the onions and celery mixture. Add the stock, salt, and pepper. Increase the heat to high to bring the soup to a simmer. Then, lower the heat to low. Partially cover and cook 8 to 10 minutes.
  5. Purée the soup: Remove from the heat. Use an immersion blender (or work in batches with a standing blender, only filling the blender bowl 1/3 of the way each time) to purée the soup.

    Add more salt to taste. Sprinkle with lime juice and chopped cilantro to serve.

Maple-Roasted Brussel Sprouts and Rutabaga with Hazelnuts, from Martha Stewart

Yield: 5 Servings

½ cup pure maple syrup
2 ½ tablespoons extra-virgin olive oil
1 tablespoon fresh lemon juice
Coarse salt and freshly ground black pepper
2 pounds rutabaga, skin removed and cut into 1 ½-inch pieces (5 cups)
¾ pound brussels sprouts, trimmed and halved lengthwise
1 ounce toasted hazelnuts, chopped (⅓ cup)

  1. Preheat oven to 400 degrees. Whisk together maple syrup, oil, lemon juice, and 1/4 teaspoon salt in a large bowl. Add rutabaga, and toss.
  2. Transfer rutabaga and all but 2 tablespoons glaze to a rimmed baking sheet (leave remaining glaze in bowl). Spread rutabaga in a single layer, sprinkle with 1/4 teaspoon salt, and roast for 35 minutes, tossing halfway through and making sure rutabaga is spread toward the edges of pan.
  3. Raise oven temperature to 450 degrees. Toss brussels sprouts with remaining glaze in bowl and 1/4 teaspoon salt. Remove sheet from oven, and add sprouts. Toss, and spread in a single layer. Roast vegetables, tossing every 5 minutes, until glaze is very thick and vegetables are deep golden brown, about 20 minutes. Season with pepper and sprinkle with hazelnuts.

For the farm crew,

Charlie

Summer CSA Week 17, 2023

It appears that we’ll be experiencing a couple of unexpectedly warm days following the rainy spell that persisted throughout last week. It sure would have been nice to have received some of this rain a little more spaced out and during the summer months, but the plants seem to be hanging on nonetheless. After a bout of rain, it’s essential for plants to have an opportunity to dry off to prevent the onset of disease. Rain can leave leaves and stems damp, creating an ideal environment for fungal and bacterial pathogens to thrive. If moisture lingers on plant surfaces for extended periods, it can weaken the plant’s defenses, making it more vulnerable to infections. Adequate air circulation and sunlight play crucial roles in allowing plants to dry naturally, effectively reducing the risk of diseases.

We spent the day Friday harvesting storage cabbage, the biggest one we got was 14 1/2 pounds! Fortunately we sell about 6000 pounds per year for our friends over at Spirit Creek Farm for their delicious kraut and kim chi, and a few restaurants also use it for their cole slaw and kraut as well. So don’t worry, you won’t be getting any cabbages that big in your share!


In your share this week:

Broccoli – Carrots – Cilantro – Cukes – Leeks – Onions Red Peppers

Hot Peppers – Potatoes – Spinach – Delicata Squash – Tomatoes Pumpkins!


A note regarding this week’s spinach: There has been a recent congregation of cut worms gathering in the greenhouse that our current planting of spinach calls home. While it may be disheartening to discover cutworms feasting on our spinach plants, there’s no need to despair. Cutworms are a common garden pest known for their big appetite, but their presence doesn’t render your spinach inedible. With proper care, you can still enjoy the greens. Simply pick out any affected leaves that we may have missed in the commotion of harvesting, give the remaining spinach a good wash to remove any potential residue, and it will be perfectly safe to include in your meals.


Apple Spinach Salad, from Gimme Some Oven

Salad Ingredients:

5 ounces fresh spinach
2 small apples, cored and thinly sliced
half of a small onion, thinly sliced
1/2 cup chopped walnuts, toasted
1/3 cup dried cranberries
3 ounces crumbled goat cheese

Apple Cider Vinaigrette Ingredients:

1/4 cup extra virgin olive oil
2 tablespoons apple cider vinegar
2 teaspoons honey
1 teaspoon Dijon mustard
1 small garlic clove, peeled and minced
a generous pinch of salt and black pepper

  1. Make the vinaigrette. Combine all of the vinaigrette ingredients together in a bowl and whisk vigorously (or shake them together in a mason jar) to combine.
  2. Toss the salad. Add spinach, apples, onion, walnuts, dried cranberries, and half of the goat cheese to a large bowl.  Drizzle with the vinaigrette, and toss to combine.
  3. Serve. Serve immediately, garnished with the remaining goat cheese, and enjoy!

Delicata Squash Gratin, from Feasting At Home

Yield: 8 servings

2lb delicata squash
2 tablespoons olive oil or butter
2 medium leeks, thinly sliced
4 garlic cloves, rough chopped

15 sage leaves, chopped (8 more for crispy sage leaf garnish – optional)
1 cup heavy cream (or sub coconut milk)
1/2 teaspoon salt and peppers
1/2 teaspoon nutmeg
1/2 teaspoon onion powder, optional

1/4 cup water
3 ounces gruyere cheese (or sub parmesan)
1/2 cup walnuts, chopped

  1. Preheat oven to 375°
  2. Prep Delicata: Thinly slice the squash into 1/8 -inch thick rounds. When you get to the seeds, scoop them out and continue slicing.
  3. Cook the Leeks: Slice and rinse the leeks- the moisture here will help them soften. Heat oil or butter in a large skillet over medium heat. Sauté the leeks, for 8-10 minutes, covering part way through so they soften. Add the garlic, sage and a pinch of salt, cook 2-3 more minutes. Turn heat off.
  4. Whisk: the cream with the salt, pepper, nutmeg and onion powder in a medium bowl.
  5. Layer: Grease a large 9 x 13-inch baking dish or 11-12 inch round baking dish. A big shallow pan is best to ensure even cooking. Grease the pan, add 1/4 cup of water to the bottom of the pan. Layer with squash overlapping slightly. Sprinkle with half of the sautéed leeks. Drizzle with 1/3 cup cream mixture. Sprinkle with one ounce of Gruyere (about 3-4 tablespoons grated). Add the 2nd layer of squash- using up any misshapen pieces here. Scatter with the remaining leeks. Drizzle with 1/3 cup cream mixture and sprinkle with grated gruyere cheese. Add the final layer of squash, overlapping and pressing down so not domed in the middle. Drizzle the remaining cream mixture over top, lightly sprinkle with cheese and the walnuts. Give the pan a little shake, press down in the center again so gratin is level, not domed. Cover, using parchment first as a barrier, under the foil if the foil touches the top of the gratin.
  6. Bake 45 minutes covered. Uncover, confirming the delicata is tender using the tip of a knife, then bake at 400 F uncovered, 15 minutes until beautifully golden
  7. To make the crispy sage leaf garnish, heat 1-2 tablespoons oil or butter in a pan over medium heat, add 8 whole sage leaves, saute each side 30 seconds or so until crisp (try a tester first) and place on a paper towel to cool for a couple of minutes. Arrange over the gratin.

For the farm crew,

Charlie

Summer CSA Week 16, 2023

Greetings, fellow Food Farm enthusiasts! As we bid adieu to the vibrant greens of summer and warmly embrace the gold & red arrival of autumn, we find ourselves hard at work in the changing landscape of the farm. With Saturday’s equinox marking the official start of fall, we ready ourselves for the snow to fly. Hopefully not too soon though, as there is a lot left to harvest! With only two more summer CSA shares remaining (after this week), the harvesting has shifted more and more to winter storage items. Last week, the big to-do was clipping and bringing all the squash varieties in from the field. This year we grew six different varieties: Delicata, Kabocha (green, winter sweet & sunshine), Acorn & pumpkins!

Apart from our usual CSA packing and retail orders, the squash took just about the entire week to complete. It is one of the more physically demanding tasks we do here and that is much in part to the sheer weight that needs to be moved to and fro – over 20,000 pounds of squash! Many hands do not make light work in this case, although it is always fun when the whole crew gets to work together on a singular task.


In your share this week:

Northeaster Beans – Broccoli – Carrots – Celery – Cucumbers – Lettuce – Onions

Red Peppers – Red Potatoes – Spinach – Winter Squash


New to the shares last week and featured again this week are the northeaster beans. Upon being greeted by them in the greenhouse, it is easy to imagine someone dreaming up the fairytale of Jack and the Beanstalk. The vigorous pole beans enthusiastically scale the framing of the greenhouse, almost as if they would keep climbing and climbing until out of sight if not for the layer of plastic containing them to safe picking heights.

This week’s share also includes what will likely be the last of the broccoli for the year. To celebrate I have included a recipe for broccoli cheddar soup that will help us feel extra cozy through all this dreary weather.


Ina Garten’s Butternut Squash Salad Recipe, from fool proof living

Yield: 4 servings

1 1/2 pounds winter squash, ¾ inch slices
1 tablespoon maple syrup
2 tablespoons + 1/4 cup olive oil, divided
2 teaspoons Kosher salt, divided
1 teaspoon coarsely ground black pepper, divided
3 tablespoons dried cranberries or raisins
3/4 cup apple juice or apple cider
2 tablespoons apple cider vinegar
2 tablespoons onion minced + dash of garlic powder
2 teaspoons Dijon Mustard
6-8 cups lettuce & spinach
1/2 cup walnut halves, toasted
1/4 cup shaved Parmesan cheese

  1. Prep the oven and squash seasoning: Preheat the oven to 400°F.
  2. Toss the squash: Place the squash on a baking sheet. Drizzle it with maple syrup and 2 tablespoons of olive oil. Sprinkle it with 1 teaspoon kosher salt, and ½ teaspoon black pepper. Toss to ensure that all of the squash is coated.
  3. Roast and turn: Place it in the oven and roast for 20-25 minutes until tender, turning once halfway through. In the last 5 minutes, add the cranberries.
  4. Make the vinaigrette: Place apple juice, cider vinegar, and minced onion + dash of garlic powder in a small saucepan and bring to a boil over medium-high heat. Cook for 6-8 minutes, or until reduced to 1/4 cup. Remove from heat.
  5. Finish the dressing: Off the heat, whisk in the Dijon mustard, 1/4 cup of olive oil, 1 teaspoon salt, and 1/2 teaspoon pepper. Whisk until emulsfied.
  6. Assemble the salad: Place the lettuce & spinach in a large salad bowl. Pour over the dressing and give it a big toss. Add the roasted butternut squash and cranberries.
  7. Finish and serve: Top it off with toasted walnuts and shaved Parmesan cheese. Taste and season with salt and pepper, if necessary. Enjoy!

Broccoli Cheddar Soup, from Gimme Delicious

Yield: 4 servings

4 tablespoons butter
1/2 medium onion, chopped
2-3 cloves garlic, minced
4 tablespoon AP flour
2 cups low sodium chicken or vegetable stock
1 teaspoon kosher salt
1/2 teaspoon black pepper
1/2 teaspoon paprika (or ground nutmeg), optional
3 cups broccoli florets (1 large head), cut into small pieces
1 large carrot, grated
2 cups half & half, heavy cream or milk
8 oz block grated cheddar cheese

  1. Melt butter in a large dutch oven or pot over medium-high heat. Add the onion and cook 3-4 minutes or until softened and light gold. Add the garlic and saute for another minute.
  2. Add flour and whisk for 1-2 minutes or until the flour begins to turn golden in color. Pour in the chicken stock, broccoli florets, carrots, and seasoning. Bring to a boil then reduce heat to medium-low and simmer for 15 minutes or until the broccoli and carrots are cooked through.
  3. Stir in half & half and cheddar cheese and simmer for another minute. Taste and adjust seasoning if needed.
  4. Serve with toasted crusty bread or in a bread bowl if desired.

For the farm crew,

Charlie

Summer CSA Week 17, 2022

It’s pumpkin time!

This is the penultimate CSA week! You will be receiving a carving pumpkin with your share this week. The pumpkins do not fit in the box, so please remember to grab your pumpkin when you pick-up. Enjoy carving jack o’lanterns! Try roasting your pumpkin seeds for a bonus tasty snack.

Next week will be the 18th and final CSA box for this season. It has been a joy having you as part of the Food Farm family!

Loading up pumpkins for Monday deliveries.

In your share this week:

Noreaster Beans – Broccoli – Carrots – Garlic – Leeks – Lettuce – Onion – Sweet Red Peppers (not hot) – Jalapeño Pepper (hot) – Yellow Potatoes – Daikon Radish – Delicata and Acorn Squash – Tomatoes – Parsley


Leaves changing at the farm


Universal Cream of Vegetable Soup

This recipe works for nearly any vegetable the farm grows – from celery to leeks to squash! This is also a great way to use up veggies from last week.

Ingredients

  • 4 tbsp butter
  • 6-8 cups coarsely chopped veggies (suggested starting point: 1 med onion coarsely chopped, 2 leeks, one clove garlic minced, 2 diced carrots,  2-3 stalks celery coarsely chopped, 2 potatoes diced. Add any other veggie like broccoli, cauliflower, or  squash to total 6 cups veggies.)
  • 1/4 cup flour.  
  • 4 cups broth (chicken, pork or veggie)
  • 1/2 to 1 cup milk or cream
  • Salt and pepper to taste

Instructions

  1. Sauté veggies in the butter 10-15 minutes (until tender but not brown).
  2. Add flour and cook for a couple of minutes.  
  3. Turn heat to high and add 4 cups of broth (chicken, pork or veggie), while constantly stirring as the soup thickens.  Bring to a boil.  
  4. Reduce heat to simmer the soup.  Cook, partially covered, until the vegetables are very tender (appx 30 minutes).   Using an immersion blender, food processor, or blender process the soup until smooth.  Add a little water or more broth if the soup is too thick and difficult to process.  
  5. Return soup to the pot and add 1/2-1 cups milk or cream.  Salt and pepper to taste.
  6. Can be served with grated cheese.

Recipe from Deb Rausch


What to do with Daikon Radish?!

This week you will find daikon radish in your box. Daikon is a large peppery variety of radish that is common in Asian cuisines. This crunchy vegetable can be eaten raw, pickled (like in traditional kimchi), or cooked.

Vietnamese Pickled Carrots & Daikon Radish (Đồ Chua)

Ingredients

  • 1/2 lb daikon radish*
  • 1/2 lb carrots*
  • 1 tbsp salt
  • 1/2 c boiling water
  • 5 tbsp granulated white sugar
  • filtered room temp. water
  • 4 tbsp distilled vinegar

Instructions

  1. Peel daikon and carrots, then cut with mandolin slicer medium to small matchsticks. Smaller cuts will pickle faster.
  2. In a large bowl, sprinkle with salt evenly and toss to coat. Soak for 15 minutes.
  3. Rinse thoroughly to remove the salt and in small hand-fulls, squeeze to remove as much moister as you can.
  4. Add to jars, filling almost to the top.
  5. Create the vinegar solution (brine) by boiling water then adding sugar. Mix to dissolve. Add vinegar.
  6. Pour this liquid evenly into your jars. If needed, add extra room temp water to barely fully submerge the veggies.
  7. Screw on the lids, store at room temperature until pickled to your taste, checking every 12 or 24 hours. It usually takes 2-5 days depending on the temperature.
  8. Refrigerate when ready, for up to 3 weeks, or until too sour or veggies lose their crunch.

*You can change the ratio of veggies to your preference and/or scale the recipe up or down depending on how much veg you have to pickle. Just make sure you have enough brine to completely submerge your veggies.

Based off recipe from Hungry Huy.

Check out other daikon recipes here.


For the farm crew,

Starr