Summer CSA Week 4

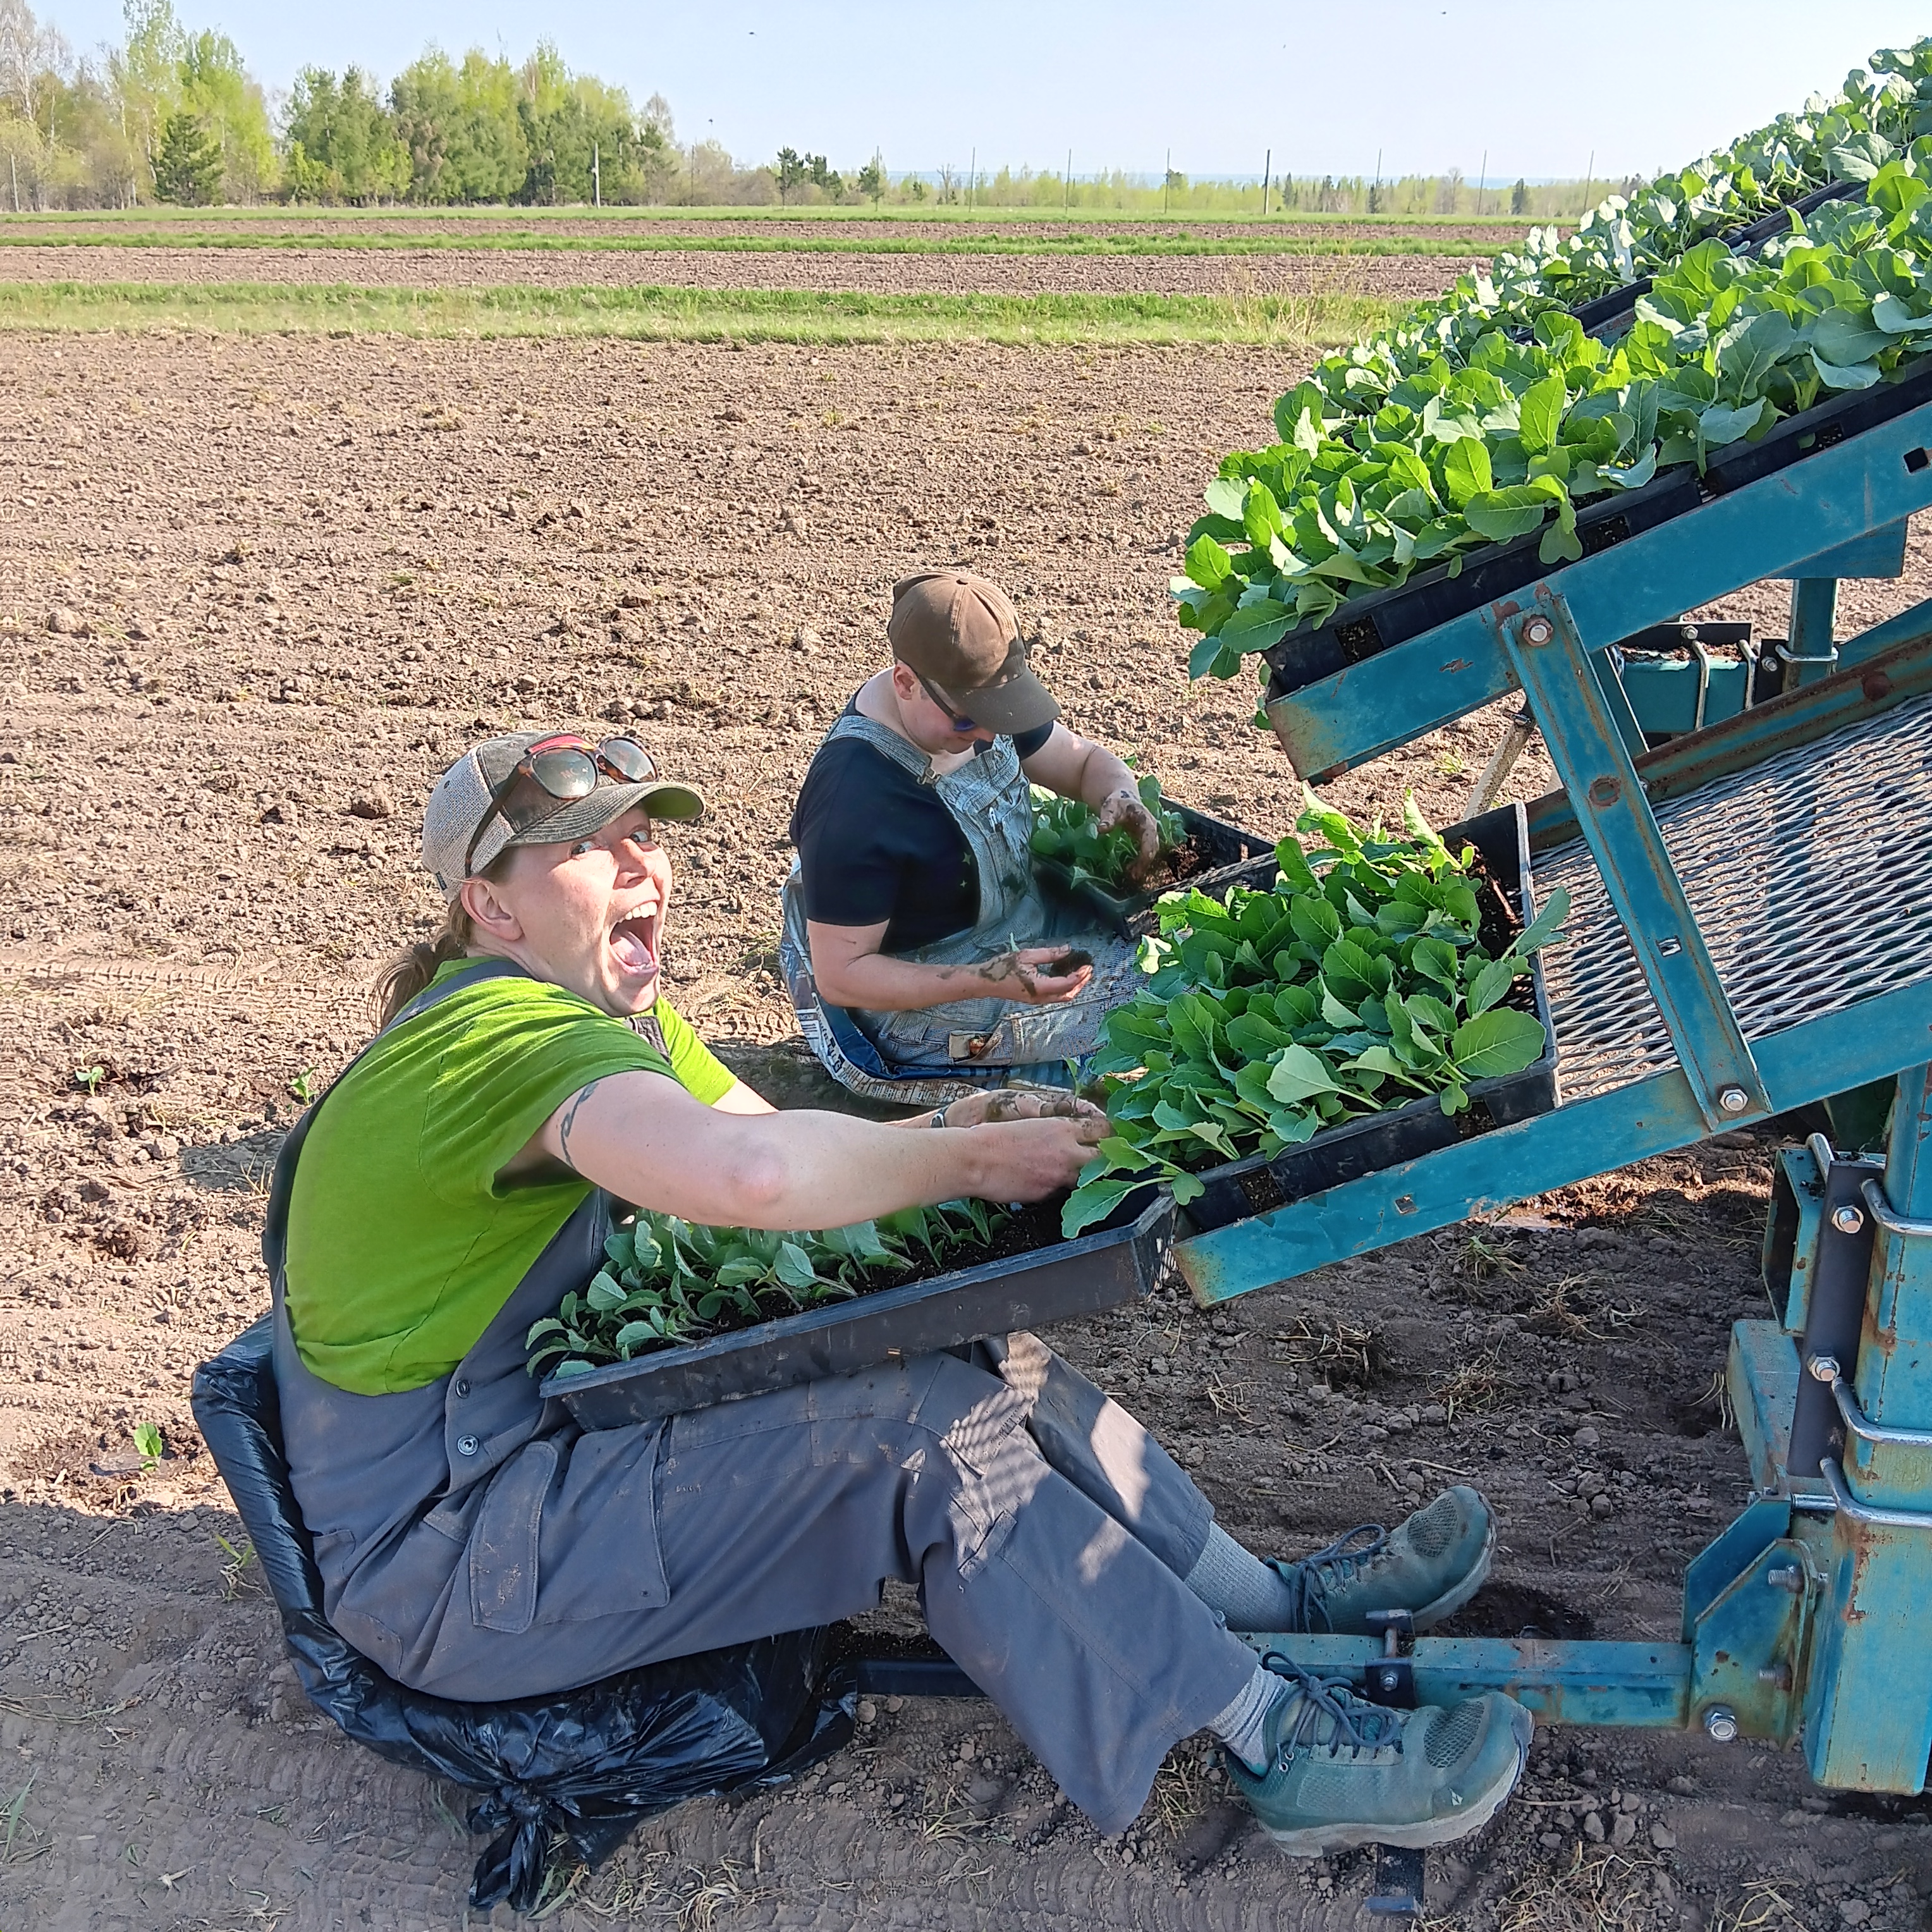
For all of us who put in a plea to Mother Nature, it worked…sort of. Last week felt like a normal week on the farm (if such a thing even exists in agriculture). This time of year, as the seasons shift from Spring to Summer, the farm crew’s agenda changes from spontaneous to more routine. It usually means weeding, row cover, weeding, bug hunting, and more weeding. Janaki and the crew were finally able to get out into the fields to do some much needed field work.

The drier weather gave us the opportunity to roll up all of our row cover. If you aren’t familiar with it, row cover is a permeable fabric that we lay over the top of our plants, specifically the brassicas. The row cover has multiple benefits, but the main ones we use it for on the farm are for deterring pests, and adding some extra early season heat. Broccoli is generally a cool season crop, but “cool season” generally refers to our normal weather in early June, while our first planting goes in the ground in mid-April. This is one of the reasons we are able to provide all of you with broccoli so early in the summer. It’s a large task to lay out the 30’x400′ sheets of row cover after each Spring planting of brassicas, but it’s an even larger task to roll all of it back up. 

We also made it across the road to weed through the first two plantings of outdoor carrots, and do some bug hunting while we were over by the potatoes. Each year we find ourselves fully experiencing what it means to work for an organic farm. It means that instead of the farm crew going out to spray insecticides on the plants, we take the organic approach. Think Ghostbusters, but instead of proton packs and cool jumpsuits, we get 5 gallon buckets and overalls. We go row by row, plant by plant, searching for the various life stages of the Colorado Potato Beetle. The eggs are by far the easiest to spot since they are bright orange against the deep green foliage of the plants. The larvae are a little more difficult, but get easier to spot as they go through the 4 larval stages. They start out really tiny with a black head and brown body, and slowly grow to almost being the size of an adult beetle. Once they’ve reached the adult stage, they get wings and stripes on their back which help them to be more noticeable against the plant. The worst thing about the Colorado Potato Beetle is how adaptable it is. These bugs overwinter in different life stages, don’t have to mate in the spring before they lay eggs, and aren’t even solely attracted to potato plants! Their favorites are potatoes and eggplant, they will also survive on other members of the nightshade family. This unfortunately meant we found quite a few on our outdoor tomatoes. Nothing the Beetlebusters (aka the farm crew) couldn’t handle. 

In case that wasn’t enough bug fun, we also noticed cucumber beetles on our greenhouse cucumbers, and squash beetles on our squash. We did identify a ‘new’ pest on the potatoes called a blister beetle. Mother nature is always keeping us on our toes. This summer is going to have a lot of bug pressure. We are coming off of a mild winter which didn’t get cold enough to kill most of the populations, then following that up with warm wet weather in the Spring/Summer, it’s the perfect recipe for a lot of bugs! This is all to remind you that if you ever find a little critter, or see some holes on your veggies, we promise it’s okay. It’s just nature’s way of reminding all of you that the veggies you receive each week are grown with love instead of harsh chemicals!

This week in your share: 

Arugula – Broccoli – Turnips – Radishes – Spinach – Green Onions

Garlic Scapes – Cucumbers – Green-top Carrots

This week we are giving you garlic scapes. If you’ve never used these before, they have the same flavor you get from fresh garlic, only a little milder and a lot less work since no peeling is involved. You can substitute scapes for fresh garlic in almost any recipe using 4-6 scapes = 1 clove of garlic.

One- Pan Orzo With Spinach and Feta

Ingredients

Yield:4 servings

  • 2tablespoons unsalted butter
  • 4large green onions, trimmed and thinly sliced
  • 2large garlic cloves, minced
  • 8ounces baby spinach leaves (8 cups), coarsely chopped
  • 1teaspoon kosher salt
  • 1¾cups low-sodium chicken or vegetable stock
  • 1cup orzo
  • 1teaspoon finely grated lemon zest (from 1 lemon)
  • ¾cup crumbled feta (3 ounces), plus more for garnish
  • ½cup frozen peas, thawed (optional)
  • 1cup chopped fresh dill, or use parsley or cilantro

PREPARATION

  1. Heat a 10-inch skillet over medium, then melt butter, 30 seconds to 1 minute. Stir in about three-quarters of the green onions (saving some of the green parts for garnish) and garlic, and cook until softened, stirring frequently, about 3 minutes.
  2. Stir in spinach, adding in batches if it doesn’t all fit in the pan at once, and ½ teaspoon salt. Continue to cook, stirring occasionally, until spinach is wilted, about 5 minutes.
  3. Stir in stock and bring to a simmer. Stir in orzo, lemon zest and remaining ½ teaspoon salt. Cover and simmer over medium-low heat until orzo is nearly cooked through and most of the liquid is absorbed, 10 to 14 minutes, stirring once or twice.
  4. Stir in cheese, peas (if you like) and dill, cover the pan, and cook for another 1 minute, to finish cooking and warm the peas. To serve, sprinkle with more cheese and the reserved green onions

Salmon Cakes With Arugula Salad

Ingredients

  • 1 pound salmon, skinned (canned will also work)
  • 2 tablespoons lemon juice, divided
  • 2 teaspoons Dijon mustard, divided
  • ½ cup finely chopped yellow bell pepper
  • 1 tablespoon finely chopped shallot
  • ½ teaspoon ground pepper, divided
  • ½ cup panko breadcrumbs
  • ½ cup crème fraîche or sour cream
  • ¼ cup buttermilk
  • 3 tablespoons chopped fresh dill
  • ½ teaspoon salt, divided
  • 2 tablespoons extra-virgin olive oil
  • 5 ounces arugula
  • 1 cup sliced radishes

Directions

  • Coarsely chop salmon and place half in a food processor. Add 1 tablespoon lemon juice and 1 teaspoon mustard. Process, scraping down the sides as necessary, until smooth. Add the remaining salmon, bell pepper, shallot and 1/4 teaspoon pepper and pulse until the mixture is combined but still chunky.
  • Transfer the salmon mixture to a medium bowl. Add breadcrumbs and stir until combined. Form the salmon into 4 patties, about 4 inches wide each, and place on a plate. Freeze for 5 minutes.
  • Meanwhile, whisk crème fraîche (or sour cream), buttermilk, dill and 1/4 teaspoon salt with the remaining 1 tablespoon lemon juice, 1 teaspoon mustard and 1/4 teaspoon pepper in a large bowl. Set aside 1/4 cup of the dressing for drizzling.
  • Heat oil in a large cast-iron or nonstick skillet over medium-high heat. Add the salmon cakes and cook, flipping once, until well browned and cooked through, 2 to 3 minutes per side. Transfer to a clean plate and sprinkle with the remaining 1/4 teaspoon salt.
  • Add arugula and radishes to the dressing in the large bowl. Toss to coat. Serve the salmon cakes on top of the salad, drizzled with the reserved 1/4 cup dressing

Carrot Top Salsa (The CSA Cookbook by Linda Ly)

2 cups minced carrot greens leaves and tender, stems only

3 tablespoons minced garlic

3 tablespoons minced fresh oregano

2 tablespoons minced jalapeño

One to one and a quarter cups olive oil

1/4 of a cup red wine vinegar

Zest and juice of lemon

Add all the ingredients to a medium bowl and stir to combine (use more or less oil to make a chunkier or thinner sauce).  Cover and let stand at room temperature overnight so the flavors intermingle.  This salsa gets better with age – so the carrot have turned to deep muted shade of army green is still good!!  Decant into a jar and refrigerate.  The oil will congeal in the cold temperature, but it does not affect the flavor. Bring the salsa to room temperature before serving.

For the farm crew,

Jennifer

Summer CSA Week 3

This week was filled with more rain. If any of you know Mother Nature personally, will you please let her know that we are good on rain, and could really use some sunshine. We would especially like to see some sun now that we’ve reached the official start of Summer! I’ve always been told that the Summer Solstice is the longest day of the year to allow us more time to find joy in the constant change that is happening around us.  

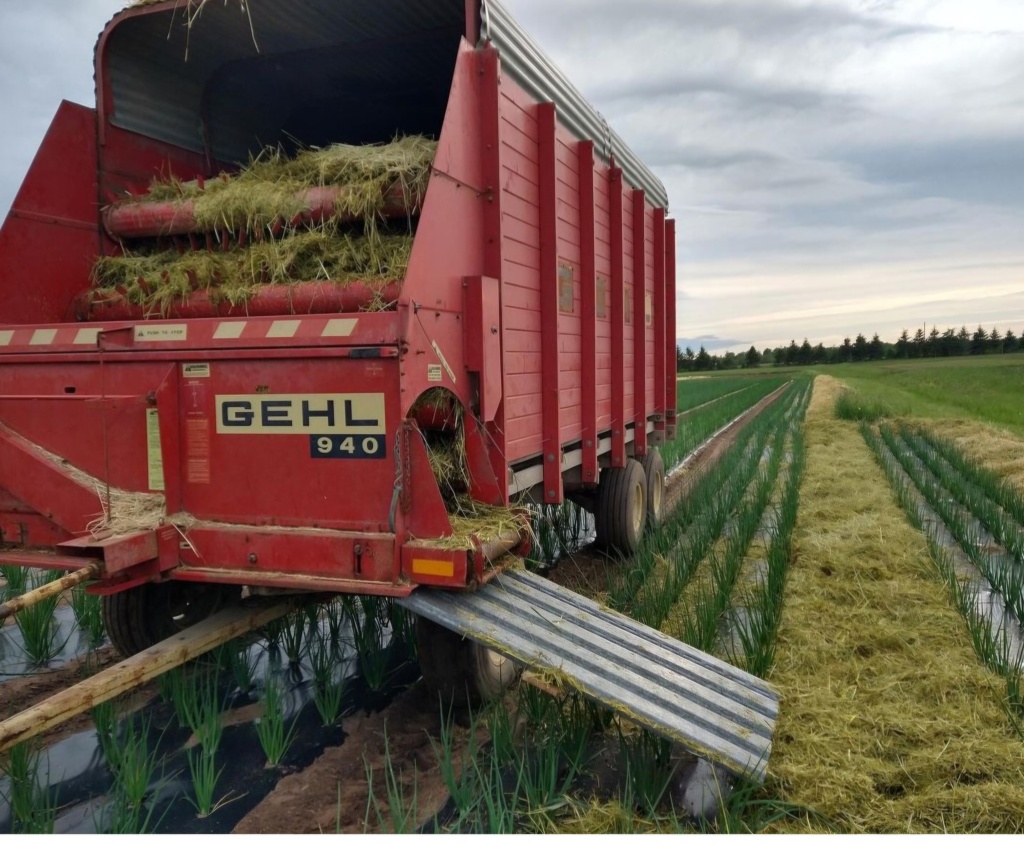
One of the big, and exciting changes that happened on the farm last week was the debut of the new chopper box (also known as a forage wagon). Thanks to all of your support, the farm was able to purchase a new to us, chopper box earlier this Spring. 

Every fall, after harvest, we plant a cover crop of rye. The rye goes dormant over the winter, and starts to grow again in the Spring. While it’s growing, it’s adding fertility to the soil, supporting soil life, suppressing weeds, and preventing soil erosion from happening (something we are really thankful for this year). Right before the rye goes to seed, we cut the rye, and it’s blown through a chute into the chopper box. An auger inside the box then pushes it out onto Janaki’s handmade ramp, and drops it in the aisleways between the onion beds. The crew then smooths it out to make sure it will be effective. This is what we spent most of last week doing. In the coming weeks, we will spread mulch around the outdoor tomatoes once they’ve dried off a bit. 

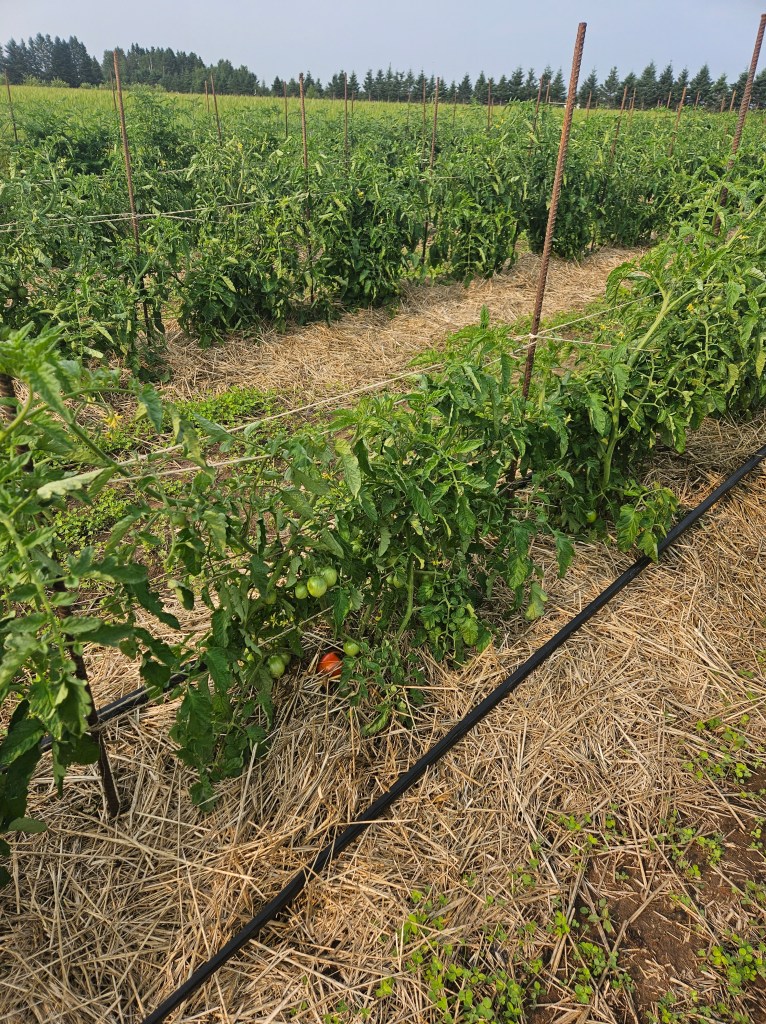
The rye mulch serves multiple purposes for different crops. For the onions, we mainly use it to suppress weeds. Less weeds means less use of the tractors for cultivation, and less labor needed to weed by hand in the places the tractor can’t access. It also creates earthworm habitat and food, leaving the field healthier than before the season. For the tomatoes, we use the mulch as a weed suppression, disease prevention, and as a way to retain moisture. Tomatoes appreciate a warm environment which leads to faster water evaporation. The mulch slows that evaporation which lessens the frequency at which we need to water, and prevents soil from splashing onto leaves.

To me, one of the coolest parts of the mulch is that we don’t remove it once the vegetables are harvested. We leave all of the mulch exactly where it is, and Farmer Janaki tills it into the soil before he plants another cover crop in that field. This adds organic matter which improves the health of the soil, and provides a habitat for organisms. Some of those organisms will prevent diseases, and help to control the levels of pests.  

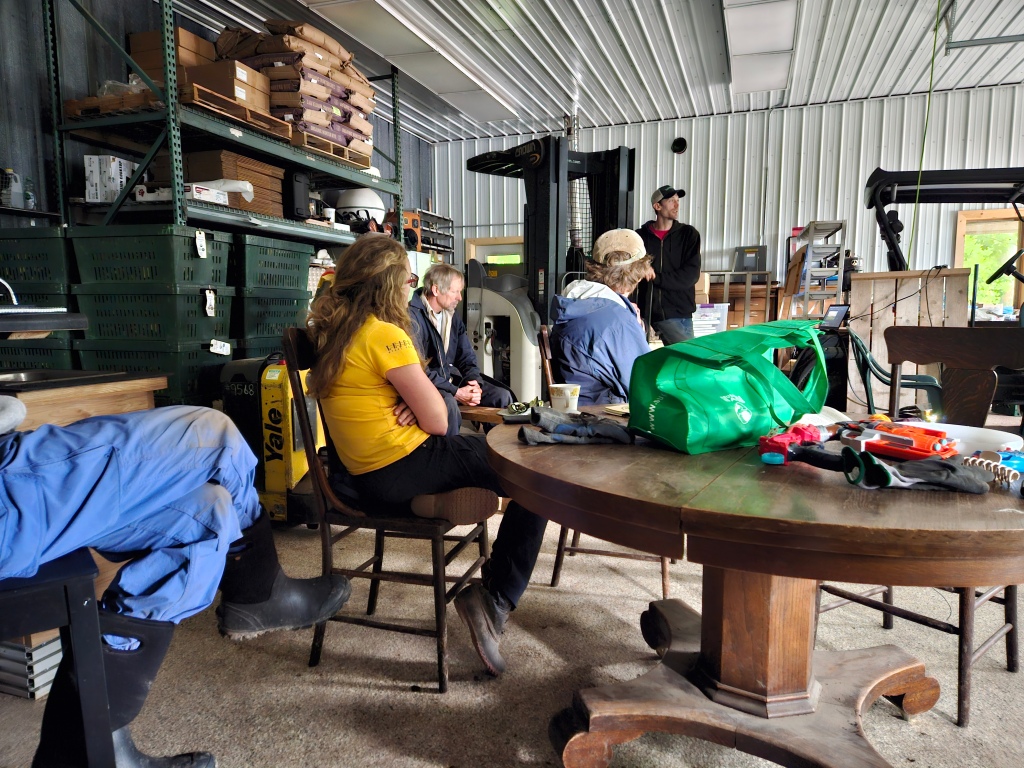
The farm crew was able to learn all this information about cover crops during what we called “classroom time”, a few weeks ago. This was an unusual occurrence considering we are normally too busy with field work to all come together for an educational session, but when the fields are too wet to work, we finally have time to talk about the behind the scenes of farming. This is just another one of the many ways the farm crew is embracing the changes being thrown at us thanks to mother nature and her abundance of rain. Fingers (and toes and arms and legs) crossed this week stays a little drier, so our outdoor vegetables can get some much needed love and attention.

In your share this week:

Broccoli – Lettuce – Spinach – Green Onions – Pac Choi

If you’re looking for some non-salad ways to use up greens, Deb has a few more ideas for you!

Cannellini Beans and Wilted Greens 

2 cans cannellini beans

1 large bunch spinach, pac choi, or mixed greens (appx 1/2 lb)

1-2 cloves garlic

1/4 cup olive oil

1.5 tsp rosemary, chopped

Wash and prepare greens.  Drain beans and reserve liquid.  Finely chop garlic and sauté in olive oil with the rosemary for 1 minute.  Add the beans and 3/4 cup bean liquid and simmer for 5 minutes, until some of the beans have fallen apart.  Add the greens to the beans and stew until they are wilted and tender.  Add more liquid if needed.  Salt and pepper to taste.  

Serve as a side-dish with olive oil drizzled over the surface

Lentils with Greens and Ginger 

1 cup green lentils, rinsed

2 1/2 cups water

1-2 hot green chilies, finely sliced (optional!!)

1 tsp finely grated ginger

1/2 cup chopped cilantro

1-1/4 lbs spinach 

1 tsp salt

Black pepper to taste 

2 tbsp lemon juice

Cook lentils in water until soft.  Put oil in large sauté pan (large enough to hold spinach) over medium heat.  When hot, add chilis and ginger- stir and fry for 10 seconds.  Add cilantro and spinach.  Continuously stir and cook until spinach has wilted.  Add cooked lentils (with any remaining cooking water)and salt.  Stir to mix and bring to simmer.  Cover and cook gently for 10 minutes- add pepper and lemon juice.  Cook for 5 minutes. Serve with rice

For the farm crew,

Jennifer

Summer CSA Week 2

It’s the second week of Summer CSA season, and the crew is getting back into the harvesting rhythm. 

Last week was a big week for us on the farm. We needed to play catch up on some plantings. It was a daunting task, but our crew worked extra hard to get it all done, with time to spare. 

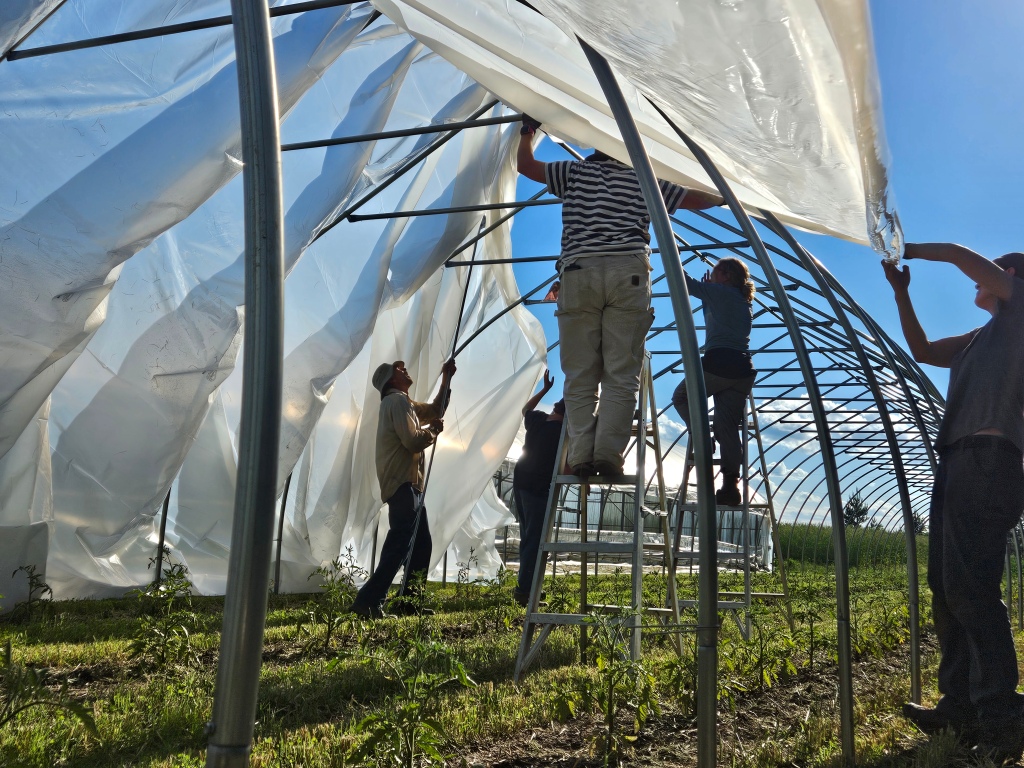
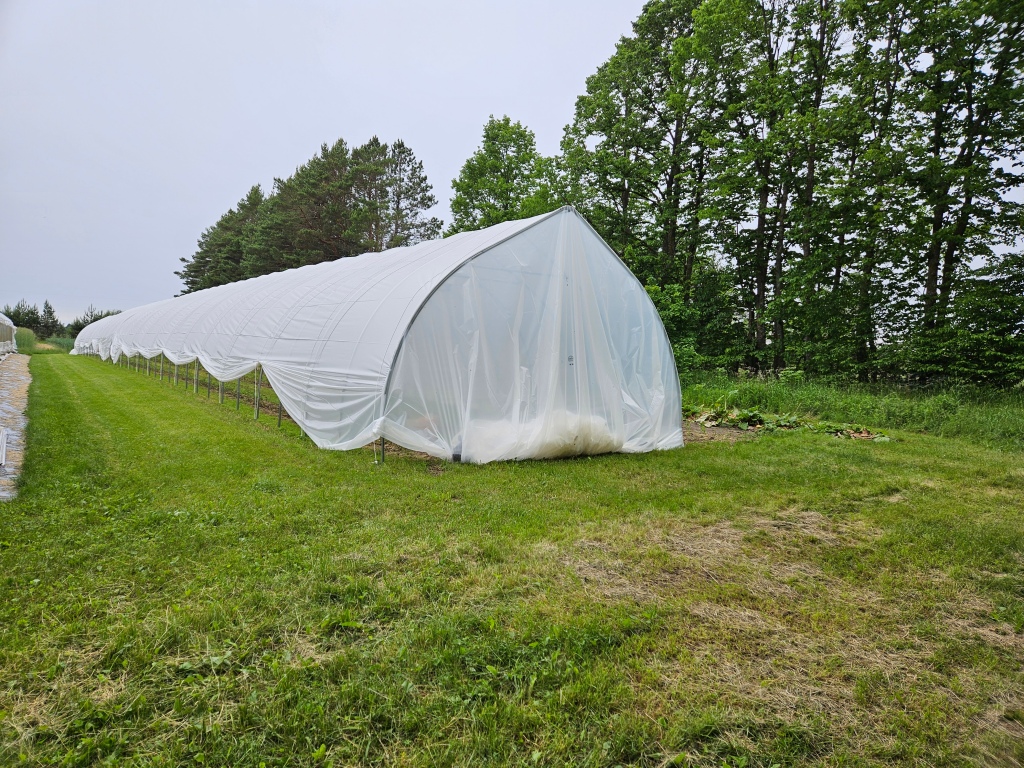
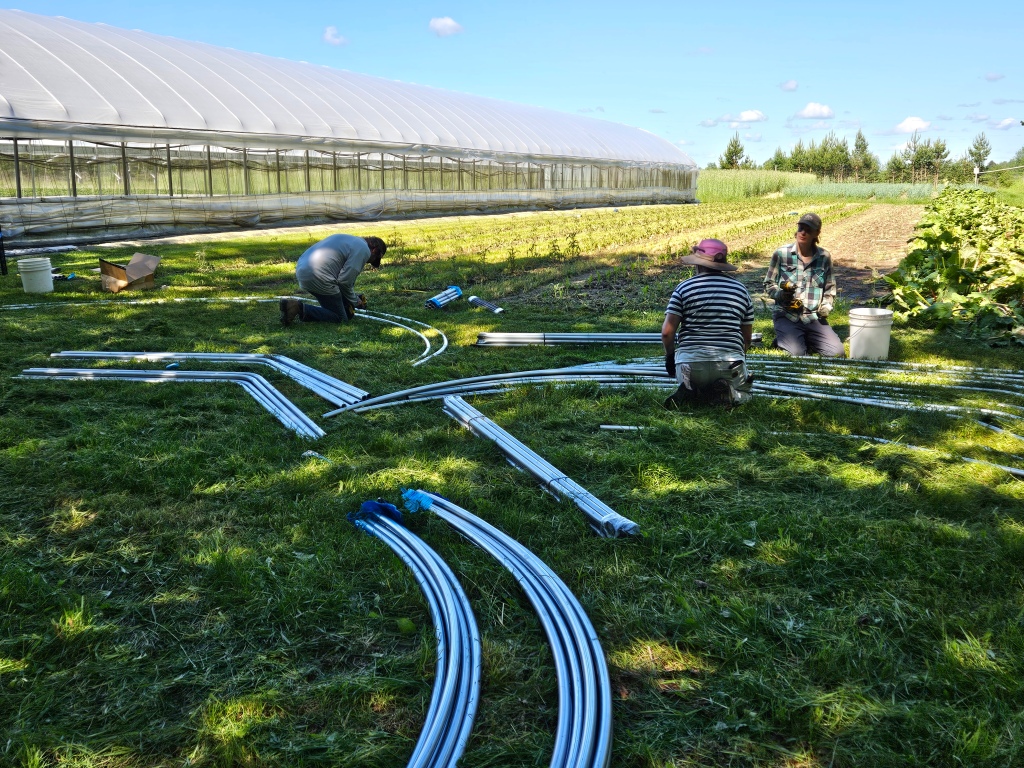
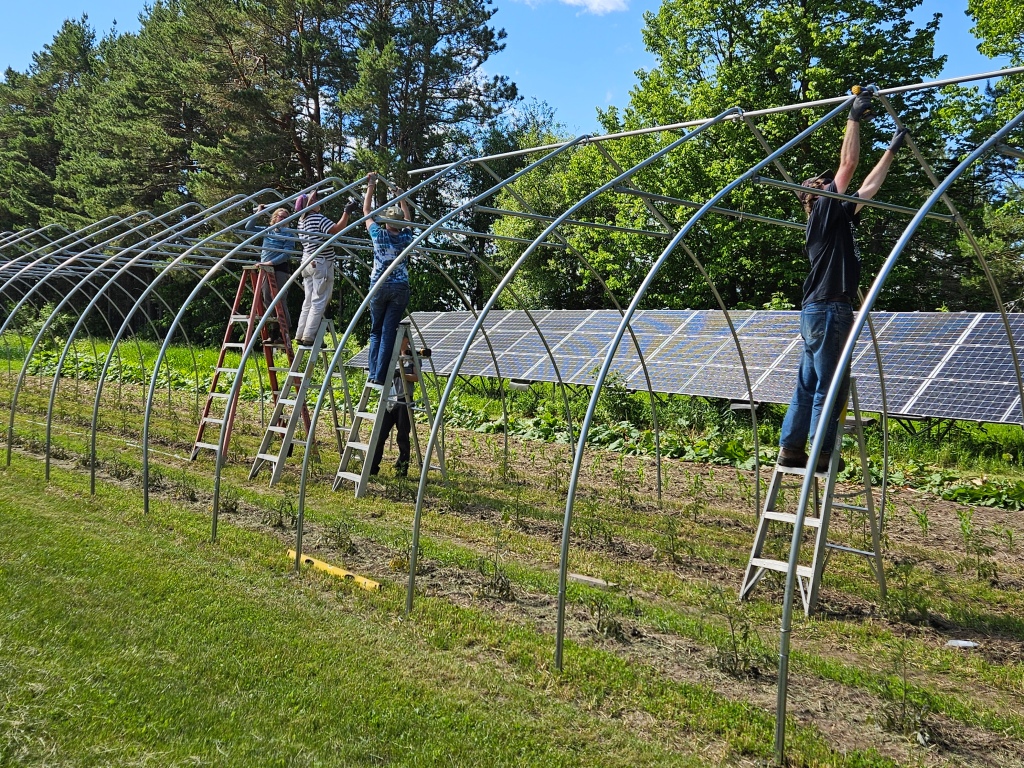
Thanks to dryer days, and all hands on deck, we had time to accomplish a few additional things last week as well. The most noteworthy was the caterpillar tunnel the crew put together on Friday.

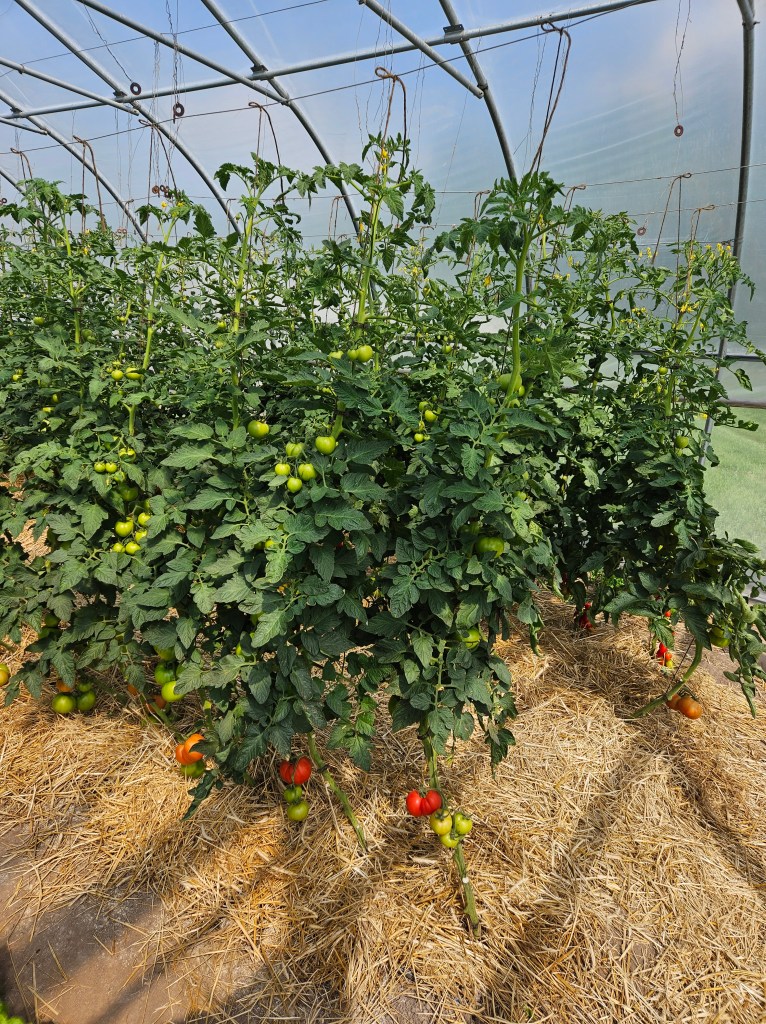
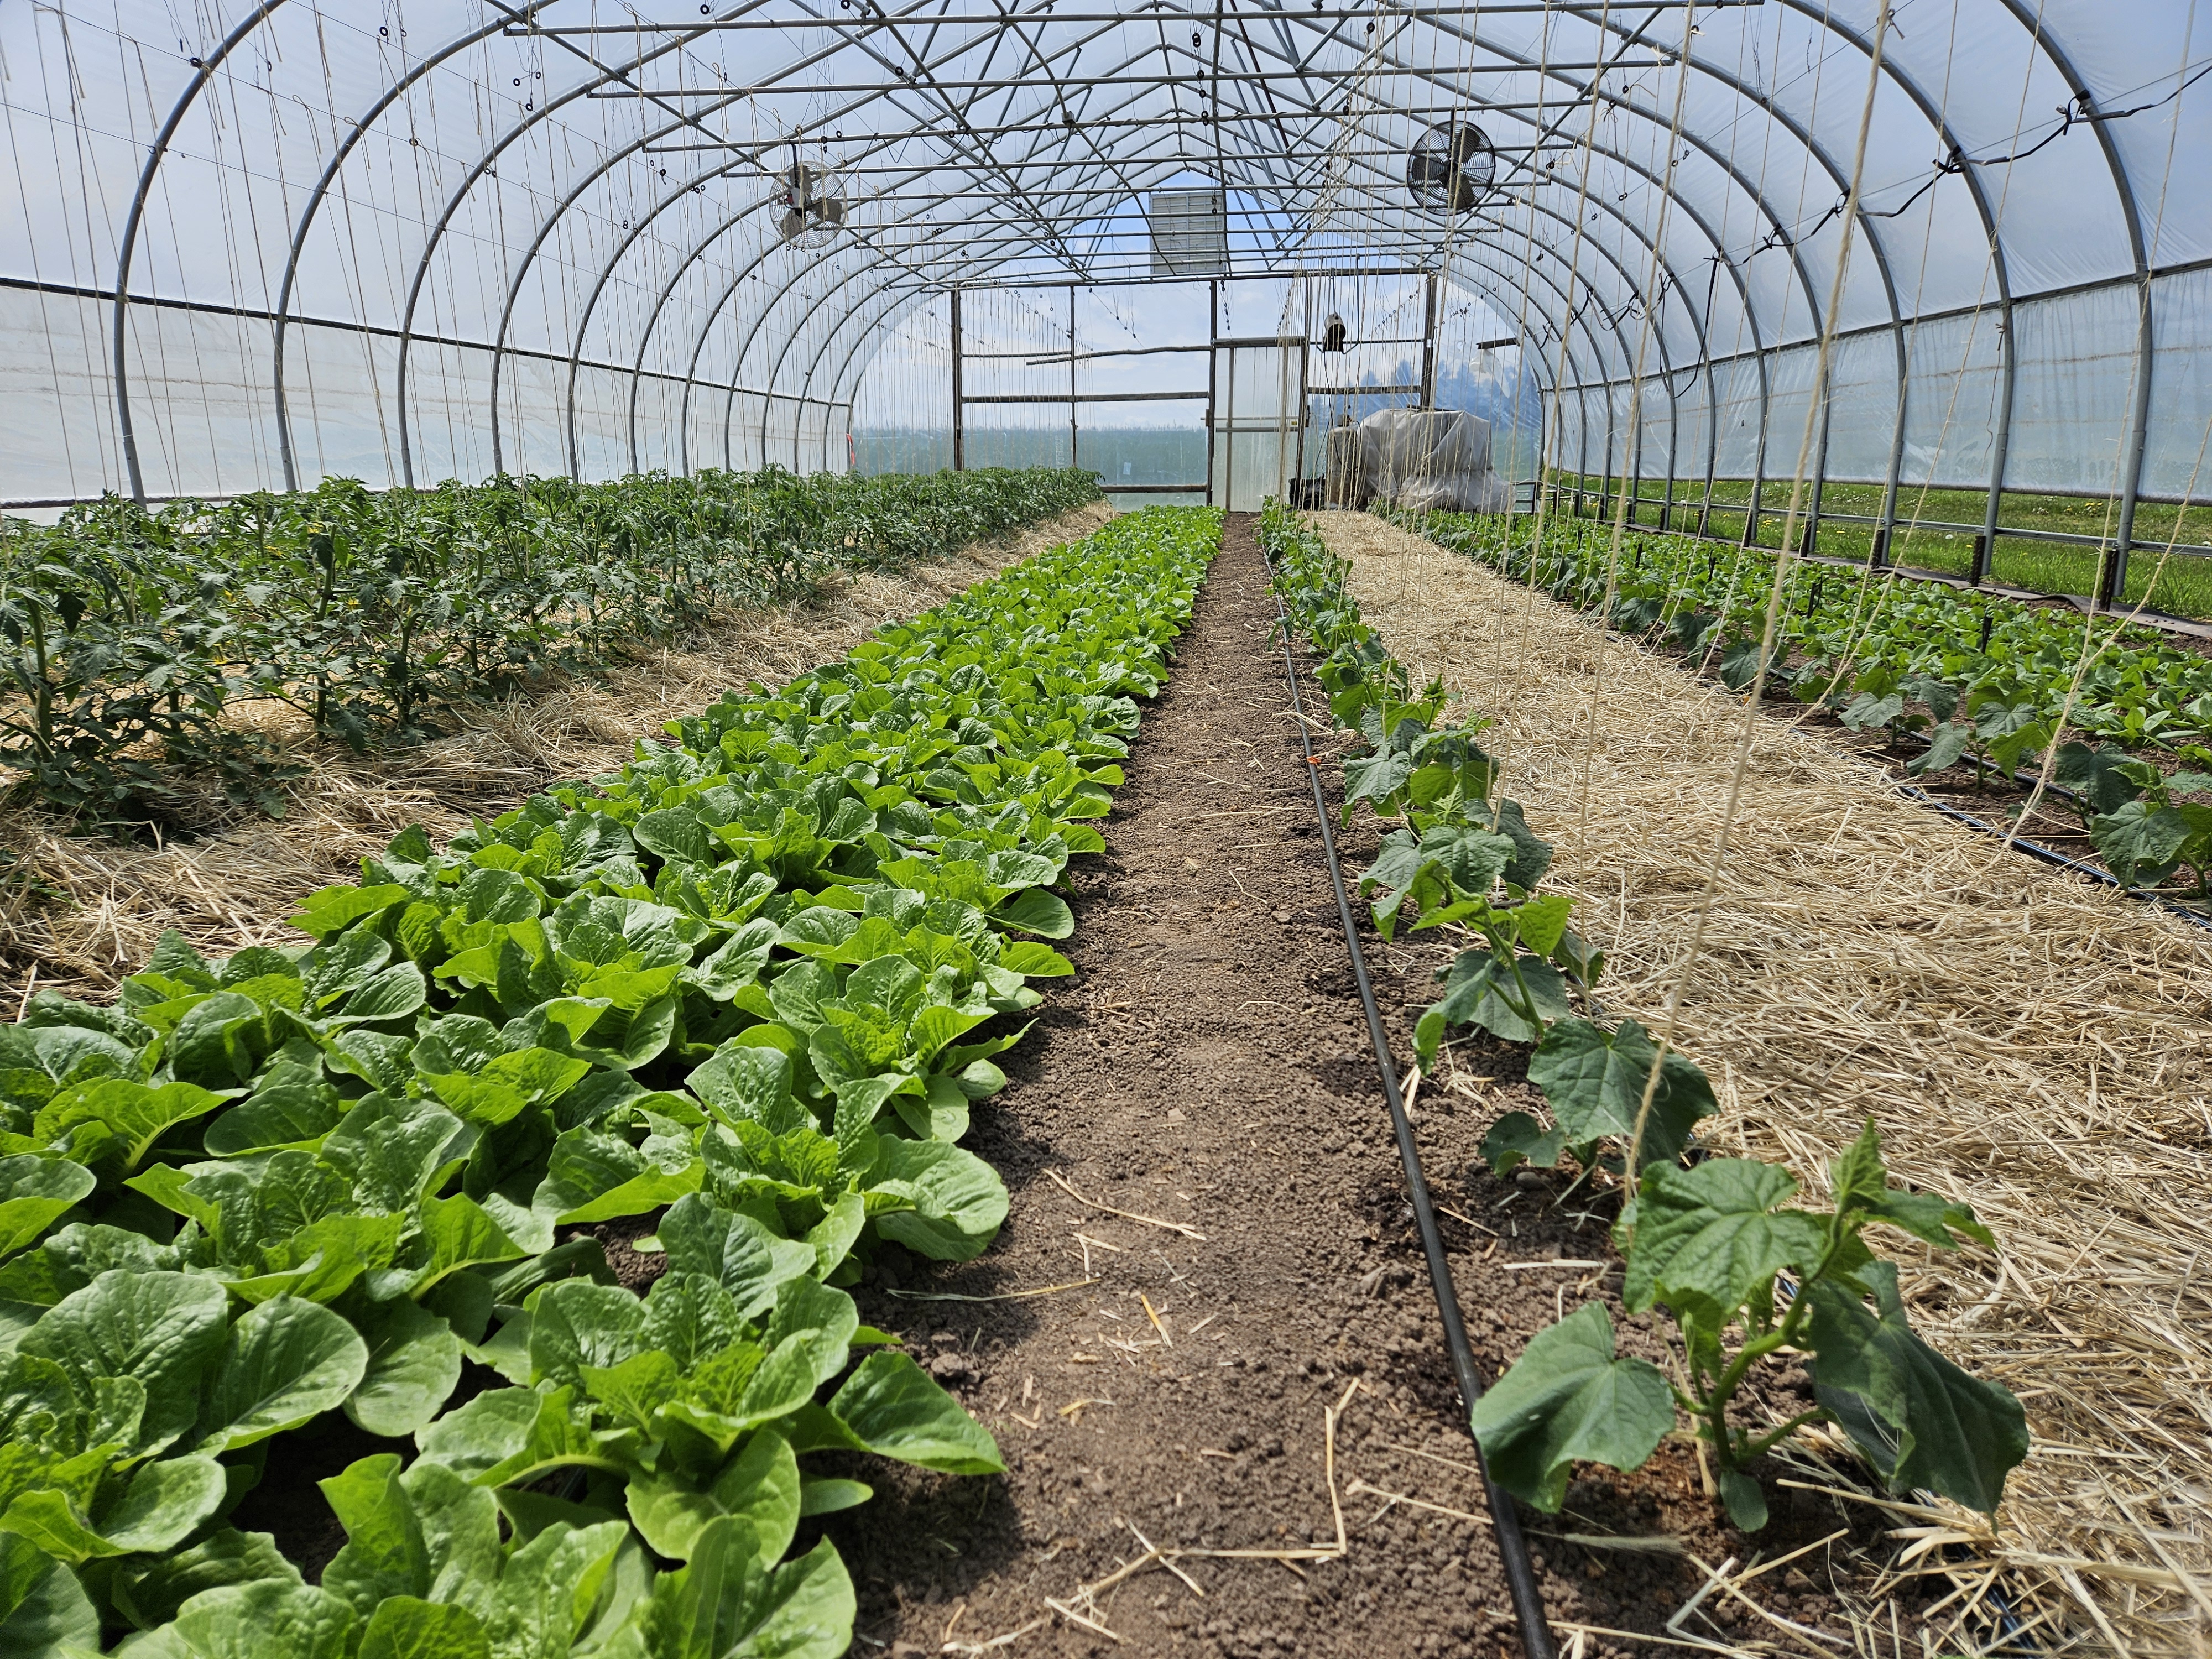
This tunnel is part of an experiment we are trying on the farm with some of our outdoor tomatoes. The main variety of slicing tomatoes you will be receiving in your box this season is called Geronimo. These tomatoes are know for being prolific producers, resistant to some common diseases, and for producing uniform fruit. The downside that they do best in a greenhouse and often crack before they’re ready to be harvested when subjected to the elements. We have several permanent greenhouses that house our earliest planting of tomatoes, but the tomatoes are more flavorful when grown in field soil rather than soil that’s been permanently protected. Our hope with the caterpillar tunnel is that it will give us the best of both worlds. Since they can be moved easily each year, we get the delicious flavor from the outdoor soil, but we get the protection of a greenhouse. 

As any of our science-loving members know, a good experiment always has a control group. We have standard greenhouse tomatoes, and we have standard outdoor tomatoes serving as our control groups. We can use these control group tomatoes to compare against our experimental tomatoes, to see if the quality and flavor are the same or different. 

I am very excited for this experiment. Mostly because I love tomatoes, but also because it’s refreshing to know that after many decades, and 2 generations, Farmer Janaki is still learning. Often we look at farms of this size and think they must know it all, and do everything perfectly. Nope! Janaki and the farm crew are learning and trying new things every day just like all of you. I believe that every experiment is worth it because even if it doesn’t go as planned, you always learn something from the process, and I think learning is half the fun of trying something new. 

You’ll still have to wait a little while for any tomatoes, but this week in your share you can expect to see: 

Turnips – Broccoli – Lettuce – Rhubarb – Greens mixRadish


We’ve been giving you lots of lettuce lately, if you are stumped on fun ways to enjoy it, one of my favorite ways is to grill it before putting it on a sandwich or chopping it up to add to a salad. Grilling the lettuce will add a smoky flavor, and takes out some of the bitterness. This works best with Romaine lettuce because it’s a little firmer. With the Butter Crunch, or softer lettuce, I like to use the leaves as lettuce wraps. It’s a nice way to lighten any dish that you would usually use bread or a tortilla with. On a hot summer day, a lighter dinner is just what I crave after a long day on the farm.

Another fun way to use lettuce is as a dip for bread, veggies, or whatever you can think of. I like this Peruvian Aji-style sauce.

Ingredients

  • 1 head lettuce, stem-end trimmed and discarded
  • ½ bunch fresh cilantro, stems removed
  • 5 green onions
  • ¼ cup mayonnaise or olive oil
  • 2 jalapeno peppers, seeded
  • 1 clove garlic
  • salt and ground black pepper to taste

Directions

  1. Place lettuce, cilantro, green onions, mayonnaise (or oil), jalapeño peppers, garlic, salt, and black pepper into a blender; blend until smooth, about 2 minutes.

Honey-Glazed Radishes and Turnips

Ingredients

  • 2 Tbsp. margarine or butter
  • 1 large shallot, sliced
  • 1 1/2 lb. radishes, halved
  • 1 1/2 lb. small turnips, halved or quartered
  • 1/3 c. water
  • 1/4 c. lower-sodium chicken broth
  • 1 Tbsp. honey
  • Kosher salt and freshly ground pepper
  • 2 Tbsp. thinly sliced mint leaves
  • 1 Tbsp. finely chopped chives

Directions

  1. Step 1In 12-inch skillet, melt margarine or butter on medium-high. Add shallot and cook 2 minutes or until golden and tender, stirring occasionally. Add radishes and turnips; stir until well coated. Stir in water, broth, honey, 1/4 teaspoon salt, and 1/4 teaspoon freshly ground black pepper. Heat to boiling. Reduce heat to medium-low; cover and cook 15 minutes.
  2. Step 2Uncover and cook 7 to 10 minutes longer or until vegetables are glazed and most of liquid has evaporated, stirring occasionally. Remove from heat and stir in mint and chives. Transfer to serving platter and garnish with mint leaves

For the farm crew, 

Jennifer 
Summer CSA Week 1

Happy first week of the Summer CSA season! Thank you for being part of this community, and for joining us on the crazy and fun ride that we call farming. 

It’s been a wet Spring, with more rain falling last week than we had the entire 2023 growing season, but that hasn’t stopped us on the farm. The crew has been seeding, transplanting, building, cleaning, weeding, and everything in-between. We snuck leeks, tomatoes, squash, melons, and the first round of potatoes in the ground before the rain soaked everything. We did have to put a temporary pause on planting last week to let the fields dry out a bit. Lucky for all of you, a pause on planting doesn’t mean a lack of vegetables. Thanks to all of our greenhouses, we’ve been able to get lots of greens and some herbs ready for this week’s box. The lettuce and spinach. have especially been thriving in their cozy, covered home.

In your share this week: 

Greens Mix – Lettuce – Oregano – Radishes – Rhubarb – Spinach

The week ahead is looking like a busy one. Not only are we adding CSA harvests into our schedule, but we are also planning to play catch-up with some planting. The peppers are ready to get out of the greenhouse and into the field, which will free up more greenhouse space for other crops. Other plans for the week include: the third seeding of field carrots, transplanting the next round of brassicas, getting our storage potatoes in the ground, and sharing a few laughs along the way. It’s going to be a lot of work, but our crew is up for the challenge. 

Our wonderful volunteer, Deb Rausch, has graciously offered to submit recipes that may help you find fun ways to use some of the vegetables in your boxes each week. If you like starting with dessert, or want a sweet breakfast to begin your day, this is the recipe for you.

Rhubarb Torte

1 cup flour

8 tablespoons butter

5 tablespoons powdered sugar

2 large eggs, well beaten

1/4 tsp salt

3/4 tsp baking powder

3/4 cup sugar

1 tsp vanilla

1 tsp grated lemon peel

3 cups diced rhubarb

Cream together the flour, butter and powdered sugar. Press into the bottom of a glass or Pyrex pie pan and bake for 10 to 12 minutes in a 350° oven

Combine the remaining ingredients and spread over the crust. Return to the oven and bake 30 minutes more or until the center is set. Serve warm, topped off with a spoonful of whipped cream.

For the farm crew, 

Jennifer 
April Winter Share

Greetings! As we ease out of this odd winter, things are moving quickly at the farm. The root cellar is nearly empty, and the greenhouse is filling up with onions, tomatoes, peppers, broccoli, cabbage, and cauliflower transplants. Dave has already seeded green onions and carrots in the high tunnels, and cover crop has been mowed and tarped in preparation for cucumbers and tomatoes.

The rest of the seasonal crew will be ramping up their activity over the course of the next few weeks, and we’re still looking for one more crew member. If you know of anyone who is interested in doing difficult but meaningful work with a great group of people, please have them be in touch with us!

We’re a little nervous that the irrigation pond is only about 2/3 full. After 25 years, this is the first season that it hasn’t filled with snowmelt! Hopefully we’ll get a little bit more consistent rainfall than last summer. Ultimately, we’re at the mercy of mother nature but we feel pretty well prepared for whatever the season brings and we’re grateful to be on this journey with you!

For the farm crew,

Janaki

In your share today:  

Beets (just one this month!) — Carrots — Garlic — Greens Mix — Onions — Red and Yellow Potatoes, Rutabagas

Try this great recipe for Hasselback Potatoes from Love and Lemons: https://www.loveandlemons.com/hasselback-potatoes/

Or this recipe for Cajun Rutabaga Chips: https://foodaciously.com/recipe/cajun-rutabaga-chips

March Winter Share

It’s the second to last winter CSA delivery and the farm season is just around the corner!

🌱 Greenhouse Delights: There’s an unmistakable magic in the revival of the greenhouse scents, which is where the crew has gotten to hang out more and more recently 🙂 Our first planting of onions are just starting to poke out of the potting soil, with subsequent plantings not far behind.

🥕 Carrot Countdown: I am not 100% sure how many pounds of carrots we bagged up this winter, but I do know it was a lot! When the winter began, the root cellar was packed to the ceiling with pallet boxes of them… I mean packed, you could barely move around in there. Now there is but a few pallet boxes remaining and most of them will be reserved for the final CSA delivery in April. This means that this is the last week you will find our carrots in local restaurants and stores!


In Your Share This Month:

Beets – Green Cabbage – Purple and Orange Carrots – Onions – Shallots

Parsnips – Fingerling, Baby Yellow, & Red Potatoes – Rutabagas


For the recipes this month, it’s back to basics… One of my favorite ways to eat root vegetables is to roast them in the oven with nothing but a little olive oil, salt & pepper. They can then be enjoyed as a side dish, thrown on salads for fiber & flavor, or paired with a tasty sauce… like the caramelized shallot & herb aioli recipe below.

When roasting, I’m typically a fan of potato skins, but the French fingerlings in this month’s share have a slightly rough texture. They remain delicious, but I do suggest peeling them this time round.


Roasted Root Vegetables

Ingredients:

Assorted root vegetables (such as carrots, potatoes, parsnips, Rutabaga, etc.)
Olive oil
Salt and pepper to taste

Directions:

  1. Preheat your oven to 425°F
  2. Wash and peel the root vegetables, then chop them into similar-sized pieces to ensure even cooking.
  3. Place the chopped vegetables in a large mixing bowl.
  4. Drizzle olive oil over the vegetables, using enough to coat them evenly. Toss the vegetables with your hands or a spoon to ensure they are all well coated with the oil.
  5. Season the vegetables generously with salt and pepper, adjusting the amount to taste.
  6. Spread the seasoned vegetables out in a single layer on a large baking sheet. Make sure they are not overcrowded to allow for even roasting.
  7. Place the baking sheet in the preheated oven and roast the vegetables for about 25-35 minutes, or until they are tender and golden brown, stirring halfway through the cooking time for even browning.
  8. Once the vegetables are roasted to your desired level of doneness, remove them from the oven and transfer them to a serving dish.

Feel free to customize this recipe by adding other seasonings or herbs such as garlic powder, rosemary, thyme, or paprika for extra flavor!


Caramelized Shallot & Herb Aioli by newinthekitchen.wordpress.com

Ingredients:

3/4 cup light mayonnaise
2 tablespoons freshly squeezed lemon juice, plus a pinch of zest
3 tablespoons fresh parsley, chopped finely
2 tablespoons fresh dill, chopped finely
1 tablespoon dijon mustard
1 teaspoon hot sauce (your choice of brand, we enjoy Cholula)
3 shallots, minced
Olive Oil
Salt and pepper, to taste

Directions:

1. Heat a saute pan with one tablespoon of olive oil over medium heat.
2. Add shallots and cooked until browned and caramelized, about 10 minutes.
3. Allow shallots to cool.
4. Meanwhile, combine mayonnaise, herbs, lemon juice and zest, dijon mustard, hot sauce, and salt and pepper to taste.
5. When shallots are cooled, add them to mixture. Stir to combine.
6. Allow Aioli to chill in the refrigerator for about an hour prior to serving to allow flavors to combine.


For the farm crew,

Charlie

February Winter Share

Greetings food lovers,

It’s quite strange to find ourselves contemplating spring already, especially since winter seems to have barely made an appearance… Thanks a bunch, El Niño! Nevertheless, it’s that time of year. The root cellar seems more spacious with each passing week, and excitement for onion seeding is steadily growing. The team is looking forward to a change of scenery from the pack shed as we transition into more greenhouse work.

These days, carrot bagging tends to stretch on quite a bit. With the influx of orders from Super One, we’re handling much larger volumes than usual. It can feel overwhelming to see the stacks of empty boxes waiting to be filled for the day’s orders; however, this bagging time gives us ample opportunity to engage in casual conversation. Lately, there’s been a lot of chatter about seeds, which is quite enjoyable. As lunchtime draws near, our discussions typically turn to recent cooking endeavors or recipes we’re eager to try. The standout from this past week has been Jennifer’s effortless pasta sauce featuring beets!


In Your Share This Month:

Beets – Green Cabbage – Orange & Purple Carrots – Garlic – Onions

Parsnips – White Potatoes – Russet Potatoes – Delicata Squash


Jennifer’s Beet Pasta Sauce

1/2 cup coconut milk
1/3 cup salted cashews
4 medium sized beets

  1. Boil & peel the beets
  2. Blend beets & cashews
  3. Stir in coconut milk
  4. Serve over pasta

Some of the beets we harvested last year are rather large… If you happened to get a gigantic one in your share, feel free to count that as four medium beets. A nice thing about this recipe is that it is easily adjustable. Simply add more or less coconut milk & cashews to get the consistency and salt content just where you like it!


Braised Green Cabbage

1 medium green cabbage
1 yellow onion, rough chop
2 large carrots, cut into 1/4″ coins (I’d stick with the orange ones for this dish)
1 parsnip, cut into 1/4″ coins
1/4 cup bone broth or vegetable broth
1/4 cup + 2 Tablespoons olive oil, duck fat or ghee
1 teaspoon salt
1/4 teaspoon black pepper
2 cloves garlic, whole
1 Bay leave

  1. Heat oven to 325°F with the rack in the middle.
  2. Lop off the tough stem end of the cabbage and divide it into 6-8 wedges. Keep the core attached so the wedges stay intact after the long cooking time. Don’t worry: The tough core will get super tender, too.
  3. Generously salt the cabbages and let sit for a little while.
  4. Heat 2 tablespoons of olive oil, duck fat or ghee in a large dutch oven over medium heat. Once hot, sauté onion, carrots and parsnip until vegetables start to sweat.
  5. Pour in bone broth to deglaze the pan.
  6. Turn off heat and add 1/4 cups of oil / fat. Place cabbage wedges in a single layer in the dutch oven – a little overlap is okay. Throw in salt, pepper, garlic cloves and bay leave. Cover tightly with foil & dutch oven lid and place in the oven.
  7. Cook the cabbage undisturbed for 1 hour. Crack open the foil cover and carefully flip the wedges over. Reseal the dish tightly and braise for another hour or until fork-tender.
  8. At this point, you can remove the cabbage to cool and store in the fridge until you’re ready to eat it (up to 4 days). When you’re ready to serve, crank the oven up to 425°F and bake until browned (about 15 minutes).

For the farm crew,

Charlie

January Winter Share

The chickens love feasting on reject squash and cabbage leaves!

Happy New Year!

After weeks of anticipation, the first real snowfall has finally graced the fields! While the gentle start to winter offered a break from the unrelenting snow removal that defined last year’s snowy season, there was an unanimous sentiment—it’s about time!

It’s been a whirlwind of activity here in the pack shed, and we can’t express enough gratitude for the support we’ve received from both our valued members and our partners in grocery stores and restaurants. Knowing that our vegetables are making their way onto the plates of our community brings us immense joy. It’s heartwarming to imagine our produce being shared among friends and families, becoming a part of the meals and moments that bring people together. We take pride in cultivating these vegetables and seeing them find their rightful place in the homes and gatherings of our community members.

Janaki is currently working on the budget and Catherine is prepping the signup software for next season, so we’re hoping to begin 2024 signups in about two weeks!


In Your Share This Month:

Chioggia Beets – Carrots – Onions – Parsnips – Yellow Potatoes

Baby Yellow & Baby Russet Potatoes – Rutabagas – Delicata & Winter Sweet Squash


This month, a trio of newcomers make their debut from storage in the root cellar: Chioggia beets, rutabagas and parsnips. I love to roast these all together with olive oil, salt, pepper and thyme. It makes a great side dish when fresh from the oven and leftovers are delicious when thrown into a salad. In my opinion, Choigga beets are the star of the show.

Chioggia beets, often referred to as candy cane beets, originated in the historic fishing town of Chioggia, Italy, just across the lagoon from Venice. These heirloom beets have a mild, sweet taste and slightly less earthy flavor compared to traditional beets. Whether enjoyed raw (thinly sliced, dipped in olive oil, salt, and pepper) for their visual appeal or cooked to showcase their flavor, Chioggia beets impress both the eyes and the taste buds.


Rutabaga Latkes (by Lisa Richards, CNC)

Latkes, or potato pancakes fried in oil, need not necessarily be made from potatoes. This recipe uses rutabaga with hemp seeds for added protein.

Yield: 10 latkes

1 lb. peeled, grated rutabaga (approx. 3 cups)
1 scallion, minced
1 egg, lightly beaten
1 Tbsp. coconut flour
3-4 Tbsp. raw, shelled hemp seeds
1 tsp. salt
Pepper to taste
A few gratings of fresh nutmeg
Olive oil for frying

  1. In a large bowl, add grated rutabaga, minced scallion, beaten egg, coconut flour, hemp seeds, salt, pepper and nutmeg. Mix well.
  2. In a large skillet, heat a good tablespoon of olive oil between medium low and medium heat. Working in batches of 3 latkes, spoon about 2 tablespoons of mixture per latke into skillet, spreading into 3 to 4 inch rounds and frying until the edges begin to brown. Flip and fry until other side is golden brown. Repeat with remaining latke mixture, adding another good tablespoon of olive oil to the skillet for each batch.
  3. When latkes are done frying, place in warm oven on wire racks on a rimmed baking sheet. This keeps latkes crispy until ready to serve.

Baby Russet Hash Browns

It wouldn’t feel right to send out baby russets without sharing our recipe for baby russet hash browns. Small russet potatoes have a low moisture content and a high ratio of skin to flesh, so no draining or precooking is required.

Baby russet potatoes (grated, as many as desired)
Oil or butter or both
Season to taste with salt and pepper

  1. Grate baby russet potatoes
  2. Heat a skillet or pan to medium heat and add a generous amount of oil
  3. Spread grated potatoes in a layer no thicker than one inch in the pan. Do not stir or agitate. Cover with a lid until the bottom appears toasted and crispy, then flip the hash browns. (This will likely need to be done in sections around the pan unless you’re just doing a small amount.)
  4. Add a little more oil / butter after flipping
  5. Once the 2nd side is toasted as well, season and serve!

Janaki’s favorite is to add some grated beets to the mix, but you could also try rutabagas, parsnips, or carrots, too. Feel free to get experimental with this one!


For the farm crew,

Charlie

December Winter Share

Happy December! We hope everyone is finding time to be with the ones who matter most, whether it’s those in our everyday lives or those we reconnect with during this time of year. The holiday season offers the perfect opportunity to embrace the bounty of winter CSA vegetables!

Despite the calendar signaling December, the absence of snow and the uncharacteristic warmth persist, creating a season that has felt more like an extended November than the traditional winter landscape we anticipate. There has even been talk in the root cellar about the possibility of using spray-on snow around the windows to help re-create that quintessential winter charm. This idea may give the crew a good laugh, but it won’t do much for the fields…

Indeed, aside from being beautiful, snow brings a handful of advantages to farm fields:

Insulation: Acting as a natural blanket, snow shields the soil and crops from extreme cold, maintaining more stable temperatures. This prevents frost from penetrating too deeply and safeguards the roots of plants.
Moisture Source: As snow melts, it provides a slow and steady release of moisture into the soil, replenishing water levels essential for the growth of crops, especially in the drier winter months.
Nutrient Retention: Snow can capture and retain nutrients, gradually releasing them into the soil as it melts. This nutrient-rich water aids in enriching the soil for future planting seasons.
Erosion Prevention: Snow cover can mitigate soil erosion by shielding the surface from wind and water runoff, preserving the topsoil and preventing nutrient loss.
Microbial Protection: Snow cover can offer a protective environment for beneficial soil microbes and organisms, supporting a healthier soil ecosystem.


In Your Share This Month:

Beets – Green Cabbage – Orange & Purple Carrots – Garlic – Red & Yellow Onions

French Fingerling & Russet Potatoes – Kabocha & Delicata Squash


Roasted Winter Squash with Vanilla Butter (by Kay Chun from Food&Wine.com)

Yield: 6-8 Servings

4 tablespoons unsalted butter, at room temperature
1/2 vanilla bean, seeds scraped
4 pounds mixed squash (such as kabocha, Delicata and Red Kuri)—scrubbed, seeded and sliced 1/2 inch thick
3 sage sprigs, plus 24 small sage leaves
Kosher salt
Pepper
1/4 cup extra-virgin olive oil

  1. Preheat the oven to 425°. In a small saucepan, combine the butter and vanilla bean and seeds and cook over moderately low heat, stirring occasionally, until the butter is deeply browned and has a nutty aroma, about 5 minutes. Discard the vanilla bean.
  2. On a baking sheet, drizzle the squash and sage sprigs with the vanilla browned butter, season with salt and pepper and toss to coat. Roast for about 25 minutes, turning once, until the squash is golden in spots and tender. Arrange on a serving platter. Discard the sage sprigs.
  3. In a small saucepan, heat the olive oil. In batches, fry the sage leaves over moderate heat, stirring, until crisp, about 2 minutes. Using a slotted spoon, transfer the sage to a paper towel-lined plate to drain. Scatter the fried sage over the squash and serve.

Moroccan Grated Carrot & Beet Salad (by Elise Bauer from SimplyRecipes.com)

This recipe comes to us upon recommendation from one of our Ely members. She said her son used dried cherries instead of raisins, and added pistachios as well!

Yield: 4 Servings

2 cups grated carrots (from about 3 carrots)
1 cup grated fresh beets (from about 1 medium-sized peeled beet)
1/2 cup golden raisins
1/2 teaspoon paprika (sweet, not hot)
1/4 teaspoon ground cumin
1/4 teaspoon cinnamon
Small pinch salt
Small pinch cayenne
2 tablespoons lemon juice
2 teaspoons honey
2 tablespoons sliced fresh mint leaves

  1. Rinse the grated beets, combine with carrots and raisins:
    Place the grated carrots in a medium sized serving bowl.
    Place the grated beets into a sieve and briefly rinse with cold water. This will rinse away a little of the excess beet juice that may otherwise color the whole salad beet red. Pat dry with a paper towel.
    Then add to the bowl with the carrots. Add the raisins. Stir to gently combine.
  2. Make the dressing:
    In a small bowl, whisk together the paprika, cumin, cinnamon, salt, and cayenne. Then add the lemon juice and honey and whisk until smooth.
  3. Dress the carrots and beets, let sit for an hour:
    Drizzle over the the carrots and beets, then gently fold until the carrots and beets are lightly coated. Let sit for an hour before serving, either chilled or at room temperature, for the dressing to seep into the carrots and beets.
  4. Stir in sliced mint before serving:
    Right before serving, stir in a couple tablespoons of sliced fresh mint leaves. Garnish with fresh mint.

For the farm crew,
Charlie

November Winter Share

The first winter CSA delivery is upon us! For our new members: Welcome to our veggie community and thank you for choosing local and organic 🙂 For our season to season members: Thank you for your continued support and welcome back! It’s been a little over a month since our last summer share box was delivered. We hope the short break in your Food Farm veggie action has not been too much to bear. Despite a pause in share deliveries, the farm crew has done anything but pause…

Next year’s garlic crop all tucked in for the winter

It has been a mad dash to get us set up for winter! A short three weeks ago we were digging the last of our storage potatoes from the ground (a remarkable feat in its own regard), thinking to ourselves “How in the heck are we gonna get 35 tons of carrots, four tons of beets, a couple tons of parsnips and a few thousand pounds of rutabagas from the rapidly cooling earth before it freezes in four days?”

Well… we did things a little differently this year, that’s how.

Usually, during peak harvest time, we operate with two crews. One crew harvesting and another washing. This year, because of the hard freeze during the last week of October, we used all hands on deck (along with some volunteers from Fond du Lac Community College) to harvest everything as quickly as we could. Just in the nick of time, we packed the veggies in pallet boxes and stacked them to the ceiling of our root cellar with dirt still clinging to their skin. We then began November by pulling it all back out, one pallet box at a time, to gently roll or tumble through our washing assembly. We took the occasional break to knock ice free from the spray nozzles and it was a chilly process indeed, but Dave brought lots of extra winter gear and by the end the veggies were shining in vibrant shades of orange, purple & parsnip. It also helped that Janaki kept us fed and happy with hot cocoa, cookies & pizza during our lunch breaks. The morale boost was at times needed.

All in all, it was a year filled with joys and challenges, but we got through it and at the end of the day, that’s farming!


In your share this month:

Beets – Brussels Sprouts – Carrots – Celery – Onions

Red & Yellow Potatoes Delicata & Sunshine Winter Squash – Tatsoi


Thriving under the shelter of Catherine’s hoop houses, the celery reached rather impressive height this fall. We had to cut the stalks in half just to fit them in the share box. Because of this, we went ahead and left the leaves on – something we don’t often do in the summer shares. The leaves present a concentrated flavor that is more robust than the stalks. They can be used in a variety of dishes, including soups, stocks, salads, and as a garnish. Or maybe you would like to include them in your stuffing this holiday season… Included below is a recipe for just that!


Classic Thanksgiving Stuffing (by Anna from crunchycreamysweet.com)

Yield: 6 servings

1 fresh French bread or 10 cups dried cubed bread
1 ½ sticks unsalted butter, divided
1 ½ cup chopped celery
½ cup celery leaves, chopped
1 large yellow onion, chopped
1 tablespoon chopped fresh sage
1 tablespoon fresh thyme
1 tablespoon chopped fresh rosemary
1 teaspoon salt
½ teaspoon black pepper
1 ½ cups broth chicken, turkey or vegetable

  1. If you are using fresh French bread: slice it into ½″ slices, then each slice into ½″ cubes. Place bread cubes on a baking sheet (most likely you will need at least two sheets), in a single layer, then let it air-dry in room temperature overnight OR preheat oven to 250° F and bake bread for 30 to 35 minutes, shaking the pans every 15 minutes. If using already dried bread, place 10 cups in a large bowl.
  2. Preheat oven to 350° F. Butter a 13″x9″ baking dish or 3 quart baking dish. Set aside.
  3. In a skillet, melt 1 stick (½ cup) of butter. Add chopped onion and celery. Saute until veggies are soft.
  4. Add veggies to bread.
  5. Add herbs, celery leaves, salt and pepper. Stir in.
  6. Add broth and stir in gently. Place in buttered dish.
  7. Melt remaining butter and pour over the stuffing.
  8. Cover the dish with aluminum foil.
  9. Bake in preheated oven for 30 to 35 minutes. You can uncover it for the last 5 minutes to toast up the top pieces, if desired.
  10. Let cool for 10 minutes, then serve.

P.S. – For the best texture, bake the stuffing the same day you will serve it. You can prep everything the day before: dry the bread and sauté veggies. The next day just assemble everything and bake!


Bacon & Brussels Sprout Salad (from pinchofyum.com)

Yield: 8-10 servings

Dressing:
1 lemon
1 orange
1-2 tablespoons of apple cider, maple syrup or honey (something for sweetness)
1 shallot, minced
1/2 cup olive oil
1/2 teaspoon salt & pepper to taste

Salad:
4 dozen brussels sprouts
1 cup almonds
6 slices of cooked bacon, crumbled or chopped
1 cup grated parmesan cheese

  1. Combine the lemon juice, orange juice, apple cider, and shallots in a small bowl. Add the olive oil in a steady stream and whisk for a minute or two, until it becomes creamy-looking.
  2. Slice the brussels sprouts with a mandoline, taking care of your fingers! and slicing them as thin as possible. This works best when you hold the stem, slice from the top, and stop with a little bit left at the bottom, discarding the remaining bottom stem part since it’s not very leafy anyway. The thinner the shreds, the better the salad! Toss the shreds and loosen them with your fingers to they separate and fluff a little bit.
  3. Pulse the almonds in a food processor until finely chopped.
  4. Toss the brussels sprouts, almonds, bacon, cheese, and dressing together. Serve immediately or within a few hours of tossing.

This next recipe is rather simple, but I haven’t been able to get enough of it in the last couple weeks. I like it as a side, just as the recipe below says, but I also think it would make a great salad if combined with a bed of greens & dressing of your choice.

Delicata, Beets & Goat Cheese w/ Papitas

Yield: 2 servings

1 delicata squash
2 beets
olive oil
salt & pepper to taste

2 tablespoons toasted & salted pepitas
1-2oz. goat cheese

  1. Preheat the Oven: Preheat your oven to 400°F (200°C).
  2. Prepare the Squash: Wash the delicata squash and cut it in half lengthwise. Scoop out the seeds using a spoon. Then, slice the squash into half-moon shapes about 1/2-inch thick. Leave the skin on as it becomes tender when roasted.
  3. Prepare the Beets: Wash the beets thoroughly to remove any dirt. If the beets are large, you can peel them, but small to medium-sized beets can be roasted with the skin on for easy preparation. Cut the beets into even-sized pieces to ensure uniform cooking. You can either slice them into rounds or cube them, depending on your preference.
  4. Arrange on a Baking Sheet: Lay the squash slices in a single layer on one baking sheet & the beet cubes on another. Make sure not to overcrowd to ensure even roasting. Drizzle with olive oil and season with a generous dusting of salt and pepper.
  5. Roast in the Oven: Roast the delicata squash in the preheated oven for approximately 20-25 minutes, or until the edges are golden brown and the squash is tender. You can flip the slices halfway through the cooking time for even browning. Roast the beets for about 30-40 minutes, or until they are fork-tender. Larger pieces may require more time.
  6. Serve and Enjoy: Once the vegetables have cooled, serve with goat cheese & pepitas!

For the farm crew,

Charlie