Summer CSA Week 13

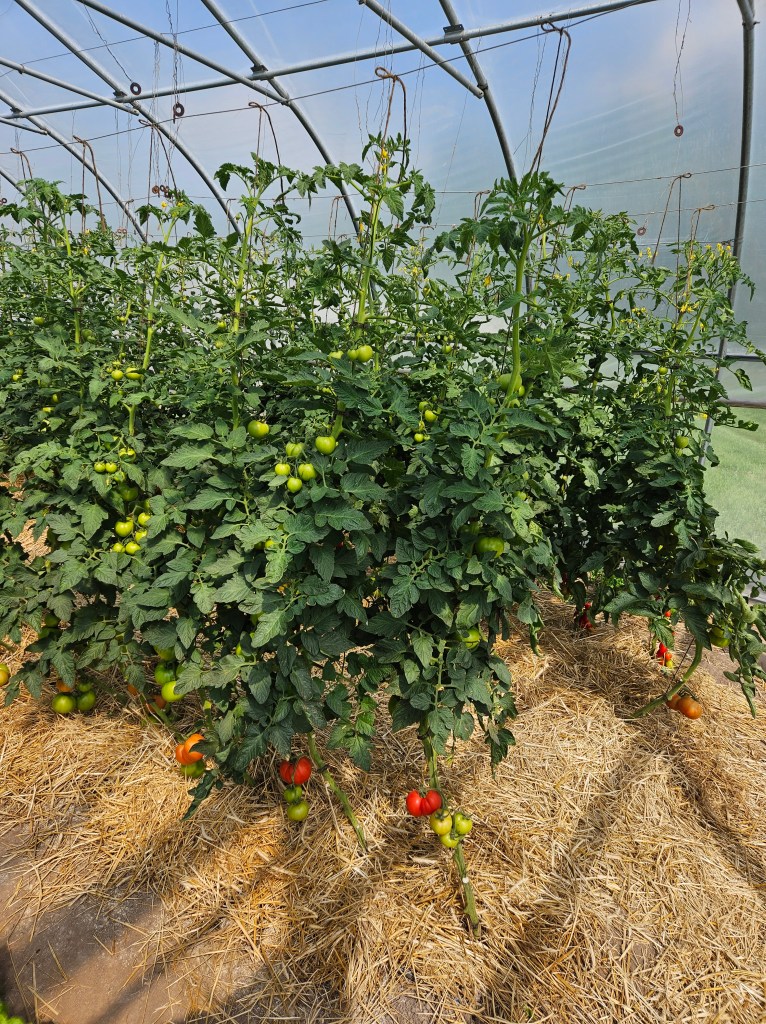
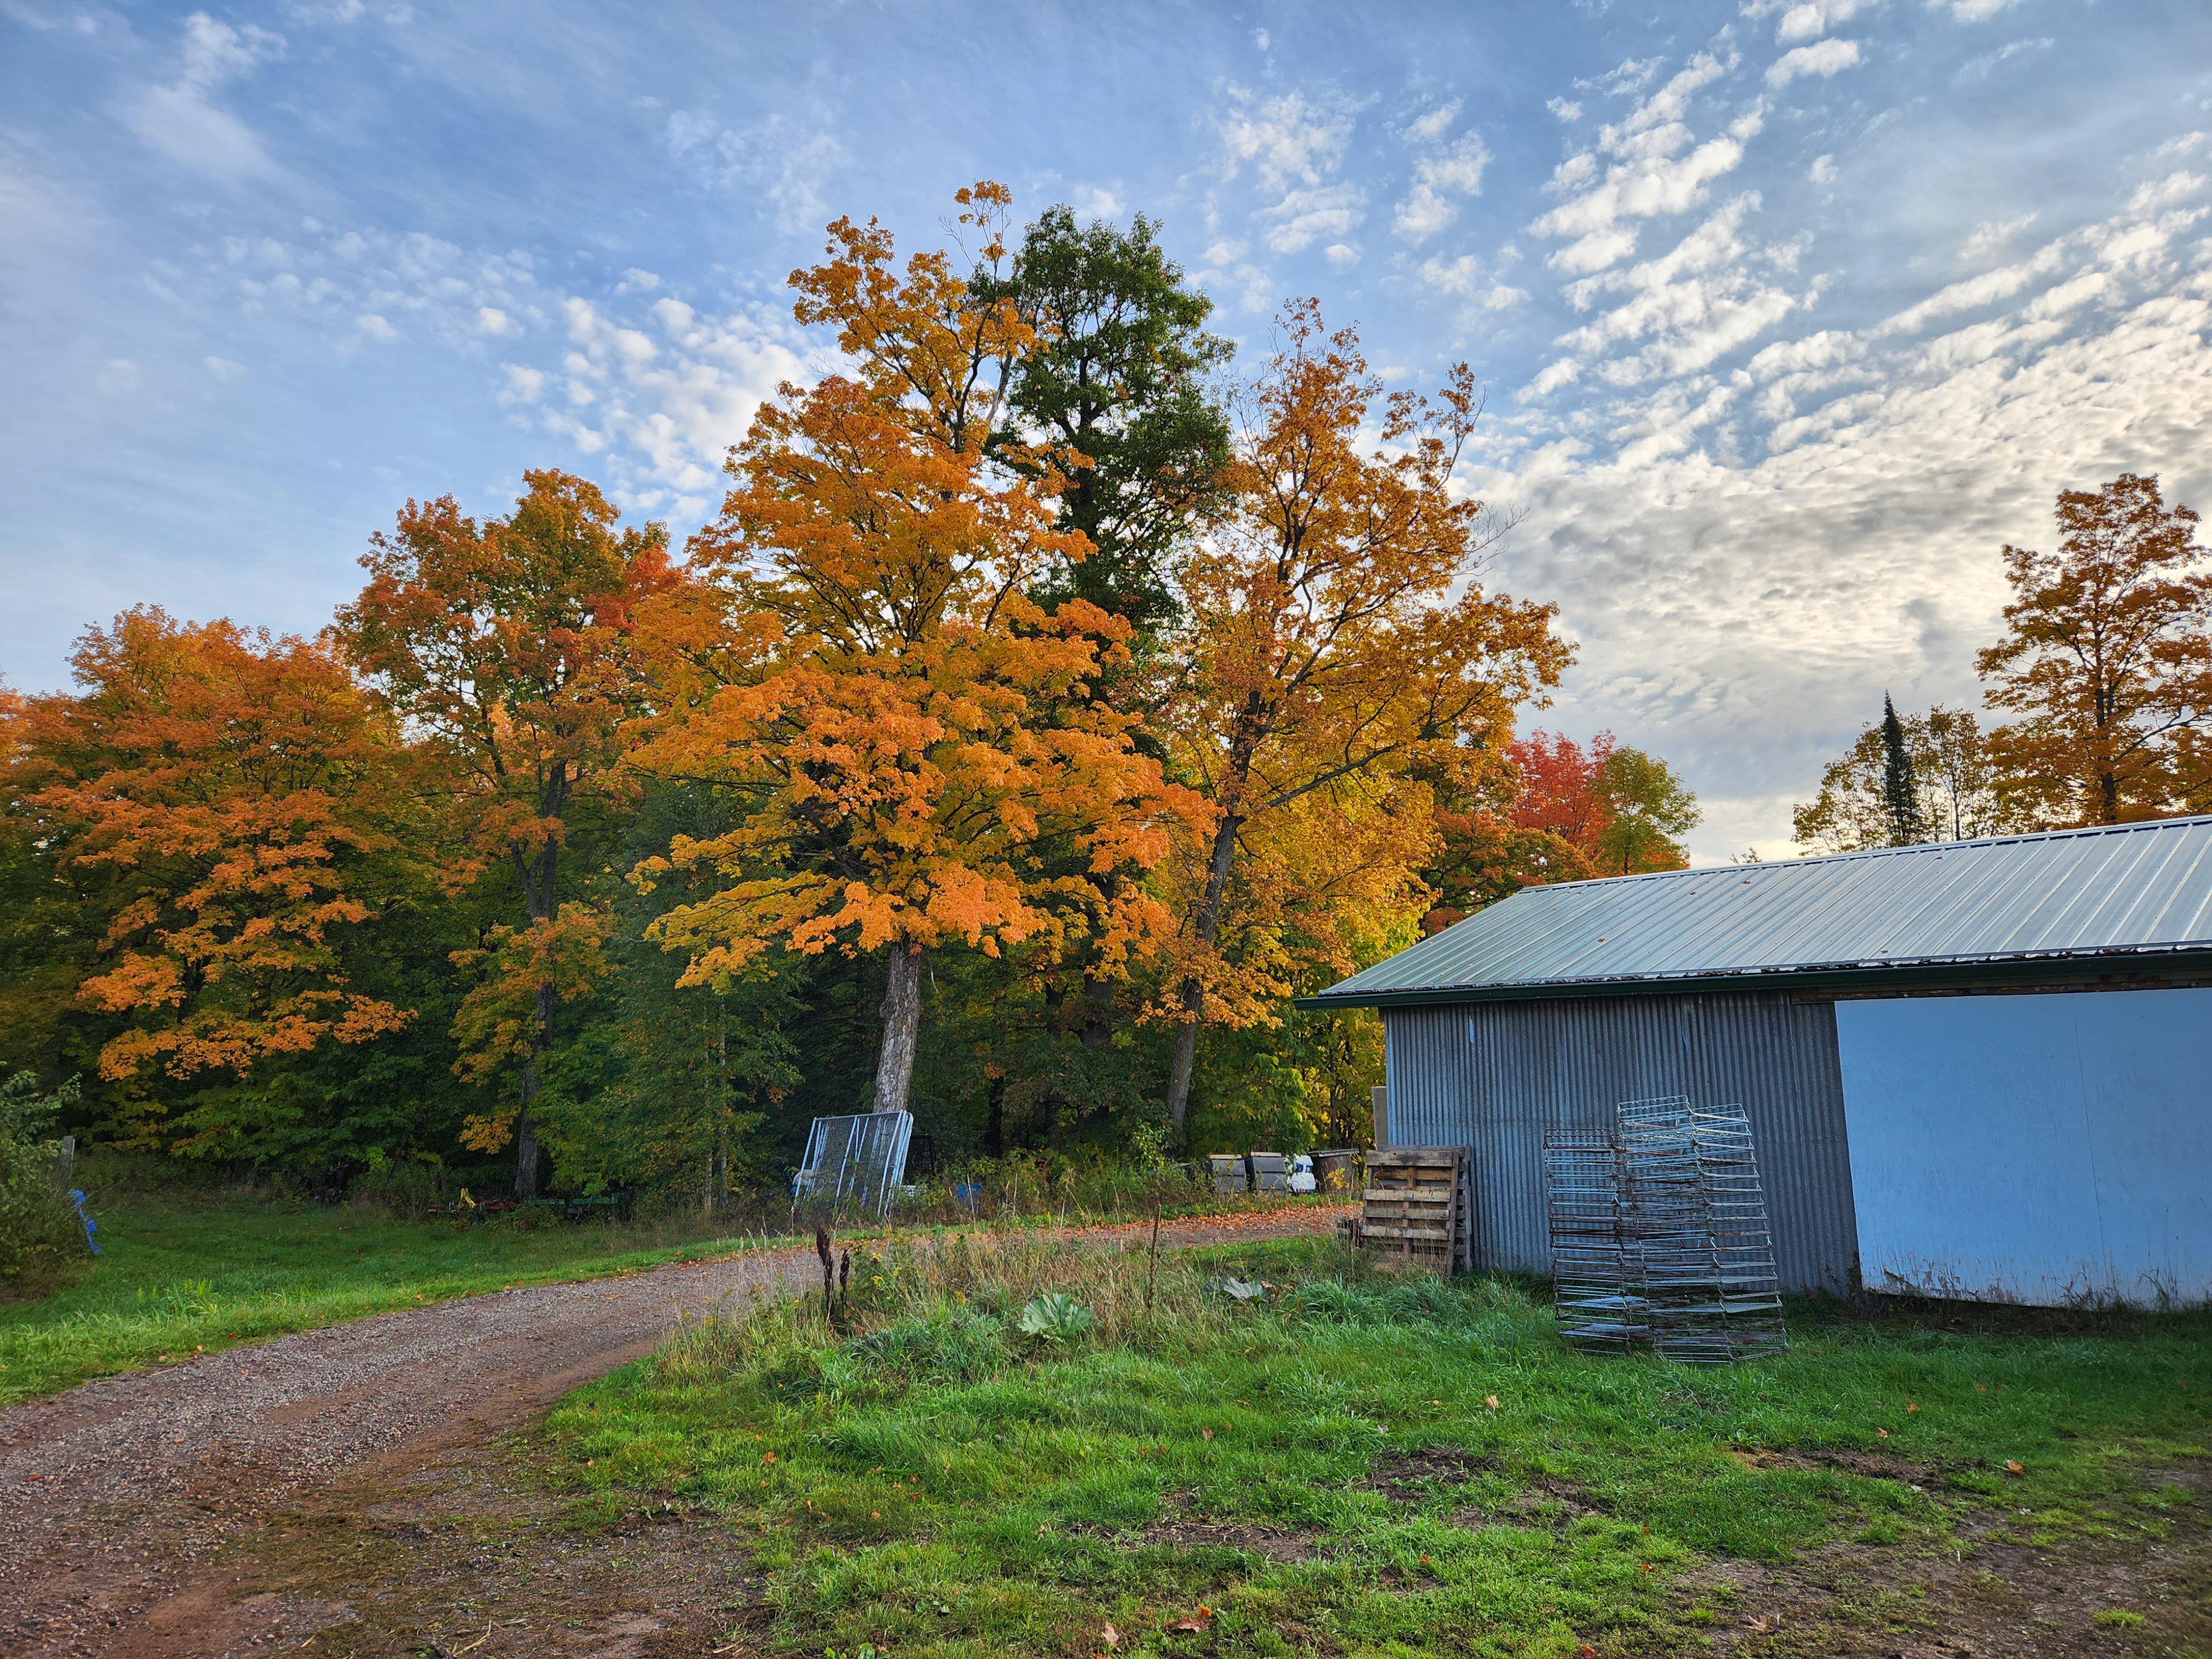
Last week I promised you all an official update on how the caterpillar tunnel experiment went. I know a few of you were heartbroken to learn that this was not in fact a fun tunnel that we let caterpillars run through all day, but instead it was an effort to save our sad looking tomatoes.

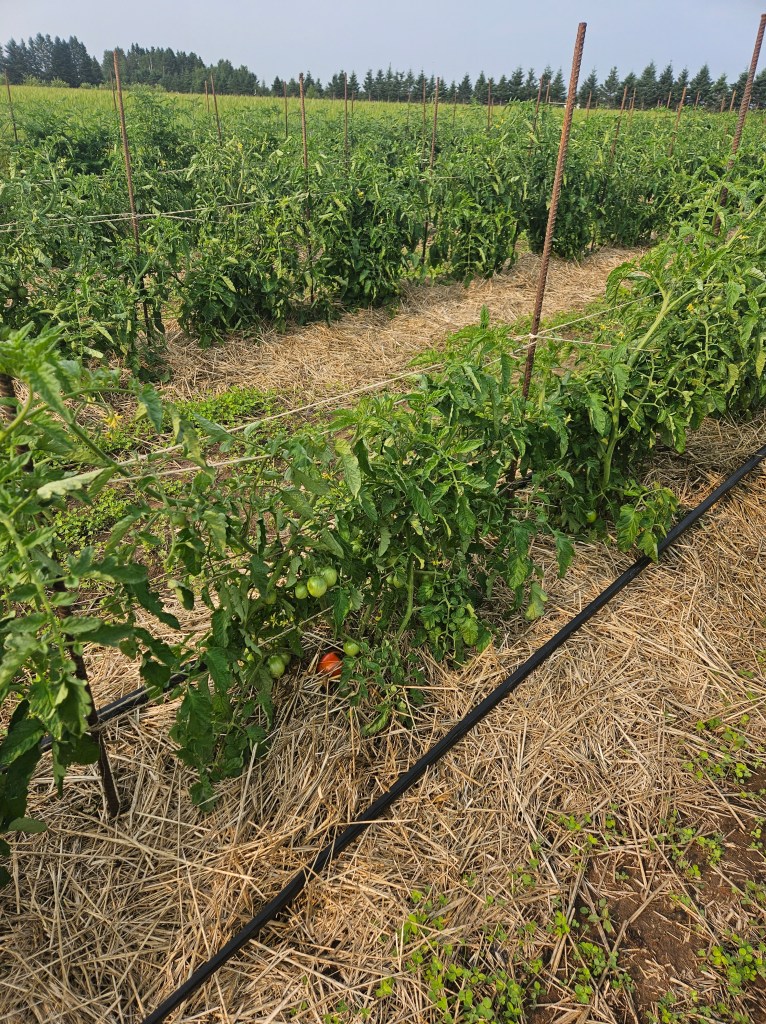
At the beginning of the season, before we put the caterpillar tunnel up, the field tomatoes looked very stressed. They had gotten their leaves pelted by so much rain and the soil was soaked. As we hustled to get the tunnel up before yet another 2″ rain, we worried that it might be too late for them to recover. I am happy to report that the exact opposite happened. We put the caterpillar tunnel over the tomatoes, and in just a few weeks, they looked like entirely different plants. The leaves went from a dry, shriveled, brown color to a soft, vibrant green color. The plants started producing more leaf sets, growing taller, and eventually putting on flowers and fruit. We think the protection from the elements really saved them because the rest of the field tomatoes developed early blight.

The fruit has been slow to ripen, but that could be because we pinched off the first one or two sets of flowers in an effort to convince the plant to focus on getting healthy rather than producing fruit. We have been able to harvest a few tomatoes, but most of the fruit on the plants is still green.

The most important factor in determining if this tunnel was a success came down to the taste. First, for background, we haven’t been satisfied with our greenhouse tomatoes for a few years so this year we tested out new fertility sources. Previously, our nitrogen source was coming from fish fertilizer, and our potassium source was mineral based. Nitrogen is important for the chlorophyll formation in plants. Chlorophyll is what makes plants green which allows them to absorb sunlight through photosynthesis. Without adequate nitrogen, plants won’t be “green” enough to absorb sunlight thus stunting their growth, and possibly preventing them from fully maturing. Potassium is important for plants because it aids in regulating the rate of photosynthesis, and it is associated with the movement of water and nutrients throughout the plant. Without adequate potassium, plants have reduced yield, stunted growth, and poor flavor. 

Our previous fertilizer mixture worked okay (though applying fish fertilizer through drip tape is a smelly hassle), but we wanted to see if we could do better so we tried an amino acid based nitrogen. This is beneficial to the plants because amino acids are immediately available for the plants to absorb. The fish fertilizer delivered nitrogen in the form of proteins which can take a while to break down so they can be absorbed by the plants. We also switched to using a plant based potassium source instead of a mineral based source. Mineral based sources can often lead to a build up of minerals at the roots of the plant, preventing the plant from being able to absorb other nutrients. We also added calcium and micronutrients to round out the program.  

Farmer Janaki thought this new fertilizer combination made the greenhouse tomatoes taste significantly better than in previous years. This meant the caterpillar tunnel tomatoes had to be really great in order to earn the top spot for best tomatoes on the farm this year. We had lots of people taste testing, and we all came to the same conclusion: for our Geronimo (large slicing tomatoes) we compared one from our regular greenhouse and one from our caterpillar tunnel, and the greenhouse won. They both had a similar texture, but the greenhouse tomato had more flavor. We also compared an Early Cascade (small canning tomato) from outside and one from the caterpillar tunnel. In this test the caterpillar tunnel won. Again, they had similar textures, but the appearance and flavor of the caterpillar tunnel tomatoes was better. Oddly, the caterpillar tunnel fruit ripened later than both the high tunnel and field tomatoes. We only did a small sample so far, and this is just one year, so we are excited to keep this in mind and see if we feel the same again next year. In farming, there are so many variables that it’s hard to run true experiments that inform results year-to-year, but we keep trying to zero in on better ways of growing healthy food!

In your share this week:

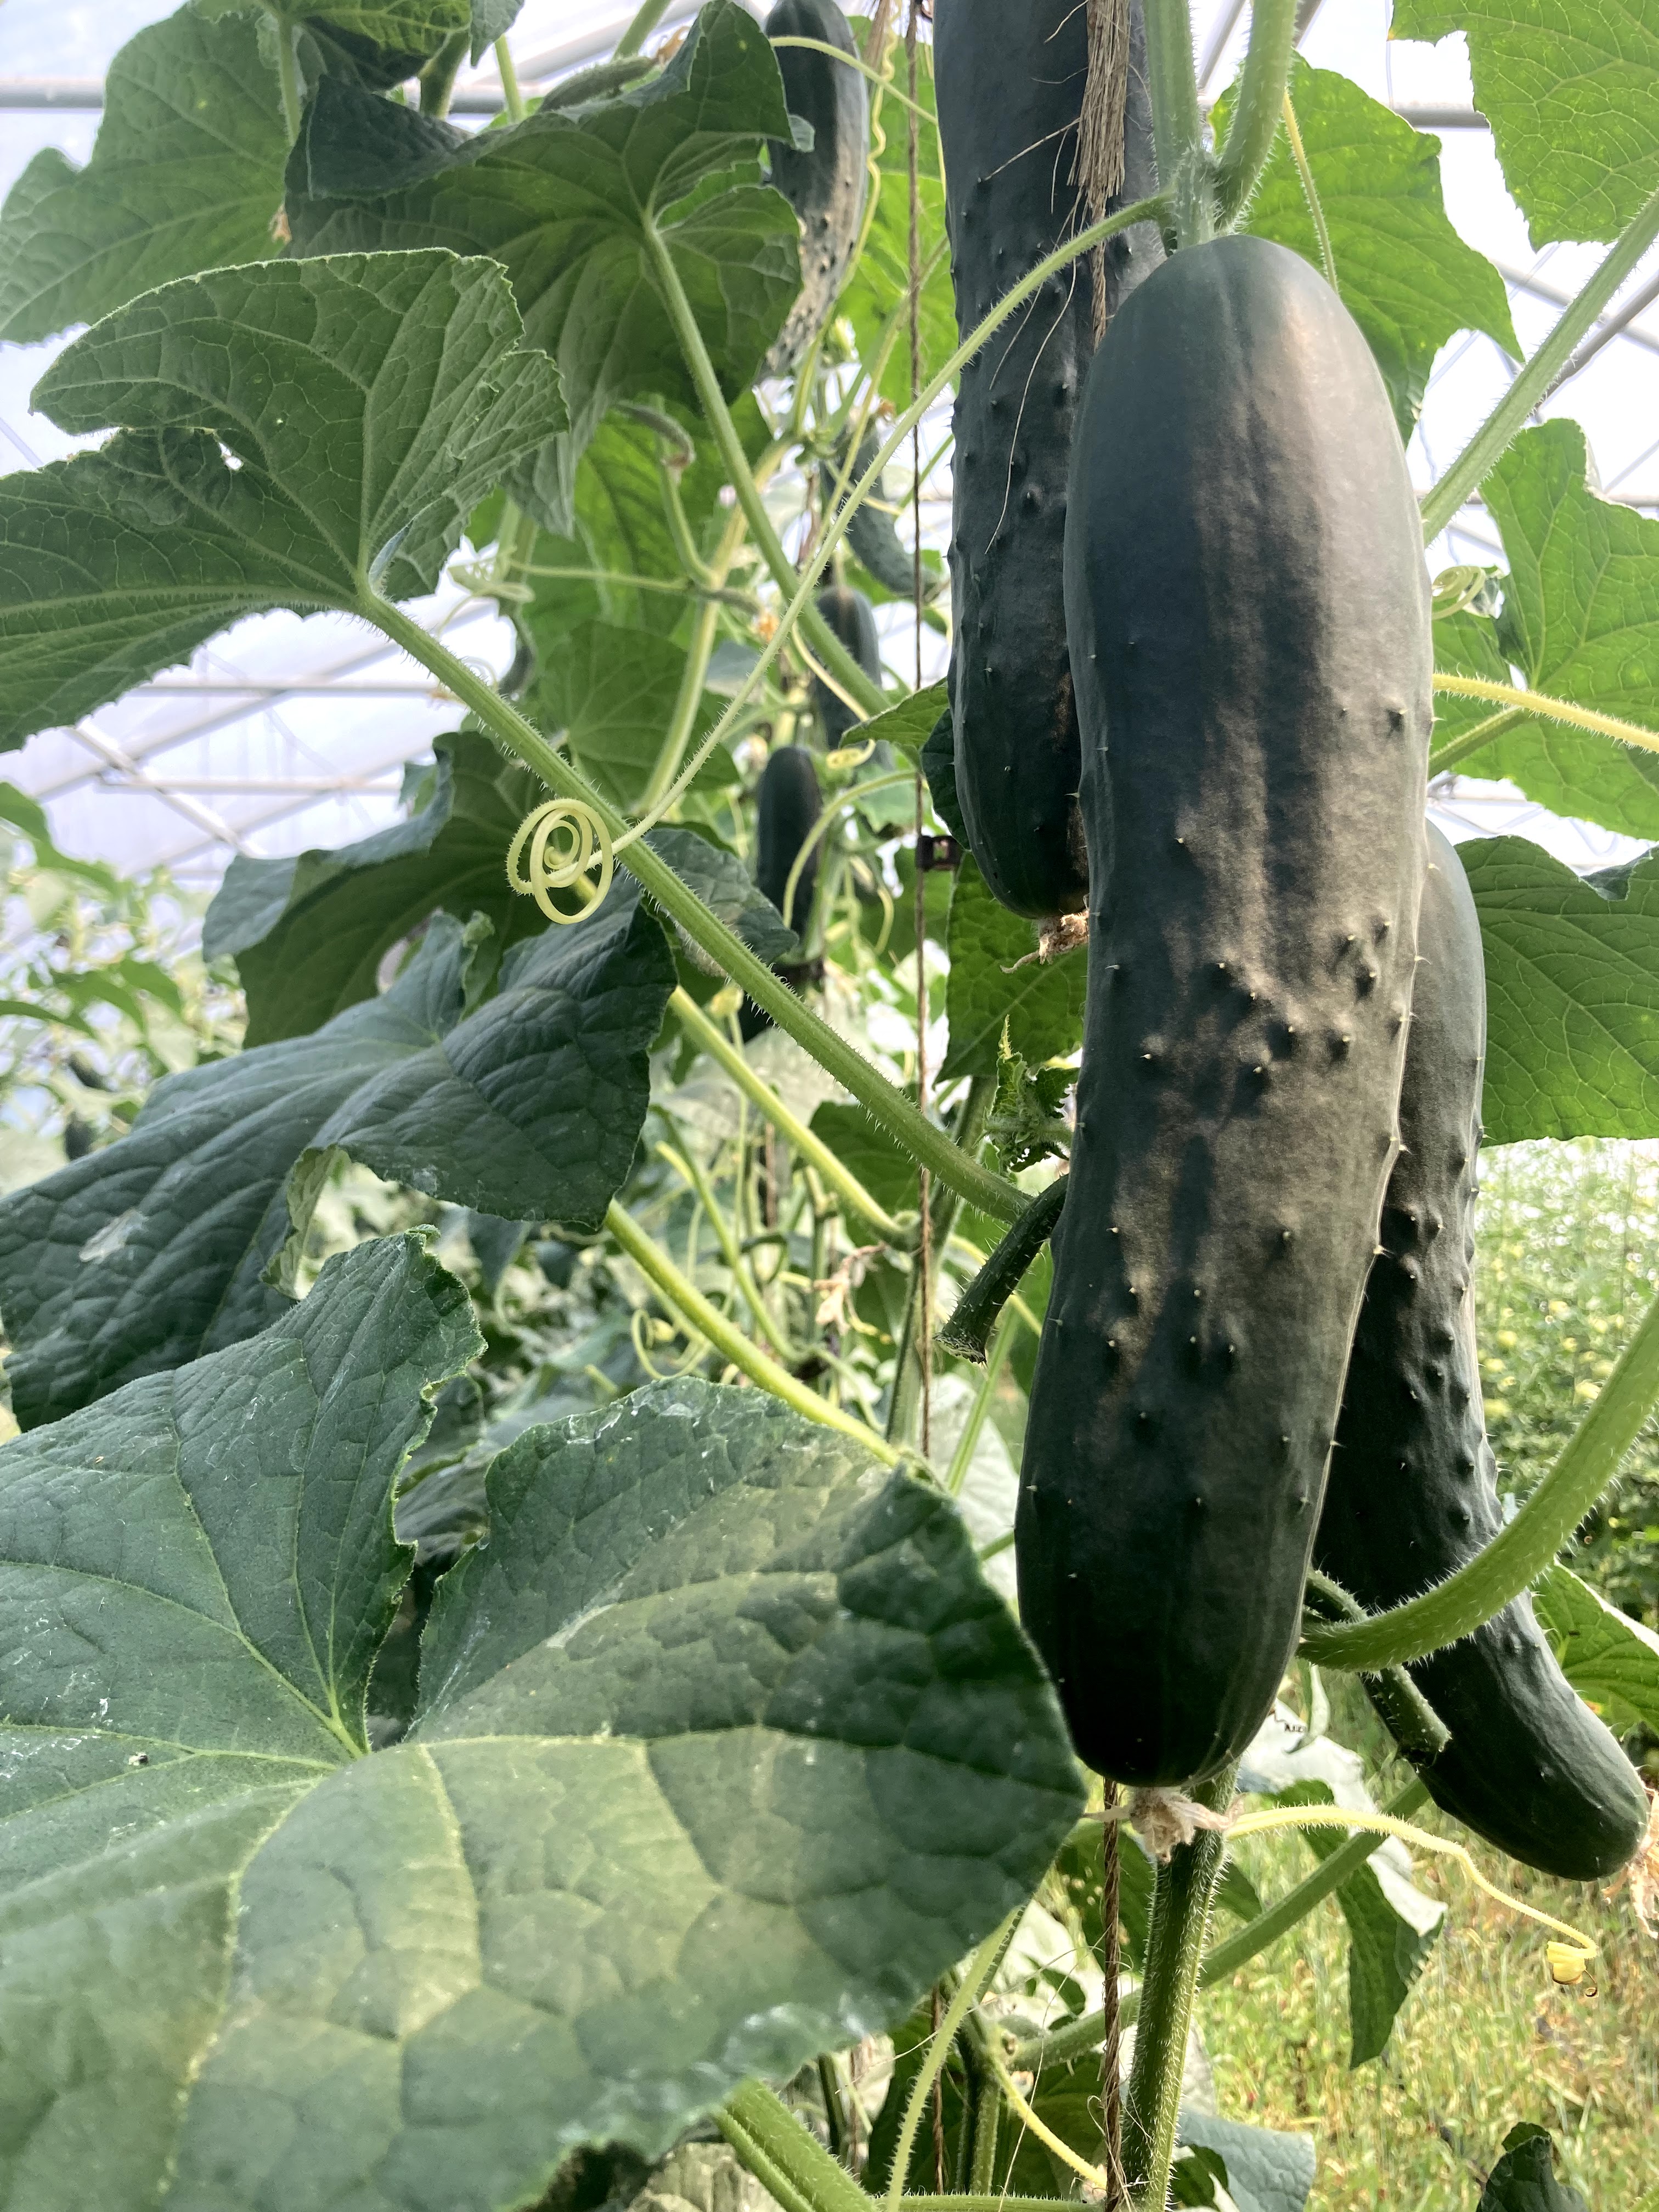
Green Beans – Broccoli – Cucumbers – Zucchini – Tomatoes – Sweet Onions – Carrots

Hot Peppers – Sweet Peppers – Potatoes – Melons – Lavender

Marcella Hazan’s Tomato Sauce 

2 cups of tomatoes with juices

5 tablespoons of butter

One onion, peeled and cut in half

Salt

Combine tomatoes and juices, butter and the onion halves in a sauce pan with one or two pinches of salt.  

Place over medium heat and bring to a simmer. Cook uncovered for 45 minutes occasionally stirring and breaking up chunks of tomatoes with the back of the spoon.

Discard the onion before pouring sauce on cooked pasta.  This recipe creates enough sauce for 1 pound of pasta.

Marinated Vegetable Antipasto

Vegetable suggestions: Blanched and chilled broccoli, cauliflower, and carrots.  Onion, celery, sweet peppers, zucchini

Marinade:

1/2 cup water

1-1/2 cups wine vinegar

1 cup olive oil

2 tbsp sugar

2 tsp fresh oregano, minced

1/2 cup pitted olives

Salt and pepper to taste

Prepare appx 8 cups vegetables by cutting into bite-size pieces.  Bring marinade ingredients to a boil in a larger saucepan.  Add approximately 2 quarts of cut up vegetables – cover and cook 3 to 4 minutes, stirring once.   Uncover, cool and refrigerate for at least two hours. Drain before serving.

Summer CSA Week 10

First things first, let’s get the business out of the way. It ‘s now August which means Coffee on the Farm is right around the corner. Please join us on Saturday, August 24th from 10am-12pm to have some delicious coffee, tour the farm, meet other CSA members, and taste some veggies straight out of the ground. This event is open to CSA members and those who are farm-curious. Bring your friends, family, neighbors, or anyone else you know who likes coffee and veggies!

Now for the fun! Last week, Janaki enjoyed some much deserved time off with his family. Thankfully he has an awesome crew who keeps things going while he’s away. This annual vacation marks 2 important timelines on the farm: garlic harvest and what I like to call “crop transition”. This is the beautiful time of year where we say our official goodbye to early season crops, and welcome the vegetable abundance that comes with the warmer weather crops.

We finished up harvesting all of the garlic, and it is set to spend the next few weeks drying away with the first group of garlic that we harvested 2 weeks ago. This marks the first empty field of the year. an exciting, but bittersweet moment.

We spent the rest of the week giving our attention to the crop transition that comes with veggie abundance. This meant saying goodbye to spring and early season crops like snap peas, napa cabbage, and Pak Choi. This meant getting any of these vegetables that might be remaining, out of the field, and taking down the pea fencing so we can put it into storage until next year.
Now we can start paying more attention to our warm weather crops such as outdoor cucumbers, tomatoes, zucchini, and peppers. It’s their time to shine, and thanks to that heat wave we got, the plants are thriving!

Last week marked the first of our peppers going out. It was great to get some peppers off the plants so smaller fruit has more space to grow. You’ll get to enjoy green peppers for a while, and as the season progresses, so will the plants resulting in delicious red peppers. Did you know that a green pepper is a pepper at its first point of maturity? Most bell peppers start out green, and as they mature they turn red, yellow or orange depending on the variety. The Jalapenos are also loving the weather lately, and we are excited to introduce these to you all this week. Be warned: these beauties pack some serious heat, so a little goes a long way.

Our zucchini got kind of a rough start this year, but looks like they’re finally coming around. When we first planted them, they immediately got attacked by squash and cucumber beetles. This left the plants weak and struggling. We put a clay spray on the plants to make them less tasty for the bugs, and it worked. The plants started growing and began producing fruit and flowers. The zucchini flowers need to be pollinated in order for fruit to grow. Ours weren’t pollinated consistently for the first few weeks, which results in strange and deformed fruit. These still taste okay, but they are unsightly and only last a day or two before they get wiggly or start to rot so we don’t send them to shares. We suspect the issue is that we planted the zucchini right next to a bed of melons, and the bees seem more interested in melon flowers rather than the zucchini flowers. This means fewer zucchini in your share, but hopefully lots of delicious and juicy melons later this month.

The outdoor tomatoes are starting to ripen, and the greenhouse tomatoes continue to get bigger and ripen at rapid speed. If you get overwhelmed by tomatoes, a great option is to freeze them and use them later for sauces, stews, salsa, or many other things. If you freeze the tomatoes with the skin on, once they’ve defrosted, the skin slides right off. No boiling necessary. This is my favorite trick to be able to enjoy the delicious taste of fresh tomatoes in the middle of winter when we’re all thinking of warmer times.

Another new introduction to your share this week is potatoes. You already got to try two of our other pre-storage crops with the green garlic and the onions. Potatoes are the next addition to this collection. We call them “new potatoes”. This means that they are young and not fully developed. They have a thin skin, and delicious flavor. We love sharing these with you as soon as possible. However, this means they aren’t fully mature. You’ll likely notice that their skin is really thin and flaky. This is because they haven’t been in the ground long enough to create the sturdy outer skin we are all used to. On the plus side, this means no peeling needed. On the downside, this means they won’t store as long, and they should be kept in the fridge. The outer skin protects the potatoes and allows them to be stored longer. Without the shell, the potatoes will turn brown and spoil quite quickly if left out at room temp for too long.

In your share this week:

Beets – Beans – Cucumbers – New Potatoes Zucchini – Baby Carrots

Broccoli – Greens Mix – Cilantro – Cucumbers – Hot Peppers – Onions – Green PeppersOregano – Tomatoes

Broccoli Pasta Salad

Ingredients

  • 3 cups small broccoli florets
  • 1 cup cut green beans
  • 2 cups uncooked gluten free fusilli pasta
  • 1 small zucchini, thinly sliced and cut into half moons (or spiralized)
  • 1 cup sliced cherry tomatoes
  • 4 oil-packed sun-dried tomatoes, chopped
  • 8 fresh basil leaves, thinly sliced
  • ¼ cup pine nuts
  • sea salt and freshly ground black pepper
  • Lemon Tahini dressing: (can be made ahead)
  • 3 tablespoons extra-virgin olive oil
  • 3 tablespoons tahini
  • 3 tablespoons fresh lemon juice, more for squeezing at the end
  • 2 tablespoon white wine vinegar
  • 1 garlic clove, minced
  • ½ teaspoon Dijon mustard
  • ½ teaspoon maple syrup
  • ½ teaspoon sea salt
  • 3 tablespoons water
  • Instructions:
  • In a small bowl, whisk together the olive oil, tahini, lemon juice, vinegar, garlic, mustard, maple syrup, salt and water. Set aside.
  • Prepare a large pot of salted boiling water and a large bowl of ice water. Drop the broccoli and green beans into the boiling water and blanch for 1-2 minutes, until tender but still bright green. Remove and immediately immerse in the ice water to stop the cooking processing. Keep in the ice water long enough to cool completely, about 15 seconds. Then, drain and and place on a kitchen towel to dry.
  • In a large pot of salted boiling water, prepare the pasta according to the instructions on the package, cooking until al dente. Drain and rinse with cold water.
  • In a large bowl, combine the broccoli, green beans, zucchini, tomatoes, basil and the pasta. Drizzle with the dressing and toss. Season to taste with salt, pepper, and squeezes of lemon, if desired. Sprinkle with the pine nuts and chill for 15 minutes. Can be stored in the refrigerator for up to 2 days.

Veggie Fajitas

SIMPLE PICO

  • 2 tomatoes, diced small
  • 1 garlic clove, minced
  • 1 jalapeño, minced
  • 1 lime, juiced
  • 1 small onion, diced small
  • 1/2 tsp. kosher salt
  • 1/4 tsp. black pepper
  • 3 Tbsp. fresh cilantro, chopped

FAJITAS

  • 2 Tbsp. salted butter, divided
  • 2 Tbsp. olive oil, divided
  • 6 oz. white button mushrooms, halved
  • 1 small red onion, sliced
  • 1 Tbsp. steak seasoning
  • 1 bell pepper, sliced into strips
  • 1 poblano pepper, sliced into strips
  • 1 small yellow squash, halved lengthwise and cut into half-moons
  • 1 small zucchini, halved lengthwise and cut into half-moons
  • 2 limes, juiced
  • 1 Tbsp. honey

Directions

For the simple pico: Combine the tomato, garlic, jalapeño, lime juice, onion, salt, pepper, and cilantro in a medium bowl.

For the fajitas: Heat 1 tablespoon of the butter and 1 tablespoon of the oil in a large heavy-bottom skillet over medium-high heat. Add the mushrooms and onions in a single layer. Let cook undisturbed for 2 to 3 minutes, allowing the vegetables to char. Season with half of the steak seasoning, and stir. Remove to a plate and set aside.

Add the remaining 1 tablespoon butter and 1 tablespoon olive oil to the skillet and heat over medium-high heat. Add the bell pepper, poblano, yellow squash, and zucchini in a single layer. Let cook undisturbed for 2 to 3 minutes, allowing the vegetables to char. Season with the remaining steak seasoning, then stir in the reserved mushrooms and onions. Let cook until the vegetables are tender but still have some bite, about 2 minutes more. Stir in the lime juice and honey, and remove from the heat.

Serve the fajitas with the simple pico, tortillas, cheddar jack, crema, lime wedges, and hot sauce.

Summer CSA week 7

Last week felt like it was all about tomatoes here on the farm. This can only mean one thing, TOMATO SEASON IS HERE! Our crew member Catherine, and our lovely volunteer, Patricia, spend a lot of time in the Spring and Summer keeping the greenhouse tomatoes happy and healthy while the rest of the farm crew tends to all of the outdoor tomatoes. It’s helpful to dedicate specific people to each location since the tomatoes are grown in different ways, which requires different levels of attention. 

In the greenhouse, we vertically trellis the tomatoes using the single leader system. In non-farm speak, this essentially means that we force the tomato plants to grow on one single stem, and we use a small circular clip to connect the twine to the tomato stem as a means of supporting the plant as it continues to grow. Tomatoes love to grow what we call suckers, also known as side shoots. These are shoots that sprout out from where the main stem and a leaf meet. If we left the suckers on the plant, they would eventually grow into another top, so the plant forms a bush. This sounds really cool because most people think it means extra tomatoes, but it can actually mean the exact opposite. By leaving the suckers, the plant then has more stems and leaves to distribute nutrients to. As the plants grow taller, this can take a lot longer for the nutrients to get past all the suckers and make its way to the top of the plant. This means more of the plant’s attention is put into vegetation rather than fruit. Too much foliage also reduces air movement which is one of the many ways tomato plants can get and spread disease. In order to achieve this, once a week, Catherine and Patricia spend time pruning off any suckers and adding clips to the plant to keep it supported. This week, Catherine also spent time taking off any of  the leaves that were growing below the first set of fruit. This does two things, it speeds ripening by allowing more light to reach the fruit, and creates better air circulation. With the hot weather we’ve recently been getting, and the plants being grown in an already hot greenhouse, more air flow is very welcomed by the plants. 

The outside tomatoes are a whole different story. We don’t do any pruning on those tomatoes. Airflow is better outside, and space isn’t at as much of a premium, so we’re able to plant the tomatoes farther apart without causing disease or shading. Another major difference between the inside and outside tomatoes is how they are trellised. Since there isn’t a pole or wire above the tomatoes, and we aren’t pruning them to follow the single leader system, the easiest way to trellis these crazy tomatoes is to use what is called the “Florida Weave” or “Basket Weave” method. With this method, posts are evenly spaced between the tomato plants, and string or twine is tightly run, horizontally, on either side of the plant. This method works to compress the plant so it stays tight and tidy in its space. It helps to lift the leaves off the ground so they are less likely to pick up diseases from the soil splashing on the leaves when it rains.  Most home growers will use a tomato cage which creates a similar effect. However, with the cages, the plant will eventually grow over the top of the cage and run out of support, and cages are prone to falling over unless they’re large, which can make harvesting tedious. With the Florida Weave method, a new set of twine is added every week or so as the plant grows to continue giving it support. At this point in the season, the outdoor tomatoes have 3 sets of twine holding them up, and we plan to add another 3 or 4 as the season progresses. 

The cool thing about these trellising methods is that they aren’t exclusive to tomatoes. You can use either method for trellising many other vegetables. On the farm, we use the single leader, vertical trellising for all of our greenhouse cucumbers. In the coming weeks, we will use the Florida Weave method as a form of trellising all of our pepper plants. 

In your share this week:

Beets – Broccoli/Cauliflower – Cilantro – Chard – Carrots Green Onions – Snap Peas – Juliet tomatoes (just a couple today, but more to come!) 

Fried Rice

3 tablespoons oil

One medium onion, chopped

1 clove garlic, minced

One bell pepper, chopped

Two carrots, chopped

Broccoli or cauliflower chopped

Chard cut into ribbons

Snap peas, chopped

Green onions, chopped

1/4 cup Cilantro, minced

Tomatoes, optional

2 eggs, whisked

3 to 4 cups of cooked rice, cooled

1/4 c water

2tbsp soy sauce

1 tbsp sesame oil

Salt and pepper to taste

Put 1 tablespoon of oil into a wok or large skillet.   When it begins to shimmer add the chopped onion, garlic, carrots, pepper, broccoli, and cauliflower.  Sauté a few minutes and then add the peas, chard and tomatoes.  Fry  until partially cooked, but still crisply textured. 

Remove vegetables. Add remaining oil to pan or wok.  When the oil shimmers, add the rice.  Break up clumps and stirfry. Make a well in the center and pour the eggs into the well.  Scramble the eggs in the middle of the rice and when they’re cooked, add all the vegetables.

Add water, soy sauce, sesame oil and salt + pepper.   Stir.   Top with cilantro and green onions

For the farm crew,

Jennifer

Summer CSA Week 16, 2023

Greetings, fellow Food Farm enthusiasts! As we bid adieu to the vibrant greens of summer and warmly embrace the gold & red arrival of autumn, we find ourselves hard at work in the changing landscape of the farm. With Saturday’s equinox marking the official start of fall, we ready ourselves for the snow to fly. Hopefully not too soon though, as there is a lot left to harvest! With only two more summer CSA shares remaining (after this week), the harvesting has shifted more and more to winter storage items. Last week, the big to-do was clipping and bringing all the squash varieties in from the field. This year we grew six different varieties: Delicata, Kabocha (green, winter sweet & sunshine), Acorn & pumpkins!

Apart from our usual CSA packing and retail orders, the squash took just about the entire week to complete. It is one of the more physically demanding tasks we do here and that is much in part to the sheer weight that needs to be moved to and fro – over 20,000 pounds of squash! Many hands do not make light work in this case, although it is always fun when the whole crew gets to work together on a singular task.


In your share this week:

Northeaster Beans – Broccoli – Carrots – Celery – Cucumbers – Lettuce – Onions

Red Peppers – Red Potatoes – Spinach – Winter Squash


New to the shares last week and featured again this week are the northeaster beans. Upon being greeted by them in the greenhouse, it is easy to imagine someone dreaming up the fairytale of Jack and the Beanstalk. The vigorous pole beans enthusiastically scale the framing of the greenhouse, almost as if they would keep climbing and climbing until out of sight if not for the layer of plastic containing them to safe picking heights.

This week’s share also includes what will likely be the last of the broccoli for the year. To celebrate I have included a recipe for broccoli cheddar soup that will help us feel extra cozy through all this dreary weather.


Ina Garten’s Butternut Squash Salad Recipe, from fool proof living

Yield: 4 servings

1 1/2 pounds winter squash, ¾ inch slices
1 tablespoon maple syrup
2 tablespoons + 1/4 cup olive oil, divided
2 teaspoons Kosher salt, divided
1 teaspoon coarsely ground black pepper, divided
3 tablespoons dried cranberries or raisins
3/4 cup apple juice or apple cider
2 tablespoons apple cider vinegar
2 tablespoons onion minced + dash of garlic powder
2 teaspoons Dijon Mustard
6-8 cups lettuce & spinach
1/2 cup walnut halves, toasted
1/4 cup shaved Parmesan cheese

  1. Prep the oven and squash seasoning: Preheat the oven to 400°F.
  2. Toss the squash: Place the squash on a baking sheet. Drizzle it with maple syrup and 2 tablespoons of olive oil. Sprinkle it with 1 teaspoon kosher salt, and ½ teaspoon black pepper. Toss to ensure that all of the squash is coated.
  3. Roast and turn: Place it in the oven and roast for 20-25 minutes until tender, turning once halfway through. In the last 5 minutes, add the cranberries.
  4. Make the vinaigrette: Place apple juice, cider vinegar, and minced onion + dash of garlic powder in a small saucepan and bring to a boil over medium-high heat. Cook for 6-8 minutes, or until reduced to 1/4 cup. Remove from heat.
  5. Finish the dressing: Off the heat, whisk in the Dijon mustard, 1/4 cup of olive oil, 1 teaspoon salt, and 1/2 teaspoon pepper. Whisk until emulsfied.
  6. Assemble the salad: Place the lettuce & spinach in a large salad bowl. Pour over the dressing and give it a big toss. Add the roasted butternut squash and cranberries.
  7. Finish and serve: Top it off with toasted walnuts and shaved Parmesan cheese. Taste and season with salt and pepper, if necessary. Enjoy!

Broccoli Cheddar Soup, from Gimme Delicious

Yield: 4 servings

4 tablespoons butter
1/2 medium onion, chopped
2-3 cloves garlic, minced
4 tablespoon AP flour
2 cups low sodium chicken or vegetable stock
1 teaspoon kosher salt
1/2 teaspoon black pepper
1/2 teaspoon paprika (or ground nutmeg), optional
3 cups broccoli florets (1 large head), cut into small pieces
1 large carrot, grated
2 cups half & half, heavy cream or milk
8 oz block grated cheddar cheese

  1. Melt butter in a large dutch oven or pot over medium-high heat. Add the onion and cook 3-4 minutes or until softened and light gold. Add the garlic and saute for another minute.
  2. Add flour and whisk for 1-2 minutes or until the flour begins to turn golden in color. Pour in the chicken stock, broccoli florets, carrots, and seasoning. Bring to a boil then reduce heat to medium-low and simmer for 15 minutes or until the broccoli and carrots are cooked through.
  3. Stir in half & half and cheddar cheese and simmer for another minute. Taste and adjust seasoning if needed.
  4. Serve with toasted crusty bread or in a bread bowl if desired.

For the farm crew,

Charlie

Summer CSA Week 9, 2023

Start your engines… The harvest machines are starting to make their laps through the fields! Heretofore, the veggies you’ve been enjoying have been harvested by hand, with love. Towards the end of last week, the carrots and potatoes were still harvested with lots of love, but with a little extra help from two wonderful harvesting machines that are made specifically for those crops. The added volume means we can now send carrots to local grocery stores like the Co-op & Mt. Royal, as well as more for our CSA members.

Not all the work was machine assisted, however, as the crew also spent many hours crawling on their hands and knees to remove weeds from the beet, carrot and pea fields. This may not be the most glamorous of tasks, but the plants sure are thankful for less competition for water, sunlight and nutrients.

I hope you’ve been enjoying this newsletter as a way to stay updated about the recent happenings at the farm, however, nothing captures the beauty of this place quite like seeing it for yourself. Coming up is the perfect opportunity to do just that! We would love to see you all at our Annual Farm Tour get-together on Saturday, August 26th from 10am to noon!


In your share this week:

Basil – Green Beans – Broccoli – Carrots – Celery – Cucumbers

Green Garlic – Onion – Bell Peppers – Potatoes – Tomatoes – Zucchini


This weeks share features a few new additions in basil, bell peppers, onion, and celery. Also included is a head of green garlic, which is brighter, milder and has less heat than fully cured garlic.

The past couple weeks, I have had multiple friends reach out to tell me about the delicious berry pies they have been making with the freshly foraged juneberries, raspberries and blueberries that are currently in season. We have many wonderful berry farms in our area, but that isn’t the only thing a pie crust is good for. A more veggie applicable method would be to make a quiche! This is also a delicious way to use up some of our girls’ eggs if you happen to have an egg share.

I’ve decided to include my favorite most versatile recipe for flaky pastry crust as the base for both recipes this week. It is somewhat involved, so If you are short on time, a store bought crust will also do the trick.


Flaky Pastry Crust

12oz butter
3/4 cup cold water
2 tablespoons apple cider vinegar
3 3/4 cup flour
1 1/2 teaspoons cumin
1 1/2 teaspoons salt

  1. Put butter in the freezer for an hour or so to let it get nice and cold.
  2. Combine flour, salt & cumin in a large mixing bowl. Stir 3-4 times to combine.
  3. Combine apple cider vinegar and water in a small cup or liquid measuring container.
  4. Using the large holes of a cheese greater, grate the frozen butter into the flour mixture. Gently stir to combine.
  5. Slowly add water & vinegar mixture to the large mixing bowl until a crumbly dough starts to just come together. A little extra water may be necessary depending on humidity levels. Go slow though, as the dough should just barely hold together.
  6. Remove the dough from the bowl and mound onto a clean work surface. Cut ball in half then form each half into discs. Wrap discs in plastic wrap and place in fridge for at least an hour.
  7. Roll out when ready.

Broccoli Quiche w/ Peppers and Tomatoes

2-ish cups broccoli florets (about 1/2 pound)
1/2 cup peppers, diced
1 medium tomato, sliced
5 large eggs
3/4 cup milk (whole works, but half and half can be used for extra richness)
3/4 tsp salt
1/4 tsp pepper
1 tsp dijon mustard
1 cup shredded cheese of choice (cheddar is great!)
1 9-inch pie crust

  1. Preheat oven to 350 degrees F.
  2. Roll out pie crust, arrange in pie tin, and chill until ready to use.
  3. Place 1-2 cups water in the bottom of a small pot. Add broccoli and bring to a boil. Cook until the broccoli is bright green and slightly tender (about 3-4 minutes). Transfer broccoli to a colander and rinse with cool water. Chop broccoli into small pieces.
  4. In a large bowl, whisk together eggs, milk, salt, pepper, and mustard. Stir in the broccoli, peppers, and cheese. Pour into the prepared pie shell.
  5. Gently pat the tomato slices with a paper towel to absorb excess moisture and place on top of the egg mixture.
  6. Bake quiche for 35-40 minutes, until eggs are set in the center. Check quiche starting at 25 minutes, and tent with foil if the crust is browning too quickly.

Vegetable Galette

Galettes are a wonderful way to use up vegetables! “Galette” is a french term for a pastry base, filled with sweet or savory fillings, with the edges folded in. I recommend sautéing vegetables such as onion, broccoli, and green beans before baking in a galette. They don’t need to be fully cooked, as they will continue cooking while the galette is baking. Veggies such as zucchini, pepper, garlic can be chopped and mixed with olive oil, salt, pepper, and any other dried spices of your choosing and placed in a galette raw. Grate some parmesan or another hard cheese over the vegetables before folding up the sides. Fresh herbs (such as the basil from this weeks share) can be chopped up and sprinkled over the top of the galette when it comes out of the oven.

Here’s an article from Bon Appetit to shed some more light on the galette-making process.

Channel the spirit of this free-form pastry to experiment with ingredients from this week’s share and whatever is hanging around in your fridge! You can rarely go wrong when pie dough is involved 🙂


For the farm crew,

Charlie

Summer CSA Week 17, 2022

It’s pumpkin time!

This is the penultimate CSA week! You will be receiving a carving pumpkin with your share this week. The pumpkins do not fit in the box, so please remember to grab your pumpkin when you pick-up. Enjoy carving jack o’lanterns! Try roasting your pumpkin seeds for a bonus tasty snack.

Next week will be the 18th and final CSA box for this season. It has been a joy having you as part of the Food Farm family!

Loading up pumpkins for Monday deliveries.

In your share this week:

Noreaster Beans – Broccoli – Carrots – Garlic – Leeks – Lettuce – Onion – Sweet Red Peppers (not hot) – Jalapeño Pepper (hot) – Yellow Potatoes – Daikon Radish – Delicata and Acorn Squash – Tomatoes – Parsley


Leaves changing at the farm


Universal Cream of Vegetable Soup

This recipe works for nearly any vegetable the farm grows – from celery to leeks to squash! This is also a great way to use up veggies from last week.

Ingredients

  • 4 tbsp butter
  • 6-8 cups coarsely chopped veggies (suggested starting point: 1 med onion coarsely chopped, 2 leeks, one clove garlic minced, 2 diced carrots,  2-3 stalks celery coarsely chopped, 2 potatoes diced. Add any other veggie like broccoli, cauliflower, or  squash to total 6 cups veggies.)
  • 1/4 cup flour.  
  • 4 cups broth (chicken, pork or veggie)
  • 1/2 to 1 cup milk or cream
  • Salt and pepper to taste

Instructions

  1. Sauté veggies in the butter 10-15 minutes (until tender but not brown).
  2. Add flour and cook for a couple of minutes.  
  3. Turn heat to high and add 4 cups of broth (chicken, pork or veggie), while constantly stirring as the soup thickens.  Bring to a boil.  
  4. Reduce heat to simmer the soup.  Cook, partially covered, until the vegetables are very tender (appx 30 minutes).   Using an immersion blender, food processor, or blender process the soup until smooth.  Add a little water or more broth if the soup is too thick and difficult to process.  
  5. Return soup to the pot and add 1/2-1 cups milk or cream.  Salt and pepper to taste.
  6. Can be served with grated cheese.

Recipe from Deb Rausch


What to do with Daikon Radish?!

This week you will find daikon radish in your box. Daikon is a large peppery variety of radish that is common in Asian cuisines. This crunchy vegetable can be eaten raw, pickled (like in traditional kimchi), or cooked.

Vietnamese Pickled Carrots & Daikon Radish (Đồ Chua)

Ingredients

  • 1/2 lb daikon radish*
  • 1/2 lb carrots*
  • 1 tbsp salt
  • 1/2 c boiling water
  • 5 tbsp granulated white sugar
  • filtered room temp. water
  • 4 tbsp distilled vinegar

Instructions

  1. Peel daikon and carrots, then cut with mandolin slicer medium to small matchsticks. Smaller cuts will pickle faster.
  2. In a large bowl, sprinkle with salt evenly and toss to coat. Soak for 15 minutes.
  3. Rinse thoroughly to remove the salt and in small hand-fulls, squeeze to remove as much moister as you can.
  4. Add to jars, filling almost to the top.
  5. Create the vinegar solution (brine) by boiling water then adding sugar. Mix to dissolve. Add vinegar.
  6. Pour this liquid evenly into your jars. If needed, add extra room temp water to barely fully submerge the veggies.
  7. Screw on the lids, store at room temperature until pickled to your taste, checking every 12 or 24 hours. It usually takes 2-5 days depending on the temperature.
  8. Refrigerate when ready, for up to 3 weeks, or until too sour or veggies lose their crunch.

*You can change the ratio of veggies to your preference and/or scale the recipe up or down depending on how much veg you have to pickle. Just make sure you have enough brine to completely submerge your veggies.

Based off recipe from Hungry Huy.

Check out other daikon recipes here.


For the farm crew,

Starr

Summer CSA Week 5, 2022

We love fresh produce any time of the year, but early summer is particularly special. There’s something magical about the first time in a season we’re able to share a vegetable. We have several firsts this week: cauliflower, kale, cucumber, AND garlic scapes. We’re watching our harvests diversify and we love it!

Pictured to the right: the crew weeding carrots in a wet fog on the 4th of July.

We’ve had some more storms and wet weather this past week, but fortunately nothing severe, and the moisture levels aren’t excessive. A word of advice to home gardeners: stay out of your gardens as much as possible in wet weather. Stepping in wet mud will cause compaction and be detrimental to your soil’s health. Plant diseases spread more readily in wet weather and your hands and tools could make that worse. On the Farm, have to keep working, even when it’s rainy, but we’re very selective about the tasks we do and how we harvest. Keep dry!


In your share this week:

Broccoli – Cauliflower – Lettuce – Green Onions – Carrots with Tops – Kale – Garlic Scapes – Cucumber


Forager’s Soup

Serves 6-8

Ingredients

4 tablespoons butter (use olive oil for a vegan alternative)

1 cup diced onion

1 medium potato, peeled and diced

salt and freshly ground black pepper

2 cups chicken or vegetable stock or hot water

1 1/2 cups whole milk (optional)

1/4 cup heavy cream (optional)

~4 cups (8 oz) mixed chopped spring greens, include scapes, kale, green onions, carrot tops, and/or broccoli (use whatever is on hand!)

3 tablespoons olive oil (to cook meat)

3 oz chorizo or bacon, finely diced (optional)

Preparation

  1. Melt butter in a large pot over medium-high heat. Once the butter foams add onion and potato and stir to coat butter. Add salt and pepper. Turn down heat and sweat the onions and potato on with a tight fitting lid for 10 minutes. Vegetables should not brown.
  2. Heat the stock (or water) in a saucepan until simmering. Add hot liquid to potatoes and onions and simmer 5-10 minutes more until vegetables are completely cooked. Add greens and simmer uncovered for 2-3 minutes more. (Don’t over cook the greens!)
  3. Blend with a blender or hand blender. Puree until smooth. Salt and pepper to taste. Stir or blend in milk and cream.
  4. If adding meat, heat olive oil in a small skillet. Add chorizo or bacon and cook until fat is rendered and meat is crisp, 5-10 minutes. Remove and drain on paper towels. Reserve the oil for a garnish or other cooking projects.
  5. Serve soup hot with the above meat and a few drops of the cooking oil to garnish.

This soup can be made a day in advance and kept in the refrigerator! Just gently reheat on the stove top, uncovered. To make this recipe vegetarian, use vegetable broth and skip step 4. To make vegan, also exclude the milk and cream, or substitute with vegan milk option.

*The above recipe is adapted from “Forgotten Skills of Cooking” by Darina Allen and has revisions from volunteer Deb Rausch to better suit our boxes this week. *(Source of recipe previously listed incorrectly.)


garlic scapes ready to go into share boxes

What are garlic scapes?

Scapes are the curly stems produced by hardneck varieties of garlic. We prune off these scapes so the garlic plant puts more energy into producing the garlic heads we all enjoy. If left on the plant these scapes would produce bulbils, which are like seeds that produce a clone of the parent plant.

Lucky for us, scapes are super tasty and get us through the early summer before the garlic crop is ready! Scapes are have a hot garlic flavor when eaten fresh and are a great garlic replacement in pesto. When cooked, the flavor mellows out. Try grilling garlic scapes or adding them to soups.


Still looking for recipes?

Use the Tag Cloud below to find archived recipes from past years. Just click an ingredient below and you’ll be taken to a list of all posted newsletters with a recipe that includes that vegetable. The larger the text below, the more posts there are including that vegetable.

Arugula Basil Beet Bell Pepper Broccoli Brussels Sprout Brussels Sprouts Cabbage Carrot Cauliflower Celery Cilantro Cucumber Delicata Squash Dill Dressing/Sauce Egg Garlic Garlic Scape Green Bean Green Onion Jalapeno Kale Leek Lettuce Mint Napa Cabbage Onion Parsley Parsnip Pepper Potato Radish Red Onion Rutabaga Scallion Shallot Spinach Squash Thyme Tomato Turnip Winter Squash Yellow Onion Zucchini

The farm crew admiring dramatic cloud formations on 7/11 just before being pelted with rain.

For the farm crew,

Starr

Summer CSA Week 10

We’re just over half way through the 2021 summer share! We hope you’ve been enjoying the ever more summery selection! Our item list on the white board hardly fits any more – time to write it smaller. The crew has more of a routine as the summer goes on as different people take on a different, regularly harvested crop like daily zucchini and cucumbers, and almost daily melons (for a while), peppers and broccoli (never ending!). The addition of increasingly more harvesting is butting up against some later-than normal season weeding as rains have helped both crops, and the little (and not so little) unwanted plants in our fields.

We will be getting into a more regular rhythm of harvesting large amounts of things at a time too, to have available for a week or two at a time. The first planting of carrots got harvested a week and a half ago, and we have a few bins of cabbage in the cooler waiting for wholesale orders and for CSA delivery. The garlic is out of the ground, a couple weeks ahead of usual, and is curing in the greenhouse for now. Soon we’ll trim those stalks and move the garlic to make way for onions. Bit by bit the harvest ramps up, and we can start ticking entire crops off the list.

How about all of you? Do you feel like you’re in a good rhythm of using your share, or are you stuck in a rut? Hopefully you won’t ever feel too stuck since the veggies change throughout the season, though I think my household is already ready to move on from zucchini fritters… Time to move on to my regularly occurring (but it’s been a while!) potato salad I guess!

August in Minnesota always feels so full and so fast with late summer camping trips, or weddings and planning for the fall and school season ahead. Even if school isn’t a part of your life any more, there seems to be a different pace to things come September. I hope you are all finding satisfying ways to spend these last summery weeks. Perhaps in a couple of weeks, on the 21st (3-5pm), you’ll find yourself out here at the Food Farm for our farm gathering, or up the road for the Free Range Film Festival (7pm)! What could be more summery than an afternoon drive out to Wrenshall?

For the busy crew,

Karin


In your share this week:
Green Beans – Broccoli – Carrots – Cucumber – Dill – Melons! – Sweet Onion – Green Onions – Sweet and Hot Peppers – Potatoes – Tomatoes – Zucchini


Cream of Broccoli Soup, By Farmer John

One large head of broccoli “the biggest you can find”, chopped
One large onion, the biggest you can find, chopped (not a sweet onion… sorry)
One large carrot, also the biggest you can find, chopped

2 Cloves Garlic
2 Tbsp, (but he uses 3) butter
2 Cups chicken or veggie broth
Salt to taste
1 Cup milk

Cook veggies in broth until quite soft, and then blend the living daylights out of it with an immersion blender. Add milk, stir and taste.
We talked about the option of freezing the soup – perhaps freeze it before blending, and adding the milk, so as to simplify the reheating. Then thaw, heat, blend and add milk when you’re ready to serve.

Ultimate Zucchini Bread

From The Smitten Kitchen

I have been making this like it’s going out of style… but it never will in my house! If you want a fun little description about how she got to this recipe from other less satisfying versions, look it up on her website – all her complaints about plain old zucchini bread were also my own- but I love this recipe! Disclaimer… it is basically eating cake for breakfast.

  • 2 cups (13 ounces or 370 grams) grated, packed zucchini, not wrung out, grated on the large holes of a box grater
  • 2 large eggs
  • 2/3 cup (160 ml) of a neutral oil (I use safflower), olive oil, or melted unsalted butter
  • 1/2 cup (95 grams) packed dark brown sugar
  • 1/2 cup (100 grams) granulated sugar
  • 1 teaspoon vanilla extract
  • 1 teaspoon fine sea or table salt
  • 1 1/4 teaspoons ground cinnamon
  • 1/8 teaspoon ground or freshly grated nutmeg
  • 3/4 teaspoon baking soda
  • 1/2 teaspoon baking powder
  • 2 cups (260 grams) all-purpose flour
  • 2 tablespoons (25 grams) raw or turbinado sugar

Heat oven to 350 degrees F. Lightly coat a 6-cup or 9×5-inch loaf pan with nonstick spray. Place grated zucchini in a large bowl and add oil, eggs, sugars, vanilla, and salt. Use a fork to mix until combined. Sprinkle cinnamon, nutmeg, baking soda, and baking powder over surface of batter and mix until combined — and then, for extra security that the ingredients are well-dispersed, give it 10 extra stirs. Add flour and mix until just combined. Pour into prepared loaf pan and smooth the top. Sprinkle with the raw or turbinado sugar — don’t skimp. Bake for 55 to 60 minutes, until a toothpick or tester inserted into the middle cake but also into the top of the cake, closer to the dome, comes out batter-free.

Let cool completely in the pan. Leave in pan, unwrapped, overnight or 24 hours, until removing (carefully, so not to ruin flaky lid) and serving in slices. Zucchini bread keeps for 4 to 5 days at room temperature. I wrap only the cut end of the cake in foil, and return it to the baking pan, leaving the top exposed so that it stays crunchy.

Summer CSA Week 8

We’re grateful for the half inch of rain we got on Saturday- and we’d like to place an order for more on Monday… but no hail this year please! It is hard to know the total of what damage the hail did last year exactly – but it definitely made the 2020 season feel more Biblical than ever- and not in a nice way.

I am excited for potatoes this week. New potatoes are so extra tasty, tender, and fresh feeling. You could do anything you want with them and it would be delicious. However – if I were you, I’d keep it simple with the potatoes the first few weeks. You have all winter to cover them up with mayonnaise, cheese, or gravy. These first potatoes are so good roasted and then smashed with herbs and butter, or in a potato salad with a bright dressing as opposed to something creamy. Of course- if you’ve been waiting months for local-cheesy hashbrowns, I won’t stand in your way.

Potatoes are such a great vegetable. Even people who don’t like vegetables like them, that’s how great they are. And, while fries and potato chips are not sustainable every day options, potatoes really are quite nutritious as an every day food. They are such a staple of so many recipes from European countries, but they really only made it from the Americas to Europe around five hundred years ago, give or take. In some ways, that isn’t really so long ago.

The share is moving in a particularly American direction this week with the addition of potatoes, peppers and of course the tomatoes and zucchini. What a tremendous amount of work and attention must have happened to breed otherwise poisonous plants into what would become near-global staples. I feel grateful, but of course the how and why these vegetables made it halfway around the world and back is not a happy one for the people who originally bred and worked over plots of potatoes, peppers, tomatoes and squashes. I wish there was a word that mixed joyful gratitude with un-payable debt.

Whatever that word would be, perhaps it will hover over you as you prepare meals from your share this week. I am sure they will all be delicious.

For the farm crew,

Karin


In your share this week:
Broccoli – Carrots – Cauliflower – Cucumbers – Dill – Lettuce – Green Onions – Parsley – Peas – Peppers – Potatoes! – Tomatoes – Zucchini

How to Freeze Broccoli

Janaki is feeling super guilty for sending so much broccoli, so here’s a quick tutorial on how to freeze it so it’s not so overwhelming. You can certainly find videos on YouTube for how to do it, but a lot of them seem too fussy. We like to get things done fast here at the farm, so here’s the farmer way:

Supplies:

1 large stockpot or saucepan, ideally with a steamer basket

Colander

Ziploc quart freezer bags

Ice (optional)

Salad spinner (optional but awesome)

Broccoli (not optional)

Cut the broccoli into smallish similarly-sized pieces, I usually shoot for around 1.5-2″ diameter. Stems can be used as well, though they’re more dense so should be cut smaller/thinner so they blanch in the same amount of time. I only use the tender part of the stems, but you can use the lower part as well if you want to peel to remove the tough skin.

Once your pot of water is boiling well, fill the steamer with broccoli pieces. (Boiling also works, but I prefer steaming). If you cram it really full they don’t cook evenly, so you’ll have to judge the right amount based on the size of your pot. For mine it’s about enough for 1 1/2 bags.

Set a timer for 3 minutes and fill both sides of your sink with water. Put in ice on one side. When the timer is done, dump the steamer basket into the colander. Put that into the side without ice. Refill the steamer basket and reset the timer.

After about 90 seconds, move the colander to the ice bath. Just before the timer goes off, dump the colander into the salad spinner and take the broccoli out of the pot, into the sink, etc.

Spin the broccoli in the spinner to remove excess water. If you don’t have one, just shake the excess off in the colander. Some people pat it dry with a towel but I don’t think you need to be that finicky. Take it out of the spinner and stuff it into bags. Put the bags in the freezer.

Label the bags first so you know what year it’s from. If you forget that part, don’t worry just eat it faster. If you only have a single basin sink, don’t worry, just use more ice. If you don’t have ice, don’t worry. The faster you cool it down the longer it keeps, but I’ve eaten broccoli that’s several years old and it’s usually fine.

If you get really fast/impatient like me, you can have two steamers going at once and still keep up as long as you don’t have any “helpers” in the kitchen.

Final step: make someone else clean up, you’ve done your part. (I still haven’t figured out that step yet.) That’s it, good luck!


Tzatziki Sauce

From Cookie and Kate

  • 2 cups grated cucumber (from about 1 medium 10-ounce cucumber, no need to peel or seed the cucumber first, grate on the large holes of your box grater)
  • 1 ½ cups plain Greek yogurt
  • 2 tablespoons extra-virgin olive oil
  • 2 tablespoons chopped fresh mint and/or dill
  • 1 tablespoon lemon juice
  • 1 medium clove garlic, pressed or minced
  • ½ teaspoon fine sea salt
  1. (Karin’s side note on straining: I would use either cheese cloth, a clean flour-sack towel or a sturdy strainer you could push against to strain water out… or, do it her way): Working with one big handful at a time, lightly squeeze the grated cucumber between your palms over the sink to remove excess moisture. Transfer the squeezed cucumber to a serving bowl, and repeat with the remaining cucumber.
  2. Add the yogurt, olive oil, herbs, lemon juice, garlic, and salt to the bowl, and stir to blend. Let the mixture rest for 5 minutes to allow the flavors to meld. Taste and add additional chopped fresh herbs, lemon juice, and/or salt, if necessary (I thought this batch was just right as-is).
  3. Serve tzatziki immediately or chill for later. Leftover tzatziki keeps well, chilled, for about 4 days.

Summer CSA Week 7

It isn’t an easy summer to be a plant – or someone trying to grow plants. All the trees around town look tired and soft, like a sweaty brochure being used as a fan. Janaki is spending his time running irrigation around to keep vegetables alive in their turn, constant triage ensuring that every crop has what it needs. There are around 42 fields now, some quite large. Wow, I had never counted. No wonder I still get “lost” with the field numbers.

This image has an empty alt attribute; its file name is img_3230.jpg

There is something daunting about the weather this year. It’s not a good rain year. Last year wasn’t a good rain year, nor particularly snowy. Who can say if this is a trend, but who can say what a trend is other than unusual and more intense. It feels unsettling to know that the rest of my life will be marked by these changes. Perhaps some more “normal” feeling seasons or years will still happen- but I fear for more winters with little snow (what is the point of winter if there is no snow!?) and more growing seasons that are hot and dry. And what all will that change? In my life time will pine trees become more rare, will more invasive pests and plants make their way north, will all the ash trees die? Probably. Maybe I’ll find myself accepting change and growing a patch of lavender in my 70s. Or maybe I’ll move somewhere I can still ski.

Going down either an emotional or intellectual rabbit hole of climate worry will drive anyone insane after a while. Beyond my worry is grief, which is easier to be with than worry in the long term, but still not easy.

The other day I found myself thinking how hard it would be to plan and build for these changes we see. From air conditioning in schools to making changes to river banks – a lot could get done and some of it is a guessing game.

On the farm Janaki is continually making those guesses as well as he can in an attempt to mitigate risk and maintain some level of sanity in our work. We can’t make it rain, but he is in the market for a more sustainable and efficient irrigation system. And when (not if) the 5 inches of rain in a weekend fall, he has drain-tile now throughout the fields, to give the water somewhere to go instead of sitting and rotting carrots. We use refrigeration in the root cellar now, instead of solely relying on cold fall air to cool the old cellar for winter storage. Many changes in the past 8 seasons I have known the farm – and many of them just in time. We’re trying, folks. Thanks for coming with us on the journey.

For the farm crew,

Karin


In your share this week:
Broccoli – Carrots – Cucumbers – Lettuce – Green Onions – Peas – Tomatoes


Carrot and White Bean Burgers

From The Smitten Kitchen

  • Olive oil
  • 1/2 cup panko-style breadcrumbs
  • 3 shallots, or 1 small onion, diced
  • 1 tablespoon tomato paste
  • 1 1/2 teaspoons kosher salt
  • 1 cup packed grated carrot (from 2 medium carrots)
  • 1 1/2 tablespoons apple cider vinegar
  • Two 15-ounce cans cannellini or other white beans, drained and rinsed
  • 1 large egg, beaten
  • Freshly ground black pepper
  • Burger accompaniments, as you like

Heat 1 tablespoon olive oil in a large skillet over low heat. Add the panko and cook, stirring often, until lightly browned and crisp, 3 to 5 minutes. Transfer crumbs to a large bowl, then return the pan to the heat.

Add 2 tablespoons olive oil to the skillet, followed by the shallot or onion. Cook until softened and lightly golden, 8 to 10 minutes. Stir in the tomato paste, salt, and carrots and stir frequently until the carrots are soft and a bit blistered, another 8 to 10 minutes. Add the vinegar, scraping up all the browned bits until the pan is dry. Remove from heat and add the bowl with the toasted panko. Add beans and use a wooden spoon or spatula to very coarsely mash the mixture until a bit pasty and the mixture coheres in places—there should still be plenty of beans intact. Add pepper, and more salt if needed, to aste. Stir in the egg. Shape into 6 patties (I used a 1/2 cup measure as a scoop) for the size burger you see here; 4 patties for really large burgers (to warn, I found this size a little unwieldy), or 8 to 10 for slider-size.

To cook the veggie burgers, heat a thin layer of olive oil in a wide skillet over medium heat and carefully cook until browned and slightly firm to the touch, 3 to 4 minutes per side. It may be necessary to cook in batches. Serve hot or at room temperature, with whatever you like on or with veggie burgers.

Quinoa Broccoli Salad

From Cookie and Kate

Slaw

  • ¾ cup uncooked quinoa
  • 1 ½ cups water
  • ½ cup slivered or sliced almonds
  • 1 ½ pounds broccoli (about 2 large or 3 medium heads)
  • ⅓ cup chopped fresh basil

Honey-mustard dressing

  • ½ cup olive oil
  • 2 tablespoons lemon juice
  • 2 tablespoons smooth Dijon mustard
  • 1 tablespoon apple cider vinegar or more lemon juice
  • 1 tablespoon honey
  • 2 medium cloves garlic, pressed or minced
  • ½ teaspoon sea salt
  • Freshly ground pepper, to taste
  • Red pepper flakes, optional (for heat)
  1. To cook the quinoa: First, rinse the quinoa in a fine mesh colander under running water. In a medium-sized pot, combine the rinsed quinoa and 1 ½ cups water. Bring the mixture to a gentle boil over medium heat, then reduce the heat to medium-low and gently simmer the quinoa until it has absorbed all of the water. Remove the quinoa from heat, cover the pot and let it rest for 5 minutes. Uncover the pot and fluff the quinoa with a fork. Set it aside to cool.
  2. Meanwhile, toast the almonds: In a small skillet over medium heat, toast the almonds, stirring frequently, until they are fragrant and starting to turn golden on the edges, about 5 to 7 minutes. Transfer to a large serving bowl to cool.
  3. To prepare the broccoli slice the florets off the stems into manageable pieces. Feed the broccoli florets through your food processor using the slicing blade, then switch to the grating blade to shred the stems. Alternatively, you can shred the broccoli with a mandoline or by hand with a sharp knife.
  4. Combine all of the dressing ingredients in a liquid measuring cup and whisk until emulsified. The dressing should be pleasantly tangy and pack a punch. If it’s overwhelmingly acidic, add a little more honey to balance out the flavors. If it needs more kick, add a bit more mustard or lemon juice.
  5. Add the shredded broccoli slaw, cooked quinoa and chopped basil to your large serving bowl. Pour the dressing over the mixture and toss until well mixed. Let the slaw rest for about 20 minutes to let the flavors meld.