Summer CSA Week 11

We hope you’re ready! This Saturday, August 24th is our wonderful Coffee On The Farm event. We will have coffee, hay rides, dog pets, and farm tours from 10am-12pm. This is a great event for all, so bring your friends, family, neighbors, or make it a solo outing. We hope to see all of your smiling faces.

Last week was focused on emptying out some more rows and fields, and dusting off all the washing equipment that hasn’t been used since January when we washed the last of the 2023 carrots. 

We spent a muddy and rainy afternoon pulling the rest of the Spring/Summer beets out of the field. Seems that every time we do a big harvest of beets, it’s muddy and wet. Thank goodness for outside hoses so we can set up the “human car wash” and hose ourselves off before moving onto the next activity. We had been harvesting beets as needed which allowed the smaller beets to keep getting bigger, and it allowed us to send you the delicious tops along with the beets. It was time to pull the rest of the beets because even the small ones had sized up nicely. Restaurants like Duluth Grill and Ursa Minor will be very excited to receive such big beets that take less time and are easier to process than a handful of smaller beets. On days when we do big beet harvests, we take all the tops off while we are in the field. The tops will get tilled into the soil to add back organic matter to make the field even better the next time we use it. The beets get put into buckets and loaded on a trailer to be brought down to the packing shed. Outside the packing shed, we have our washing station set up. The buckets get dumped into our brush washer where a series of sprayer nozzles and brushes clean all the dirt off of the beets. They pop out the other side where we sort out any odd beets, and give them a final spray to get off any remaining dirt. Once the beets are all approved, they ride the roller table, which is a series of rollers that push the beets along. Eventually they drop into a pallet box where they will stay until they get packed up for CSA or retail orders. We filled one pallet box with the remaining spring/Summer beets which is estimated to be around 1,000 pounds of beets.

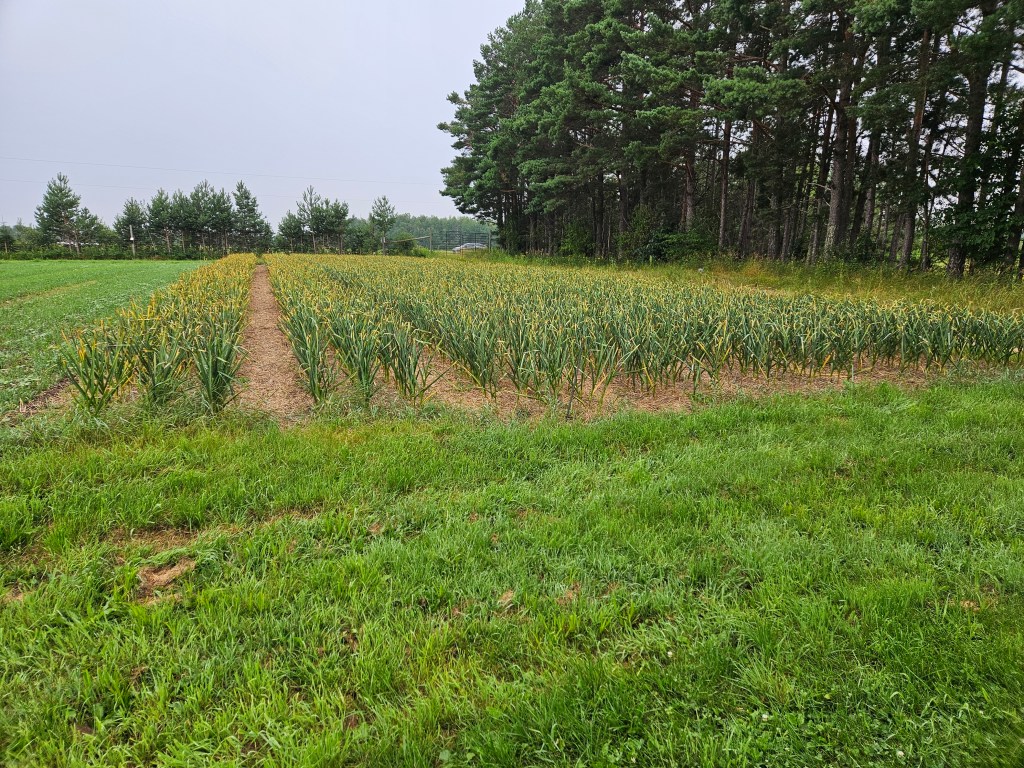
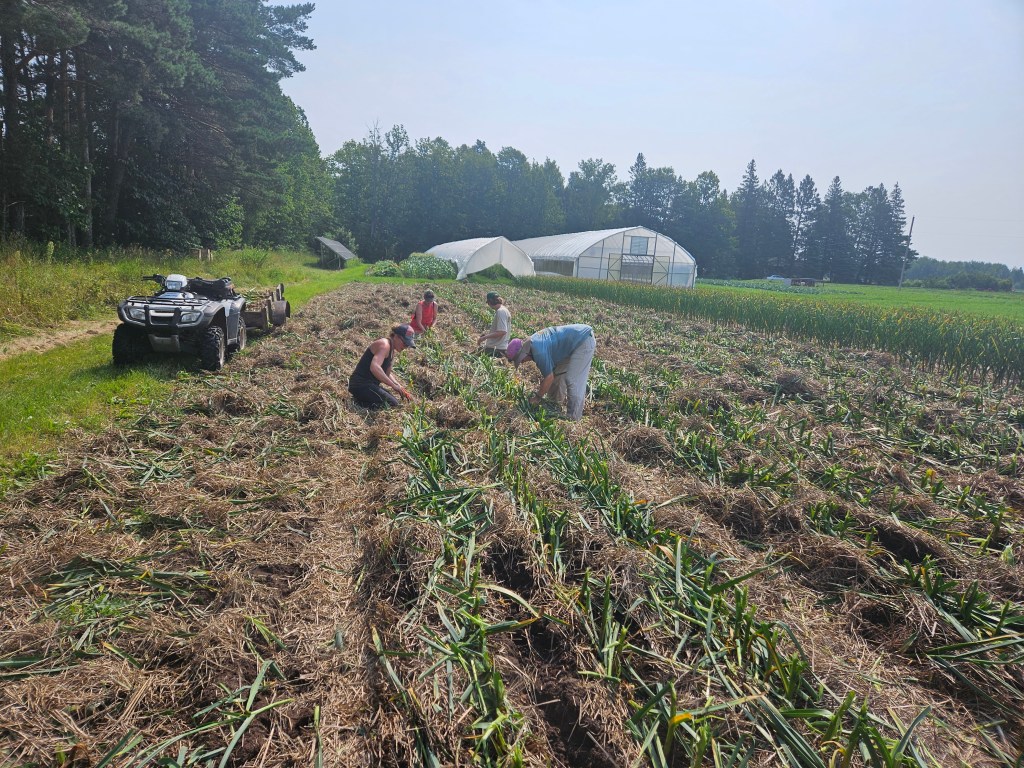
We spent a few days last week across the road, starting to get the first two plantings of outdoor carrots out of the ground. Normally at this time in the year, we would just be removing the first outdoor planting, but disease has hit these carrots pretty hard, so it’s best to get them out sooner rather than later in an attempt to save some of the crop. Our carrots have gotten a disease known as Aster Yellows. A bug called a Leaf Hopper carries this disease. The Leaf Hopper gets the disease when it feeds on an infected plant, then spreads the disease when it starts feeding on a healthy plant. Once a plant is infected, there is no cure, so the only option is to remove the crops or plants before the disease gets worse. We knew the carrots had this because 1) when you touch the carrot tops, hundreds of Leaf Hoppers jump and fly around. 2) from afar, you can tell because it causes the carrot tops to turn a yellow color, and some even get purple and red tops. The really infected carrots will start getting “hairy” this is where they begin to grow extra roots out of the carrot. Once the carrots get hairy, they will also take on a bitter taste. 

The first planting required lots of hand sorting to find the healthy carrots. We left quite a few carrots in the field, but we were still able to harvest and keep around 1500 pounds of carrots. That’s a lot of carrots, but a far cry from the 6,000 pounds that we should have harvested. The second planting looks a bit healthier, but is still pretty young, so get ready to receive some “baby” carrots in your shares. 

The annoying thing about Aster Yellows and Leaf hoppers is that they are not exclusive to carrots. Leaf Hoppers can infect a long list of plants including house plants, flowers, and other vegetables. We struggled earlier with asters yellow on some lettuce in a few of our greenhouses. The insects cause the leaves to turn a yellowish green color, and it tastes bitter. We had to do the same thing as with the carrots where we harvested and kept what we could, and the infected lettuce went to our chickens as an unexpected treat. Thankfully, lettuce grows really quickly, so we got a new planting seeded right away, and our chickens were very happy.

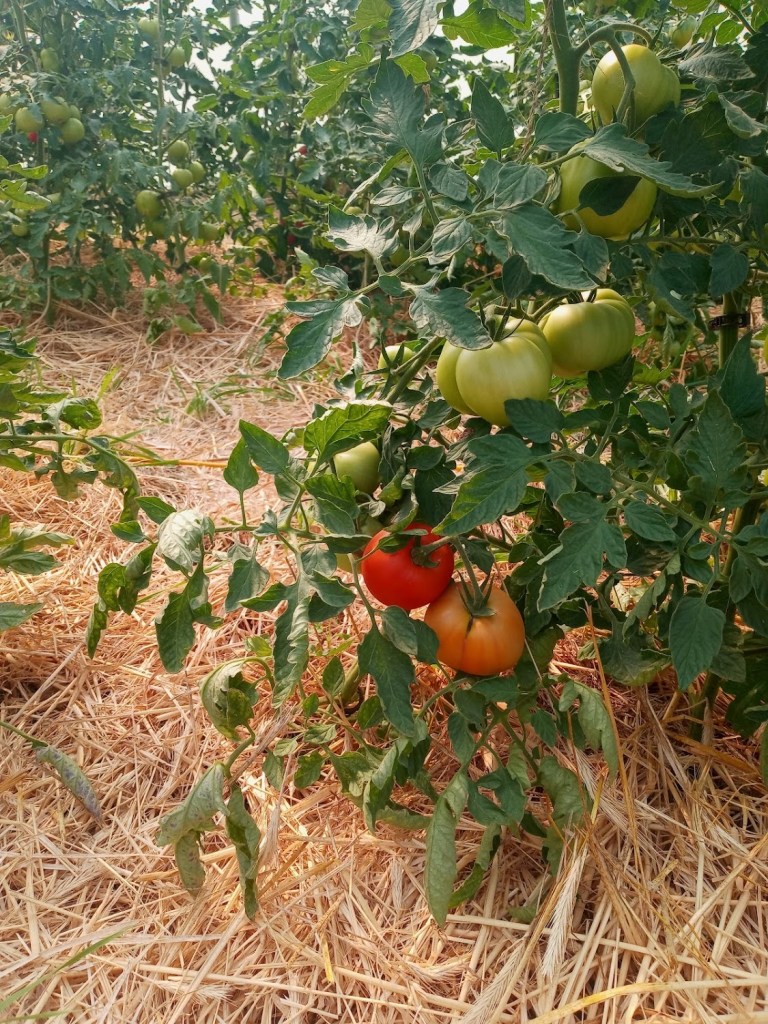
We’ve also found other diseases in our broccoli, outdoor tomatoes, the first planting of potatoes (not the big planting thank goodness), zucchini, and cucumbers. The good thing is, most of these diseases are “normal” for us, so we’ve done a lot of research on ways to slow down the spread such as harvesting infected plants last, and using different harvesting tools for healthy plants vs. infected plants. Janaki has also done a lot of research to see if any organic materials can be used in slowing disease. The downside is, just like Aster Yellows, there is no cure for these diseases. Eventually the plants will get too stressed and weak, causing them to begin either producing funny looking and strange tasting vegetables, or the plants will stop producing entirely. 

I know this wasn’t as upbeat of a newsletter as normal, but farming isn’t always happiness and sunshine. Farming is all about how you manage and move forward. We’ve never given up when things get hard. We reach out to new resources and experts, we pour an extra cup of coffee, say a few colorful words, and get back to it. This time of year can be hard looking at all the veggies that didn’t make it, but it sure makes us appreciate the veggies that did make it. We hope that this week when you get your box, you take a moment to look at all the beautiful vegetables and know that each one of them was grown with love, sweat, and maybe some dog fur.

In your share this week:

Cabbage – Green Beans – Carrots – Celery – Cilantro – Cucumbers – Dill

Green Onions – Green Peppers – New Potatoes – Tomatoes – Zucchini

Mixed Salad

Note:  ingredients are chopped or cut into very small pieces in order to absorb the dressing and each each others’ flavors better. 

2 tomatoes

2 small cucumbers

6 olives

large raw carrot, peeled

raw beet

1-2 avocados, peeled and pitted

2 potatoes (boiled)

1 large, mild onion

1 pepper

2 hard-boiled eggs

Chop all the ingredients and cut them into a very small dice. Mix them together in a bowl.  Dress with the following tahini cream dressing and mix well. 

Tahini Cream

1 to 3 cloves of garlic (to taste)

1/2 cup of lemon juice

1/2 cup of tahini

1/2 teaspoon ground cumin

6 tablespoons chopped parsley

Crushed the garlic with the salt. Mix it with a little lemon juice in a large bowl add the tahini and mix well then add the remaining lemon juice and enough cold water to achieve a thick smooth cream while beating vigorously season salt and cumin.  Add more lemon juice, garlic or salt (all to taste) until the flavor is strong and tart. 

This dressing may be used for many salads

For the farm crew,

Jennifer

Summer CSA Week 9

Last week was an exciting week here on the farm. It was garlic harvest! Well, part one of two for garlic harvest.

This is a much anticipated time on the farm. Garlic is the crop that takes by far the longest to go from being planted to being ready for harvest. Garlic gets planted in the Fall, usually by Halloween, and doesn’t get harvested until the end of July or early August. That’s almost 9 months of growing to create the beautiful bulbs that you all get to enjoy.

A little background about garlic, there are two main types of garlic: hardneck and softneck. Hardneck garlic is what we grow on the farm, while softneck garlic is generally what you find in most grocery stores. Hardneck garlic gets its name from the hard neck or stem that grows in the middle of the bulb. This is actually where the garlic scapes came from (remember those from a few weeks ago?) making it two crops in one. If the scapes are left on the plant, it will eventually create a flower. However, this also results in a very small garlic bulb because the plant has spent all its energy on creating a flower rather than on creating the garlic bulb. By removing the scapes, we redirect the plant’s energy back to creating a big, beautiful bulb. Hardneck garlic needs to experience a hard freeze in order for the individual cloves to form. The freeze initiates the division of the cloves. Without a freeze, you end up with what’s called a “round”. This is one massive garlic clove. Makes for easy peeling, but really difficult to use since I’ve never found a recipe that calls for that much garlic at one time. This is why we have to plant the garlic in the fall, then wait so long before harvesting.

 We know the garlic is ready to harvest when about half of the leaves have started to brown and die. If the garlic is harvested too early, the cloves won’t be fully formed and you’ll end up with a small bulb.You also run into the possibility of air pockets between the skin and the cloves which could lead to moisture getting trapped and hindering the drying process. If we wait too long to harvest, the bulb will start splitting which exposes the cloves and prevents the bulb from being stored. It’s a delicate balance. Janaki wasn’t sure if the garlic was ready to harvest, so we decided to harvest half of the garlic that seemed further along, and leave the rest of the garlic for another week to give it more time to mature. 

On harvest day, we mow off some of the foliage to make them easier to handle. Then Janaki uses a tractor attachment to gently loosen the bed so it’s easier to pull the bulbs from the soil. At this point, one crew jumps in and we start pulling all of the garlic bulbs out one by one. They get loaded onto a trailer, then moved over to the greenhouses to be washed. Another crew gently sprays off any excess dirt, and lays them on racks in front of industrial sized fans to begin the drying process.  After harvest, the garlic needs to dry for about a month (timeline depends on temps and humidity) in order for the papery, protective shell to properly form. You can eat the garlic before it’s dried, but it won’t store if it doesn’t get properly dried. After the garlic is dried, we save the biggest, best looking bulbs to use for next year’s planting. That’s right, garlic is the gift that keeps on giving. We harvest the garlic, dry it, select the best bulbs, break them apart into individual cloves, plant the cloves in the Fall, and repeat. Once you get garlic, you never have to buy it again because you can keep planting it over and over. Because you can keep using the garlic over and over to plant, I asked Janaki when the last time garlic was purchased to use for seed, and he said it had been so long that he couldn’t remember but knew it was long before 2010 (the year he and Annie took over the farm). That’s more than 14 years of the same garlic being used over and over! He did say that this might be the first year he may purchase more seed garlic since the garlic preserving shares sold this year were at an all time high. Thanks for all the garlic love!

In your share this week:

Cauliflower – Cucumber – Carrots – Green Garlic – Kale – Onion – Parsley – Green Pepper – Sage – Tomatoes – Zucchini

Zucchini stuffed with sausage and sage

INGREDIENTS

  • 2 to 3 pounds zucchini
  • 1/2 cup walnuts
  • 1 pound sausage
  • 1 onion, diced
  • 8 ounces mushrooms, diced
  • 3 to 4 cloves garlic, minced
  • 2 tablespoons minced fresh sage
  • 2 eggs
  • 1 cup shredded pecorino cheese, divided

INSTRUCTIONS

  • Pre-heat the oven to 375° F.
  • Cut the zucchini in half lengthwise and scoop out the seeds. Leave an inch or so of zucchini. Set the zucchini in the baking pan cut-side up and season it with olive oil, salt, and pepper. Pour a quarter inch of boiling water into the pan, cover with foil, and bake for 10 minutes, just until the zucchini is no longer raw. Set aside to cool enough to handle.
  • Spread the walnuts on a baking sheet and roast them alongside the zucchini for 5-10 minutes, until fragrant. Chop into small pieces and set aside.
  • Heat a large skillet over medium-high heat. Brown the sausage, breaking it up into medium-sized bits as you go. Transfer to a bowl and drain off all but a teaspoon of the grease. Add the onions to the pan with a good pinch of salt, and cook until soft and golden. Add the mushrooms and another pinch of salt. Cook together until the mushrooms have turned golden and any moisture they released has evaporated. Stir in the garlic and sage. Cook for about thirty seconds until fragrant.
  • Combine the walnuts, cooked sausage, onions, and mushrooms in a large bowl. Beat the eggs together. Stir the eggs and 3/4 cup of the pecorino into the stuffing mixture.
  • Pat the zucchini dry and fill the cavity with the stuffing..
  • Drain the liquid from the baking pan, rub it with a little butter or olive oil, and place the stuffed zucchini back inside. Cover with foil and bake for 30 minutes. Uncover, sprinkle the remaining cheese over the zucchini, and bake for another 10-15 minutes until the filling is bubbling and the cheese is crispy.
  • Allow the zucchini to cool slightly. Slice into portions and serve. Leftovers will keep refrigerated for one week

Mediterranean tuna salad

  • 1 (5-ounce) can albacore tuna in water, drained
  • 1 small bell pepper, halved, cored, and finely chopped (1 cup)
  • 2 tablespoons extra-virgin olive oil
  • 2 tablespoons fresh lemon juice
  • 1 teaspoon grainy mustard
  • 3 tablespoons chopped capers
  • ½ cup chopped fresh parsley
  • Kosher salt and freshly ground pepper
  • Dressed salad greens for serving
  • Sliced cucumbers and crackers, for serving

Directions


Place tuna in a bowl and flake with a fork.
Add bell pepper, oil, lemon juice, mustard, capers, and parsley; stir well to combine and season with salt and pepper.
Serve with salad greens, cucumbers, and crackers on the side

Summer CSA week 6

Last week was a very busy week for the farm crew. Along with the heat, more of our time is dedicated to harvesting in addition to weeding and other tasks. Now that we have more consistent supply of a few items, we are beginning to ramp up deliveries to our wholesale customers. In addition to our CSA members, we also harvest and deliver vegetables to local grocery stores, co-ops, and restaurants. Once Fall hits and kids are back in school, we will also start selling some of our vegetables to local schools. We sell a more limited mix of crops to these outlets, and their deliveries start later than the CSA because of the risk and inconsistency of the wholesale market. Having these outlets does provide great balance for the farm, though, since it allows us to to stabilize the supply of staple crops to the CSA boxes and grow these crops at a scale and efficiency that wouldn’t be possible with CSA alone. It also is great outreach and helps expose the broader public to the exceptional quality and flavor of local produce.

We harvested an early planting of cabbage last week as well. This is always a fun activity on the farm. You know when your parents always told you “don’t play with your food”? Yeah, well, we don’t listen to that here on the farm. When it comes to cabbage harvest, we play with our food. The way it works is we usually have one group of people who are cutting the cabbages, and one group of people who are catching the cabbages. The first group cuts the cabbages, removes the outer leaves, then they throw the head to someone that’s catching, and they place it into the pallet box which gets put into the root cellar for storage. It’s a fun activity that always creates a lot of smiles, laughs, and teamwork, but takes a little while to bring back our muscle memory on how to toss around a 4 pound cabbage without dropping it or hurting anyone. These small cabbage harvests will give the crew plenty of practice time before the big fall cabbage harvest. You’re getting tender Napa Cabbage in your shares today, but regular cabbage will be on its way in a couple of weeks.

Last Friday, we did something I didn’t think we would ever have to do this season and that was lay irrigation pipe. The way the season started, it seemed as though mother nature was going to take care of the irrigation for us, but with the warm and dry days we got last week and more being predicted for this week, it was time to haul out the irrigation pipe. On the farm we always try to push the envelope on sustainability. One of the ways we do this is by utilizing a pond for watering our crops, rather than groundwater alone. Each year this pond fills up with snow melt and rain water, which we then pump about 1/4 mile to the vegetable fields. The pond also catches the water coming from our underground drainage tile system that has helped keep our fields from becoming too waterlogged this year.

If you grow anything at home, you probably use a garden hose and sprinkler. We have similar set up, only industrial sized. The way it works is we turn on a pump by the pond that sucks water from the pond. The water then travels through many 40 foot sections of pipe until it reaches the water reel that’s placed at the end of the field we wish to irrigate. The water reel is a big fancy looking hose reel. Think of those things you can put on the side of your house to wind up your garden hose but imagine that it’s 12 feet tall. It has an 1100′ long hose that attaches to a sprinkler system that’s on wheels. We pull the hose and sprinklers to the end of the field we wish to irrigate. Once you turn on the pump, the water starts flowing and irrigating the plants. The coolest thing, and probably the biggest difference from a home set up is that you don’t have to move the sprinkler down the field. The reel slowly retracts the hose which moves the sprinkler. From far away, it looks like it’s not moving at all, but up close, you can see that it is moving about two feet per minute. This is a wonderful set up because it allows us to irrigate a lot of acreage efficiently.

In your share this week:

Cucumbers – Napa Cabbage – Snap Peas – Carrots – Garlic Scapes

Green Onions – Lettuce – Cauliflower or Broccoli (we didn’t have enough for everyone but we’ll switch sites next week to make sure everyone gets some of each!)

Sesame Carrots (from Vegetable Heaven by Mollie Katzen)

2 tsp sesame oil

1.5-2 cups carrots, sliced into coins

2 tbsp unseasoned rice wine

2 tbsp honey

2 tsp tahini

One clove of garlic, minced (or several scapes minced)

1 teaspoon vegetable oil

 3 cups of chopped onion

6 cups chopped Napa cabbage

1 tsp salt

Freshly ground pepper

Heat a large skillet and add the sesame oil, carrots and half a teaspoon of salt. Stirfry over medium high heat for five minutes. Cover, and cook for another five minutes.

Turn heat down to medium and add the vinegar cover again and cook for an additional five minutes. Stirring the honey tahini, and the garlic and cook, uncovered, stirring frequently for 5 to 8 more minutes or until carrots are tender, and starting to brown.

At the same time in a second skillet and add the vegetable oil, onion and the remaining half a teaspoon of salt. Stirfry over medium heat add cabbage.  Keep the heat high and stirfry for another five minutes or until the cabbage wilts (it will be slightly crunchy).  Transfer to a serving platter. Spoon the carrots on top of the cabbage. Grind some black pepper over the top and serve hot warm or at room temperature.

Quinoa Salad (from NYT Cooking)

4 cups water 

2/3 of a cup dried fruit, such as apricots, raisins, craisins, or currents

1/4 cup chopped cilantro

1/4 cup chopped mint

1/4 cup chopped parsley

Salt to taste

One cup, red or rainbow quinoa

1/4 cup toasted pistachios 

1/4 cup toasted almonds

1/4 cup toasted walnuts

2 tsp lemon zest

Dressing:

1/4 cup lemon zest

Salt to taste

1 small garlic clove, pureed (optional) (or use minced scapes!)

1/4 tsp cinnamon

1 tsp balsamic vinegar

1/3 c olive oil

Bring water to boil and add quinoa and salt.  Bring back to a boil, then turn down and simmer for 20 minutes until the thread separates from the quinoa grains.  Drain and shake well in the strainer then return to the pot. Cover the pot with a dish towel and put the top back on it and let it sit for 10 to 15 minutes. Place quinoa in a large bowl.

Meanwhile, mix all the dressing ingredients together. Add remaining ingredients and toss place on a large platter or in a large serving bowl.

***  add chopped up pea pods, broccoli florets, raw carrots, or any of the delicious vegetables you receive this week in your share to increase the vegetable content of this dish

For the farm crew,

Jennifer

Summer CSA Week 5

As July begins, there seems to be a strange energy in the air. It’s technically the middle of Summer which means it’s almost the middle of the growing season. It’s this happy, yet sad, yet stressful time of year. It’s the time of year on the farm when most of the planting is complete, but a lot of vegetables aren’t quite ready to be harvested. It creates a sort of limbo stage.

As farmers, we try to stay in the moment (then again aren’t we all) to ensure we complete all the necessary tasks so the vegetables stay happy and healthy. This week that meant the farm crew was out mulching the rest of the outdoor tomatoes, doing some pruning of the peppers, more bug hunting, and lots and lots of weeding. Falling behind on any of these tasks can lead to unhealthy or stressed out plants that won’t produce how we expect them to. That would mean less veggies in your box each week, which would be a disaster!

However, in order to be a successful farmer, one must also be thinking of the future. Farmer Janaki spent a lot of time this week checking on the storage planting of potatoes that went in a few weeks ago, to ensure the seed pieces didn’t get entirely drowned out in all the rain. He’s also been checking in on the storage cabbage to make sure they are growing on track for fall harvest. There’s also been an uptick in conversations during our morning staff meetings about when final plantings of vegetables are scheduled to go in the ground. Every vegetable gets seeded, planted, and harvested at very specific times to ensure the predicted outcome is achieved. Straying too far from any of these dates could have big consequences if we aren’t careful.

This can make July an overwhelming time on the farm, but it’s also one of my favorite. As the crew walks along the fields moving from one weeding project to the next, you can’t help but notice all the flowers and tiny vegetables popping up all over. The baby broccoli peeking through the foliage. The beautiful white flowers that will soon turn into tasty peas. The Napa cabbage that is just days away from being ready to harvest. The big green tomatoes that, if I stare at them long enough, I can convince myself they might have the slightest tint of yellow to them.

I always think of July as nature’s way of reminding us to slow down and find happiness in the little things. Of course we will keep checking our calendars and racing around to get everything done before the end of the work day, but we might occasionally take the long way to our next weeding project as a way to bask in the beauty of almost-full fields, and to congratulate ourselves on all the hard work we’ve done to get to this point. I encourage all of you to take an extra moment this week to really take in the beauty and flavor of all the vegetables inside your box.

As I mentioned, good farmers are always thinking about the future, and we are going to ask all of you to do the same. We are giving you a heads up that we will be hosting our Coffee On The Farm event the morning of Saturday, August 24th. It’s a time for you to drink coffee, tour the farm, and meet other members. We will send out more information and additional reminders as the event gets closer.

This week in your share:

Kale – Cucumbers – Beets – Lettuce – Pac Choi – Parsley Green Onions – Garlic Scapes

Cucumber and Yogurt Salad (modified from A Book of Middle Eastern Cooking by Claudia Roden)

One large, cucumber, peeled and diced

Salt

3 to 4 garlic scapes, minced

2 cups plain yogurt

Pepper to taste

1 tablespoon dried, crushed mint or 3 tablespoons finally chopped fresh mint

Sprinkle diced cucumber with salt, and leave in a colander to drain for 30 minutes.  Mix the yogurt, garlic scapes, and mint in a large bowl. Season with salt and pepper.  Drain the cucumbers and add them to the yogurt dressing. Mix well and serve.

Moroccan Beet Salad

Half a pound of beets

Juice of half a lemon

One clove of garlic, minced finely

Half to 1 teaspoon ground cumin

2 tablespoons olive oil

Salt and pepper to taste

1/4 cup of parsley, chopped

Place water in a saucepan and bring to a boil.  Cut the beets in half and add them to the boiling water -cook until tender when pierced with a fork (approximately 30 minutes). Cool, peel and cut into bite-size pieces.   Place in a serving bowl.

Whisk lemon juice, garlic, and cumin in a small bowl.  Add salt and pepper to taste.  Gradually add the olive oil while whisking.  Pour over the beets and stir to mix.  Let beets marinade for a few hours.  Sprinkle parsley on top on beets before serving.

For the farm crew,

Jennifer

Summer CSA Week 4

For all of us who put in a plea to Mother Nature, it worked…sort of. Last week felt like a normal week on the farm (if such a thing even exists in agriculture). This time of year, as the seasons shift from Spring to Summer, the farm crew’s agenda changes from spontaneous to more routine. It usually means weeding, row cover, weeding, bug hunting, and more weeding. Janaki and the crew were finally able to get out into the fields to do some much needed field work.

The drier weather gave us the opportunity to roll up all of our row cover. If you aren’t familiar with it, row cover is a permeable fabric that we lay over the top of our plants, specifically the brassicas. The row cover has multiple benefits, but the main ones we use it for on the farm are for deterring pests, and adding some extra early season heat. Broccoli is generally a cool season crop, but “cool season” generally refers to our normal weather in early June, while our first planting goes in the ground in mid-April. This is one of the reasons we are able to provide all of you with broccoli so early in the summer. It’s a large task to lay out the 30’x400′ sheets of row cover after each Spring planting of brassicas, but it’s an even larger task to roll all of it back up. 

We also made it across the road to weed through the first two plantings of outdoor carrots, and do some bug hunting while we were over by the potatoes. Each year we find ourselves fully experiencing what it means to work for an organic farm. It means that instead of the farm crew going out to spray insecticides on the plants, we take the organic approach. Think Ghostbusters, but instead of proton packs and cool jumpsuits, we get 5 gallon buckets and overalls. We go row by row, plant by plant, searching for the various life stages of the Colorado Potato Beetle. The eggs are by far the easiest to spot since they are bright orange against the deep green foliage of the plants. The larvae are a little more difficult, but get easier to spot as they go through the 4 larval stages. They start out really tiny with a black head and brown body, and slowly grow to almost being the size of an adult beetle. Once they’ve reached the adult stage, they get wings and stripes on their back which help them to be more noticeable against the plant. The worst thing about the Colorado Potato Beetle is how adaptable it is. These bugs overwinter in different life stages, don’t have to mate in the spring before they lay eggs, and aren’t even solely attracted to potato plants! Their favorites are potatoes and eggplant, they will also survive on other members of the nightshade family. This unfortunately meant we found quite a few on our outdoor tomatoes. Nothing the Beetlebusters (aka the farm crew) couldn’t handle. 

In case that wasn’t enough bug fun, we also noticed cucumber beetles on our greenhouse cucumbers, and squash beetles on our squash. We did identify a ‘new’ pest on the potatoes called a blister beetle. Mother nature is always keeping us on our toes. This summer is going to have a lot of bug pressure. We are coming off of a mild winter which didn’t get cold enough to kill most of the populations, then following that up with warm wet weather in the Spring/Summer, it’s the perfect recipe for a lot of bugs! This is all to remind you that if you ever find a little critter, or see some holes on your veggies, we promise it’s okay. It’s just nature’s way of reminding all of you that the veggies you receive each week are grown with love instead of harsh chemicals!

This week in your share: 

Arugula – Broccoli – Turnips – Radishes – Spinach – Green Onions

Garlic Scapes – Cucumbers – Green-top Carrots

This week we are giving you garlic scapes. If you’ve never used these before, they have the same flavor you get from fresh garlic, only a little milder and a lot less work since no peeling is involved. You can substitute scapes for fresh garlic in almost any recipe using 4-6 scapes = 1 clove of garlic.

One- Pan Orzo With Spinach and Feta

Ingredients

Yield:4 servings

  • 2tablespoons unsalted butter
  • 4large green onions, trimmed and thinly sliced
  • 2large garlic cloves, minced
  • 8ounces baby spinach leaves (8 cups), coarsely chopped
  • 1teaspoon kosher salt
  • 1¾cups low-sodium chicken or vegetable stock
  • 1cup orzo
  • 1teaspoon finely grated lemon zest (from 1 lemon)
  • ¾cup crumbled feta (3 ounces), plus more for garnish
  • ½cup frozen peas, thawed (optional)
  • 1cup chopped fresh dill, or use parsley or cilantro

PREPARATION

  1. Heat a 10-inch skillet over medium, then melt butter, 30 seconds to 1 minute. Stir in about three-quarters of the green onions (saving some of the green parts for garnish) and garlic, and cook until softened, stirring frequently, about 3 minutes.
  2. Stir in spinach, adding in batches if it doesn’t all fit in the pan at once, and ½ teaspoon salt. Continue to cook, stirring occasionally, until spinach is wilted, about 5 minutes.
  3. Stir in stock and bring to a simmer. Stir in orzo, lemon zest and remaining ½ teaspoon salt. Cover and simmer over medium-low heat until orzo is nearly cooked through and most of the liquid is absorbed, 10 to 14 minutes, stirring once or twice.
  4. Stir in cheese, peas (if you like) and dill, cover the pan, and cook for another 1 minute, to finish cooking and warm the peas. To serve, sprinkle with more cheese and the reserved green onions

Salmon Cakes With Arugula Salad

Ingredients

  • 1 pound salmon, skinned (canned will also work)
  • 2 tablespoons lemon juice, divided
  • 2 teaspoons Dijon mustard, divided
  • ½ cup finely chopped yellow bell pepper
  • 1 tablespoon finely chopped shallot
  • ½ teaspoon ground pepper, divided
  • ½ cup panko breadcrumbs
  • ½ cup crème fraîche or sour cream
  • ¼ cup buttermilk
  • 3 tablespoons chopped fresh dill
  • ½ teaspoon salt, divided
  • 2 tablespoons extra-virgin olive oil
  • 5 ounces arugula
  • 1 cup sliced radishes

Directions

  • Coarsely chop salmon and place half in a food processor. Add 1 tablespoon lemon juice and 1 teaspoon mustard. Process, scraping down the sides as necessary, until smooth. Add the remaining salmon, bell pepper, shallot and 1/4 teaspoon pepper and pulse until the mixture is combined but still chunky.
  • Transfer the salmon mixture to a medium bowl. Add breadcrumbs and stir until combined. Form the salmon into 4 patties, about 4 inches wide each, and place on a plate. Freeze for 5 minutes.
  • Meanwhile, whisk crème fraîche (or sour cream), buttermilk, dill and 1/4 teaspoon salt with the remaining 1 tablespoon lemon juice, 1 teaspoon mustard and 1/4 teaspoon pepper in a large bowl. Set aside 1/4 cup of the dressing for drizzling.
  • Heat oil in a large cast-iron or nonstick skillet over medium-high heat. Add the salmon cakes and cook, flipping once, until well browned and cooked through, 2 to 3 minutes per side. Transfer to a clean plate and sprinkle with the remaining 1/4 teaspoon salt.
  • Add arugula and radishes to the dressing in the large bowl. Toss to coat. Serve the salmon cakes on top of the salad, drizzled with the reserved 1/4 cup dressing

Carrot Top Salsa (The CSA Cookbook by Linda Ly)

2 cups minced carrot greens leaves and tender, stems only

3 tablespoons minced garlic

3 tablespoons minced fresh oregano

2 tablespoons minced jalapeño

One to one and a quarter cups olive oil

1/4 of a cup red wine vinegar

Zest and juice of lemon

Add all the ingredients to a medium bowl and stir to combine (use more or less oil to make a chunkier or thinner sauce).  Cover and let stand at room temperature overnight so the flavors intermingle.  This salsa gets better with age – so the carrot have turned to deep muted shade of army green is still good!!  Decant into a jar and refrigerate.  The oil will congeal in the cold temperature, but it does not affect the flavor. Bring the salsa to room temperature before serving.

For the farm crew,

Jennifer

March Winter Share

It’s the second to last winter CSA delivery and the farm season is just around the corner!

🌱 Greenhouse Delights: There’s an unmistakable magic in the revival of the greenhouse scents, which is where the crew has gotten to hang out more and more recently 🙂 Our first planting of onions are just starting to poke out of the potting soil, with subsequent plantings not far behind.

🥕 Carrot Countdown: I am not 100% sure how many pounds of carrots we bagged up this winter, but I do know it was a lot! When the winter began, the root cellar was packed to the ceiling with pallet boxes of them… I mean packed, you could barely move around in there. Now there is but a few pallet boxes remaining and most of them will be reserved for the final CSA delivery in April. This means that this is the last week you will find our carrots in local restaurants and stores!


In Your Share This Month:

Beets – Green Cabbage – Purple and Orange Carrots – Onions – Shallots

Parsnips – Fingerling, Baby Yellow, & Red Potatoes – Rutabagas


For the recipes this month, it’s back to basics… One of my favorite ways to eat root vegetables is to roast them in the oven with nothing but a little olive oil, salt & pepper. They can then be enjoyed as a side dish, thrown on salads for fiber & flavor, or paired with a tasty sauce… like the caramelized shallot & herb aioli recipe below.

When roasting, I’m typically a fan of potato skins, but the French fingerlings in this month’s share have a slightly rough texture. They remain delicious, but I do suggest peeling them this time round.


Roasted Root Vegetables

Ingredients:

Assorted root vegetables (such as carrots, potatoes, parsnips, Rutabaga, etc.)
Olive oil
Salt and pepper to taste

Directions:

  1. Preheat your oven to 425°F
  2. Wash and peel the root vegetables, then chop them into similar-sized pieces to ensure even cooking.
  3. Place the chopped vegetables in a large mixing bowl.
  4. Drizzle olive oil over the vegetables, using enough to coat them evenly. Toss the vegetables with your hands or a spoon to ensure they are all well coated with the oil.
  5. Season the vegetables generously with salt and pepper, adjusting the amount to taste.
  6. Spread the seasoned vegetables out in a single layer on a large baking sheet. Make sure they are not overcrowded to allow for even roasting.
  7. Place the baking sheet in the preheated oven and roast the vegetables for about 25-35 minutes, or until they are tender and golden brown, stirring halfway through the cooking time for even browning.
  8. Once the vegetables are roasted to your desired level of doneness, remove them from the oven and transfer them to a serving dish.

Feel free to customize this recipe by adding other seasonings or herbs such as garlic powder, rosemary, thyme, or paprika for extra flavor!


Caramelized Shallot & Herb Aioli by newinthekitchen.wordpress.com

Ingredients:

3/4 cup light mayonnaise
2 tablespoons freshly squeezed lemon juice, plus a pinch of zest
3 tablespoons fresh parsley, chopped finely
2 tablespoons fresh dill, chopped finely
1 tablespoon dijon mustard
1 teaspoon hot sauce (your choice of brand, we enjoy Cholula)
3 shallots, minced
Olive Oil
Salt and pepper, to taste

Directions:

1. Heat a saute pan with one tablespoon of olive oil over medium heat.
2. Add shallots and cooked until browned and caramelized, about 10 minutes.
3. Allow shallots to cool.
4. Meanwhile, combine mayonnaise, herbs, lemon juice and zest, dijon mustard, hot sauce, and salt and pepper to taste.
5. When shallots are cooled, add them to mixture. Stir to combine.
6. Allow Aioli to chill in the refrigerator for about an hour prior to serving to allow flavors to combine.


For the farm crew,

Charlie

Summer CSA Week 10, 2023

Let’s take a moment to say thank you for the bit of rain that came last week. The farm was lucky enough to get three quarters of an inch, which isn’t that much in the grand scheme of things, but as my mother likes to say “beggars can’t be choosers.” The problem is that we need rain consistently to make much of an impact. Every hotter-than-normal, rainless day with ample sunshine dries the soil out. We do have a pond toward the back of the farm property, which we are able to pump water from to aid in our irrigation efforts, but it certainly wouldn’t hurt if we all put some collective energy into wishing for more rain to fall 🙂

We are getting to that time of year where every day is a harvest day. Whether it’s digging beets, carrots & potatoes, picking canning tomatoes, or slicing bunches of kale, there just doesn’t seem to be enough time in the day. One fun item that got added to the list this week is cantaloupe. This is a crop that can be difficult to grow in our area, but through a lot of trial an error, we have managed to grow consistently for the last five or so years. It has become somewhat of a crowd favorite and for good reason! Nothing quite cuts the summer heat like a freshly sliced melon!


Carrots – Cilantro – Cukes – Kale – Lettuce – Green Onions – Green Peppers

Green BeansHot Peppers – Parsley – Potatoes – Tomatoes – Zucchini – Melons


Feel free to get creative with the salad recipe below… As is, it uses up a good chunk of the ingredients in your share this week, but it could feature even more farm goodness if you happen to have some leftover cabbage or snap peas hiding in your fridge from weeks prior. The dressing itself is also pretty versatile and would make a wonderful marinade or stir fry sauce.

Salad w/ Peanut Butter Dressing

2 medium cucumbers
1/2 cup shredded carrots
1 green onion, thinly sliced
1/4 cup salted & roasted peanuts, chopped
2 tablespoons cilantro, chopped
1-2 hot pepper, finely diced (optional)

PB Dressing, from theendlessmeal.com:
1/2 cup peanut butter
1/4 cup lime juice
1 tablespoon soy sauce
1 tablespoon ginger, finely minced
2 teaspoons toasted sesame oil
2 cloves garlic, finely minced
1/4 – 1/2 cup water
sea salt, to taste

  1. In a medium-sized bowl, whisk the peanut butter, lime juice, soy sauce, ginger, sesame oil, and garlic. Thin with the water, starting with ¼ cup. (The amount of water you’ll need to add will depend on how thick your peanut butter is and how thick or thin you’d like the dressing to be).
  2. Taste and add salt as needed.
  3. Dress the salad as you see fit!

Potato Salad w/ Grilled Kale, from Bon Appétit

5 tablespoons olive oil, divided, plus more
2 pounds potatoes
1 pound shallots, unpeeled
3 tablespoons lemon juice
1 tablespoon apple cider vinegar
freshly ground black pepper
1/4 cup chopped pickles
2 tablespoons drained capers (optional)
1 bunch kale, ribs and stems removed
3 green onions, sliced
1 cup parsley leaves w/ tender stems

  1. Prepare a grill for medium-high heat; lightly oil grate. Place potatoes in a large saucepan and pour in cold water to cover by 1″. Season with salt and bring to a boil. Reduce heat; simmer until tender, 15–18 minutes. Drain and return to saucepan.
  2. Meanwhile, grill shallots, turning occasionally, until skins are blackened and flesh is tender, 15–20 minutes. Let cool. Halve lengthwise and scoop out insides (discard skins).
  3. Whisk lemon juice, vinegar, and 3 Tbsp. oil in a large bowl; season with salt and pepper. Add cornichons, capers, and potatoes and toss to coat.
  4. Toss kale and remaining 2 Tbsp. oil in a medium bowl; season with salt. Grill, turning often, until charred and crisp-tender, about 1 minute. Fold into salad along with scallions, parsley, and shallots.
  5. Do Ahead: Potato salad can be made 1 hour ahead. Store tightly covered at room temperature.

For the farm crew,


Charlie

Summer CSA Week 7, 2023

In our region, July is known for claiming the title of the hottest month of the year. Last week you wouldn’t have guessed it as the crew enjoyed slightly cooler temps. We won’t be so lucky this week, however, with the forecast pushing 90° for the next few days. Such high temps may be hard on the farm crew, but many of the vegetable varieties are going to love it!

This weeks box brings a few new additions in cilantro, dill and even a couple of salad tomatoes 🙂

Dill is an especially exciting one for me. While it is often associated with dill pickles and potato salad, its culinary significance spans centuries across Europe and Asia, enriching a wide array of cuisines. Due to its distinct and potent flavor, even a small quantity of dill can make a significant impact, making it an excellent choice as a garnish. The delicate, feathery texture of dill leaves adds a touch of beauty, while a mere sprig can infuse a dish with a noticeable and delightful aroma. Moreover, dill finds its place in salads and serves as a crucial component, along with buttermilk, in bestowing homemade ranch dressing with its unique and flavorful character.

When considering planting dill, it’s worth noting that this annual herb, related to celery, possesses a natural tendency to self-replant and propagate extensively, adding to its appeal as a versatile and abundant addition to your garden space.


In your share this week:

Beets – Broccoli – Carrots – Chard – Cilantro – Cucumbers

Dill – Lettuce – Tomatoes – Green Onions – Snap Peas – Zucchini


Dilly Ranch Dressing, from Feasting at Home

Yield: 1 1/4 Cup

1/3 cup mayo
1/3 cup buttermilk
1/3 cup sour cream
1-2 garlic cloves, finely minced
1/2 cup fresh dill
2 tablespoons tarragon
1 tablespoon parsley, chopped
1/2 teaspoon salt, more to taste
1 teaspoon pepper
1 tablespoon lemon juice, more to taste
1 teaspoon apple cider vinegar

  1. Whisk the mayo, buttermilk, and sour cream in a medium bowl until smooth.
  2. Stir in the remaining ingredients: garlic, herbs, salt, pepper, lemon juice, and vinegar.
  3. Taste- you want this slightly salty and tangy- so adjust salt and lemon juice to bump up the flavor.
  4. Place in a sealed jar and chill. You want this cold!

Cucumber Salsa, from Lemon Tree Dwelling

The farm peppers will be in your shares soon enough, but for now store bought will have to do for this recipe…

Yield: 8 servings

1 large English cucumber, about 2 1/2 cups chopped
1/4 cup red onion, chopped
1/3 cup yellow bell pepper, chopped
1/3 cup green bell pepper, chopped
2 tomatoes, chopped
1 jalapeño, minced
1/4 cup cilantro, minced
2 cloves garlic, minced
juice of 1/2 lemon
juice of 1/2 lime
1 teaspoon salt

  1. Chop the cucumbers, peppers, tomatoes, and onions into small pieces, about 1/4 inch. Add them to a medium mixing bowl.
  2. Mince the jalapeño (remove seeds for less heat as desired), cilantro, and fresh garlic. Add it to the chopped veggies in the bowl. 
  3. Squeeze in the fresh citrus juices and add the salt.
  4. Stir well; enjoy immediately or refrigerate until ready to use.

Carrot, Date and Feta Salad; from Food Network

Yield: 4 servings

3 medium carrots
2 tablespoons roughly chopped fresh cilantro
1 1/2 tablespoons extra-virgin olive oil
2 teaspoons honey
Kosher salt
Juice of 1 lime
1/4 cup crumbled feta cheese
2 tablespoons chopped toasted almonds
2 tablespoons finely chopped dates

  1. Thinly slice the carrots into ribbons using a vegetable peeler or mandolin, including any remaining “stubs” of carrot. Soak in ice water until the ribbons firm up and curl, about 15 minutes. Drain and pat dry. 
  2. Whisk together the cilantro, olive oil, honey, 1/2 teaspoon salt and the lime juice in a medium bowl. Add the carrots along with the feta cheese, almonds and dates, and toss until evenly combined. Serve immediately, or let the salad marinate a bit before serving. 

When I first started working at the farm, a little over a year ago, I thought that all of the job would be directly dealing with plants or dirt. I quickly learned, however, that there are many tasks we do that don’t necessarily pop into your mind when you think farming. A lot of the equipment we use here is quite old. The thing about old stuff is that it tends to break. It would be really nice to just replace something when it breaks, but new stuff is rather expensive. We will usually opt for the fix it yourself mentality – something Janaki and Dave are rather good at.

Above you can see Dave hard at work as he repairs our flail mower.

For the farm crew,

Charlie

Winter CSA Box 2, December 2022

Garlic ready to go out in shares.

Happy December! We hope you’re keeping warm and enjoying the holiday season.


In your share this month:

Chioggia Beets – Orange and Purple Carrots – Green Cabbage – Garlic – Yellow and Red Onions – French Fingerling & Russet Potatoes – Sunshine and Delicata Squash


Packing winter share boxes is quite a production! We have all hands on deck and a conveyer table set up that reaches all the way across the pack house.


Egyptian Stuffed Cabbage

Serves 10

Ingredients

Cabbage braising

  • 1 head of cabbage
  • 2 tablespoons salt
  • 1 tablespoon ground cumin

Stuffing

  • 1 tablespoon vegetable or olive oil
  • 1 large onion, finely minced
  • 1-1.5 pounds lean ground beef
  • 1 tablespoon minced garlic
  • 1 can, tomato paste (6 oz.)
  • 3 cups Egyptian rice, or Goya medium grain rice, washed until water is clear
  • 2 tablespoons salt
  • 2 teaspoons ground black pepper
  • 1 teaspoon allspice (optional)
  • 1+ can, crushed tomatoes (28 oz)
  • 1 cup finely minced flat leaf parsley
  • 1 cup finely minced cilantro
  • 1 cup finely minced dill
  • 1 tablespoon Better Than Bullion Chicken flavor
  • 2 tablespoons butter

Instructions

Cabbage braising

  1. In a large, heavy pot, fill with water until about 2/3 full. Add salt and cumin, cover and bring to a boil. 
  2. Remove any wilted or damaged leaves from the cabbage. Turn cabbage upside down (with stem facing you) on a cutting board. Make deep gashes into the cabbage leaves as close to the stem as possible in a circular fashion. Hold the stem and gently pull apart the leaves, one at a time, careful not to rip them. 
  3. Place leaves 2-3 at a time in the boiling water. Allow to cook for 2-3 minutes until it becomes less stiff and just wilted. Do not overcook. Remove and place in a colander. 
  4. Gently peel leaves from the cabbage and cook in small batches. At some point, the cabbage will become too compact to remove the leaves. Hold the cabbage stem and gently lower half the remaining cabbage in the water. With your other hand, you can begin loosening the cabbage leaves one by one into the water. Once you have loosened 2-3 leaves, remove the head and set aside. Repeat until most of the cabbage is cooked. It’s ok to stop at the deepest part of the cabbage, as the leaves become too crinkly to be rolled. 
  5. Allow cabbage to cool. Meanwhile, prepare the stuffing mix. 

Stuffing

  1. In a large Dutch oven or non-stick pot, add the vegetable oil and bring to medium high heat. 
  2. Add the onions and sauté until translucent. If using, add the beef all at once, mixing with the onions and breaking up the clumps. Sauté until browned. 
  3. Add the garlic and mince until fragrant (about 1 minute). Add all of the tomato paste, stirring constantly for 3-4 minutes (the texture will change and become less of a formed paste). Add salt, pepper, and all-spice.
  4. Add the can of crushed tomatoes and stir until evenly mixed. Turn off the heat. 
  5. Pour in all of the washed rice, stirring until mixed. Now add all of the herbs and stir until everything is combined. If necessary, adjust the salt. Transfer to a large mixing bowl and allow to cool. 
  6. Prep the cabbage leaves for rolling. Set up a clean work area with a cutting board. Take one cabbage leaf at a time and spread it out over the board. Cut out the thick stem, reserve for later. With the flat leaf on the board, cut it into 2-3 even pieces that can be rolled in a straight line, about 2 inches wide x 3-5 inches long. See Photo. Make a stack of leaf segments on a clean plate. 
  7. Prepare the pan for cooking: generously drizzle vegetable or olive oil at the bottom of the Dutch oven or nonstick pot. Take several of the cabbage stems and cover the bottom to prevent the rolled leaves from scorching on the bottom layer. 
  8. Roll the leaves: place an entire leaf segment on the cutting board. Leaving 1/2 inch of space at one end, place a line of the stuffing mixture about 1/2 inch wide inside the leaf. Gently roll it up (important to roll it securely but not too tightly, as the rice still needs to expand). See photo. 
  9. Layer the rolled cabbage leaves in one direction until one layer is completely filled, then top with another layer at a ninety degree angle to the first one to prevent the rolled cabbages from unraveling. Continue rolling and layering at 90 degrees until all of the cabbage leaves are rolled (extra rice mixture may remain). 
  10. In a small saucepan, bring 1 cup of crushed tomatoes + 1 1/2 cups of water to a boil. (Alternatively, you can use 2 1/2 cups of water and 1/2 can of tomato paste). Add 1 tablespoon of butter and 1 heaping tablespoon of bullion paste and boil until dissolved. 
  11. Place the pot with the rolled cabbage on medium heat. Pour all of the water/tomato mixture on the rolled cabbages. Cover and cook on medium low for 45 minute-1 hour. Do not uncover for the first 30 minutes, then begin checking if the rice is cooked on the top layers. If it appears too dry, add in 1/2 cup of water and continue to check. The cabbage is done with the rice is completely cooked and the liquid has been absorbed. 
  12. Turn off heat. Add small pats of butter to the top. Cover. Allow to rest for 15 minutes. Enjoy, or: 
  13. Place a large plate over the opening of the pot. Carefully invert the entire pot and let rest for 5-10 minutes. Gently remove the pot and serve immediately.

Recipe from Food52.


Archived Recipes

You can now search previously posted Food Farm recipes using the “Tag Cloud” below. If you click an ingredient below it will take you to a list of the newsletters that include a recipe using that ingredient. Larger text means there are many recipes using that ingredient while smaller text means fewer recipes have been tagged so far.


Arugula Basil Beet Bell Pepper Broccoli Brussels Sprout Brussels Sprouts Cabbage Carrot Cauliflower Celery Cilantro Cucumber Delicata Squash Dill Dressing/Sauce Egg Garlic Garlic Scape Green Bean Green Onion Jalapeno Kale Leek Lettuce Mint Napa Cabbage Onion Parsley Parsnip Pepper Potato Radish Red Onion Rutabaga Scallion Shallot Spinach Squash Thyme Tomato Turnip Winter Squash Yellow Onion Zucchini


We hope this will help you explore new and old recipes and take advantage of the produce in your share!


For the farm crew,

Starr

Summer CSA Week 10, 2022

The crew preparing to harvest carrots with THE HARVESTER.

Last week was a big week for the Food Farm crew: we harvested our long awaited garlic! You’ll find more pictures and descriptions of that process below. We also brought out the carrot harvester, which is efficient but requires many hands to run smoothly. Boxes are filled with high summer bounty. New this week you’ll find green peppers and GARLIC! The garlic in the box this week is “green” or not yet cured. It should be left out on the counter with good ventilation so it does not mildew.

Would you like to come see the farm at peak season? You’re in luck! We are hosting a farm tour and pizza dinner on Saturday, August 27th! Come by the farm at 2612 County Road 1, Wrenshall from 4:00pm to 6:00. We’ll be serving pizza hot from our wood fired oven and giving farm tours. Free for all to attend, we’d love to see you!


In your share this week:

Basil – Beets – Cabbage – Carrots – Cucumber – Dill – Green Garlic – Green Pepper – Green Onion – New Potatoes – Parsley – Tomato – Zucchini


What am I looking at?

This is a swarm of honey bees seen near the farm hives recently. When a hive gets large enough it splits into two distinct colonies. During this process, part of the hive leaves as a swarm to find a new home. These swarms are often very docile because they are not guarding honey or a queen, but always be careful around bees, especially if there there is a chance you could be allergic.


Cucumber and Tomato Salad

From Claudia Roden’s Mediterranean

Ingredients

  • Cucumber (peeled, seeded and cut into pieces)
  • 2 large tomatoes, seeded and cut into pieces
  • green onion
  • 3 Tbsp olive oil
  • juice of 1/2 lemon
  • salt and black pepper to taste
  • small handful of fresh herbs (parsley, oregano, dill, cilantro) chopped

Instructions

  1. Put cucumbers, tomatoes, and onions into a bowl. In another bowl, whisk together the olive oil and lemon juice and season with salt and pepper to make a dressing. Just before serving, pour the dressing over the salad and mix well. Sprinkle with the herbs and add feta if you like.

Basic Pesto

We have garlic AND basil in the box this week. The only option is to make pesto 😉

Ingredients

  • 2 cups fresh basil leaves (no stems)
  • 2 tablespoons pine nuts or walnuts
  • 2 large cloves garlic
  • ½ cup extra-virgin olive oil
  • ½ cup freshly grated parmesan cheese

Instructions

  1. Combine basil leaves, pine nuts or walnuts and garlic in a food processor and process until very finely minced.
  2. With the machine running slowly dribble in the oil and process until the mixture is smooth.
  3. Add the cheese and process very briefly, just long enough to combine. Store in refrigerator or freezer.

From NYT Cooking


What is Harvesting Garlic Like?

Step one: Janaki uses the tractor to mow and subsoil the garlic. The subsoiler has big hooks that dig down between the garlic rows, loosening the soil and lifting up bulbs.

Step two: Bring in the farm crew! We pull the garlic and stack it up in piles. These piles are then loaded on a trailer and brought to the wash station.

Step three: Scrub-a-dub. The garlic is washed, removing any dirt that’s still on the bulbs.

Step four: Stack and cure. In order for garlic to last into the winter it must “cure” or partially dry for a few weeks.

Garlic takes at least three weeks to cure. Then, if stored properly, garlic should last through the next spring!


For the farm crew,

Starr