Summer CSA Week 8, 2023

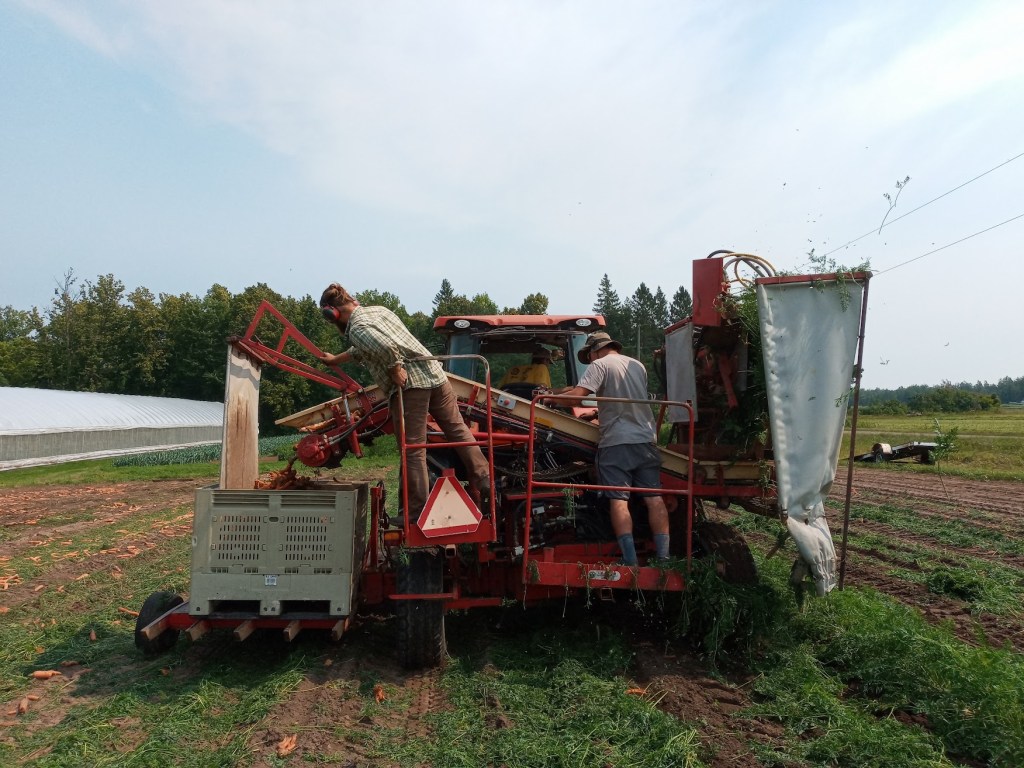
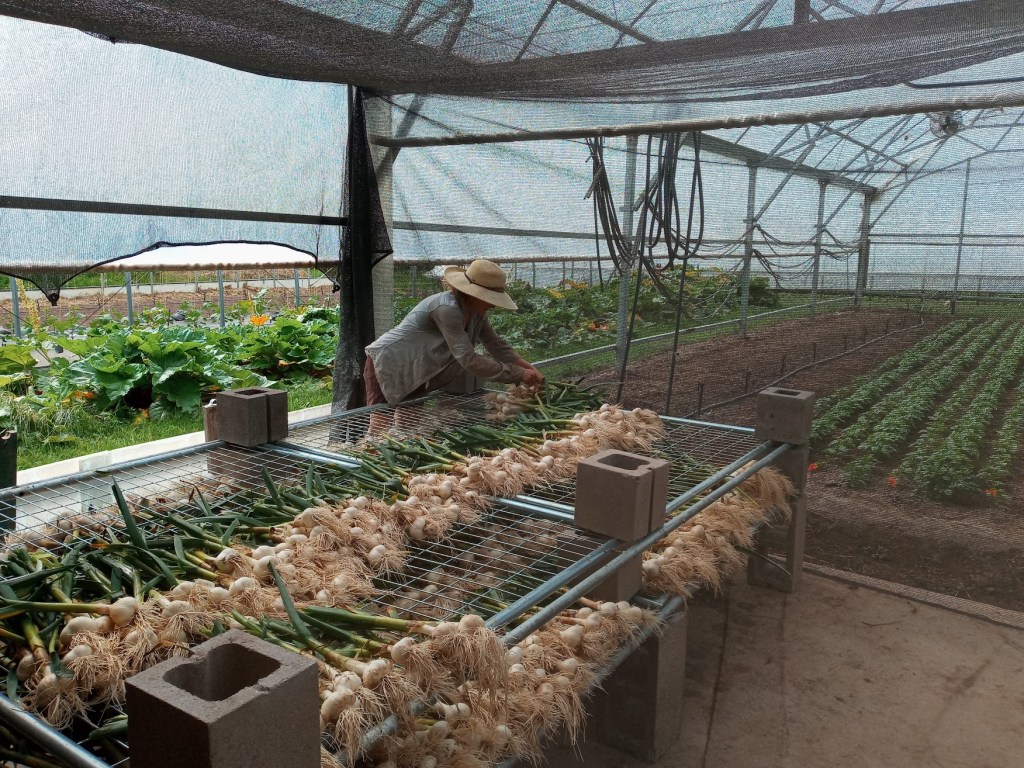
Garlic season has arrived! Last Wednesday was all hands on deck as the crew shuttled wagon load after wagon load of freshly harvested German Extra Hardy to washing stations. Once washed the garlic was gently laid out on wire racks (see below). Although it is edible right from the ground, you won’t be seeing it in the shares for at least a couple weeks. To stay fresh in the pantry for any extended period of time, it must go through the curing process – essentially just letting it dry out. As the garlic dries, the skin shrinks and turns papery, forming a protective barrier against moisture and mold.

As we wait for the garlic to be ready, we can take a little time to enjoy another new addition to this weeks box… Potatoes! Not just any old potatoes, but new potatoes. New potatoes are essentially young potatoes that are harvested before they reach full maturity. They are the same varieties as their larger counterparts but are picked early in the growing season, typically about three to four months after planting. Because they are harvested at this young stage, new potatoes are sweeter and more delicate in flavor than mature potatoes. Their skin is thin, tender, and often flaky, which makes them particularly appealing for potato salad. This week i’ve included one of my favorite recipes for just that.


In your share this week:

Cabbage – Carrots – Cilantro – Dill – Cucumbers – Lettuce – Green Onions – Snap Peas

Jalapeño Peppers – New Red Potatoes – Tomatoes – Zucchini


Herby Potato Salad, from Half Baked Harvest

Yield: 6 servings

2 pounds new potatoes
3 cloves garlic
kosher salt
1/2 cup raw cashews, soaked in hot water for 30 minutes, then drained
1 tablespoon dijon mustard
1/3 cup olive oil
1 cup fresh basil, chopped
1/4 fresh dill, chopped
2 chives, chopped
flakey sea salt and black pepper
1 pinch crushed red pepper flakes
juice of 1 lemon

1. Place the potatoes, garlic and a tablespoon of salt in a large pot and fill with water. Bring to a boil over high heat and then reduce the to heat to medium, simmer 10-15 minutes or until the potatoes are just fork tender. Drain. Place the potatoes back in the hot pot. Remove the garlic cloves. Cover the pot and let the potatoes steam for another 20 minutes.

2. Meanwhile, combine the cooked garlic, drained cashews, mustard, and olive oil in a food processor. Pulse until smooth and creamy, adding water if needed to thin slightly. 

3. Cut the potatoes in half and add to a large serving bowl. Add the cashew sauce, basil, dill, chives, lemon juice, and a pinch each of salt, pepper, and crushed red pepper flakes. Toss well to combine. Taste and adjust salt and pepper to your liking. Serve warm or cover and place in the fridge. Can be served at room temp or cold.


Cilantro Lime Slaw, from Gimme Some Oven

Yield: 4-6 servings

1 cup plain Greek yogurt
1/2 cup tightly-packed fresh cilantro
1/4 cup freshly-squeezed lime juice
1/2 teaspoon ground cumin
1/2 teaspoon fine sea salt
1/4 teaspoon freshly-cracked black pepper
3 green onions (just the green parts)
2 garlic cloves
1 jalapeño or serrano pepper, stemmed and cored
14 ounces cabbage, thinly sliced

1. Combine the Greek yogurt, cilantro, lime juice, cumin, salt, black pepper, green onions, garlic and jalapeño in a blender or food processor*.  Pulse briefly a few times until the mixtures is combined.

2. Place the cabbage in a large mixing bowl. Drizzle the sauce on top of the cole slaw, then toss until the mixture is evenly combined.  Season with extra pepper and/or lime juice if needed.

3. Serve immediately, or cover and refrigerate for up to 24 hours.


For the farm crew,

Charlie

Summer CSA Week 7, 2023

In our region, July is known for claiming the title of the hottest month of the year. Last week you wouldn’t have guessed it as the crew enjoyed slightly cooler temps. We won’t be so lucky this week, however, with the forecast pushing 90° for the next few days. Such high temps may be hard on the farm crew, but many of the vegetable varieties are going to love it!

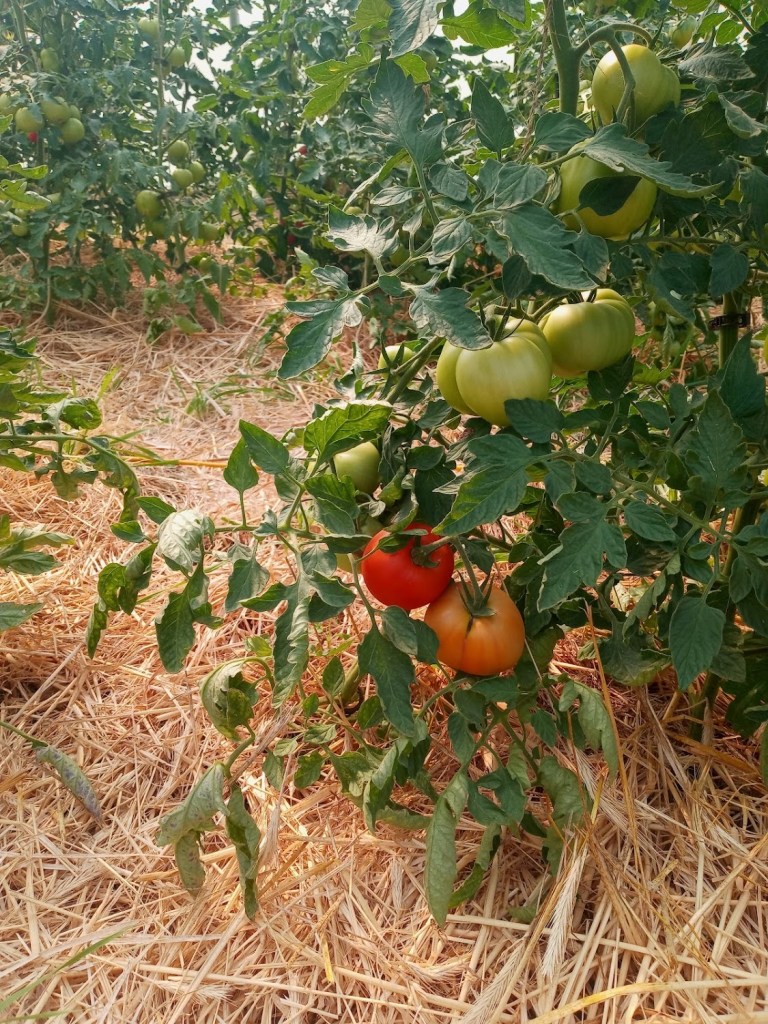
This weeks box brings a few new additions in cilantro, dill and even a couple of salad tomatoes 🙂

Dill is an especially exciting one for me. While it is often associated with dill pickles and potato salad, its culinary significance spans centuries across Europe and Asia, enriching a wide array of cuisines. Due to its distinct and potent flavor, even a small quantity of dill can make a significant impact, making it an excellent choice as a garnish. The delicate, feathery texture of dill leaves adds a touch of beauty, while a mere sprig can infuse a dish with a noticeable and delightful aroma. Moreover, dill finds its place in salads and serves as a crucial component, along with buttermilk, in bestowing homemade ranch dressing with its unique and flavorful character.

When considering planting dill, it’s worth noting that this annual herb, related to celery, possesses a natural tendency to self-replant and propagate extensively, adding to its appeal as a versatile and abundant addition to your garden space.


In your share this week:

Beets – Broccoli – Carrots – Chard – Cilantro – Cucumbers

Dill – Lettuce – Tomatoes – Green Onions – Snap Peas – Zucchini


Dilly Ranch Dressing, from Feasting at Home

Yield: 1 1/4 Cup

1/3 cup mayo
1/3 cup buttermilk
1/3 cup sour cream
1-2 garlic cloves, finely minced
1/2 cup fresh dill
2 tablespoons tarragon
1 tablespoon parsley, chopped
1/2 teaspoon salt, more to taste
1 teaspoon pepper
1 tablespoon lemon juice, more to taste
1 teaspoon apple cider vinegar

  1. Whisk the mayo, buttermilk, and sour cream in a medium bowl until smooth.
  2. Stir in the remaining ingredients: garlic, herbs, salt, pepper, lemon juice, and vinegar.
  3. Taste- you want this slightly salty and tangy- so adjust salt and lemon juice to bump up the flavor.
  4. Place in a sealed jar and chill. You want this cold!

Cucumber Salsa, from Lemon Tree Dwelling

The farm peppers will be in your shares soon enough, but for now store bought will have to do for this recipe…

Yield: 8 servings

1 large English cucumber, about 2 1/2 cups chopped
1/4 cup red onion, chopped
1/3 cup yellow bell pepper, chopped
1/3 cup green bell pepper, chopped
2 tomatoes, chopped
1 jalapeño, minced
1/4 cup cilantro, minced
2 cloves garlic, minced
juice of 1/2 lemon
juice of 1/2 lime
1 teaspoon salt

  1. Chop the cucumbers, peppers, tomatoes, and onions into small pieces, about 1/4 inch. Add them to a medium mixing bowl.
  2. Mince the jalapeño (remove seeds for less heat as desired), cilantro, and fresh garlic. Add it to the chopped veggies in the bowl. 
  3. Squeeze in the fresh citrus juices and add the salt.
  4. Stir well; enjoy immediately or refrigerate until ready to use.

Carrot, Date and Feta Salad; from Food Network

Yield: 4 servings

3 medium carrots
2 tablespoons roughly chopped fresh cilantro
1 1/2 tablespoons extra-virgin olive oil
2 teaspoons honey
Kosher salt
Juice of 1 lime
1/4 cup crumbled feta cheese
2 tablespoons chopped toasted almonds
2 tablespoons finely chopped dates

  1. Thinly slice the carrots into ribbons using a vegetable peeler or mandolin, including any remaining “stubs” of carrot. Soak in ice water until the ribbons firm up and curl, about 15 minutes. Drain and pat dry. 
  2. Whisk together the cilantro, olive oil, honey, 1/2 teaspoon salt and the lime juice in a medium bowl. Add the carrots along with the feta cheese, almonds and dates, and toss until evenly combined. Serve immediately, or let the salad marinate a bit before serving. 

When I first started working at the farm, a little over a year ago, I thought that all of the job would be directly dealing with plants or dirt. I quickly learned, however, that there are many tasks we do that don’t necessarily pop into your mind when you think farming. A lot of the equipment we use here is quite old. The thing about old stuff is that it tends to break. It would be really nice to just replace something when it breaks, but new stuff is rather expensive. We will usually opt for the fix it yourself mentality – something Janaki and Dave are rather good at.

Above you can see Dave hard at work as he repairs our flail mower.

For the farm crew,

Charlie

Farm update and Week 6 CSA

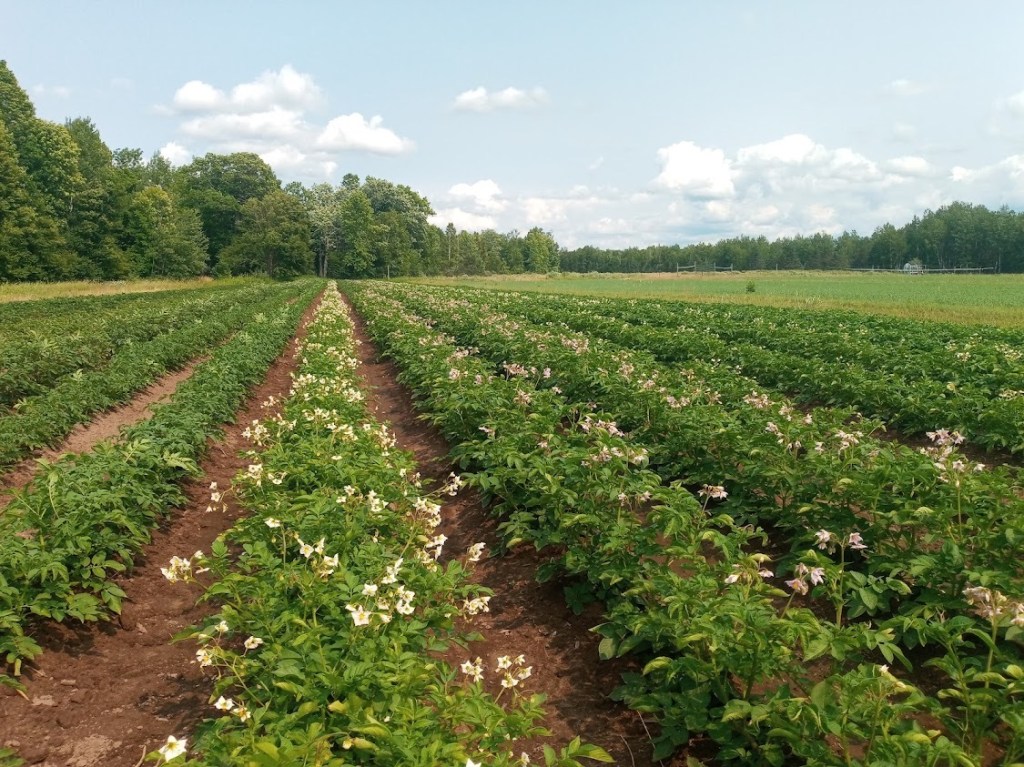
At the end of last week, Janaki took the crew for a walk about the farm to check out everything that’s going on. Things are really starting to pop! The snap peas are crawling all over their trellises and the potatoes are sporting their beautiful white flowers (see above). The biggest melons are palm-sized and starting to ripen. This year we are growing our crowd-favorite, cantaloupe, but we are also trying some watermelons. They’re unlikely to ripen in our climate, but we’re rooting for them! Stay tuned. Also looking to be in good shape are our outdoor carrots (thus far all of the carrots we’ve sent have enjoyed the comfort of greenhouse living).

A highlight for me was learning about Janaki’s growing strategy and how he rotates crops to ensure superb soil quality year after year. He tries to keep a certain level of available resources in each field by incorporating compost, organic matter and planting cover crops after a field has yielded a successful vegetable harvest. For example, he will often interseed clover in mid-to-late summer, which works to replenish important nutrients such as nitrogen levels in the soil. By doing this, we’re able to avoid using fertilizers and other conventional methods to re-establish optimal nutrient levels in our soil for the next round of vegetables. It also aids in weed suppression, meaning we can avoid using herbicides.

We also checked in on a new no-till method we are is testing out. When trying something new at the farm, it’s pragmatic to do a test and a control. In the picture above, you can observe the results at this point in the season. On the left, you can see the control group rows – the soil was turned over before planting and the cabbage is large. On the right, the no-till method shows smaller cabbages, which were planted directly into the clover cover crop. While the control rows appear to be doing much better, what you can’t see is all the work that went into turning over that soil at the beginning of the season before the cabbage could be transplanted. With a no-till method, transplants can go directly into unturned soil. Another benefit of a no-till method is less intensive to no weeding (big win!). The experiment doesn’t look promising now, but we’re waiting until the fall to make a final judgement. With trial and error, we’ve already learned a few things we’d change to make the system better.


In your share this week:

Broccoli – Green-top Carrots – Cucumbers – Garlic Scapes – Greens Mix – Lettuce

Napa Cabbage – Green Onions – Parsley – Snap Peas – Zucchini


This is a recipe forwarded to me from Deb Rausch, A frequent volunteer and friend of the farm. She’s been enjoying a variety of vegetables (mostly kale and chard) with this simple yet tasty dressing. I think it would be great with the broccoli and parsley this week, but use it for whatever feels right to you.

Deb’s Dressing

1/3 c mayo
2 green onions
1 tablespoon champagne vinegar (or rice vinegar)


Miso Glazed Grilled Zucchini

This recipe is a bit intensive but so worth the effort!

2 tablespoons white miso
1 tablespoon honey or maple syrup
1 tablespoon rice vinegar
1 tablespoon soy sauce (or Tamari)
3 medium zucchini (about 1-1/4 lbs)
Cooking oil
Green onions and sesame seeds for garnish

Instructions:

  1. Preheat oven to 400. Slice the zucchini in half length-wise. Cut a cross-hatch pattern into the cut-side of each zucchini half. Each cut should only be about 1/4-1/8 inch deep.
  2. Sprinkle each cut-side with a little bit fo salt. Turn the cut-side down onto a paper towel and let drain for 15-20 minutes.
  3. Once the moisture has been released, quickly rinse the zucchini. Take care not to let the water run over them for too long – you don’t want them to re-absorb water after you’ve drawn out the moisture! Dry off with fresh towels. Make them as dry as possible.
  4. Heat a cast iron skilled or other oven-proof vessel over medium heat. Add 1-2 tablespoons oil, let it heart up, then place the zucchini cut-side down in the pan. Cook until golden brown (about 7 minutes). You can use tongs to carefully peek at the cut-side while cooking.
  5. Once browned, place the cast-iron skill into the oven for 15 minutes. While roasting, make the miso glaze. You can add water to thin it out to the consistency of a BBQ sauce if needed. The zucchini should be extremely fork-tender.
  6. Remove pan from oven and carefully turn over the zucchini so the cut-sides are up. Spoon on the glaze so it covers the zucchini (it doesn’t have to be thick).
  7. Return the pan to the oven, this time with the cut-side up. Turn on the broil function and watch until the miso glaze just starts to bubble. Finish with green onions and sesame seeds.

Smashed Cucumber Salad

Yield: 4 servings

1 large greenhouse cucumber
handful of snap peas (everything you got in your share)
1 teaspoon kosher salt, plus more for cucumber
2 teaspoon granulated sugar, plus more for cucumber
1 1/2 tablespoons rice vinegar
2 teaspoons sesame oil
2 teaspoons soy sauce or tamari
1 tablespoon grapeseed or olive oil
2-3 garlic scapes, minced
Red pepper flakes, to taste

For garnish:
Small handful of cilantro
1 teaspoon toasted sesame seeds (optional)

Instructions:

  1. Rinse cucumber and pat dry. Cut crosswise into pieces about 4 inches long. Cut each piece in half lengthwise.
  2. On a work surface, place a piece of cucumber cut side down. Lay the blade of a large knife flat on top the cucumber and smash down lightly with your hand. The skin will begin to crack, the flesh will break down and the seeds will separate. Repeat until the whole piece is smashed. Break or slice diagonally into bite-sized pieces, leaving the seeds behind.
  3. Place the cucumber in a strainer and toss with a big pinch of salt and a big pinch of sugar. Place a plastic bag filled with ice on top of the cucumbers to serve as a weight and place the strainer over a bowl. Let drain 15 to 30 minutes.
  4. Make the dressing: In a small bowl, combine salt, sugar and rice vinegar. Stir until salt and sugar are dissolved. Stir in sesame oil and soy sauce.
  5. When ready to serve, shake cucumbers well to drain off any remaining liquid and transfer to a serving bowl with snap peas. Drizzle with grapeseed or olive oil and toss. add half the dressing, half the garlic scapes and the red pepper flakes to taste, and toss. Keep adding dressing until cucumbers are well coated but not drowned. Taste and add more pepper flakes and garlic if needed. Serve immediately, garnished with cilantro and sesame seeds.

For the farm crew,

Charlie

Summer CSA Week 5, 2023

Dear Food Farm Community,

As we delve into the heart of the growing season, we find ourselves knee-deep in the world of weeding. Weeding, although often deemed an arduous task, is an essential part of maintaining the health and vitality of our crops. The crew has been diligently working through the fields, carefully tending to each bed, ensuring that our plants have the space, nutrients, and sunlight they need to thrive.

Soon we’ll begin to notice that the daylight hours are gradually decreasing, but the harvest time seamlessly extends, stretching out longer and longer. More variety means more running around for the crew and volunteers. This morning we were doing just that; shuttling harvest totes to and fro to deliver a well rounded box of vegetables.


In your share this week:

Green-top Beets – Broccoli – Green-top Carrots

Cucumber – Garlic Scapes – Kale – Green Onions – Zucchini


Beet Greens & Kale Sautéed with Garlic Scapes

~ 2 servings

  • 1 tablespoon olive oil
  • 1 slice bacon, cut into small pieces (optional, use a little more oil if omitting)
  • 2 garlic scapes, finely chopped
  • 2 green onions, white and pale green portion, finely chopped
  • 6 leaves beet greens, stems cut into 2-inch pieces
  • 2 leaves kale, ribs and stems removed, chopped
  • salt and pepper to taste
  1. Heat olive oil in a large skillet over low heat. Cook bacon until it begins to brown and crisp, about 2 minutes. Add garlic scapes and green onion, cook and stir until golden brown, 3-5 minutes.
  2. Stir beet stems and kale into skillet. Cover and cook until kale wilts, about 3 minutes. Add beet greens. Cover and cook until bright green and wilted, 1 to 2 minutes.
  3. Season with salt and pepper.

Sautéed Zucchini & Carrots

  • 1 medium zucchini, thinly sliced
  • 2 medium carrots, thinly sliced
  • 1 tablespoon olive oil
  • 1 tablespoon ghee (optional)
  • 1 teaspoon dried thyme
  • salt and pepper to taste
  1. Heat a large skillet over medium-high heat. Add the oil and butter.
  2. Once the better is melted, add the zucchini and carrots. Sprinkle with thyme, salt and pepper, toss to coat.
  3. Sauté vegetables until lightly browned and tender, stirring occasionally so they do not burn.

I know I already included a pickled turnip recipe in the week 2 newsletter, but if you are like me, you may have a few extra rolling around in your fridge still. Here is a recipe that includes beets along with our old friend. If you happen to be out of turnips, just use more beets!

Pink Pickles, from Cotter Crunch

8 servings

  • 12–14 ounces purified water
  • Optional: 1 teaspoon sugar
  • 2 ½ Tablespoon Kosher salt
  • 1 bay leaf
  • ½ cup white vinegar (for quick pickling)
  • 1 small red beet, peeled and sliced
  • 2 turnips (about 1 pound), peeled and sliced
  • 1 clove garlic, chopped
  1. Add beet, turnips and garlic to a heatproof jar or container. Set aside.
  2. In a medium saucepan, bring salt, sugar, bay leaf, and 12 ounces of purified water to a boil, stirring occasionally to dissolve salt and sugar. Turn off heat and let mixture cool down for 5 minutes, then stir in vinegar.
  3. Pour pickling liquid over the contents in the jar, and ensure that the turnip and beet slices are submerged completely in the brining liquid. Let it cool, then close the jar and place it in a dark area for 5 to 7 days.
  4. For best flavor, refrigerate before serving.
  5. Store in a covered jar or container in the refrigerator for up to one month.

For the farm crew,

Charlie

Summer CSA Week 4, 2023

Greetings & Happy Fourth of July!

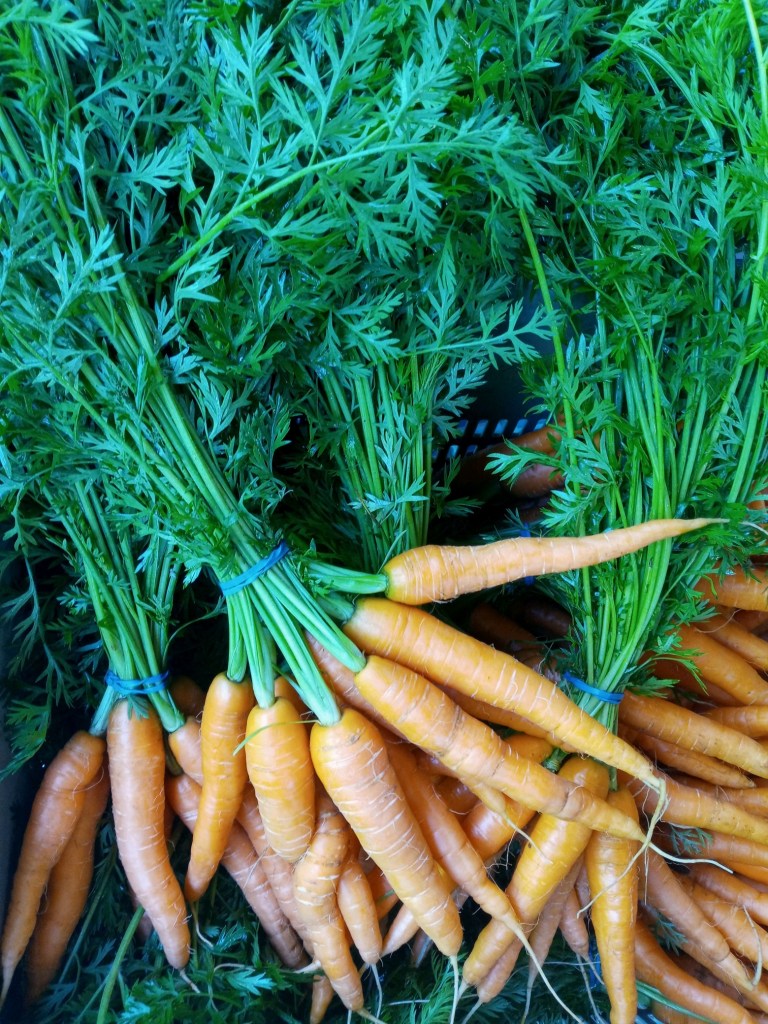
It’s a big week for us here at the farm as the first carrot harvest is underway. If there is one crop we are “known for” this could be it. Carrots have been a Fisher-Merritt staple since before the Food Farm was located in Wrenshall; back to when John and Jane were farming in Holyoke, MN. Thats over 48 years of experience and artistry!

These particular carrots are grown in our greenhouses and still feature their tops (which make a great addition to pesto). The variety is called “Ya Ya” and have been meticulously selected for their summer sweetness. Carrots always seem to taste better in the fall as they turn starches into sugars as a defense mechanism against the colder temperatures. It can be tough to find a variety with that desirable sweetness during the heat of the season, but these are always tender and sweet from the greenhouse.


In your share this week:

Cauliflower – Carrots – Chard – Cucumber – Garlic Scapes – Green Onions –

Napa Cabbage – TurnipsLettuce


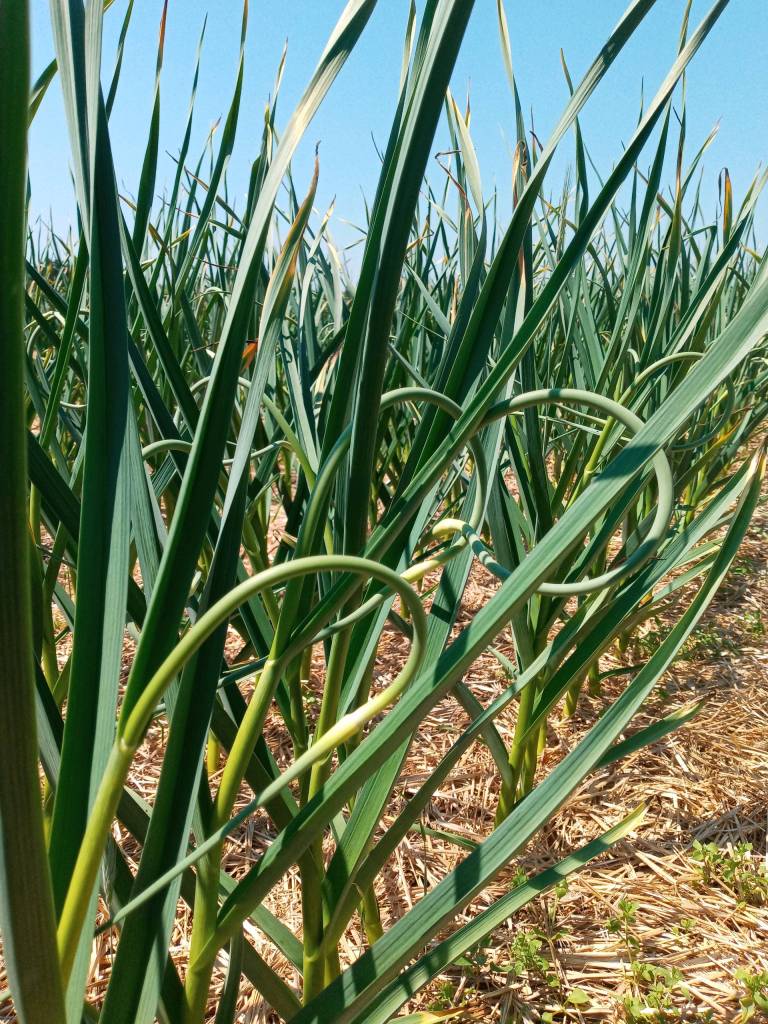
Another exciting addition to the boxes this week is garlic scapes. Garlic scapes emerge from the garlic top and start to curl and twist as they grow. It is important to harvest them before they straighten out and become woody, as this will ensure their optimal flavor and texture. Typically, garlic scapes are ready for harvest when they reach a length of 8 to 12 inches, although this may vary depending on the garlic variety. Harvesting garlic scapes at the right time not only allows you to enjoy their unique flavor but also encourages the garlic plant to direct its energy towards bulb development, resulting in plump and flavorful garlic cloves at harvest time.

Raw garlic scapes pack a robust and assertive garlic flavor, with hints of onion and a pungent, herbaceous quality, yet they offer a milder spice compared to raw garlic cloves. However, when cooked, these scapes transform into a delightful treat, revealing a sweeter profile akin to roasted garlic. In essence, their taste embodies a harmonious fusion of garlic and chives.

Garlic Scape Pesto, from NYT Cooking

yields ~ 1 Cup

  • 1 cup garlic scapes, roughly chopped (about 10 to 12 scapes)
  • 1/4 cup raw sunflower seeds
  • 1/2 cup extra virgin olive oil
  • 1/4 cup Parmesan cheese
  • 1/2 cup basil leaves
  • Juice of one lemon
  1. Place the garlic scapes in a food processor and pulse for 30 seconds.
  2. Add the sunflower seeds and pulse for 30 seconds. Scrape down the sides of the bowl.
  3. Add the olive oil and process on high for 15 seconds.
  4. Add the Parmesan cheese and pulse until the ingredients are combined.
  5. Add the basil and lemon juice, and process until reaching the desired consistency.
  6. Add salt to taste and serve immediately.

Napa Cabbage & Cucumber Slaw, from Bon Appétit

4 servings

  • 6 cups thinly shaved or slices cucumbers and/or Napa Cabbage
  • 1/4 red or white onion, very thinly sliced
  • 1/4 cup seasoned rice vinegar
  • 2 tablespoons extra-virgin olive oil
  1. Combine vegetables and onion in a medium bowl; season generously with salt. Let sit until they start to release their water, 8–10 minutes, then begin to massage, gently at first so they don’t break, then harder as they begin to expel their liquid, until softened to about the texture of coleslaw. Pour off all excess liquid and add vinegar and oil; toss to coat. Taste and season with more salt if needed.

Do Ahead: Slaw can be made 3 days ahead. Cover and chill.


As the summer scorches along, more and more people will be breaking out the grills. Here’s a friendly reminder that this doesn’t always mean brats and burgers! Veggies are also delicious when grilled – especially when paired with a yummy dip.

Veggie Dunkin’ Dip Ideas:

Hummus or Tzatziki


For the farm crew,

Charlie
Summer CSA Week 3, 2023

Hello, members and friends of the farm! As the summer solstice greets us, let us take a moment to be thankful for the life-giving rain that arrived at the farm over the weekend. The timely showers have nourished our crops, temporarily quenching their thirst and providing Janaki with a much deserved break from irrigating.

We are coming off a particularly laborious & hot week on the farm. Complete with lots of carrot weeding and mulching. Fun tasks to complete in the building humidity of approaching rains 🙂

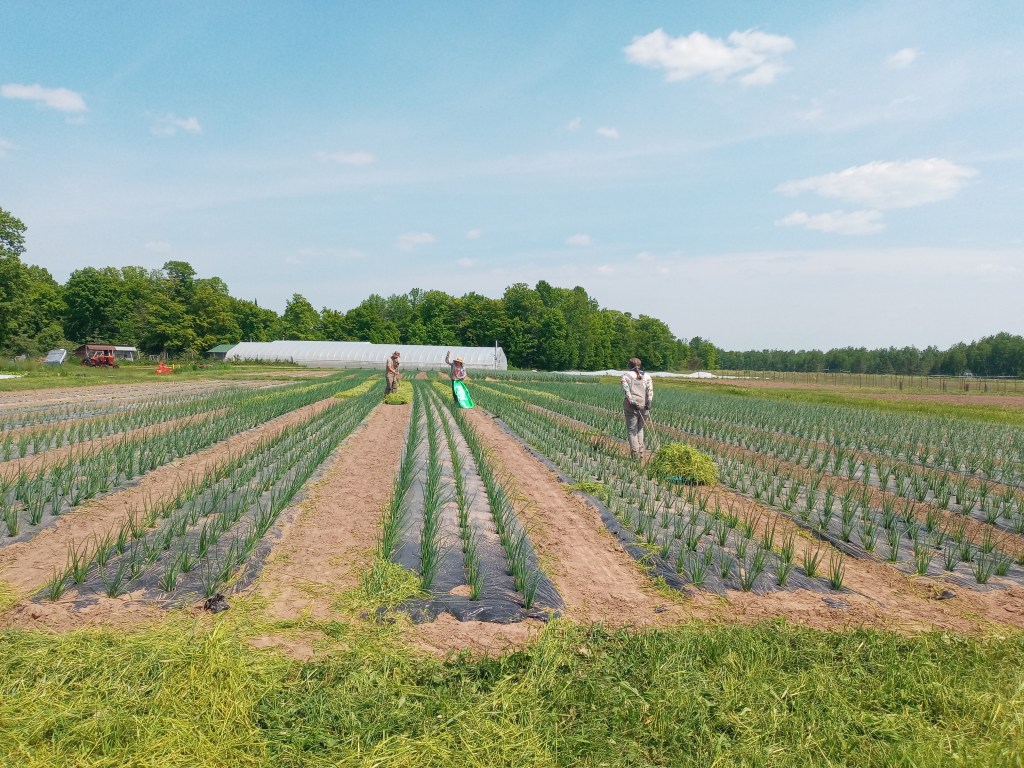
The straw mulch you see in the photos above is harvested from our winter rye cover crop. We grow this cereal grain for its ability to suppress weeds, build soil fertility, and prevent soil erosion. This particular planting was seeded last fall and remained dormant under snow cover before resuming growth this spring. When it reached about three feet tall, it is fibrous enough to chop for use as mulch.

The inclusion of straw mulch offers valuable benefits such as eliminating tillage, enhancing moisture retention, soil drainage and aeration. As it naturally breaks down, straw also acts as a nutrient source, providing food for the plants.


In your share this week:

Broccoli – Green Onions – Lettuce – Pac Choi – Radishes – Turnips


I remember some point in the depths of winter, when my diet consisted of primarily root vegetables and meat, I wanted so badly to refresh my palate with the crisp and vibrant allure of freshly harvested lettuce. That memory feels somewhat recent to me, but oh, how the turns have tabled… The long awaited reintroduction of salads into my diet has quickly shifted to leafy overwhelm. But when life gives us lettuce, we make vinaigrette!

Most Basic Vinaigrette:

  • 1 Tbsp dijon mustard
  • 2 Tbsp red wine or cider vinegar
  • 1/2 Cup olive oil or salad oil
  • salt & pepper, to taste
  1. Combine dijon mustard with vinegar.
  2. Slowly whisk in olive oil, salad oil, or a mixture of both
  3. Season with salt and pepper
  4. (1 Tbsp of mayo can also be added for creaminess)

Citrus Tahini Dressing:

This recipe is great on greens, but I also think it would be wonderful on roasted broccoli, too.

  • 1/3 Cup tahini
  • 1/4 Cup fresh squeezed orange juice
  • 2 Tbsp apple cider vinegar
  • 1/4 Teaspoon salt
  • 1-2 Tbsp maple syrup, optional, for sweetening
  • 1-2 Tbsp water, optional, for thinning
  1. Whisk all ingredients, except for water, in a small bowl or jar.
  2. Introduce water until desired consistency is reached
  3. Drizzle on your favorite veggies or salad


Wishing you all a splendid summer solstice filled with growth, gratitude, and the joy of being connected to the land.

For the farm crew,

Charlie
Summer CSA Week 2, 2023

Greetings!

Let’s start things off with a haiku…

Mid June – so so dry
Irrigate to help them grow
Janaki sleeps not

Week two and another round of locally grown goodness! Up this week:


Greens mix – Green onions – Lettuce – Radish – Tatsoi – Turnips


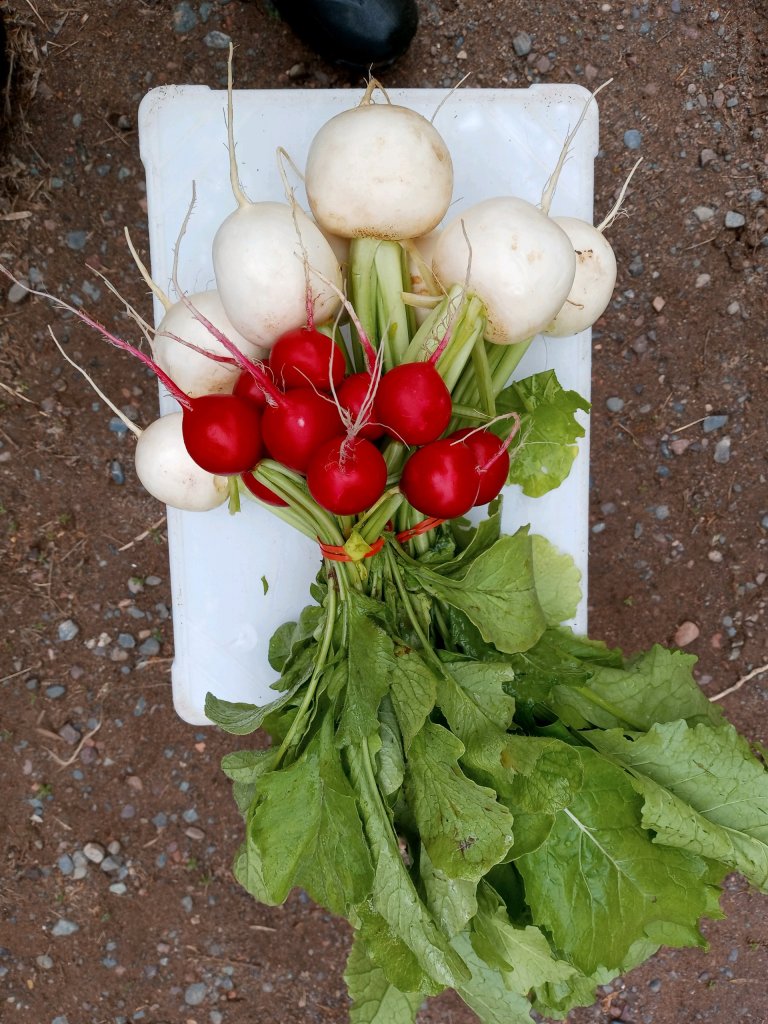
The vegetable spotlight falls on the radish this week. Radishes are not only zesty beauties… they are antioxidant-rich, as well as relatively high in vitamin C, calcium, potassium, and fiber. These cruciferous veggies are entirely edible – all the way from their crunchy bulb to their tender leaves. All parts of the radish are an excellent addition to your summer salad. Radishes are a cool-season vegetable, so they are a little hotter because of how unusually warm and dry it has been, and the heat also means that we’ve had to get all of them out of the field quickly, rather than keeping them for a few weeks. This makes them a great candidate for roasting, transforming the flavor from bright and crisp to mellow and sweet. Find below a two-for-one recipe that uses both your radishes and your turnips to bring out a caramelized quality in both (with a little help from some honey).

Roasted Turnips and Radishes

Serves 4

  • 1 lb turnips, halved or quartered
  • 1 lb radishes, halved or quartered
  • generous drizzle of extra-virgin olive oil
  • kosher salt and freshly ground pepper
  • 2 teaspoons honey, plus more to taste
  • 5 fresh thyme sprigs
  1. Position a rack in the upper third of an oven and preheat to 425 F.
  2. In a large bowl, toss together the turnips, radishes, and olive oil with salt and pepper. Transfer the veggies to a baking sheet and spread into a single layer. Keep your eye on them and roast until the veggies start to char and soften (about 10 minutes). Drizzle the honey and scatter the thyme sprigs on top. Continue roasting until the veggies are fork-tender and have a caramelized finish (about 10 more minutes).
  3. Discard the thyme springs. Transfer the veggies to a platter and drizzle with more honey, if desired. Serve immediately.

Amidst the various harvests of our CSA, our dedicated members occasionally find themselves facing a delightful yet overwhelming challenge: an abundance of produce that tests their culinary prowess and storage capabilities. When unpacking your weekly share of farm-fresh vegetables, you may wonder “what am I supposed to do with a fridge drawer full of Turnips?”

Enter the quick pickle…

Quick pickles will keep in the fridge for months. They are delicious right out of the jar, but also make zingy additions to salads, sandwiches, and really anything that needs a little punch.

Ginger – Pickled Turnips

  • 2 inches fresh ginger, unpeeled, cut into 1/4-inch-thick coins
  • 2 garlic cloves
  • 8 ounces turnips, cut into thin discs or match sticks
  • 1 cup warm water
  • 2 teaspoons kosher salt
  • 1 tablespoon honey
  • 3/4 cup apple cider vinegar
  • 1/4 teaspoon crushed red pepper flakes
  1. Put the ginger and garlic in the bottom of a 2-cup wide-mouth jar. Pack the turnips into the jar.
  2. Combine the water, salt, honey, vinegar, and red pepper flakes in a separate jar. Top it with its lid, and shake vigorously to combine. Pour the brine over the turnips until it just covers them. Top the turnip jar with a lid and refrigerate for at least 24 hours before enjoying.

When the turnips are gone, just shove more vegetables in there – the brine will work its magic on anything from green beans, to radishes, to fennel!

For the farm crew,

Charlie
The Farm Crew, Part V: Dave Hanlon

Dave, who has been farming with the Fisher-Merritt family for over 30 years now, is much too humble to name his own farming superpower. At first, I was thinking his vast farming knowledge and experience was his superpower, but he made me laugh so much while I was coaxing this information out of him, that I realized that his true superpower is his sense of humor.

How did you make your way to farming in general, and to Food Farm specifically?

John Fisher-Merritt and I had become friends through the Co-op when it was up on 7th and 8th Street in Duluth, and I would sometimes go out to their place in Holyoke and keep an eye on Janaki and Ben when they were kids. Growing up, I always wanted farming to be some part of my life. My grandpa was a farmer, and we’d drive around the countryside, and he’d talk about farms and places and people. In the town I grew up in in southern Minnesota, all my friends were farm kids, and I would go to their places, and for summer vacation I’d go to visit my cousins, who lived on a farm. When I was 15 years old, I started working for a farmer.

John and [his wife] Jane worked together, but at one point, Jane was in a bad car accident, so I started helping John. And this was in the 80’s, so whenever there would be meetings of farmers in the area about what was going on with farming and talk about generating more farming, trying to make a living, and repopulating the countryside, I would go to those meetings and meet people. I also was influenced by Wendell Berry’s writing, of course. 

The reason I was sort of interested and willing to follow John was because of his forward thinking and innovative approach to everything, and Janaki is the next generation; always very forward thinking, innovative, and a bit obsessed, in a good way.

At some point the Fisher-Merritts moved from Holyoke to Wrenshall; I remember sneaking on to this property with John when they were considering buying it and taking some soil samples.

What is your current role at the farm?

I jokingly call myself “Miscellaneous Man.” The greenhouses tend to be my area of focus. We have around 17,500 square feet of greenhouse space right now. I’m starting plants from seed and keeping successions of crops going in the greenhouses. We grow tomatoes and cucumbers in there of course, but the reason we can send people the greens mix, lettuce, and sometimes spinach that are clean and ahead of what the season up here will allow, is because we’ve got greenhouse space that we can use for that. It’s kind of just cycling through; the greenhouses get pretty intensive use during the season, so I’m just rotating the crops around. Keeping them tended, watered, and fed is my main focus. 

What would you say is your farming superpower? 

I keep showing up.

What is it about this type of farming that keeps you going?

I do really believe in what we’re doing in relation to feeding the surrounding community. When people express their enthusiasm for that, that’s a pretty great feeling. When we were first going down to Osceola and meeting with farmers there and learning about CSA, that was a big deal. I know there were growers up here before the Food Farm, but there was a time when I remember thinking, “Maybe sometime in the future there can be five vegetable farms like this….” [And now there are many more CSA farms in the area.] That’s a part of it. Feeding that community, seeing that the Food Farm is an example of how our food system could look different. Being part of kind of puzzling that out. 

Also, having people on the farm–whether they’re volunteers or paid people–who take ownership or take pride in either certain tasks or work on the farm, makes it feel like you’re part of a working team, and that feels good. Farming can be so isolating in general, so having the CSA also helps in that you have some communication with customers.

What do you like to do when you’re not at the farm?

I like biking around Duluth and wandering around Duluth in general. And relaxing at home.

How are you preparing vegetables these days?

I do like cooking and do quite a bit of cooking at home. Some people can make nice light salads and so forth, but most everything I make seems to end up, no matter what my plan, being kind of goulash-y at the end. I like to slowly build flavor as I go; I just keep adding things and intensifying the flavor. All my food is pretty serious food.

What else do you want people to know about this type of farming?

I do really want to thank all the people who are CSA members–those who’ve been members from the get-go and those who are new. Their willingness to try something different and willingness to be a part of what we’re doing kind of makes it all possible. There have been a lot of people who have really helped this farm over the years, whether they drove the delivery vans or came to the farm to help, or offered their places for drop-off sites, or been part of the core croup; all those people have been really critical to making this work. 

Summer CSA Week 1, 2023

Howdy, fellow Food Farm enthusiasts and happy first day of the 2023 Summer CSA season! Thank you for choosing to be a part of our farm family and for valuing the hard work, dedication, and love that we pour into every crop, every animal, and every interaction. Your commitment to local, sustainable agriculture not only supports our farm but also strengthens the fabric of our community, fostering a healthier, more resilient, and connected way of life.


In your share this week:

Spinach – Green Onions – Lettuce – Greens Mix – Rhubarb – Radish – Oregano – Tatsoi


Tatsoi is a versatile green that will elevate your culinary adventures!

Stir-fry perfection: Tatsoi adds a burst of flavor to your veggie stir-fry. With its mild mustard taste reminiscent of baby Pac Choi or Chinese cabbage, tatsoi is a great addition. The best part? It cooks up in a jiffy! Simply toss in the vibrant greens during the final moments of cooking, allowing them to wilt just enough to retain their delightful texture and taste.

A salad sensation: Whether it’s at the microgreen stage, as tender baby leaves, or in its full-grown glory at three to four weeks, tatsoi shines in salad mixes. You may have already noticed its crisp and unique flavor mingled with the mustard greens, arugula, kale, & chard that comprise our usual greens mix blend.

Pesto with a kick: Looking for an adventurous twist on the classic pesto? Get ready to blend your taste buds into a frenzy by incorporating tender tatsoi leaves into a zesty vegan pesto. Just combine them with cashews, a pinch of salt, a drizzle of olive oil, and a sprinkle of nutritional yeast.

Sautéed Tatsoi Recipe, from Niki Nakayama

  • 1 bunch tatsoi
  • 2 teaspoons sesame oil
  • 1 garlic clove, finely chopped or grated
  • 1 teaspoon grated ginger
  • 1 teaspoon fish sauce
  1. Cut off the base of the tatsoi and discard (or save for future stock).
  2. Rinse the leaves, but do not dry them. The excess water will lightly steam the greens while they cook.
  3. Warm the sesame oil in a small frying pan over medium heat.
  4. When the pan is hot and the sesame oil is fragrant, add the garlic and ginger, and sauté until fragrant, about 30 seconds.
  5. Add the still-wet tatsoi and fish sauce, and stir to combine.
  6. Cook uncovered, stirring occasionally until tatsoi stems are tender and leaves are wilted, about 1–2 minutes.

Tatsoi & Basil Pesto, from April Blake

  • 2 cups tatsoi
  • 1 clove garlic
  • 1 cup basil
  • 1/4 cup walnuts
  • 1/4 cup grated parmesan
  • 1-2 tbsp olive oil
  • salt to taste
  1. Throw everything but the olive oil in a food processor.
  2. Turn it on and if you have the option to drizzle in the oil while the machine is running, add it slowly until the pesto is a spreadable consistency. If you don’t have the luxury of the feature, add one tablespoon of oil, blend, then add the rest as needed.
  3. Salt to taste or add a little more cheese.

The Farm Crew, Part IV: Teri Sackmeister

Teri has been quietly making a big difference at Food Farm for more than 20 years now. She’s our very own Superwoman who makes all our deliveries and helps grow the veggies, too. Plus, she’s in charge of vegetable maintenance – yes, you read that right: vegetable maintenance!

Teri at home with Patsy and her garlic.

How did you make your way to the Food Farm?

I was working at Whole Foods Co-op, at the old location which is now Burrito Union, and I worked with John [Fisher-Merritt]. I was a front-end clerk, and I was going to UMD; it was my senior year, so I was asking around about different experiences for internships. I heard that John had had interns, so I asked him about it. I thought it would be a really fun experience, which seems pretty naïve of me looking back! I ended up working seven days a week as an intern, and I still worked at the Co-op on weekends. It was fun, but a lot of hard work, and I just fell in love with it. I became an employee the next year and have been for 20 years. I took some time off when my kids were really young, but I came back full time in 2016. Over the years, the work has expanded, so now I work almost year-round; throughout the winter I’m organizing winter deliveries and working with a winter crew. 

What are some of your early memories of working at Food Farm?

I remember the first CSA harvest days in 2002, which at the time were much smaller; we had less people. It was a little more chaotic. We didn’t have the system that we’ve developed over time. We’d have all the CSA boxes lined up on tables and would have to remember if we put the right amount of vegetables in each box. It’s more of an assembly line now.

My first year, it was really hot and dry, and we had army worms and the associated bugs, which is not a fond memory, but it’s a memory that stuck with me! I honestly thought every season would be like that first one, but I still came back, and it turned out that was the only time we had army worms. There were flies that somehow came along with the worms, and the flies would just cover us because they were attracted to the electrolytes in our sweat.

I also remember that John was such a great teacher; he would talk to me constantly throughout the season. Janaki and Ben [Fisher-Merritt] did work with me, too, but John and Dave really took me under their wings and were my teachers throughout that first season. They had the patience to teach me, because I didn’t know anything.

Speaking of Ben, you two had a bit of a farm romance, correct?

Yes, Ben and I started dating while I was an intern. I was living on the farm in an old camper, which actually was quite nice. Our official first date was probably at the Anchor Bar. We used to go on Wednesday nights as a crew, but then Ben and I went by ourselves as a date. We got engaged the next year, in 2003, and married in 2004, and I hired a catering service that used the Food Farm vegetables and Food Farm chickens for our wedding meal.

And your children are involved at the farm as well?

Yes; Brennan is 16, turning 17 soon; he’ll be a senior this year, and has helped on the farm for a few seasons now, mostly during CSA harvest days. He’s helped with harvesting and then helped me with the delivery. Mina is 12 and has also helped during CSA days. This past year she invited a friend to come over and help as well, so that’s been fun. Mina’s favorite thing is to do the chicken hugging, which happens in the spring and the fall. We just recently moved the chickens from their winter home to their summer home. We wait until it’s dark and they’re very calm; you can just pick them up off their roost and they stay calm. You can take more than one at a time, so you basically have to hug them to transport them to their final destination.

We live right across the road from the Food Farm now – we built our house in 2019-2020, so right during the beginning and the most intense part of the pandemic. It’s really nice to have such a short commute to work.

What is your current role at the farm?

A large part of my role is as the delivery person; I’ve been doing that since 2016, and it’s become a bigger role because we’ve expanded with both CSA members and with our retail partners. Janaki’s low-key talking about getting a bigger van because we may need it soon! During a busy season, the deliveries are about 60 percent of what I do. I deliver vegetables four days a week in the summer and two days a week in winter. I think it’s fun, because my job offers variety. When I’m on my delivery route, I get to talk to the people at the stores and restaurants, and sometimes I see our CSA members when I’m dropping off at our CSA sites. It’s fun to hear how much people love our vegetables and our farm.

The rest of the time I’m out in the field, or in the greenhouses, working along with the rest of the crew. I’m everywhere!

Do you have a favorite farm task or activity?

I have a lot of favorites, but at the beginning of the planting season, in March and April, I love going into the greenhouse and helping seed onions or Brassicas. It’s great after a long winter of vegetable maintenance and winter deliveries, to finally be out in the greenhouse where it’s warm and humid, and to be planting stuff again.

What is vegetable maintenance?

It’s looking after the vegetables in storage in the root cellar. This year we had to wash carrots multiple times throughout the winter; some that hadn’t been washed immediately after harvest in the fall, and later on we washed carrots that had started to sprout, to knock the sprouts off. I’m constantly looking at and going through the vegetables in storage to make sure conditions are right for storage and that they’re staying fresh.

What would you say is your farming superpower?

Most people would probably say I’m good at constantly lifting heavy things; I deliver our wholesale vegetables in 50-pound boxes. I do run into other delivery people on my routes, and they’re mostly guys, and a lot of them wear back braces; it’s physically hard work. It takes 3-4 hours to do a summer CSA delivery. I appreciated some time off to rest and recover this spring [after the root cellar was emptied].

Are there any aspects of farm work that you think would be surprising for our customers to learn? 

There’s a lot of record keeping, and it’s necessary so you know from one season to the next what’s been happening. We grow such a variety of veggies, and we need to know what was planted where and where we can plant in the future. For example, we need to leave some distance between where the Brassicas were last year and this year’s Brassica crops, because of disease and pests and crop rotation. It seems like such a miracle when stuff grows, but there’s so much planning and knowledge that goes into it, to make sure that things happen reliably.

What do you like to do when you’re not at the farm?

I just got an inflatable paddle board and I’m excited to try that out. I’ve done stand-up paddling before, but not with an inflatable one.

I also like to take our dog, Patsy, for walks; I like knitting; and I like gardening. People might ask, “Why would you want to garden when you work on a farm?” but I just like planting stuff, and I try different varieties in our garden. I always try to have a pollinator section, and a bed of garlic, because we love garlic, and in the third garden bed, we do miscellaneous stuff.  

What’s your current favorite vegetable? How do you like to cook/eat it?

Around this time of year, I love salad greens, and spinach is another seasonal favorite. I can’t wait to eat green stuff in general. I pretty much like everything. Before I started working at the farm, I didn’t have such an expansive palate, so working at the farm has really made me appreciate fresh vegetables much more. I used to hate green beans, and I hated parsnips, but now I love them. To see them growing and be able to harvest them, really gives you a love and appreciation for what you’re eating.