Summer CSA Week 5

As July begins, there seems to be a strange energy in the air. It’s technically the middle of Summer which means it’s almost the middle of the growing season. It’s this happy, yet sad, yet stressful time of year. It’s the time of year on the farm when most of the planting is complete, but a lot of vegetables aren’t quite ready to be harvested. It creates a sort of limbo stage.

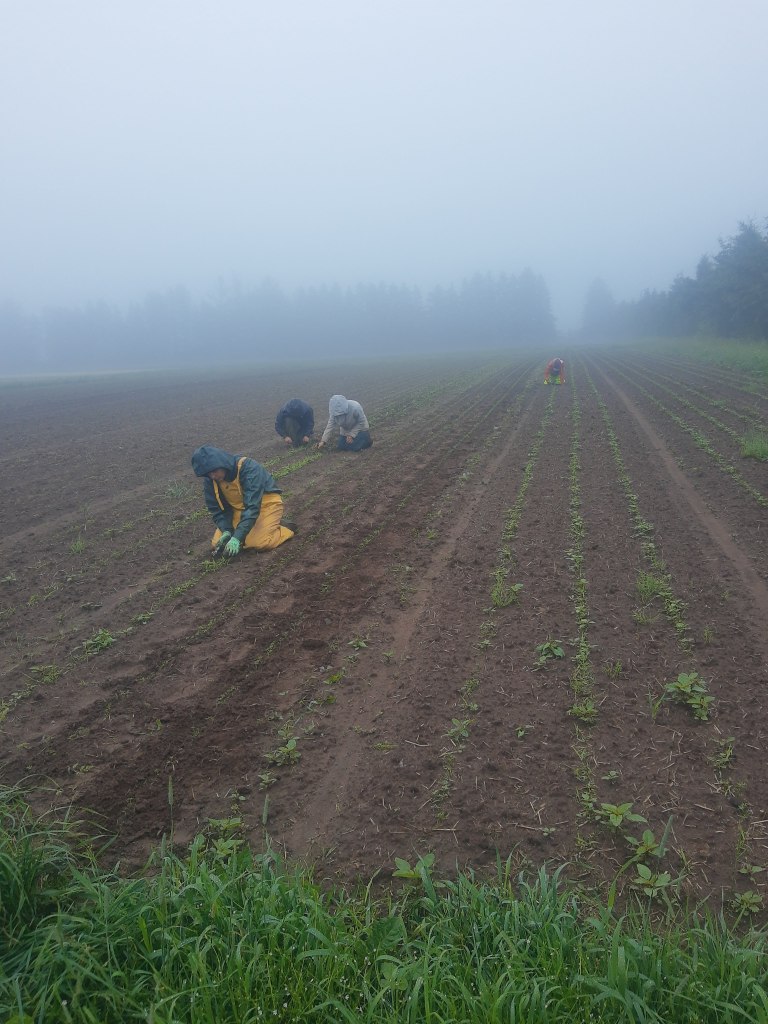
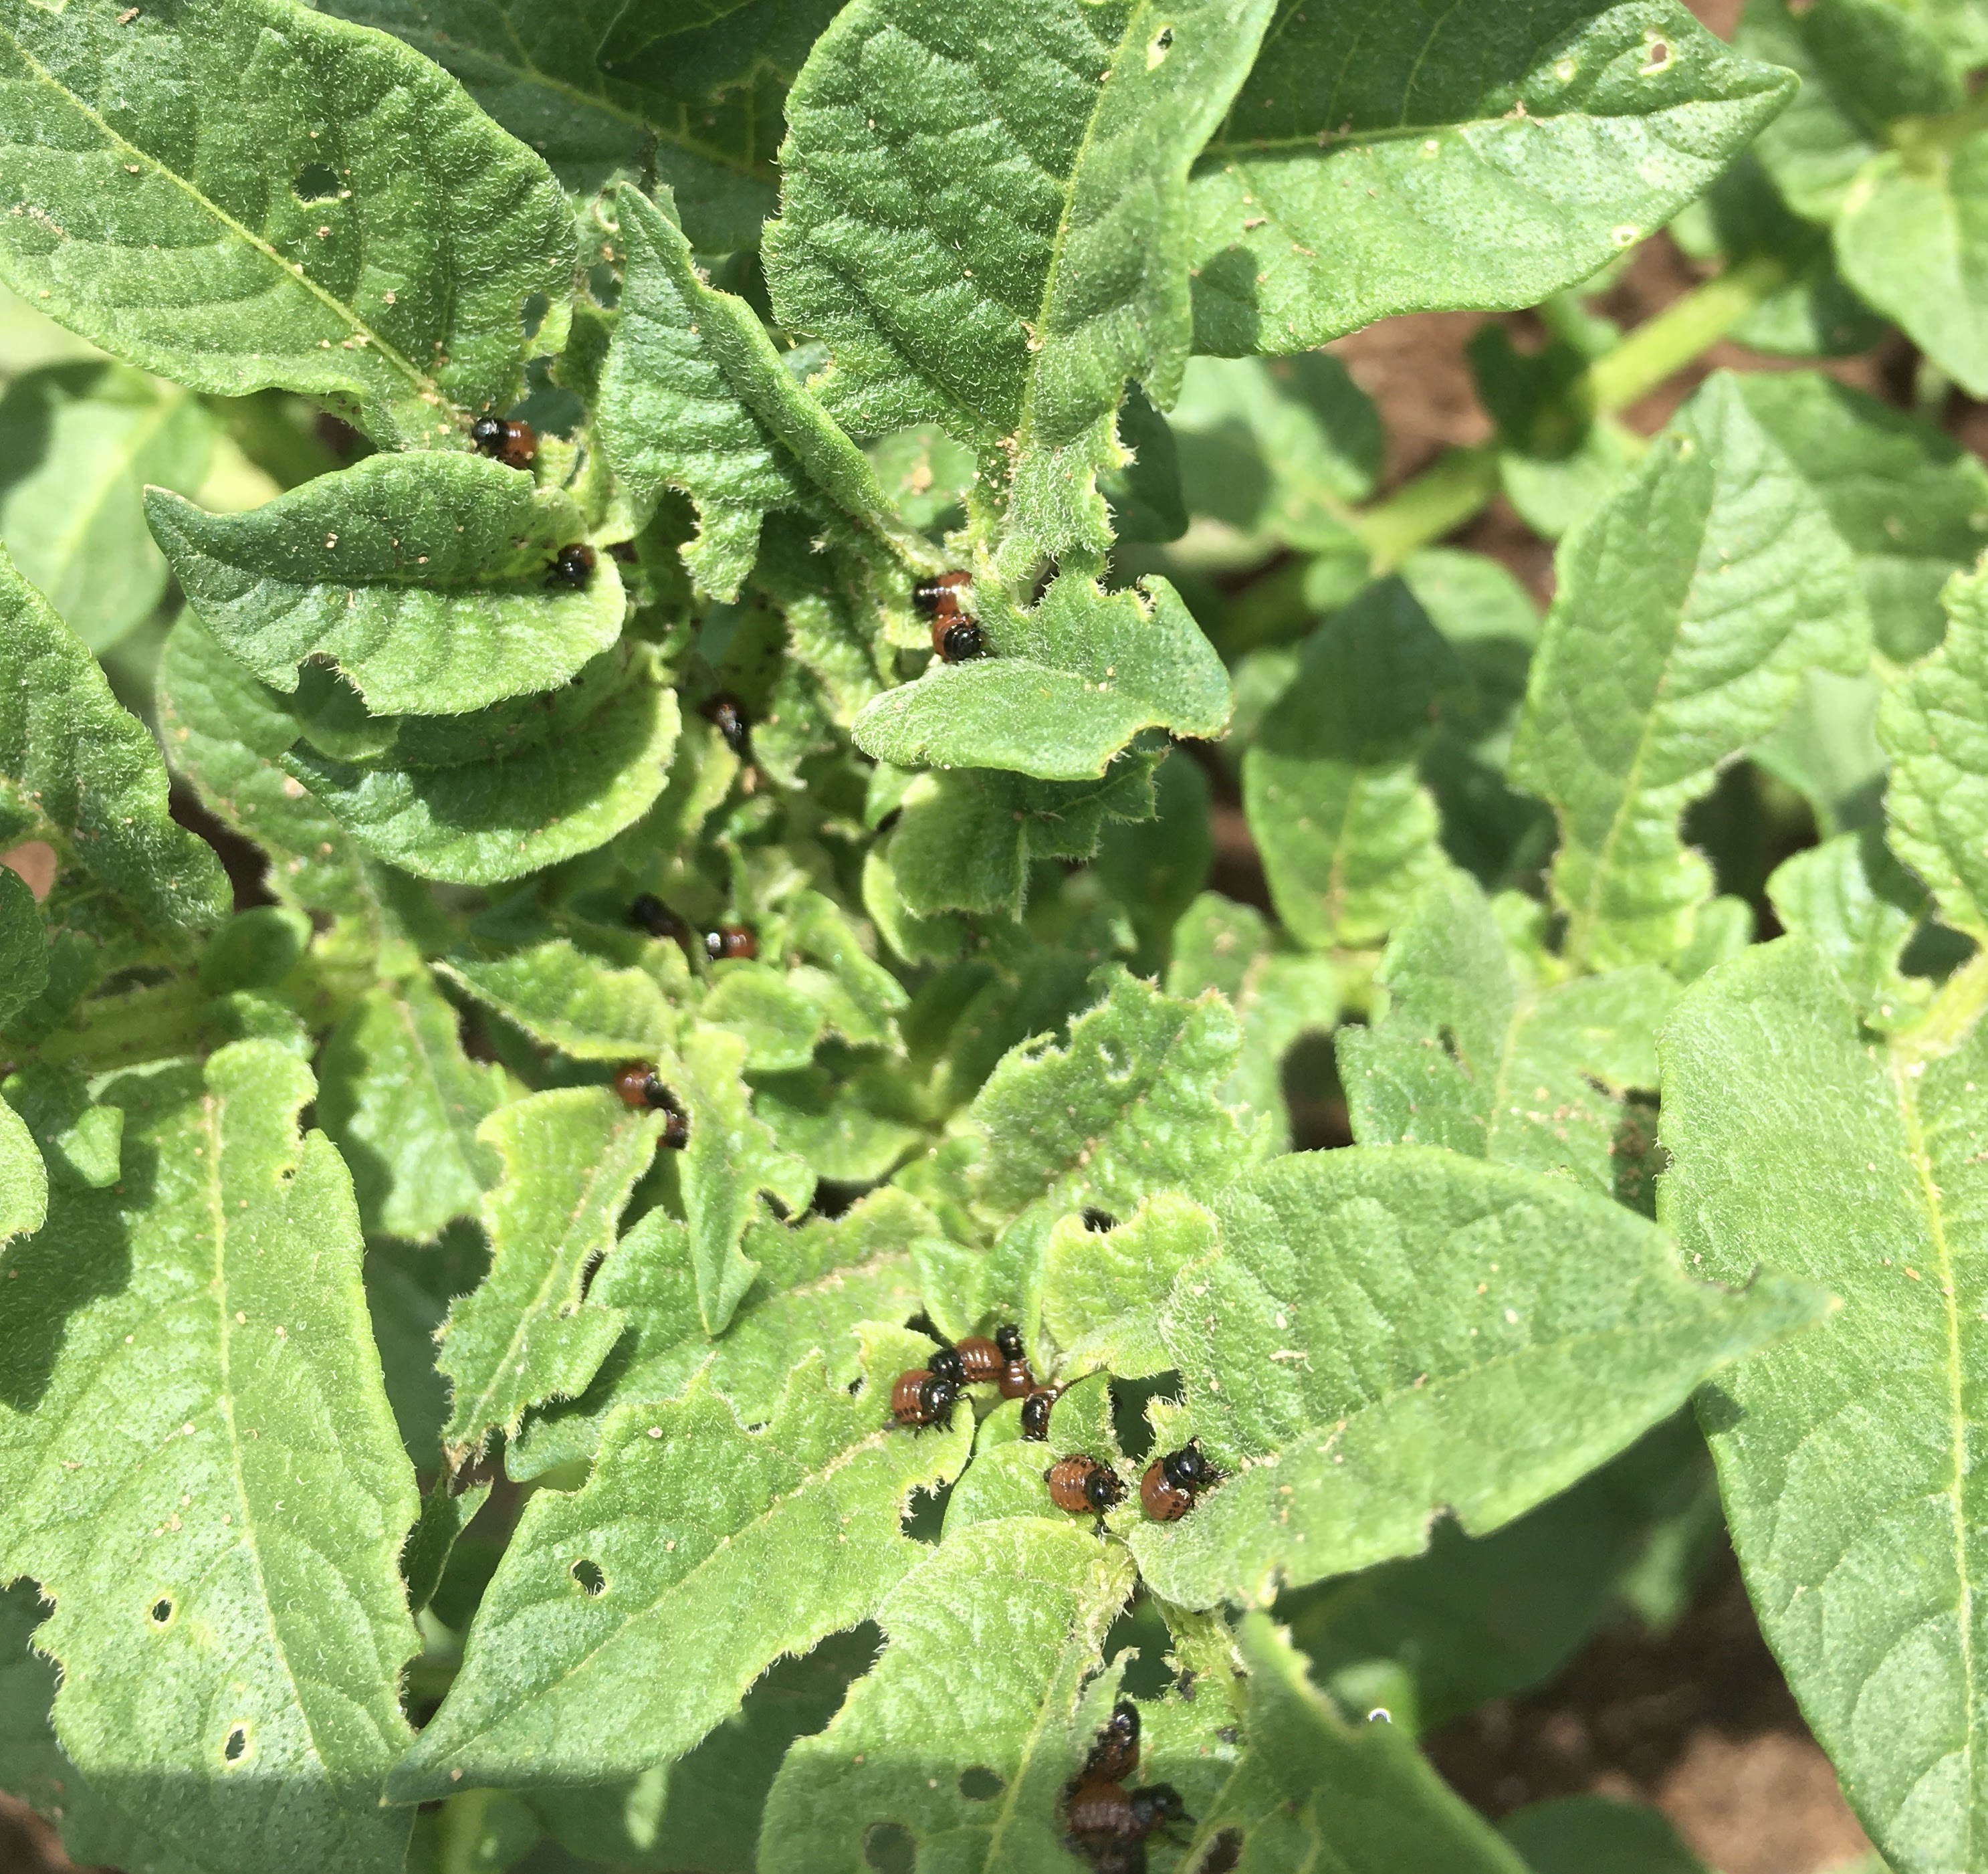
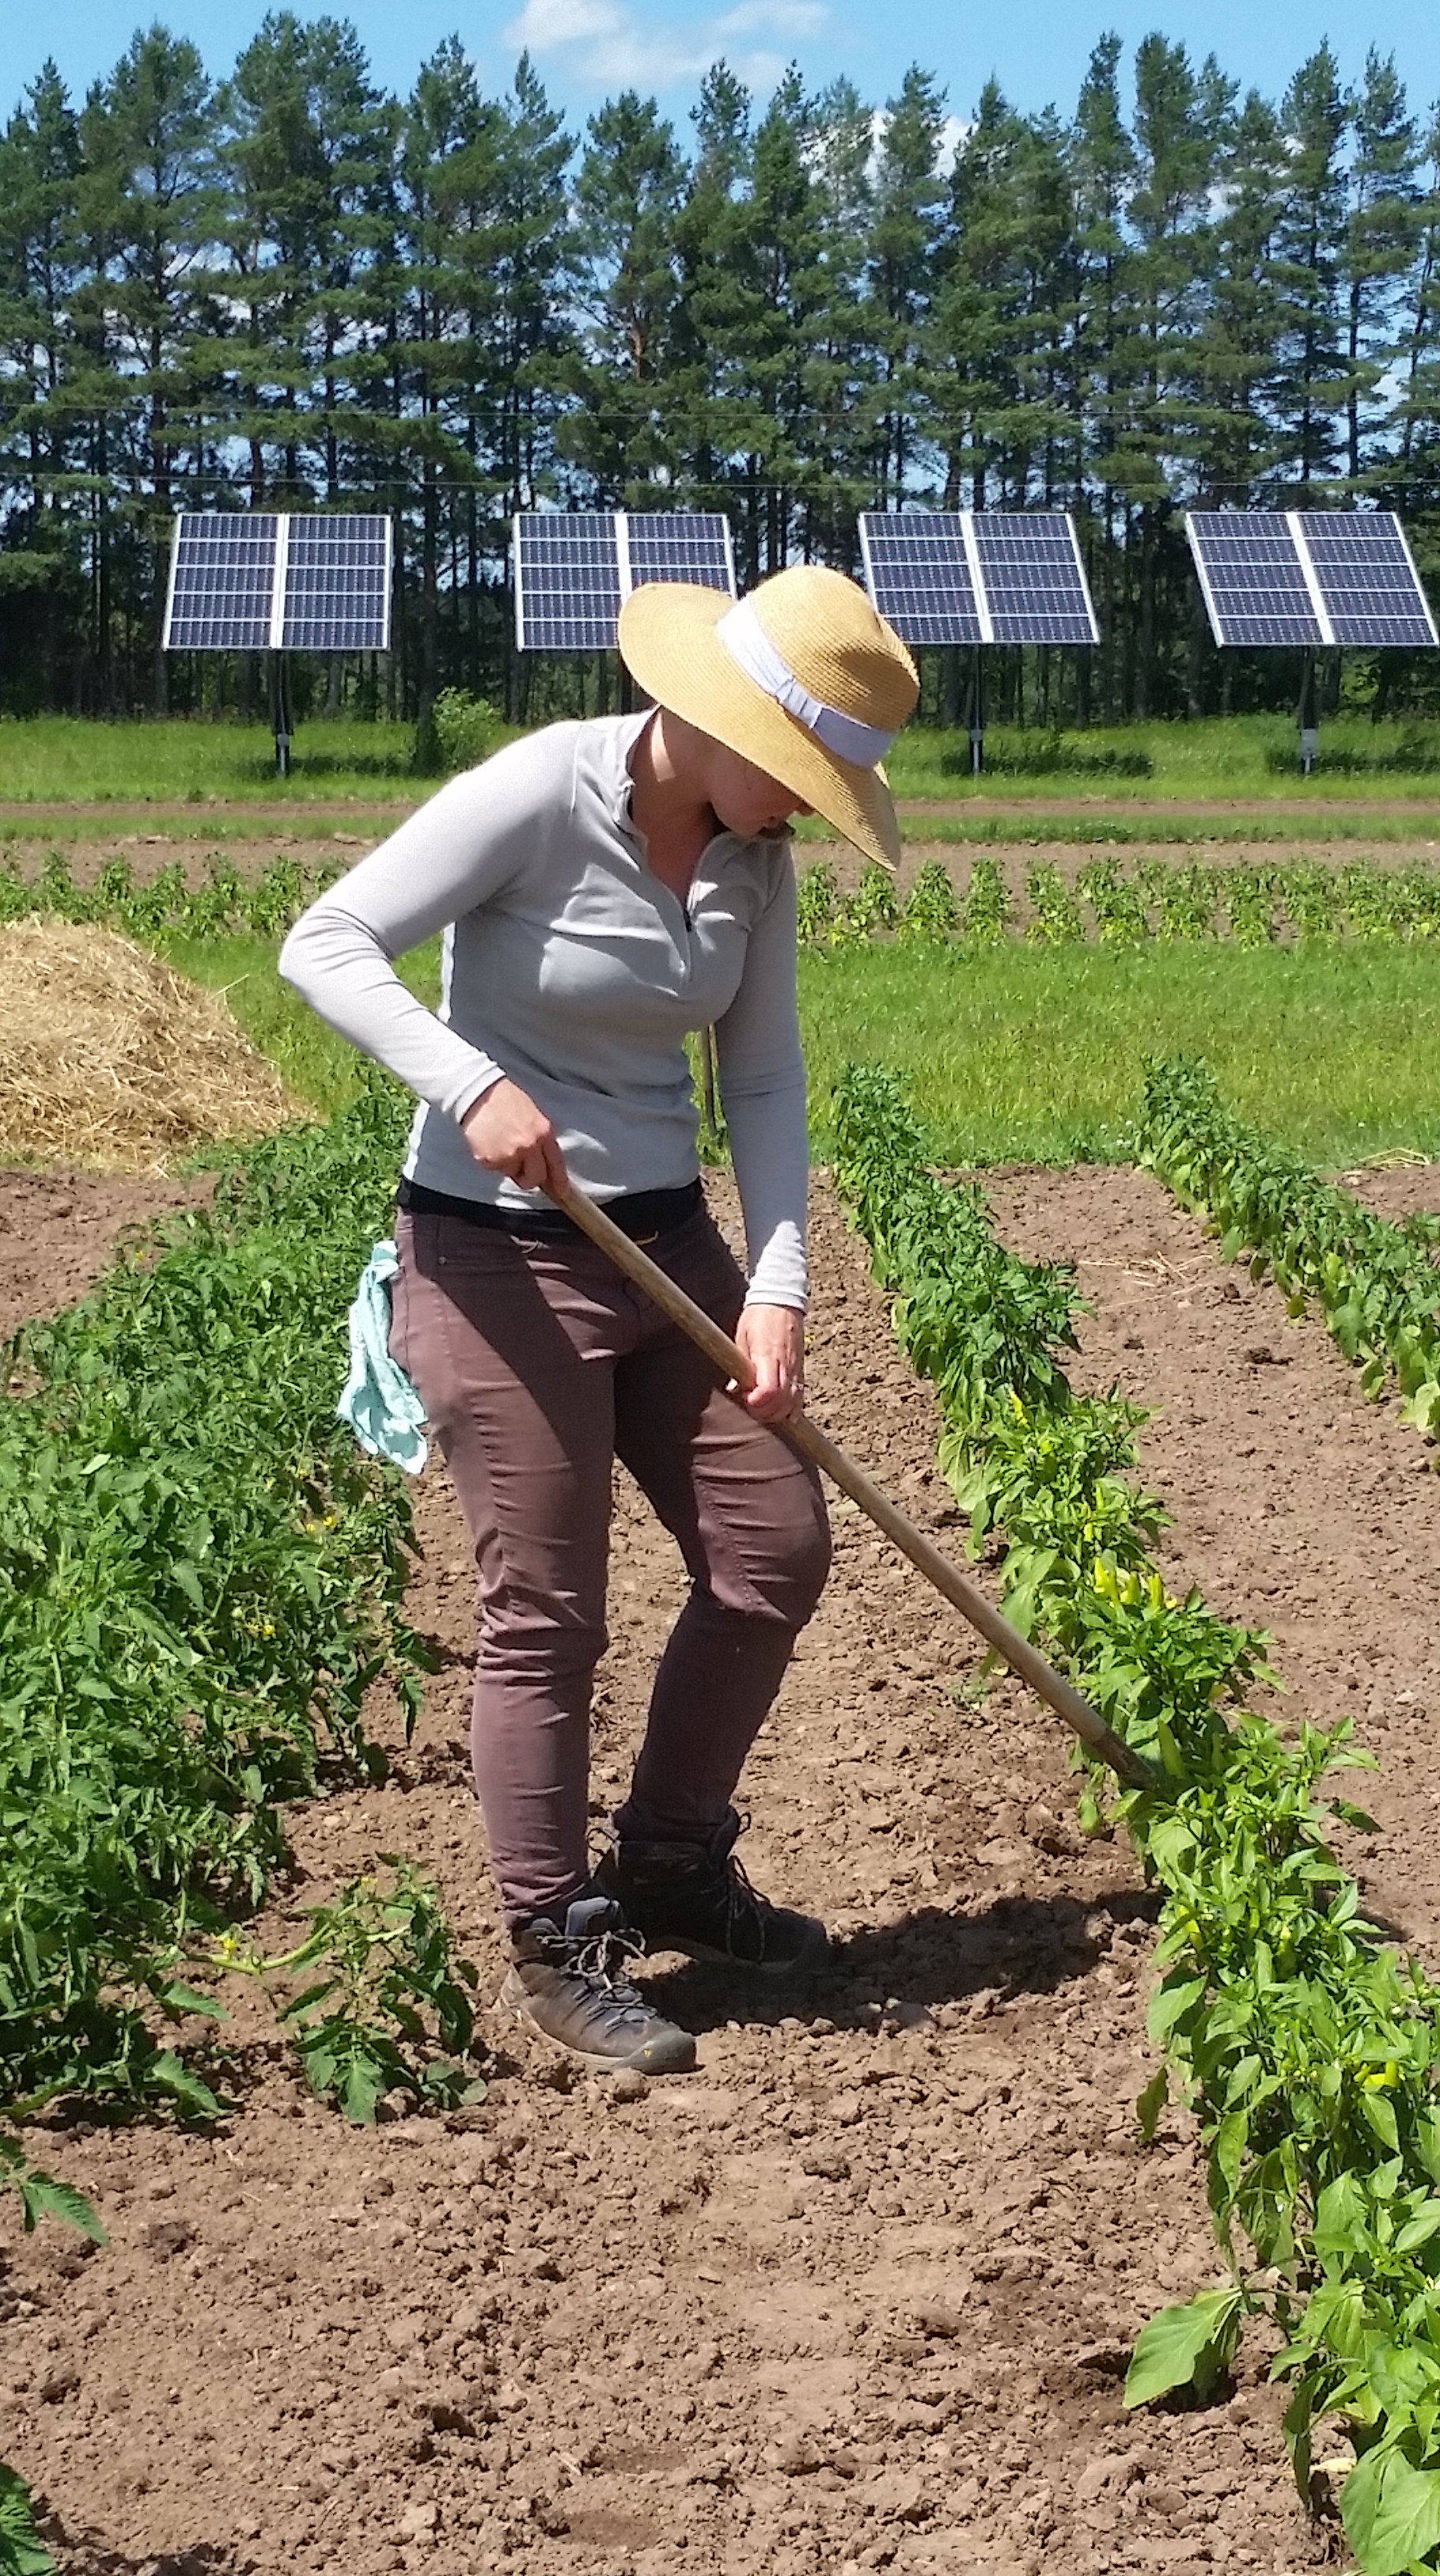
As farmers, we try to stay in the moment (then again aren’t we all) to ensure we complete all the necessary tasks so the vegetables stay happy and healthy. This week that meant the farm crew was out mulching the rest of the outdoor tomatoes, doing some pruning of the peppers, more bug hunting, and lots and lots of weeding. Falling behind on any of these tasks can lead to unhealthy or stressed out plants that won’t produce how we expect them to. That would mean less veggies in your box each week, which would be a disaster!

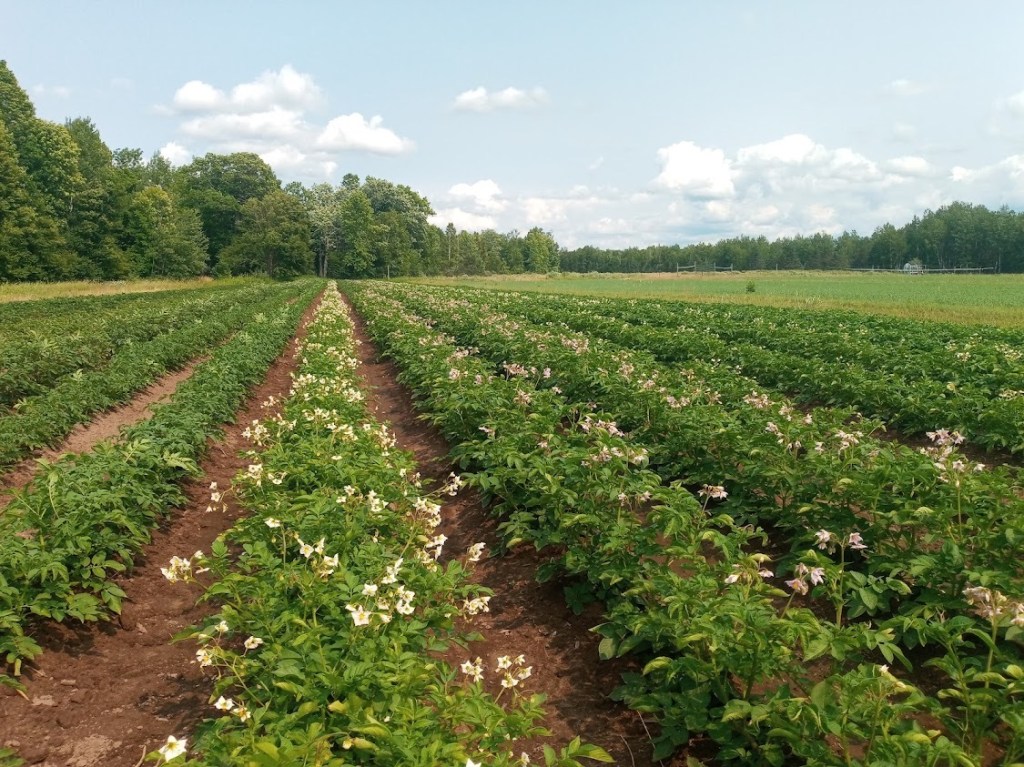
However, in order to be a successful farmer, one must also be thinking of the future. Farmer Janaki spent a lot of time this week checking on the storage planting of potatoes that went in a few weeks ago, to ensure the seed pieces didn’t get entirely drowned out in all the rain. He’s also been checking in on the storage cabbage to make sure they are growing on track for fall harvest. There’s also been an uptick in conversations during our morning staff meetings about when final plantings of vegetables are scheduled to go in the ground. Every vegetable gets seeded, planted, and harvested at very specific times to ensure the predicted outcome is achieved. Straying too far from any of these dates could have big consequences if we aren’t careful.

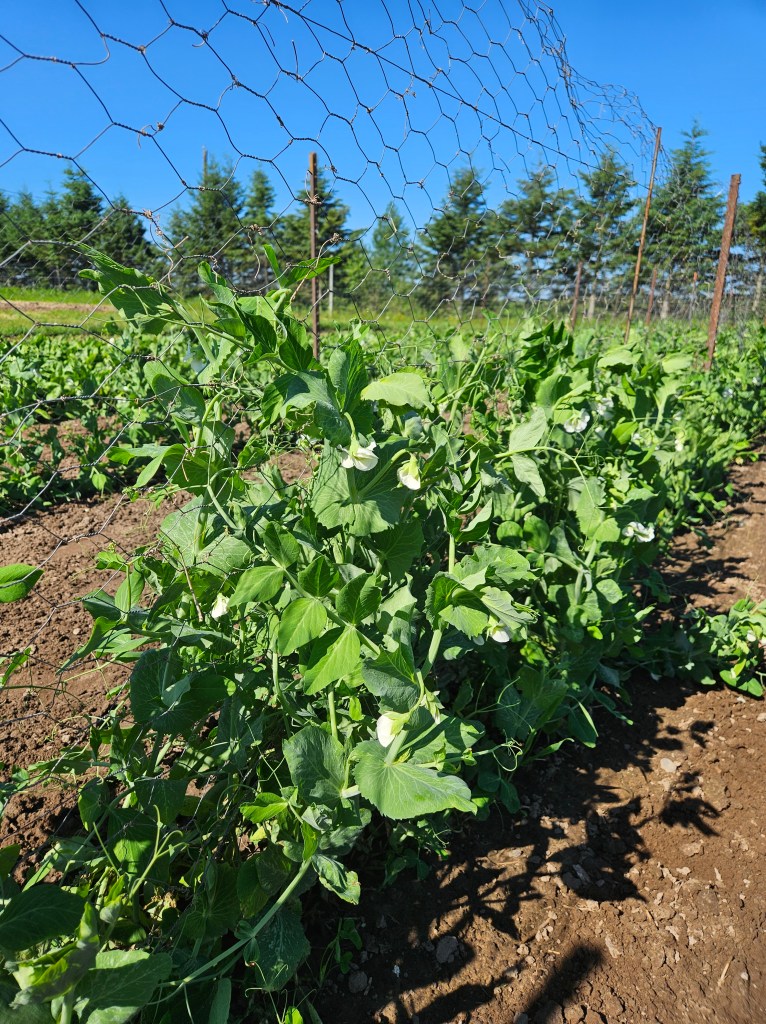
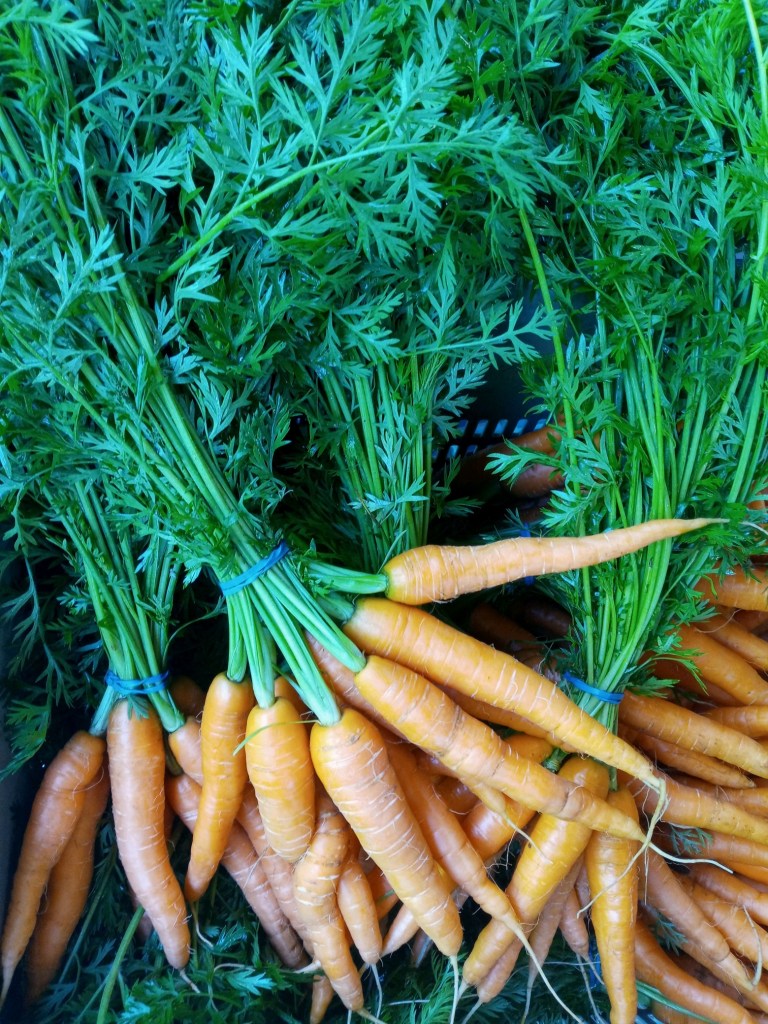
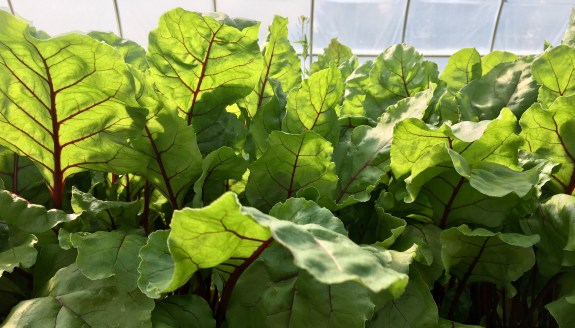
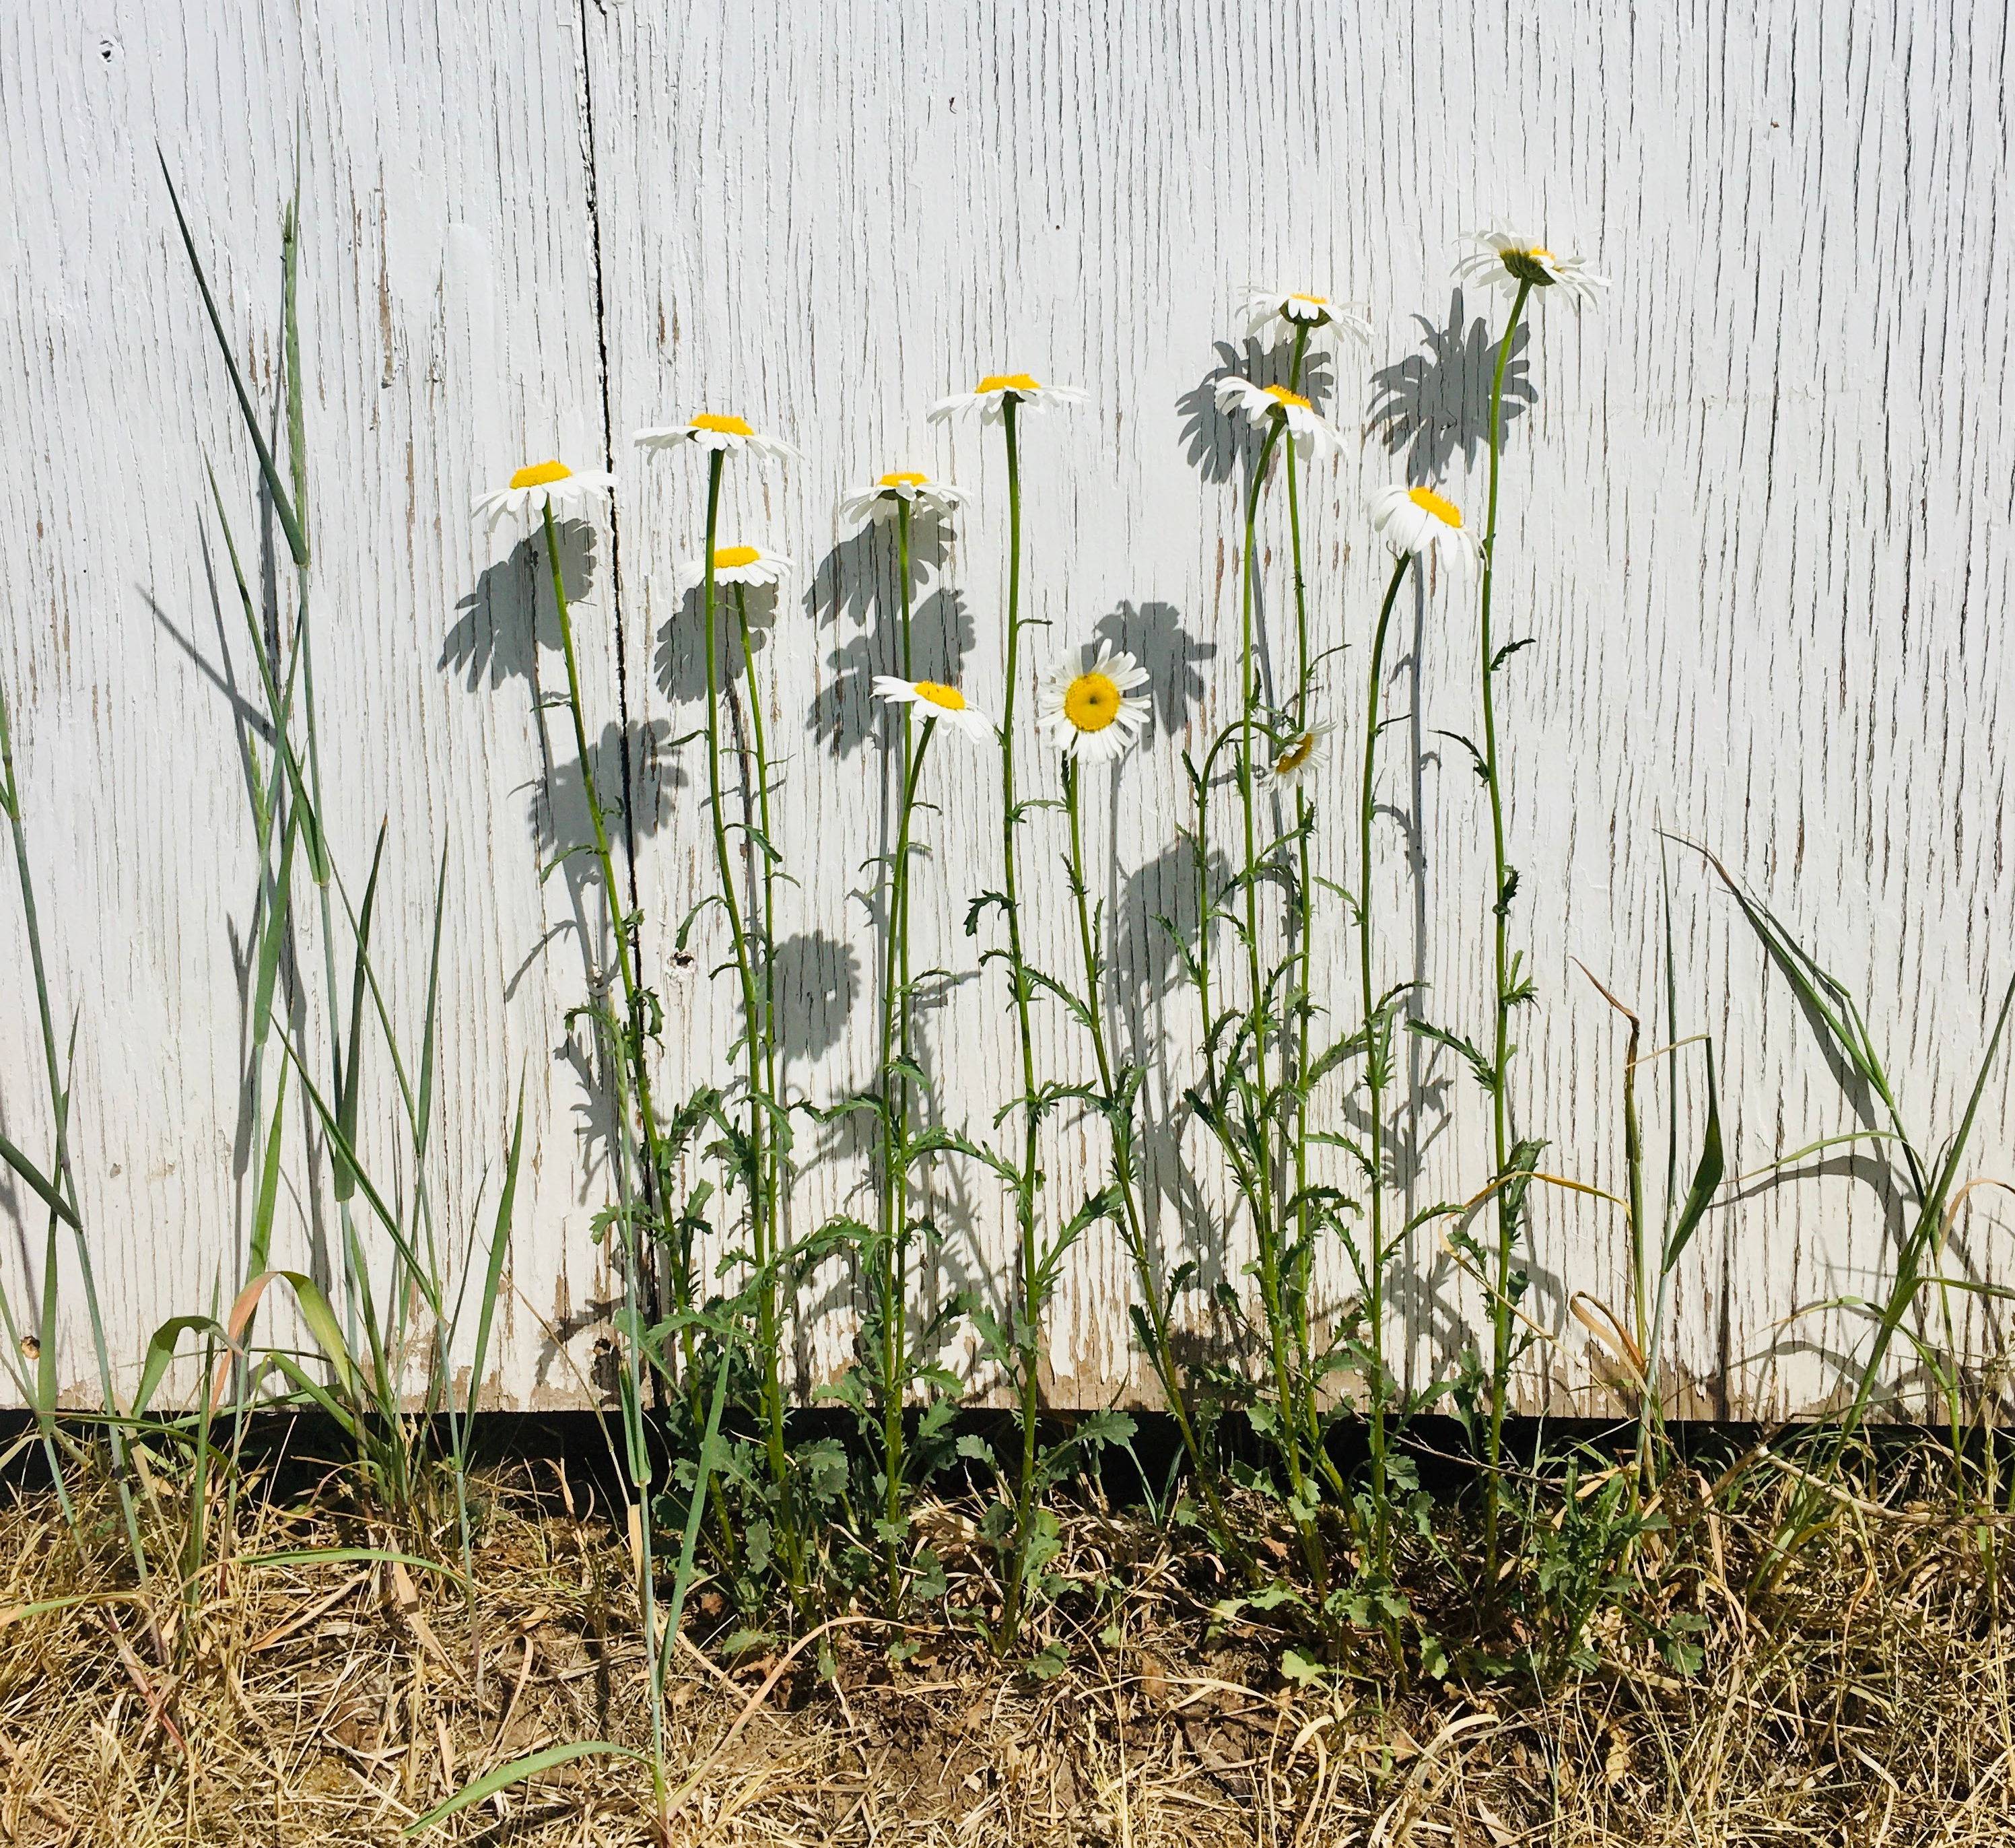
This can make July an overwhelming time on the farm, but it’s also one of my favorite. As the crew walks along the fields moving from one weeding project to the next, you can’t help but notice all the flowers and tiny vegetables popping up all over. The baby broccoli peeking through the foliage. The beautiful white flowers that will soon turn into tasty peas. The Napa cabbage that is just days away from being ready to harvest. The big green tomatoes that, if I stare at them long enough, I can convince myself they might have the slightest tint of yellow to them.

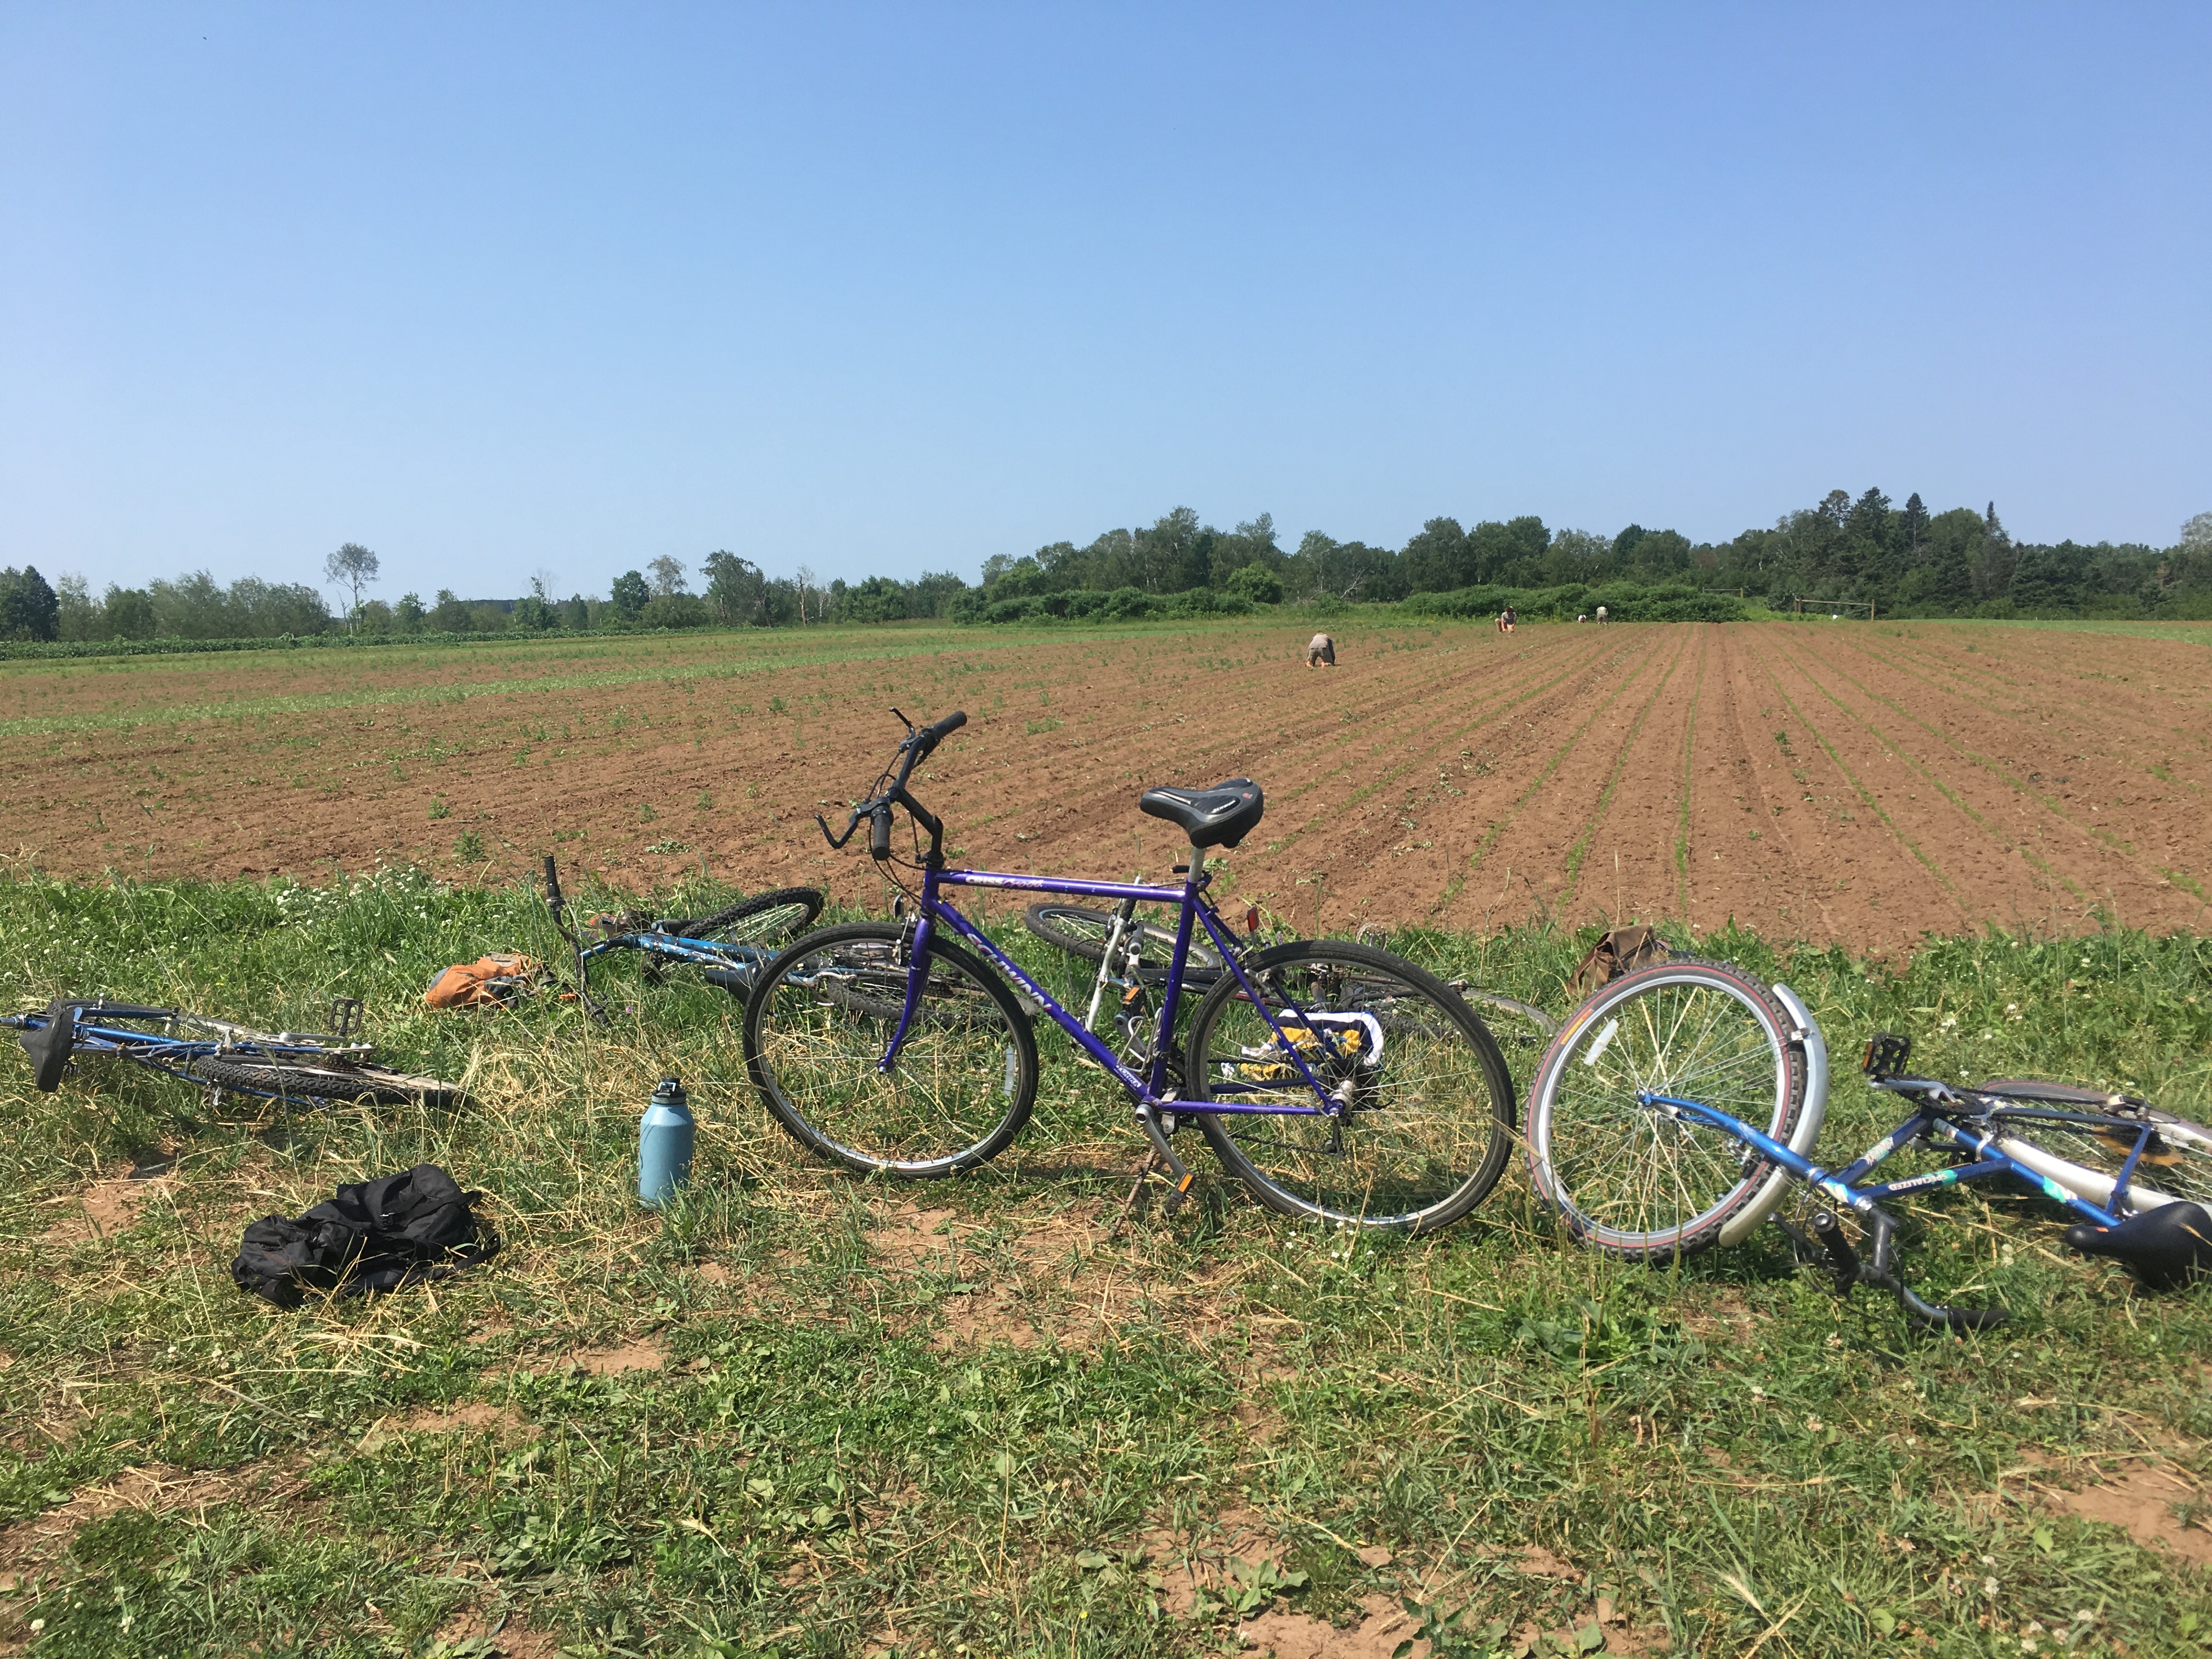
I always think of July as nature’s way of reminding us to slow down and find happiness in the little things. Of course we will keep checking our calendars and racing around to get everything done before the end of the work day, but we might occasionally take the long way to our next weeding project as a way to bask in the beauty of almost-full fields, and to congratulate ourselves on all the hard work we’ve done to get to this point. I encourage all of you to take an extra moment this week to really take in the beauty and flavor of all the vegetables inside your box.

As I mentioned, good farmers are always thinking about the future, and we are going to ask all of you to do the same. We are giving you a heads up that we will be hosting our Coffee On The Farm event the morning of Saturday, August 24th. It’s a time for you to drink coffee, tour the farm, and meet other members. We will send out more information and additional reminders as the event gets closer.

This week in your share:

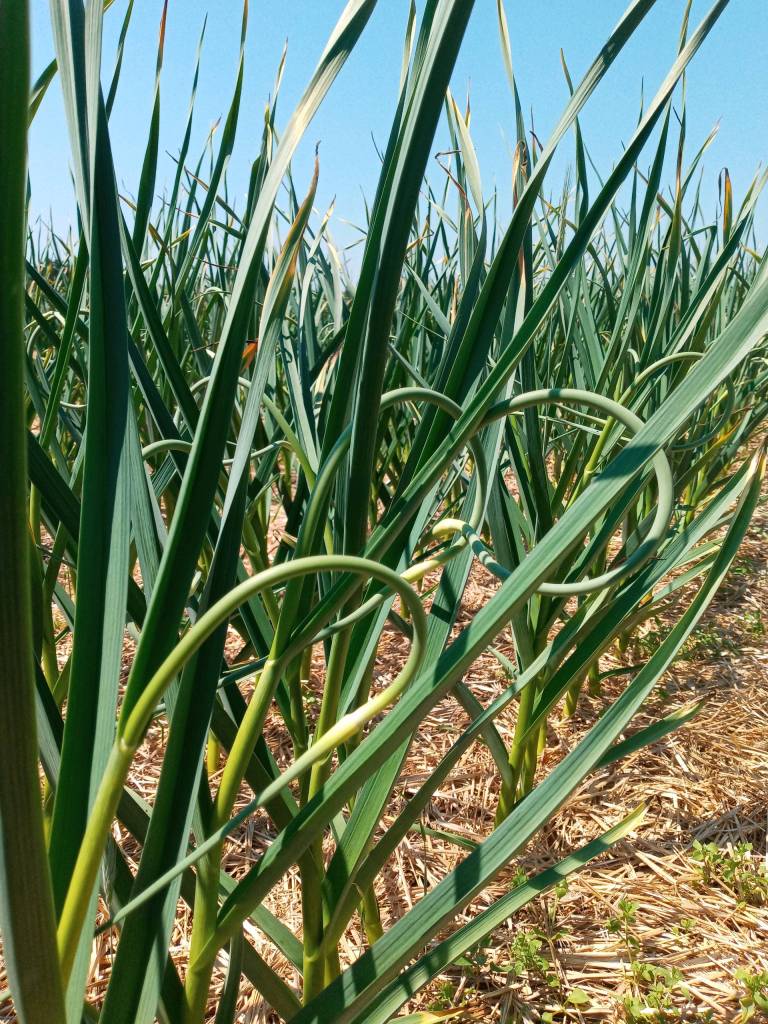
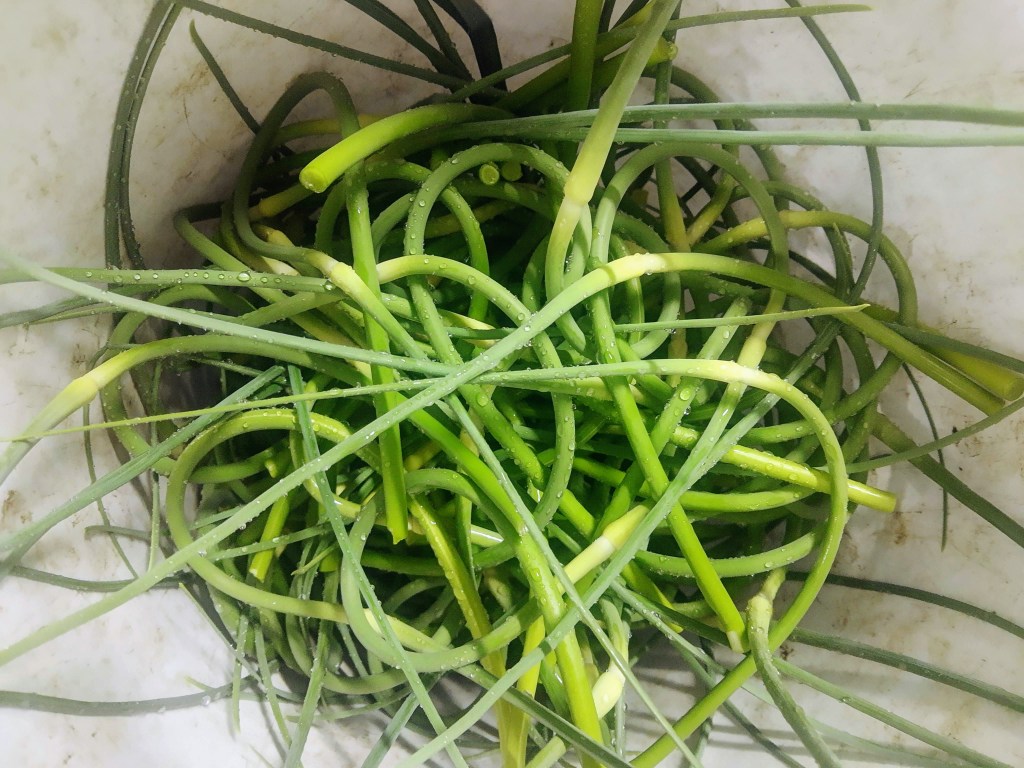
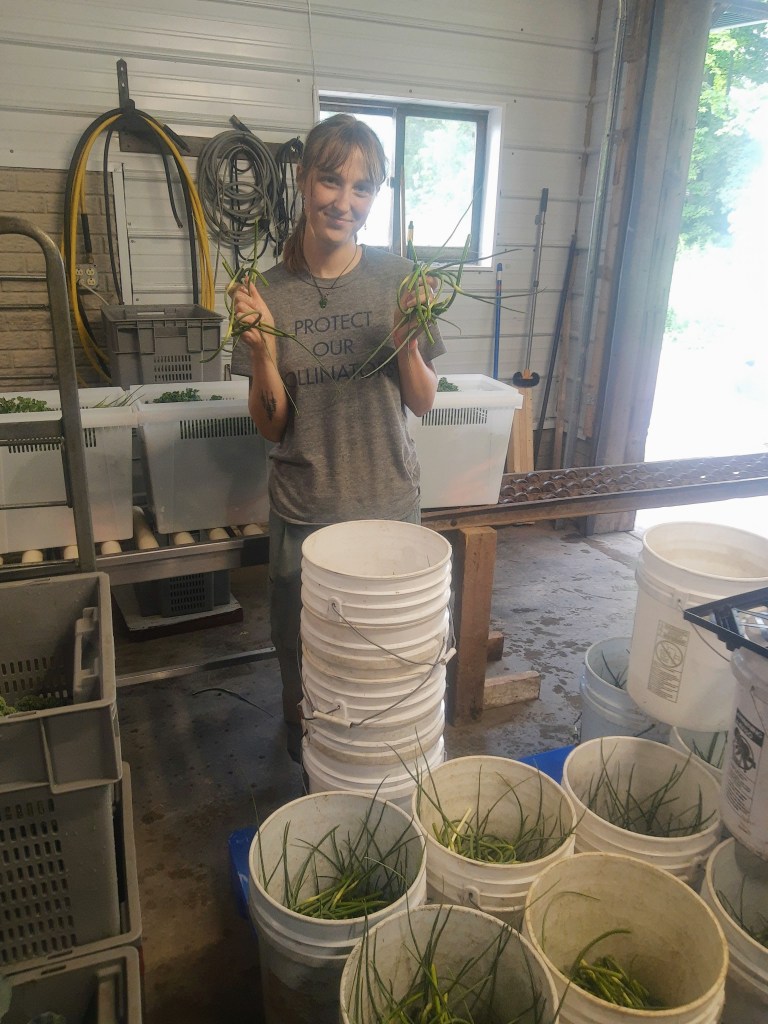
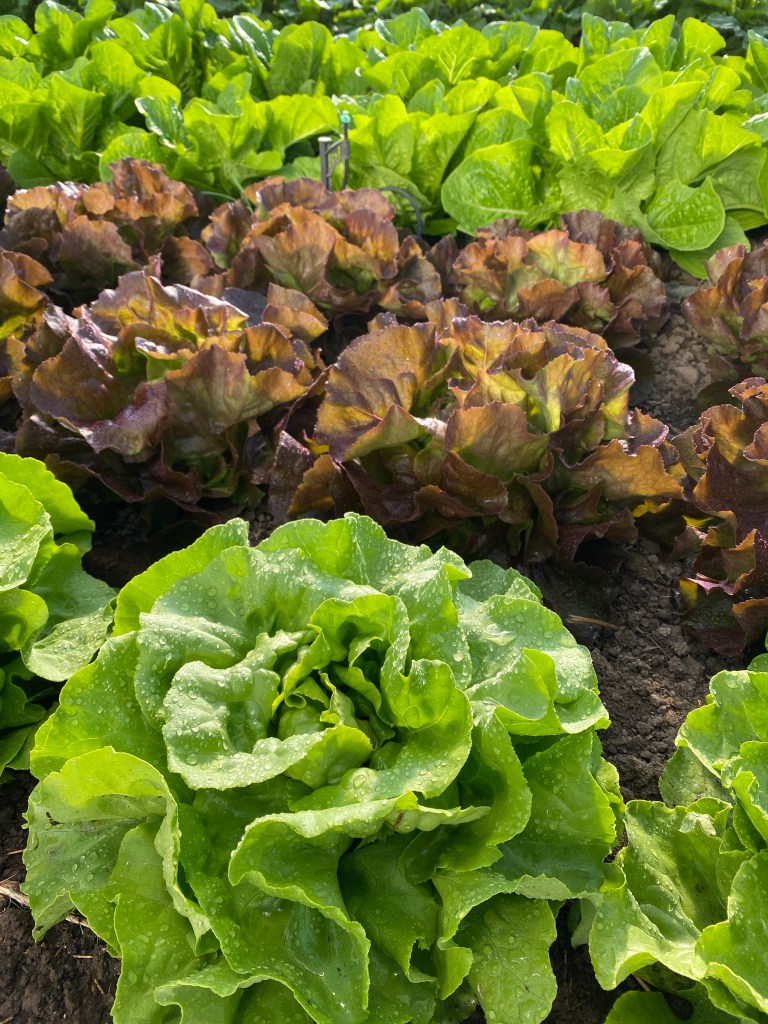
Kale – Cucumbers – Beets – Lettuce – Pac Choi – Parsley Green Onions – Garlic Scapes

Cucumber and Yogurt Salad (modified from A Book of Middle Eastern Cooking by Claudia Roden)

One large, cucumber, peeled and diced

Salt

3 to 4 garlic scapes, minced

2 cups plain yogurt

Pepper to taste

1 tablespoon dried, crushed mint or 3 tablespoons finally chopped fresh mint

Sprinkle diced cucumber with salt, and leave in a colander to drain for 30 minutes.  Mix the yogurt, garlic scapes, and mint in a large bowl. Season with salt and pepper.  Drain the cucumbers and add them to the yogurt dressing. Mix well and serve.

Moroccan Beet Salad

Half a pound of beets

Juice of half a lemon

One clove of garlic, minced finely

Half to 1 teaspoon ground cumin

2 tablespoons olive oil

Salt and pepper to taste

1/4 cup of parsley, chopped

Place water in a saucepan and bring to a boil.  Cut the beets in half and add them to the boiling water -cook until tender when pierced with a fork (approximately 30 minutes). Cool, peel and cut into bite-size pieces.   Place in a serving bowl.

Whisk lemon juice, garlic, and cumin in a small bowl.  Add salt and pepper to taste.  Gradually add the olive oil while whisking.  Pour over the beets and stir to mix.  Let beets marinade for a few hours.  Sprinkle parsley on top on beets before serving.

For the farm crew,

Jennifer

Farm update and Week 6 CSA

At the end of last week, Janaki took the crew for a walk about the farm to check out everything that’s going on. Things are really starting to pop! The snap peas are crawling all over their trellises and the potatoes are sporting their beautiful white flowers (see above). The biggest melons are palm-sized and starting to ripen. This year we are growing our crowd-favorite, cantaloupe, but we are also trying some watermelons. They’re unlikely to ripen in our climate, but we’re rooting for them! Stay tuned. Also looking to be in good shape are our outdoor carrots (thus far all of the carrots we’ve sent have enjoyed the comfort of greenhouse living).

A highlight for me was learning about Janaki’s growing strategy and how he rotates crops to ensure superb soil quality year after year. He tries to keep a certain level of available resources in each field by incorporating compost, organic matter and planting cover crops after a field has yielded a successful vegetable harvest. For example, he will often interseed clover in mid-to-late summer, which works to replenish important nutrients such as nitrogen levels in the soil. By doing this, we’re able to avoid using fertilizers and other conventional methods to re-establish optimal nutrient levels in our soil for the next round of vegetables. It also aids in weed suppression, meaning we can avoid using herbicides.

We also checked in on a new no-till method we are is testing out. When trying something new at the farm, it’s pragmatic to do a test and a control. In the picture above, you can observe the results at this point in the season. On the left, you can see the control group rows – the soil was turned over before planting and the cabbage is large. On the right, the no-till method shows smaller cabbages, which were planted directly into the clover cover crop. While the control rows appear to be doing much better, what you can’t see is all the work that went into turning over that soil at the beginning of the season before the cabbage could be transplanted. With a no-till method, transplants can go directly into unturned soil. Another benefit of a no-till method is less intensive to no weeding (big win!). The experiment doesn’t look promising now, but we’re waiting until the fall to make a final judgement. With trial and error, we’ve already learned a few things we’d change to make the system better.


In your share this week:

Broccoli – Green-top Carrots – Cucumbers – Garlic Scapes – Greens Mix – Lettuce

Napa Cabbage – Green Onions – Parsley – Snap Peas – Zucchini


This is a recipe forwarded to me from Deb Rausch, A frequent volunteer and friend of the farm. She’s been enjoying a variety of vegetables (mostly kale and chard) with this simple yet tasty dressing. I think it would be great with the broccoli and parsley this week, but use it for whatever feels right to you.

Deb’s Dressing

1/3 c mayo
2 green onions
1 tablespoon champagne vinegar (or rice vinegar)


Miso Glazed Grilled Zucchini

This recipe is a bit intensive but so worth the effort!

2 tablespoons white miso
1 tablespoon honey or maple syrup
1 tablespoon rice vinegar
1 tablespoon soy sauce (or Tamari)
3 medium zucchini (about 1-1/4 lbs)
Cooking oil
Green onions and sesame seeds for garnish

Instructions:

  1. Preheat oven to 400. Slice the zucchini in half length-wise. Cut a cross-hatch pattern into the cut-side of each zucchini half. Each cut should only be about 1/4-1/8 inch deep.
  2. Sprinkle each cut-side with a little bit fo salt. Turn the cut-side down onto a paper towel and let drain for 15-20 minutes.
  3. Once the moisture has been released, quickly rinse the zucchini. Take care not to let the water run over them for too long – you don’t want them to re-absorb water after you’ve drawn out the moisture! Dry off with fresh towels. Make them as dry as possible.
  4. Heat a cast iron skilled or other oven-proof vessel over medium heat. Add 1-2 tablespoons oil, let it heart up, then place the zucchini cut-side down in the pan. Cook until golden brown (about 7 minutes). You can use tongs to carefully peek at the cut-side while cooking.
  5. Once browned, place the cast-iron skill into the oven for 15 minutes. While roasting, make the miso glaze. You can add water to thin it out to the consistency of a BBQ sauce if needed. The zucchini should be extremely fork-tender.
  6. Remove pan from oven and carefully turn over the zucchini so the cut-sides are up. Spoon on the glaze so it covers the zucchini (it doesn’t have to be thick).
  7. Return the pan to the oven, this time with the cut-side up. Turn on the broil function and watch until the miso glaze just starts to bubble. Finish with green onions and sesame seeds.

Smashed Cucumber Salad

Yield: 4 servings

1 large greenhouse cucumber
handful of snap peas (everything you got in your share)
1 teaspoon kosher salt, plus more for cucumber
2 teaspoon granulated sugar, plus more for cucumber
1 1/2 tablespoons rice vinegar
2 teaspoons sesame oil
2 teaspoons soy sauce or tamari
1 tablespoon grapeseed or olive oil
2-3 garlic scapes, minced
Red pepper flakes, to taste

For garnish:
Small handful of cilantro
1 teaspoon toasted sesame seeds (optional)

Instructions:

  1. Rinse cucumber and pat dry. Cut crosswise into pieces about 4 inches long. Cut each piece in half lengthwise.
  2. On a work surface, place a piece of cucumber cut side down. Lay the blade of a large knife flat on top the cucumber and smash down lightly with your hand. The skin will begin to crack, the flesh will break down and the seeds will separate. Repeat until the whole piece is smashed. Break or slice diagonally into bite-sized pieces, leaving the seeds behind.
  3. Place the cucumber in a strainer and toss with a big pinch of salt and a big pinch of sugar. Place a plastic bag filled with ice on top of the cucumbers to serve as a weight and place the strainer over a bowl. Let drain 15 to 30 minutes.
  4. Make the dressing: In a small bowl, combine salt, sugar and rice vinegar. Stir until salt and sugar are dissolved. Stir in sesame oil and soy sauce.
  5. When ready to serve, shake cucumbers well to drain off any remaining liquid and transfer to a serving bowl with snap peas. Drizzle with grapeseed or olive oil and toss. add half the dressing, half the garlic scapes and the red pepper flakes to taste, and toss. Keep adding dressing until cucumbers are well coated but not drowned. Taste and add more pepper flakes and garlic if needed. Serve immediately, garnished with cilantro and sesame seeds.

For the farm crew,

Charlie

Summer CSA Week 5, 2023

Dear Food Farm Community,

As we delve into the heart of the growing season, we find ourselves knee-deep in the world of weeding. Weeding, although often deemed an arduous task, is an essential part of maintaining the health and vitality of our crops. The crew has been diligently working through the fields, carefully tending to each bed, ensuring that our plants have the space, nutrients, and sunlight they need to thrive.

Soon we’ll begin to notice that the daylight hours are gradually decreasing, but the harvest time seamlessly extends, stretching out longer and longer. More variety means more running around for the crew and volunteers. This morning we were doing just that; shuttling harvest totes to and fro to deliver a well rounded box of vegetables.


In your share this week:

Green-top Beets – Broccoli – Green-top Carrots

Cucumber – Garlic Scapes – Kale – Green Onions – Zucchini


Beet Greens & Kale Sautéed with Garlic Scapes

~ 2 servings

  • 1 tablespoon olive oil
  • 1 slice bacon, cut into small pieces (optional, use a little more oil if omitting)
  • 2 garlic scapes, finely chopped
  • 2 green onions, white and pale green portion, finely chopped
  • 6 leaves beet greens, stems cut into 2-inch pieces
  • 2 leaves kale, ribs and stems removed, chopped
  • salt and pepper to taste
  1. Heat olive oil in a large skillet over low heat. Cook bacon until it begins to brown and crisp, about 2 minutes. Add garlic scapes and green onion, cook and stir until golden brown, 3-5 minutes.
  2. Stir beet stems and kale into skillet. Cover and cook until kale wilts, about 3 minutes. Add beet greens. Cover and cook until bright green and wilted, 1 to 2 minutes.
  3. Season with salt and pepper.

Sautéed Zucchini & Carrots

  • 1 medium zucchini, thinly sliced
  • 2 medium carrots, thinly sliced
  • 1 tablespoon olive oil
  • 1 tablespoon ghee (optional)
  • 1 teaspoon dried thyme
  • salt and pepper to taste
  1. Heat a large skillet over medium-high heat. Add the oil and butter.
  2. Once the better is melted, add the zucchini and carrots. Sprinkle with thyme, salt and pepper, toss to coat.
  3. Sauté vegetables until lightly browned and tender, stirring occasionally so they do not burn.

I know I already included a pickled turnip recipe in the week 2 newsletter, but if you are like me, you may have a few extra rolling around in your fridge still. Here is a recipe that includes beets along with our old friend. If you happen to be out of turnips, just use more beets!

Pink Pickles, from Cotter Crunch

8 servings

  • 12–14 ounces purified water
  • Optional: 1 teaspoon sugar
  • 2 ½ Tablespoon Kosher salt
  • 1 bay leaf
  • ½ cup white vinegar (for quick pickling)
  • 1 small red beet, peeled and sliced
  • 2 turnips (about 1 pound), peeled and sliced
  • 1 clove garlic, chopped
  1. Add beet, turnips and garlic to a heatproof jar or container. Set aside.
  2. In a medium saucepan, bring salt, sugar, bay leaf, and 12 ounces of purified water to a boil, stirring occasionally to dissolve salt and sugar. Turn off heat and let mixture cool down for 5 minutes, then stir in vinegar.
  3. Pour pickling liquid over the contents in the jar, and ensure that the turnip and beet slices are submerged completely in the brining liquid. Let it cool, then close the jar and place it in a dark area for 5 to 7 days.
  4. For best flavor, refrigerate before serving.
  5. Store in a covered jar or container in the refrigerator for up to one month.

For the farm crew,

Charlie

Summer CSA Week 4, 2023

Greetings & Happy Fourth of July!

It’s a big week for us here at the farm as the first carrot harvest is underway. If there is one crop we are “known for” this could be it. Carrots have been a Fisher-Merritt staple since before the Food Farm was located in Wrenshall; back to when John and Jane were farming in Holyoke, MN. Thats over 48 years of experience and artistry!

These particular carrots are grown in our greenhouses and still feature their tops (which make a great addition to pesto). The variety is called “Ya Ya” and have been meticulously selected for their summer sweetness. Carrots always seem to taste better in the fall as they turn starches into sugars as a defense mechanism against the colder temperatures. It can be tough to find a variety with that desirable sweetness during the heat of the season, but these are always tender and sweet from the greenhouse.


In your share this week:

Cauliflower – Carrots – Chard – Cucumber – Garlic Scapes – Green Onions –

Napa Cabbage – TurnipsLettuce


Another exciting addition to the boxes this week is garlic scapes. Garlic scapes emerge from the garlic top and start to curl and twist as they grow. It is important to harvest them before they straighten out and become woody, as this will ensure their optimal flavor and texture. Typically, garlic scapes are ready for harvest when they reach a length of 8 to 12 inches, although this may vary depending on the garlic variety. Harvesting garlic scapes at the right time not only allows you to enjoy their unique flavor but also encourages the garlic plant to direct its energy towards bulb development, resulting in plump and flavorful garlic cloves at harvest time.

Raw garlic scapes pack a robust and assertive garlic flavor, with hints of onion and a pungent, herbaceous quality, yet they offer a milder spice compared to raw garlic cloves. However, when cooked, these scapes transform into a delightful treat, revealing a sweeter profile akin to roasted garlic. In essence, their taste embodies a harmonious fusion of garlic and chives.

Garlic Scape Pesto, from NYT Cooking

yields ~ 1 Cup

  • 1 cup garlic scapes, roughly chopped (about 10 to 12 scapes)
  • 1/4 cup raw sunflower seeds
  • 1/2 cup extra virgin olive oil
  • 1/4 cup Parmesan cheese
  • 1/2 cup basil leaves
  • Juice of one lemon
  1. Place the garlic scapes in a food processor and pulse for 30 seconds.
  2. Add the sunflower seeds and pulse for 30 seconds. Scrape down the sides of the bowl.
  3. Add the olive oil and process on high for 15 seconds.
  4. Add the Parmesan cheese and pulse until the ingredients are combined.
  5. Add the basil and lemon juice, and process until reaching the desired consistency.
  6. Add salt to taste and serve immediately.

Napa Cabbage & Cucumber Slaw, from Bon Appétit

4 servings

  • 6 cups thinly shaved or slices cucumbers and/or Napa Cabbage
  • 1/4 red or white onion, very thinly sliced
  • 1/4 cup seasoned rice vinegar
  • 2 tablespoons extra-virgin olive oil
  1. Combine vegetables and onion in a medium bowl; season generously with salt. Let sit until they start to release their water, 8–10 minutes, then begin to massage, gently at first so they don’t break, then harder as they begin to expel their liquid, until softened to about the texture of coleslaw. Pour off all excess liquid and add vinegar and oil; toss to coat. Taste and season with more salt if needed.

Do Ahead: Slaw can be made 3 days ahead. Cover and chill.


As the summer scorches along, more and more people will be breaking out the grills. Here’s a friendly reminder that this doesn’t always mean brats and burgers! Veggies are also delicious when grilled – especially when paired with a yummy dip.

Veggie Dunkin’ Dip Ideas:

Hummus or Tzatziki


For the farm crew,

Charlie

Summer CSA Week 5, 2022

We love fresh produce any time of the year, but early summer is particularly special. There’s something magical about the first time in a season we’re able to share a vegetable. We have several firsts this week: cauliflower, kale, cucumber, AND garlic scapes. We’re watching our harvests diversify and we love it!

Pictured to the right: the crew weeding carrots in a wet fog on the 4th of July.

We’ve had some more storms and wet weather this past week, but fortunately nothing severe, and the moisture levels aren’t excessive. A word of advice to home gardeners: stay out of your gardens as much as possible in wet weather. Stepping in wet mud will cause compaction and be detrimental to your soil’s health. Plant diseases spread more readily in wet weather and your hands and tools could make that worse. On the Farm, have to keep working, even when it’s rainy, but we’re very selective about the tasks we do and how we harvest. Keep dry!


In your share this week:

Broccoli – Cauliflower – Lettuce – Green Onions – Carrots with Tops – Kale – Garlic Scapes – Cucumber


Forager’s Soup

Serves 6-8

Ingredients

4 tablespoons butter (use olive oil for a vegan alternative)

1 cup diced onion

1 medium potato, peeled and diced

salt and freshly ground black pepper

2 cups chicken or vegetable stock or hot water

1 1/2 cups whole milk (optional)

1/4 cup heavy cream (optional)

~4 cups (8 oz) mixed chopped spring greens, include scapes, kale, green onions, carrot tops, and/or broccoli (use whatever is on hand!)

3 tablespoons olive oil (to cook meat)

3 oz chorizo or bacon, finely diced (optional)

Preparation

  1. Melt butter in a large pot over medium-high heat. Once the butter foams add onion and potato and stir to coat butter. Add salt and pepper. Turn down heat and sweat the onions and potato on with a tight fitting lid for 10 minutes. Vegetables should not brown.
  2. Heat the stock (or water) in a saucepan until simmering. Add hot liquid to potatoes and onions and simmer 5-10 minutes more until vegetables are completely cooked. Add greens and simmer uncovered for 2-3 minutes more. (Don’t over cook the greens!)
  3. Blend with a blender or hand blender. Puree until smooth. Salt and pepper to taste. Stir or blend in milk and cream.
  4. If adding meat, heat olive oil in a small skillet. Add chorizo or bacon and cook until fat is rendered and meat is crisp, 5-10 minutes. Remove and drain on paper towels. Reserve the oil for a garnish or other cooking projects.
  5. Serve soup hot with the above meat and a few drops of the cooking oil to garnish.

This soup can be made a day in advance and kept in the refrigerator! Just gently reheat on the stove top, uncovered. To make this recipe vegetarian, use vegetable broth and skip step 4. To make vegan, also exclude the milk and cream, or substitute with vegan milk option.

*The above recipe is adapted from “Forgotten Skills of Cooking” by Darina Allen and has revisions from volunteer Deb Rausch to better suit our boxes this week. *(Source of recipe previously listed incorrectly.)


garlic scapes ready to go into share boxes

What are garlic scapes?

Scapes are the curly stems produced by hardneck varieties of garlic. We prune off these scapes so the garlic plant puts more energy into producing the garlic heads we all enjoy. If left on the plant these scapes would produce bulbils, which are like seeds that produce a clone of the parent plant.

Lucky for us, scapes are super tasty and get us through the early summer before the garlic crop is ready! Scapes are have a hot garlic flavor when eaten fresh and are a great garlic replacement in pesto. When cooked, the flavor mellows out. Try grilling garlic scapes or adding them to soups.


Still looking for recipes?

Use the Tag Cloud below to find archived recipes from past years. Just click an ingredient below and you’ll be taken to a list of all posted newsletters with a recipe that includes that vegetable. The larger the text below, the more posts there are including that vegetable.

Arugula Basil Beet Bell Pepper Broccoli Brussels Sprout Brussels Sprouts Cabbage Carrot Cauliflower Celery Cilantro Cucumber Delicata Squash Dill Dressing/Sauce Egg Garlic Garlic Scape Green Bean Green Onion Jalapeno Kale Leek Lettuce Mint Napa Cabbage Onion Parsley Parsnip Pepper Potato Radish Red Onion Rutabaga Scallion Shallot Spinach Squash Thyme Tomato Turnip Winter Squash Yellow Onion Zucchini

The farm crew admiring dramatic cloud formations on 7/11 just before being pelted with rain.

For the farm crew,

Starr

Summer CSA Week 4

When I was somewhere between a child and an adult, I always felt like summer really started with the Fourth of July, but would also be over in a blink of an eye. We didn’t have many 80 degree and dry Junes in my childhood, I guess, to kick-start summer with. It’s the time of year to soak it up!

When living in Texas, I came home one August for a visit, and was thrilled with the 80

something degree weather Duluth was experiencing. What a nice 20 degree dip! So I made bread, to my mother’s horror upon arriving back home after work. Oops. Though I don’t run the oven “unnecessarily” it is such a short summer and pies and summer quiches can’t bake themselves!

At some other point between childhood and now, the Fourth of July was my second favorite holiday. I loved everything summery about it, the cookouts and the stay-up-late night and the careful clothing selection to find the reddest, bluest and whitest combinations I could muster out of my closet.

My relationship to the coming holiday is more complicated these days as, more and more, America feels like a child whom I will love no matter what, but who can also break my heart. Despite that, it is still nice to gather with friends and family. Soaking up the nice parts of the day is my goal. Maybe a nice part of the day will be a fantastic salad you make to impress all your friends with!

Whatever you make of the coming weekend, and whatever you make of your CSA share, I hope it is good despite any imperfection you feel in the mix.

For the farm crew,

Karin

P.S.
Dave wanted me to note that our first greenhouse cucumbers are not quite as glamorous as we usually expect. Hot winds from the south has brought added pest pressure, and consequently mesh screens have been put up around the openings to keep them out. That also cuts way down on air circulation so they are feeling the heat! We don’t know if the cosmetic issue will go away as the plants grow, or if it’s with us to stay.


In your share this week:
Broccoli – Cucumber – Garlic scapes – Lettuce – Green Onions – Pac Choi – Radishes – Parsley


Dave’s garlic scape recipe:

Dave recommends prepping your scapes this way to preserve them, and make them easy and fast to use for flavor in you meals for the week and beyond.

  • All your scapes (loosely chopped)
  • 1/2 cup (or more for consistency and/or longer storage) oil of your choice
  • 1/2 tsp or more salt to taste
  • Optional add ins: pepper, nuts (to make a pesto) any spices you’d like

    Blend all together in a food processor until smooth. If you use nuts in your batch, put them in after you’ve partly blended the other ingredients together.

    Store in a jar and use as a spread, or tossed into salads, with pasta, in eggs, mixed into rice or grain dishes, or as a facial scrub (wanted to see if you were paying attention).
    The possibilities are almost endless.
  • You can also freeze some to throw in dishes in the coming months!

Creamy Avocado Dressing

For all that lettuce salad! Keeps 3-4 days. Try using some chopped garlic scape instead of a clove!

  • 1 large avocado
  • 1 clove garlic, peeled
  • 1/2 tablespoon fresh lime or lemon juice
  • 3 tablespoons olive oil or avocado oil
  • 1/4 teaspoon kosher salt, or to taste
  • 1/4 teaspoon ground black pepper, or to taste
  • water, as needed (I add up to 1/4 cup)

INSTRUCTIONS

  1. In a mini food processor add the peeled clove of garlic, avocado, lime or lemon juice, olive oil, salt and pepper.
  2. Process until smooth, stopping to scrape down the sides a few times. Thin the salad dressing out with a little bit of water (1/4 cup or more) until it reaches a desired consistency.
  3. Keep in an airtight container for at least a week, but 3 to 4 days is best.

Summer CSA Week 5

Most years I have felt that if you blink after the Fourth of July, you may miss summer. Fortunately we have more summer left than we’ve experienced so far. I’d like it to include more rain than it has so far. This week seems promising.

This year we have a great crew with a few new people who are figuring out the pace of work on the farm and where everything is and how to do farm tasks just so. Kelly, Madison and Nick are all new this year and started between early May and early June. Jane has returned after her first season last summer. It’s always nice to have repeat people who know the ropes. Lizzy comes out on CSA harvest days, Teri does all the deliveries and joins us on projects when not on the road or harvesting. Of course Dave is out planting, running things in the greenhouses, keeping knives sharp and a myriad of other tasks that need doing. A couple of long-term volunteers have been joining us on harvest days. Usually we throw open the gates for volunteers -but with COVID19 we’ve been keeping it to a minimum. (Now that I’m going to list them, it sounds like a lot – but believe me there used to be more that would work a day or two here and there) Joe, Ki, Rollie, Sandy and Betsy and of course Patricia who keeps us all organized. I think Janaki is still working on the Farm too. We see someone driving tractors around throughout the day and moving irrigation around constantly. There is a good chance it’s him doing all that work, but with the clouds of dust following the tractor it’s hard to see.

I’m so glad we have a good number of (and just plain good) people working on the farm. There is always a lot to do. It’s way more than just a few people could manage. My first season was 2014 and there were roughly 11 acres in vegetables with the other 11 in a cover crop. Now there are at least 15 acres in vegetables at the peak of the year. When I tell someone I work on a farm, and then they hear the size of it sometimes they seem to think it’s small. But with forty plus varieties of vegetables in fields + greenhouses there is a lot of work and every crop needs something different.

I hope you enjoy some of that variety in your share this week. I love this kind of a share box -you could just chop everything up into a big bowl and eat it! Likely, you’ll eat some of this and some of that and maybe keep some for later.
However you eat it -we hope you enjoy it. We enjoy growing it.

For the farm crew,

Karin


img_0696

Potato bug larvae -shortly before their demise.


In your share this week:

Broccoli – Carrots – Cucumber – Garlic Scapes – Greens Mix – Lettuce – Napa Cabbage – Green Onions – Snap Peas


20180709_144413


Garlic Scape Salt

From Gutsy By Nature

(After hearing that a member made some last week I thought it’d be a fun item to include!)

Ingredients
  • 12 fresh garlic scapes
  • ½ cup coarse sea salt
Instructions
  1. Preheat oven to 250° F.
  2. Roughly chop garlic scapes, then place in bowl of food processor along with sea salt and process until it becomes an even paste.
  3. Spread the paste in an even layer on a small baking sheet. Place in oven and allow to bake for 1 hour, stirring and re-spreading in an even layer every 15 minutes, until the paste is uniformly dried.
  4. Remove from oven and allow to cool enough to handle.
  5. Using your hands, crumble the dried salt and garlic scape mixture into fine pieces. If you find you have very hard and large clumps, you may wish to return this dried mixture to your food processor (making sure you have cleaned and dried it first) and pulverize it even further.
  6. Transfer the resulting garlic scape salt into jars for storage.

Carrot Ginger Dressing

  • 1 large carrot, peeled and roughly chopped
  • 1 small shallot, peeled and roughly chopped
  • 2 tablespoons roughly chopped fresh ginger
  • 2 tablespoons white miso
  • 2 tablespoons rice vinegar
  • 2 tablespoons toasted sesame seed oil
  • 1/4 cup grape seed or another neutral oil
  • 2 tablespoons water
    Whiz the carrots, shallot and ginger in a blender or food processor until finely chopped. Scrape down the sides, then add the miso, vinegar and sesame oil. While the machine running, slowly drizzle in the grape seed oil and the water.


Summer CSA Week 4

At the end of every CSA season we send out a survey to you our members to find out what you thought of your share boxes throughout the season. There are some general questions about how we did, how you felt about the season, and then line by line we ask if you thought you got too much, too little, or just the right amount of every item we send all season long. It’s a long list, as you can imagine.

We use all that information to try to see what, if anything we should change about what we send in the share boxes, and thus, what we should plant on the farm every spring. Over the years it seems like the farm has honed in pretty well to what works for many of you.

Every year though, there are always responses that lean more to the “too much!” side than “never enough!” (we sure don’t want anyone to feel like there’s not enough -except the snap peas – we can never grow enough of those!).

I seem to remember a couple of years back, many members feeling like they had received too many green onions. A few snipped on top of a baked potato won’t use up a bunch a week, but it seems like green onions are often thought of as a garnish in recipes as opposed to a component adding a lot of flavor. Throughout my week, I seem to always be chopping an onion up, even before I’ve fully decided what to make for dinner. I know whatever I make, it needs onion. You can do the same thing with green onions. Whatever recipe calls for onion using green onions would offer that same flavor punch so you can either substitute/or add green onions. Plus, if you’re cooking them down like in a stir-fry, soup or curry you can use a lot of them. It maybe doesn’t need to be said (but I’ll say it), that green onions won’t need to be cooked as long, and can’t be caramelized in the same way as onions can.

In other years I’ve recommended sharing food with friends or family as a way to use up a share if you’re struggling to finish it by the next week. Pot-lucks can be a great way to share and use up whatever you have laying around. This year the option of gathering around food is more complicated, and sharing more difficult. In spite of this, or because of this, I hope you are able to find creative ways to use, store and maybe even share the vegetables you get from our farm.

Feel free to reach out if you have pro-tips on using up a share, or if you have questions that you think others might like answered as well!

For the farm crew,

Karin


img_0614


In your share this week:

Broccoli – Cauliflower – Cucumbers – Garlic scapes – Head lettuce – Green onions – Pac choi – Radishes


Roasted Cauliflower Spread

From Food and Wine

-I’ve said it before that I’m not much of a recipe person, and my educated guess is that this recipe would be very flexible. You could add in some of the garlic scapes and green onions, and probably change up the spices and herbs and still end up with a tasty spread as long as your liquid to solid ratio stays about the same.

  • 1 head of cauliflower (2 pounds), halved crosswise and thinly sliced
  • 1/4 cup vegetable oil
  • 1 1/2 tablespoons minced fresh ginger
  • 1 1/2 teaspoons ground coriander
  • Kosher salt
  • 3 tablespoons tahini (sesame) paste
  • 3 tablespoons fresh lemon juice
  • 3 tablespoons chopped cilantro
  • Sesame seeds

Preheat the oven to 450°. In a large bowl, toss the cauliflower with the oil, ginger and coriander and season with salt. Spread the cauliflower on a rimmed baking sheet and roast for about 40 minutes, stirring once or twice, until tender and lightly browned in spots. Let cool slightly.

Transfer the cauliflower to a food processor. Add the tahini and lemon juice and pulse to a chunky puree; season with salt. Add the cilantro and pulse just until incorporated. Transfer the spread to a bowl and sprinkle with sesame seeds. Serve warm with pita bread or chips (or on toast!)


Garlic Scape Pesto

  • 10 Garlic scapes
  • 1/3 C Pine nuts or walnuts 
  • 1/3 C Parmesan, asiago or simply parmesan dice or shredded
  • 1/2 Lemon juiced
  • 1/8 tsp Fine Sea Salt or more to taste
  • A few grinds of Pepper
  • 1/3 C Olive oil

Trim the garlic scapes by cutting just below the bulb. Discard the bulb and set the remaining scape aside.
In a food processor, add the chopped scapes. Add the pine nuts, cheese, juice of the lemon and salt and pepper. Process by pulsing until the mixture begins to break down. Scrape the bowl down.
With the processor running, slowly add all the olive oil. Continue to process until all the ingredients are incorporated and broken down, about one minute. Taste for salt.
Store in a covered container or lidded jar in the fridge and enjoy within a week. Also, you can freeze the pesto in a jar or in an ice-cube tray. Once frozen, in the ice-cube tray, remove and place in a zip top bag in the freezer.
img_0617

Summer CSA, Week 8

The agate; a treasure to find for north shore residents. We scavenge gravel pits and construction sites looking for those glossy banded rocks. We look with bent necks along the shores of Superior. And each time we come across an agate it’s an exciting surprise.

Some believe agates should go back where they were found, perhaps for the next person to find the joy. Others hoard them in jars around their homes or in the cup holders of their cars.

Our radionics padawan Garret, refers to them as energy boosters. Walking around the farm it’s common to find them piled up waiting to put a smile on someone’s face.

The last two weeks have been a collective effort to weed the 3rd and 4th planting of carrots. With burnt knees and blistered knuckles we damn near completed all 39 beds worth. By the time you read this we might have finished the last seven rows.

Sam and Garrett enjoy tucking agates between carrots. Someone will find it along the way and put it in a row next to them for someone else. Little energy boosters.

Medieval folklore suggests farmers in Europe believed agates could protect their dairy cows.

To prevent milk from spoiling during lightening storms they would hang agates inside barns. This had the added benefit of keeping the witches away from riding their cows at night. A witch will not enter a building protected by an agate.

Agates were also fastened to equipment to ensure a healthy productive crop.

As much as I’d love to see a witch riding a cow, I’d rather have a glass of unspoiled milk.

From a witch weary farm crew,

Tiffany


In your CSA Box: Broccoli – Carrots – Cilantro – Cucumber – Dill – Napa Cabbage – Green Onion – Peas – Green Pepper – Jalapeño Pepper – Tomatoes – Zucchini


Cucumber and Napa Cabbage Coleslaw

  • 1/4 cup Cilantro
  • 2 Cucumbers
  • 1/2 large Napa Cabbage
  • 1/2 cup peanuts-roasted
  • 1/2 tsp garlic powder or some scapes if you have them from last week
  • 1 tsp red pepper flakes
  • 1/4 cup lime juice
  • 1 tsp salt
  • 2 tsp sugar
  • 1/3 cup peanut or canola oil

Chop cucumber and Napa cabbage into thin elongated slices. Dress with cilantro roasted peanuts. Combine peanut oil, lime juice salt sugar and garlic powder to drizzle over slaw.

Summer CSA, Week 6

What a week!

The weather is scorching hot and vegetables are growing like crazy. The bounty of food we harvest everyday takes my breath away.

You want to know what else takes my breath away? More or less out of primal hunger …LUNCH and how good everyone on the Food Farm is at cooking! It’s kind of a job requirement.

Each day someone on the farm crew is designated to make lunch. And each day the arrangement of vegetables grows more and more impressive. On a hot, hot day caring for cabbage or carrots it is so wonderful to eat a cold salad with cold dressing and drink a glass of ice cold water.

So the salad bar has become a staple during lunch. It is common place to lay out a cornucopia of choices so we can all free range. Shredded turnips or beets, chopped cucumber and carrots, sun gold tomatoes and a pile of greens mix. Of course one cannot survive the rest of the day purely off of a salad.

Sam likes to bring bread he made over the weekend. He is an incredible baker and the bread does not last long. Jane makes kombucha and a delicious hard boiled egg. Teri often dazzles us with a quinoa dish she prepared the night before. She sometimes will even bring homemade ice cream! I constantly want to make cookies. And Garrett made an impromptu tofu beet salad this week that was stellar. Oh and Patricia likes to bring watermelon or mango from her backyard.

The possibilities of what to do with a refrigerator full of vegetables can be overwhelming. Attempting to create a new and exciting dish to please the masses can be challenging. Luckily out here when we file in for lunch no one is picky and we are all purely grateful food is made and it’s time to relax.

When food tastes this good who needs fancy sauces and spices. Wash that carrot off and start munching!

Above is Garrett, who landed a hitchhiker while hoeing in the squash field. Also in the squash field are a lot of rouge milkweed plants. Bless their hearts they didn’t realize they were growing in a field so now Janaki will have to drive around them when cultivating. Thankfully everywhere you look around the farm is milkweed. And if you look close enough you might find a caterpillar enjoying their lunch.

From a lunch happy farm crew

Tiffany


In your CSA box:

Broccoli – Carrots – Swiss Chard – Cucumber – Napa Cabbage – Garlic Scapes – Green Onions – Lettuce


Spring Rolls!

You can make spring rolls with so many different ingredients. Now that napa cabbage is ready though mmmmmm they sure sound delicious.

Thinly slice into small elongated pieces

  • Carrots
  • Cucumber
  • Napa Cabbage

You could also add

  • Avocado
  • Rice Noodles
  • Tofu
  • Beets

The list goes on and on….

Place hot water in a bowl or cake pan, submerge one spring roll rice paper at a time for about 20 seconds. Take out and apply vegetables, roll like a burrito. Don’t forget to tuck the ends in!

Add a tasty peanut sauce for dipping and you’ve got yourself a delectable summer meal.

Garlic Scape Hummus

  • 2 cups cooked chickpeas
  • 1/3 cup chopped garlic scapes
  • Juice of 1 lemon
  • 1/3 cup olive oil
  • 1/2 tsp salt

In a food processor pulse scapes, lesson juice and salt

Add chick peas and blend, adding olive oil as you go

Top with herbs and spices such as dill and sumac